This post may contain affiliate links for which I earn a small commission at no extra cost to you. For more info, check out my Disclosure Policy. Thank you for your support!
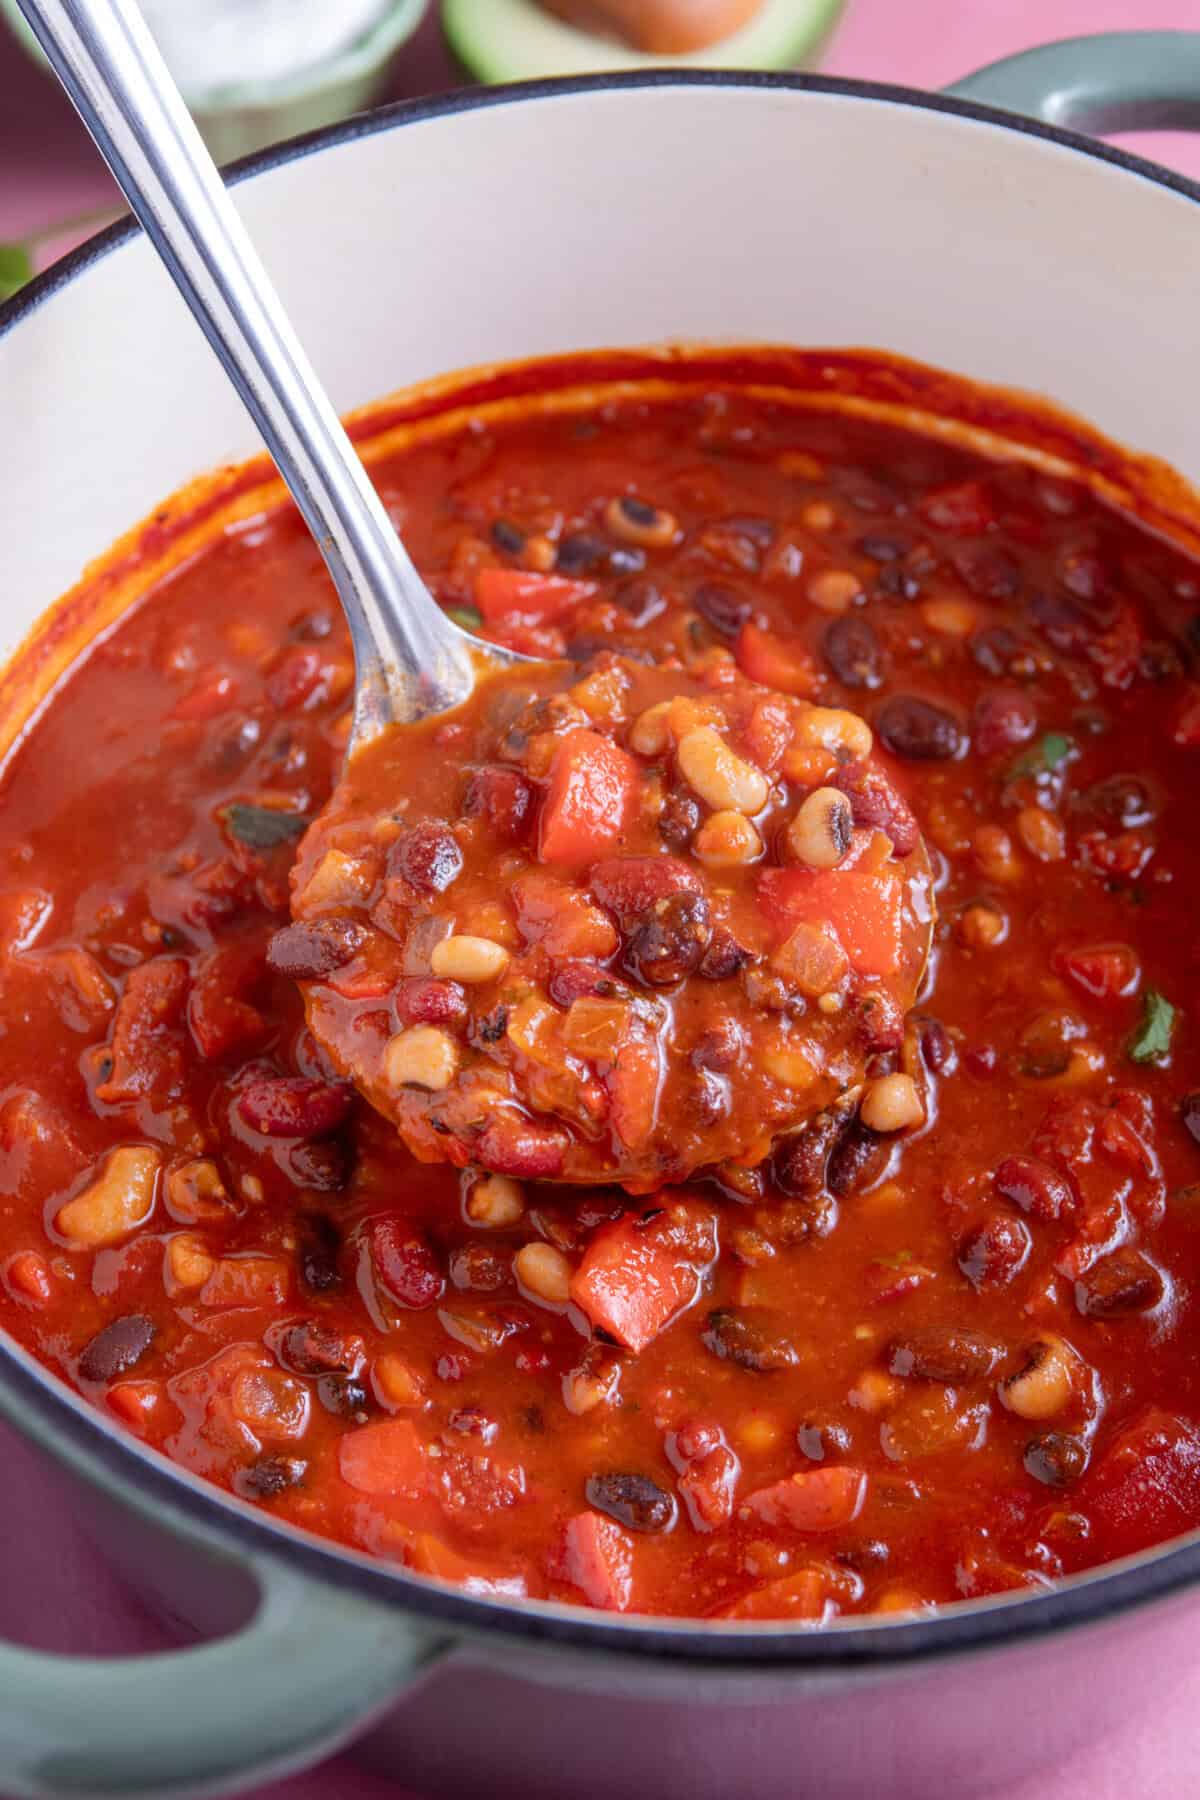
This easy Bean Chilli Recipe is the perfect comfort food for a cold night, and a great budget meal! An easy vegan chilli using tinned beans and storecupboard staples, perfect for batch cooking and freezing. Plus it’s naturally gluten free, dairy free and vegan!

Notes On This 3-Bean Chilli Recipe
- Smoky Flavours: This easy bean chilli uses chipotle paste, chilli and cumin to bring warming, gentle flavours. Dial the spice up or down to your tastes!
- Money Saving: Using tinned beans, this recipe is super cheap to make and a great source of fibre and protein. As tasty as my gluten free chilli con carne, but without the meat (or the additional cost – red meat is so pricey these days!)
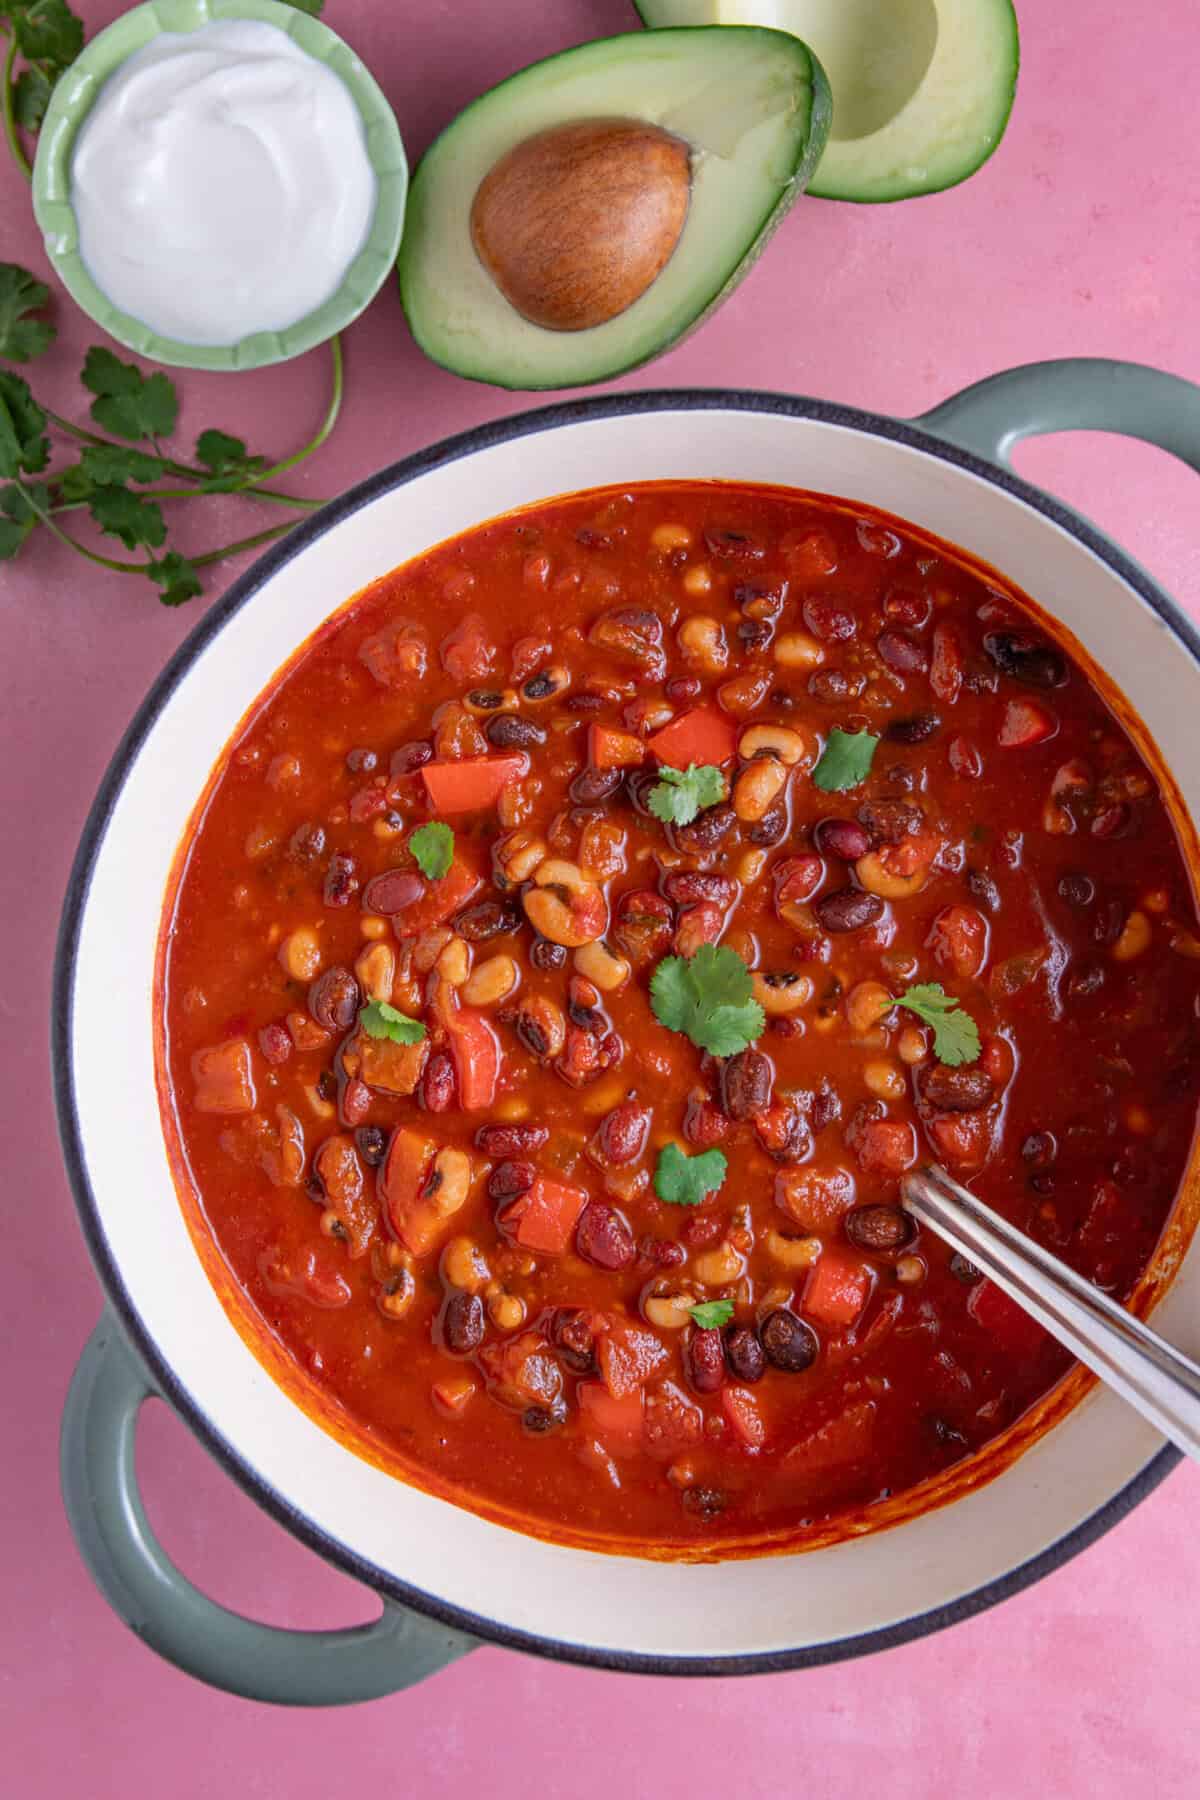
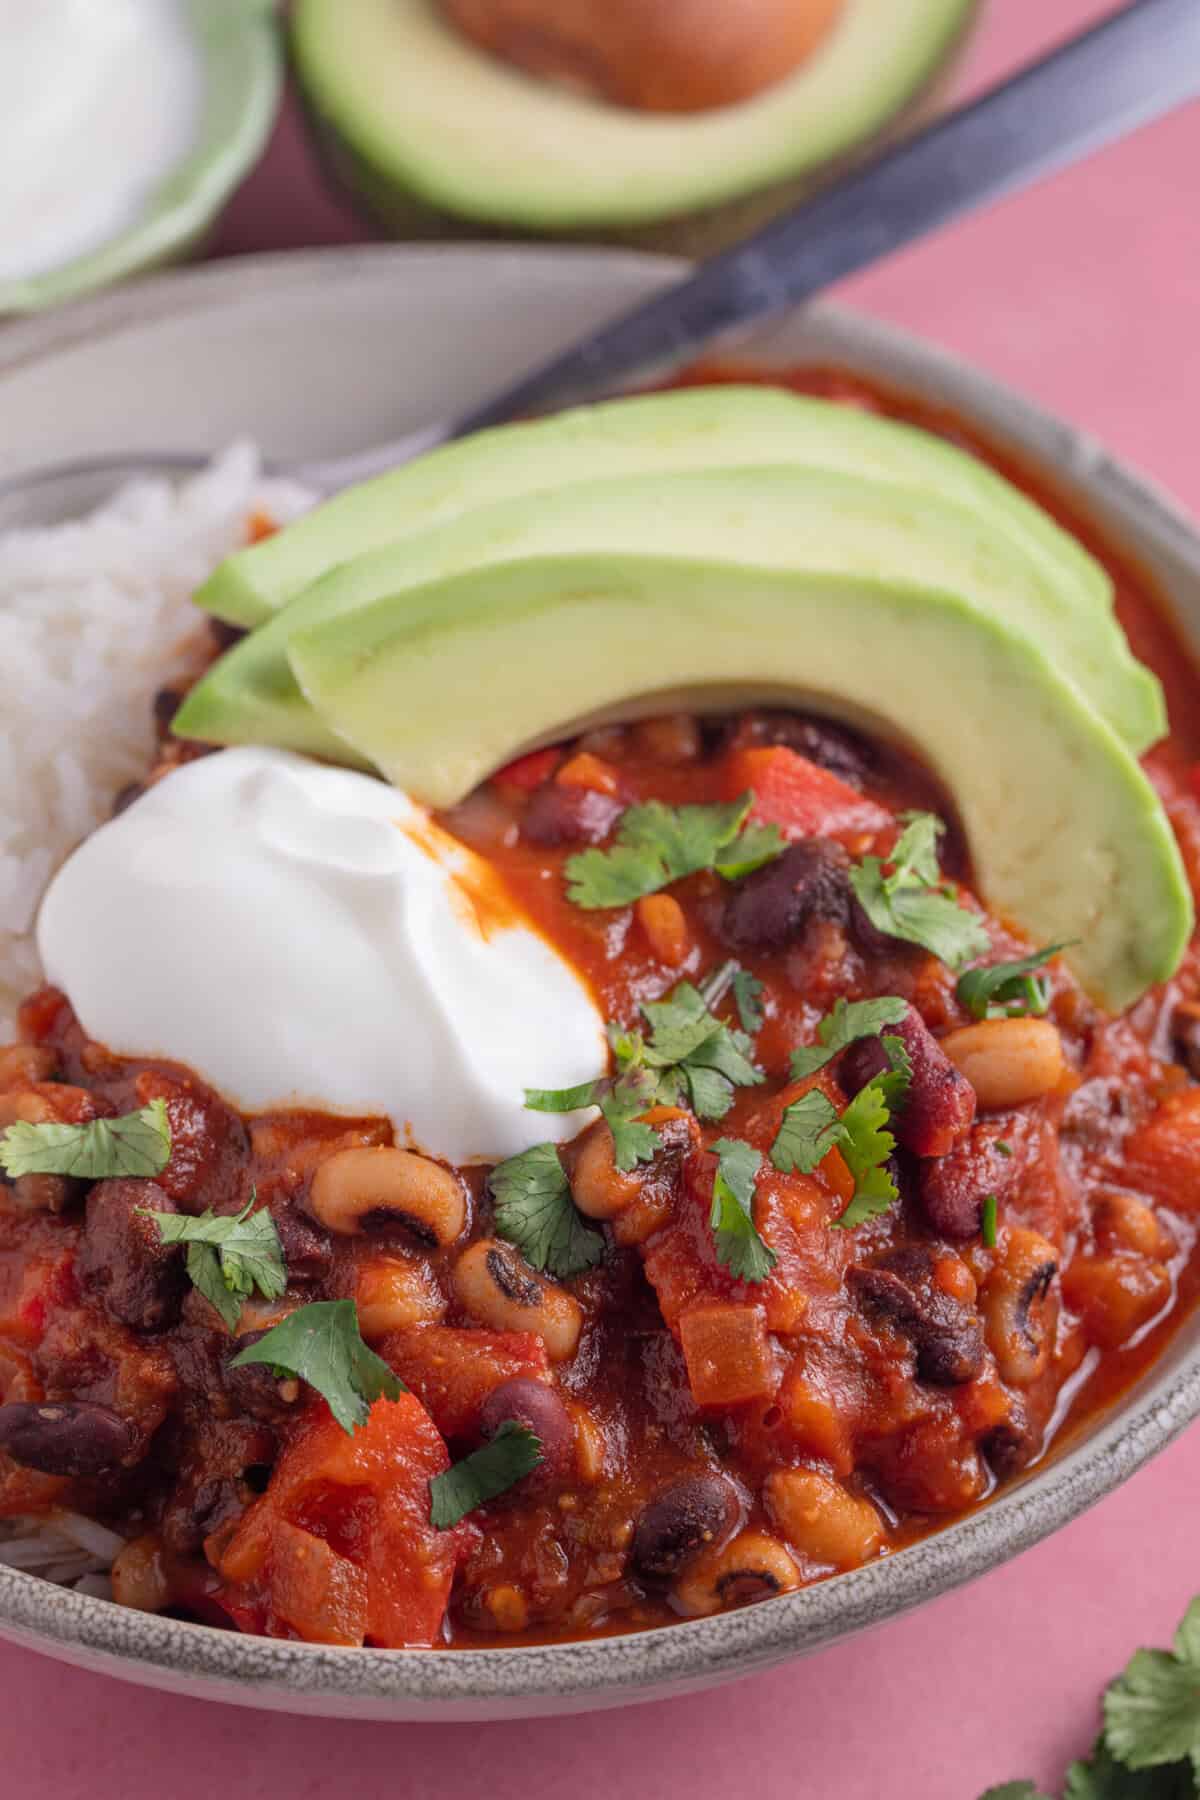
- Serving Suggestions: My favourite ways to serve this bean chilli is either with steamed rice, sliced avocado and soured cream, or loaded onto a baked sweet potato with grated cheese and a dollop of my 4-ingredient guacamole on top.
- Gluten Free & Vegan: This is one of those magical, naturally gluten free recipes, as long as you double check the spice mixes and stock pots you use are safe. It’s also dairy free, vegan and nut free – perfect for guests with multiple allergies!
Table of Contents
Don’t just take my word for it…
Johanna left ⭐️⭐️⭐️⭐️⭐️ and said: “Delicious recipe. Very filling and was loved by everyone. It was easy and quick to make. We always eat with brown nutty rice yum“
Sue messaged me on Instagram to say: “I made your 3 bean chilli the other night absolutely amazing definitely a favourite in our house. Thank you.”
Ingredients and Substitutions
There’s a printable recipe card below for this bean chilli recipe with the full quantities. But here are the main ingredients and ideas for any swaps.
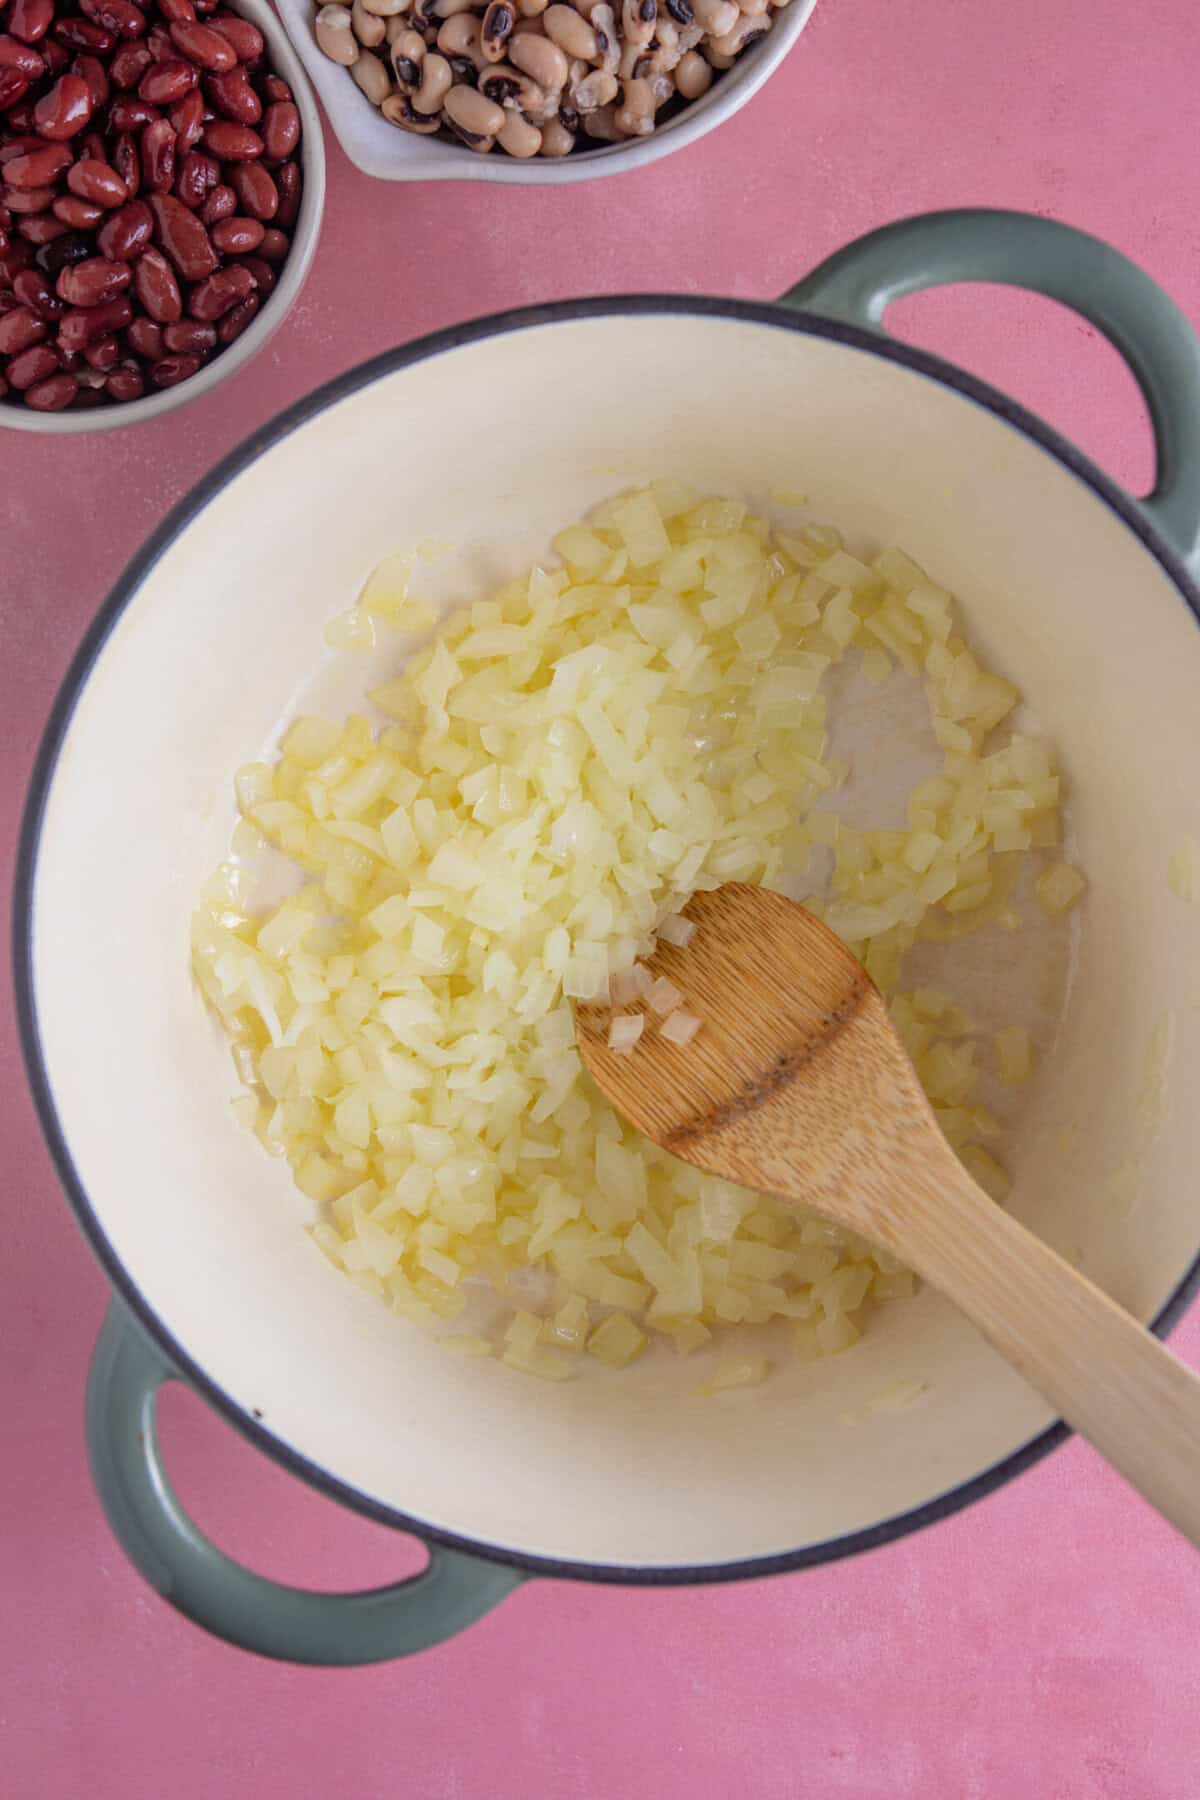
- Canned Beans: I use a mixture of black beans, kidney beans and black eyed beans, but this recipe is so easily adaptable! You could easily add in any of your favourites or swap for what you have – adzuki beans, chickpeas (garbanzo beans) and pinto beans all work. Or buy tins of pre-mixed beans so you get a good variety!
- Onion and Garlic Paste
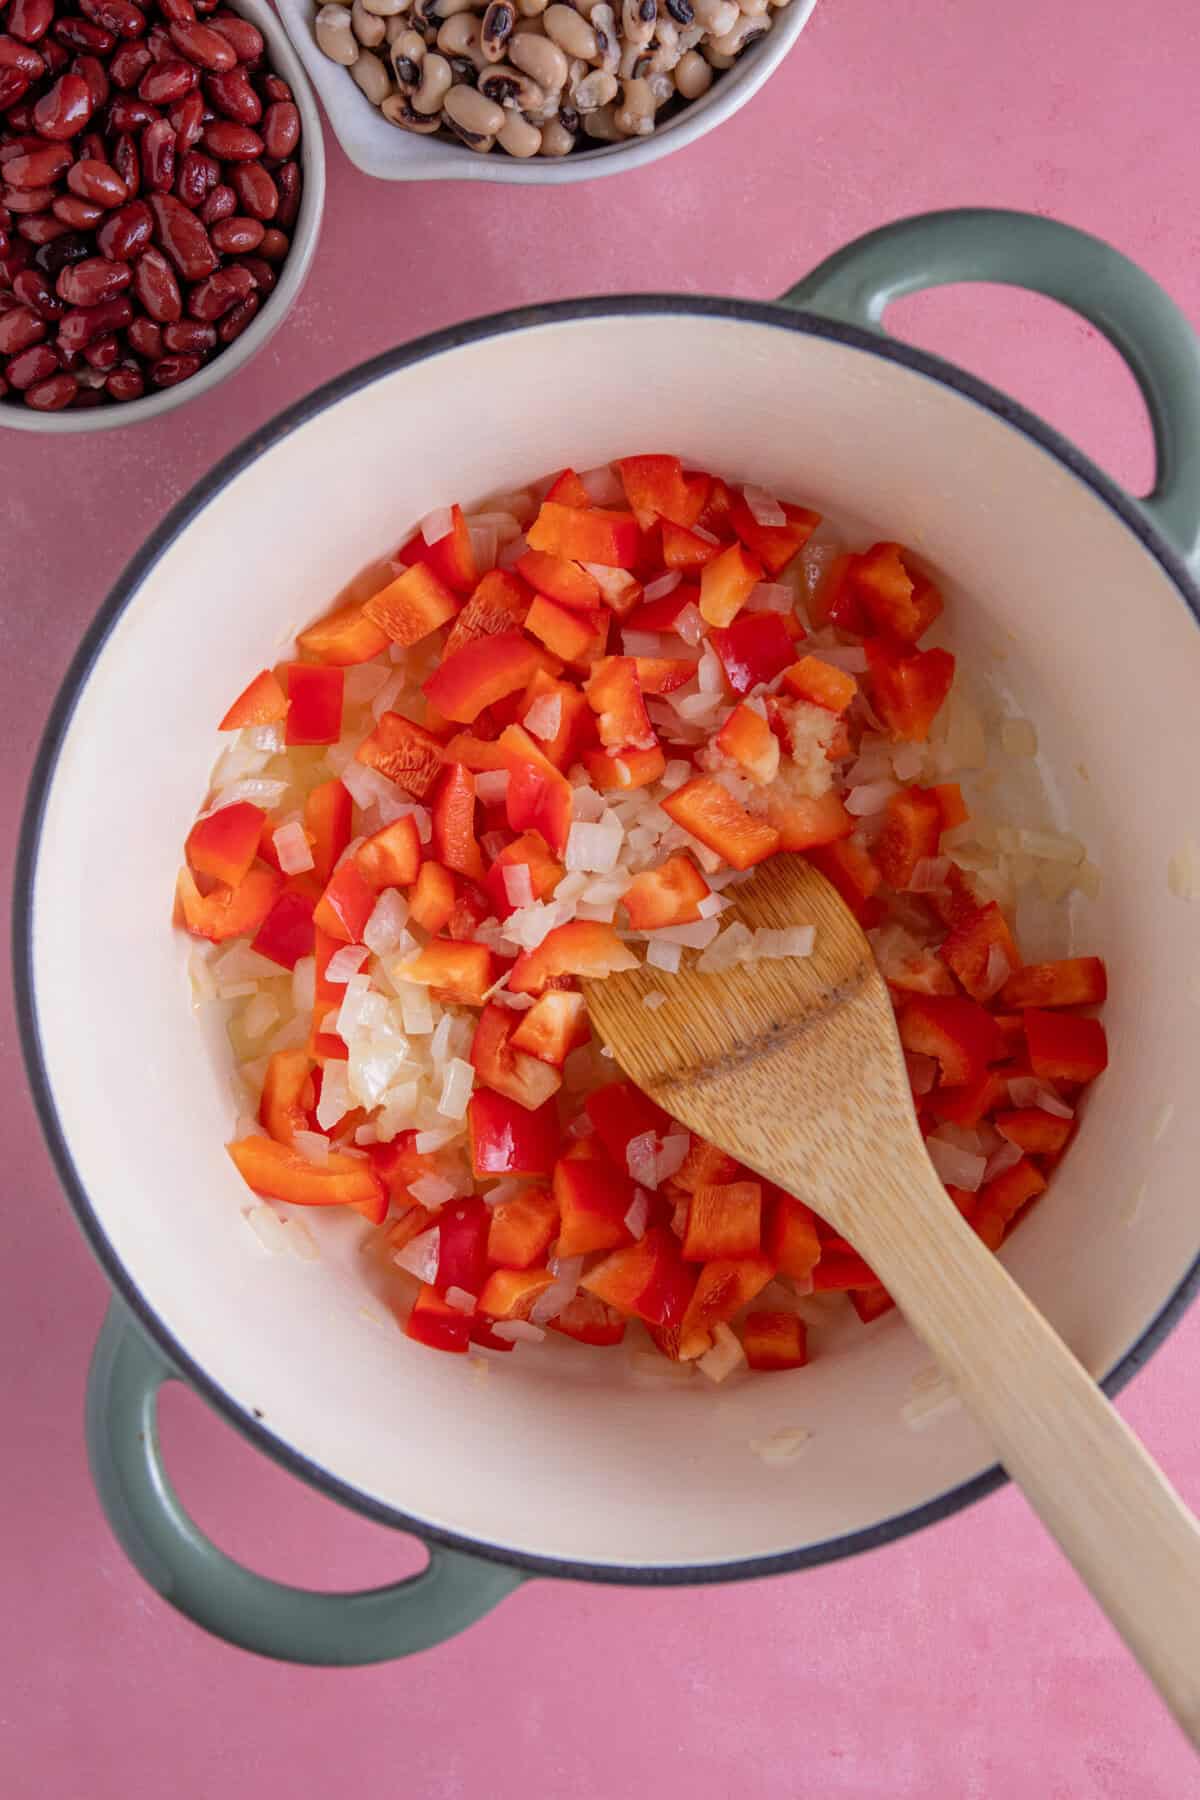
- Peppers: You can use any colour for this recipe, but I tend to go for red, orange or yellow peppers as they are a bit sweeter.
- Tinned Tomatoes: A cheap tin of canned tomatoes is perfect. You’ll also need tomato paste (tomato puree) and Passata.
- Chipotle Paste: I have tried a number of different pastes with this recipe and a word to the wise – check the spice rating before you chuck loads in! Some of the extra hot ones will need less than the recipe specifies. If in doubt, add a little then keep topping it up – you can always add, buy you can’t take away here!
- Spices: I use a mild chilli powder, but swap this for a hot one if you like spice! I also use dried cumin and oregano to add flavour.
- Stock Pot: I use the Knorr vegetable stock pots as they are certified gluten free, but any gluten free variety will work.
- Chocolate: Don’t skip chocolate in your chilli! Use one with at least 80% cocoa content, and be sure to use a gluten (and dairy free if needed) brand. I use Lindt.

How to Make Bean Chilli
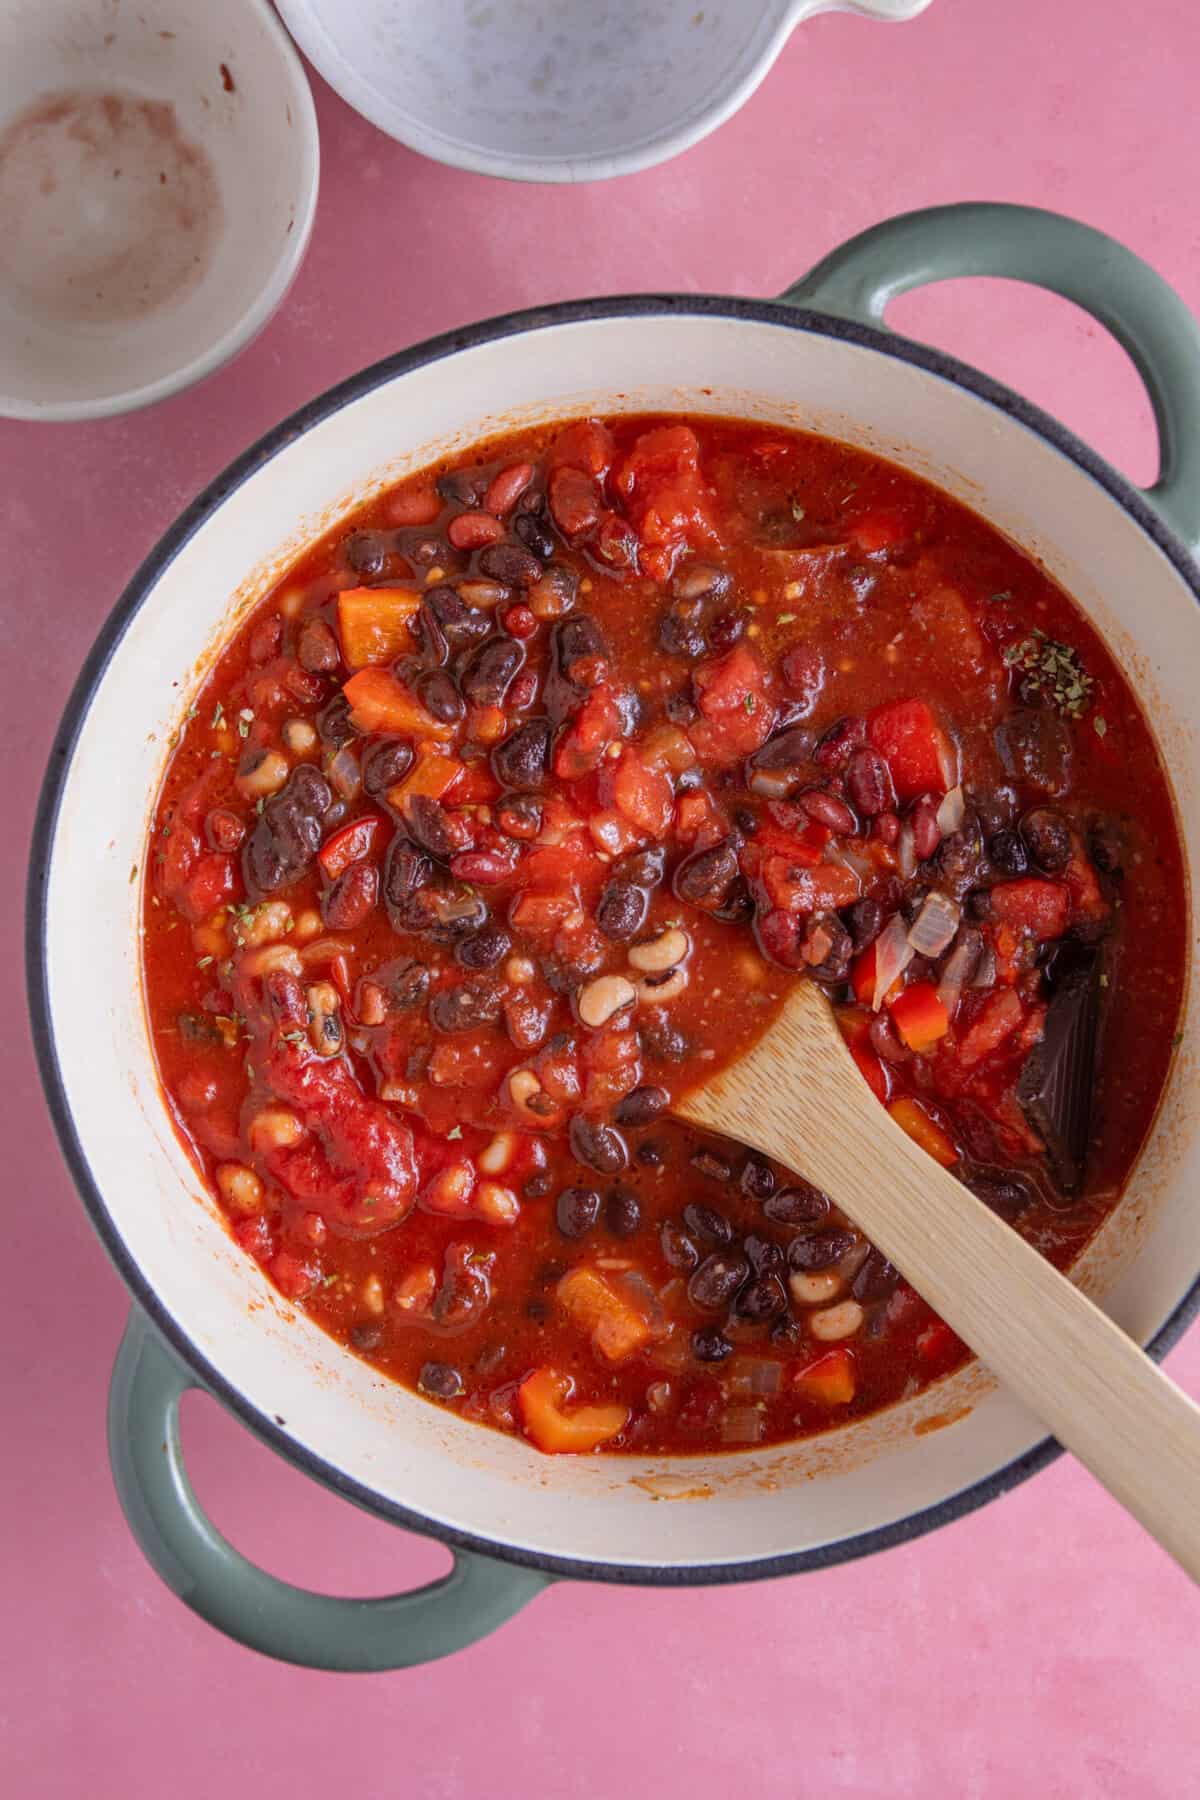
There’s a printable recipe card below with the method. But here are some step-by-step photos to show you how easy this gluten free bean chilli recipe is to make.
Storing and Freezing Instructions
TO STORE: Allow the chilli to cool then portion and store in the fridge for up to 5 days. Reheat thoroughly in a pan or microwave to serve.
TO FREEZE: To freeze this bean chilli, I usually portion it into tubs, cool on the counter and then freeze. You can then microwave from frozen when you need an easy meal.
Frequently Asked Questions
Here are some FAQs about this easy bean chilli recipe recipe. If you can’t find the answer to your question here or in the post above, please comment and I’ll try answer!
Yes, you can! To make this bean chilli in the slow cooker, simply add all the ingredients, mix well, and then cook on high for 3 hours or low for 4-5 hours. If you have time, I recommend frying the onions, garlic and peppers before adding, as this will add bigger flavours to your chilli!
The best thing about this bean chilli is it actually tastes better the next day! Make this bean chilli then cool and leave in the fridge overnight, then reheat to serve.
Serve It With…


3-Bean Chilli Recipe
Ingredients
- 1 tbsp olive oil
- 400 g tin black beans, drained and rinsed
- 400 g tin kidney beans, drained and rinsed
- 400 g tin black eyed beans, drained and rinsed
- 1 onion, finely chopped
- 2 peppers, chopped – whichever colours work best, I used red
- 3 tsp garlic paste
- 400 g tin chopped tomatoes
- 200 ml cold water
- 2 tbsp smoky chipotle paste
- 1 tsp mild chilli powder
- 0.5 tsp cumin
- 1 tsp dried oregano
- 1 Knorr vegetable stock pot
- 2 tbsp tomato paste
- 10 g 80%+ dark chocolate, (usually 1 square)
- 250 ml passata
Instructions
- Add the olive oil to a large pan and place on a medium heat. Add the onions and fry for 4-5 minutes until starting to soften.
- Add the garlic paste and peppers and fry for a further 2-3 minutes.
- Add everything else to the pan and mix together well. Bring to the boil then reduce to a simmer. Continue to simmer for 20 minutes until the sauce has thickened.
- Serve hot with rice (or in a baked potato or sweet potato) with avocado, sliced red chillis, soured cream and fresh coriander.
Video
Notes
- Check Your Pastes! Some chipotle pastes are a lot hotter than others – always double check before adding as if you have a very hot paste, you may want to add less to the chilli. I once made this mistake and no amount of yoghurt could save me!!
Nutrition
More Vegan Dinner Recipes
If you like this gluten free and vegan chilli recipe then make sure you check out these other gluten free vegan recipes too…
Have you tried this recipe?
I have a huge favour to ask! It’s getting more and more difficult to get my recipes out there to the world – so if you try this and love it, it would mean a HUGE amount if you’d come back and leave a ⭐️⭐️⭐️⭐️⭐️ review and a little comment telling me what you thought! Just 30 seconds of your time would be such a huge support! 💛
Want to connect further?
- Tag me on Instagram with your amazing creations so I can share them!
- Join my Facebook group to meet other awesome gluten free people.
- Subscribe to my Mailing List for all my new gluten free recipes first!


Delicious recipe. Very filling and was loved by everyone.
It was easy and quick to make. We always eat with brown nutty rice yum
Amazing