This post may contain affiliate links for which I earn a small commission at no extra cost to you. For more info, check out my Disclosure Policy. Thank you for your support!
This Gluten Free Shortcrust Pastry is super pliable and deliciously buttery, and always gets amazing compliments from the gluten-eaters. This 5-ingredient, gluten free pastry tastes just like ‘normal’ pastry and is perfect for pies, quiches and tarts.
Notes On This Gluten Free Pastry Recipe
- Tried and Tested: I’ve been making gluten free pastry this way for 20+ years since my coeliac diagnosis and it works like a dream every single time. Because why should being gluten free mean missing out on buttery, flaky pastry?
- Simple Recipe: This gluten free shortcrust pastry recipe only uses 5 simple ingredients and the pastry dough takes just 10 minutes to make.
- Easy To Scale: One batch of this shortcrust pastry is enough to make a 23cm lidded pie, or approximately 12 mini pies (like gluten free mince pies). For a gluten free quiche I would halve this recipe, or you can scale it up for volume.
- Sweet or Savoury: Easy options for making both savoury or sweet shortcrust.
- Updated for 2025: Readers have been loving this recipe since 2020 with rave reviews, but new for October 2025 I’ve added a new video, step-by-step photos, FAQs answering your comments and a new section on recipe troubleshooting.
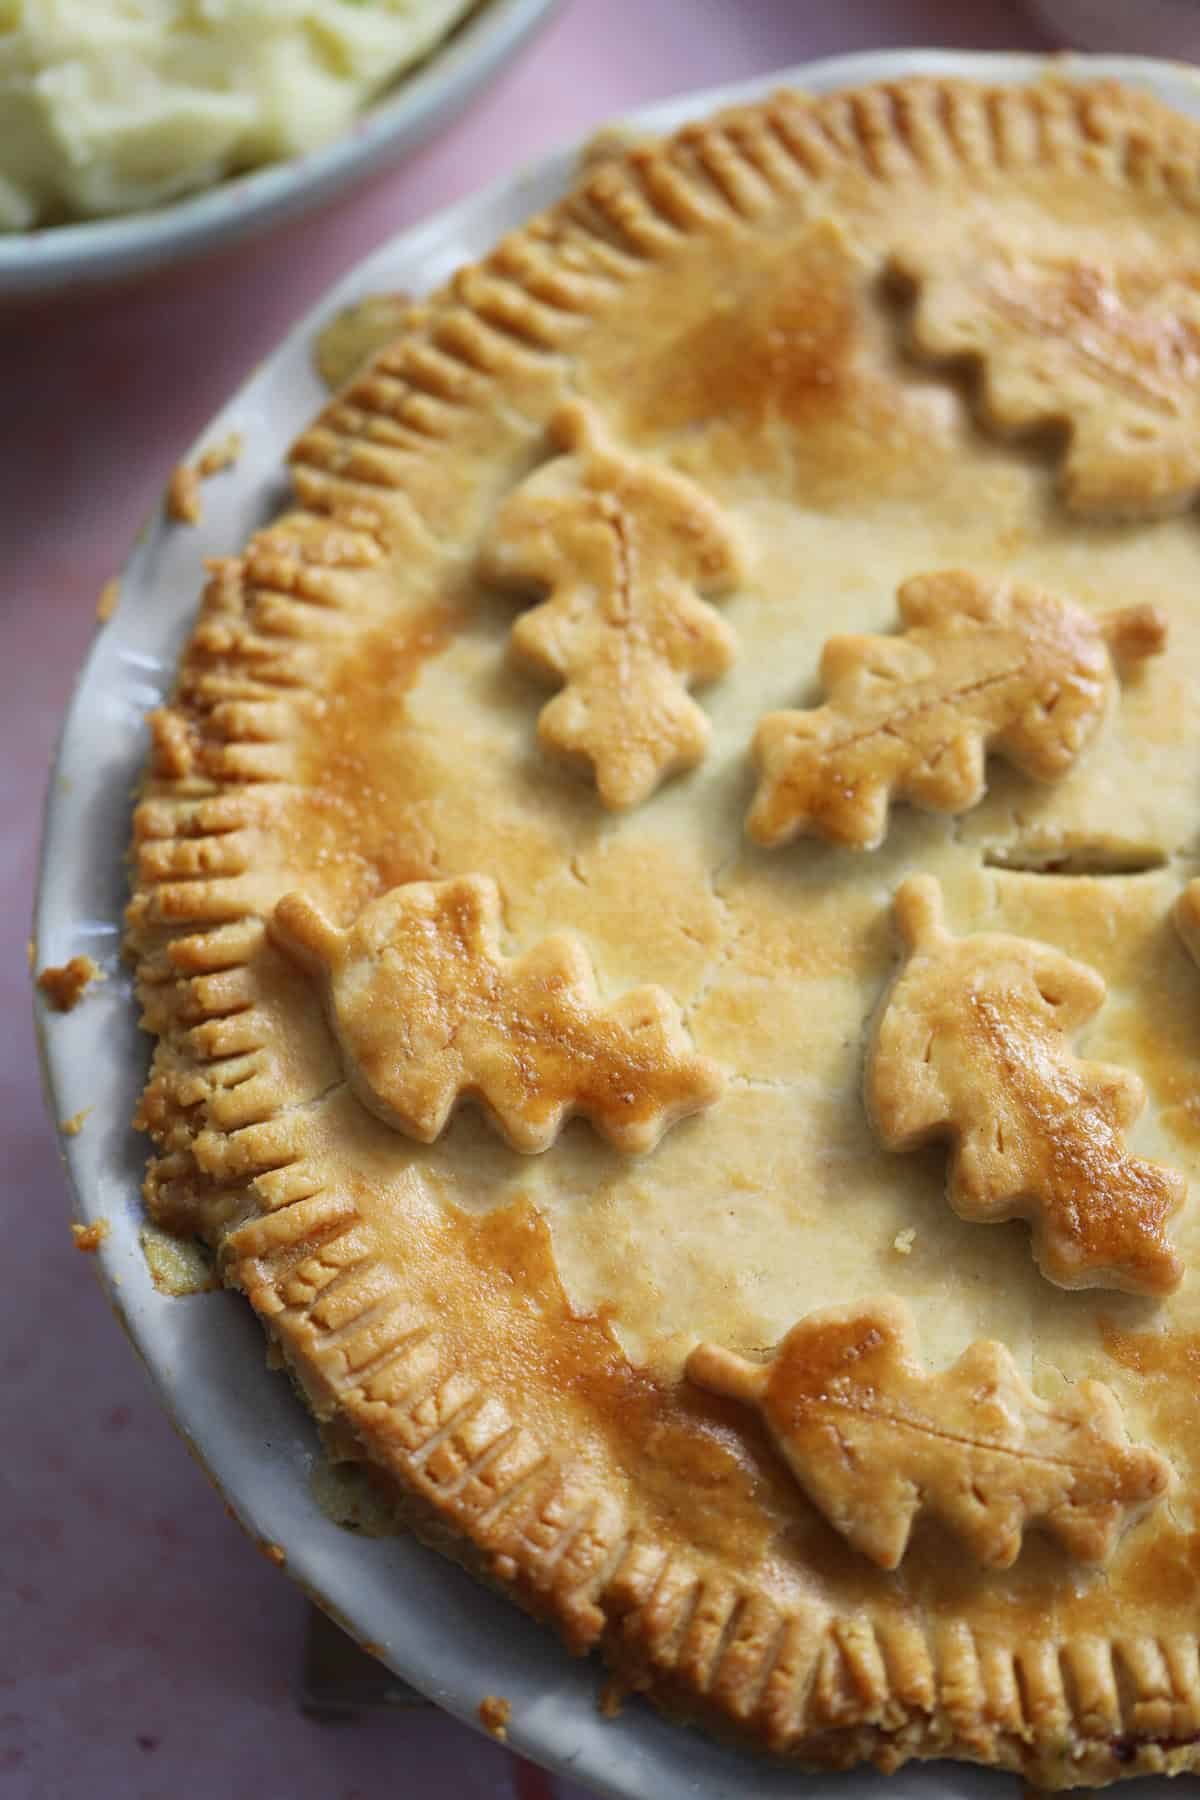
Table of Contents
- Notes On This Gluten Free Pastry Recipe
- Don’t just take my word for it…
- Ingredients and Substitutions
- How To Make Gluten Free Pastry
- At A Glance: Tips For Perfect Gluten Free Pastry
- Storing and Freezing Instructions
- Recipe Troubleshooting
- Frequently Asked Questions
- Gluten Free Shortcrust Pastry Recipe Recipe
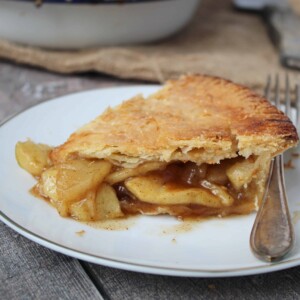
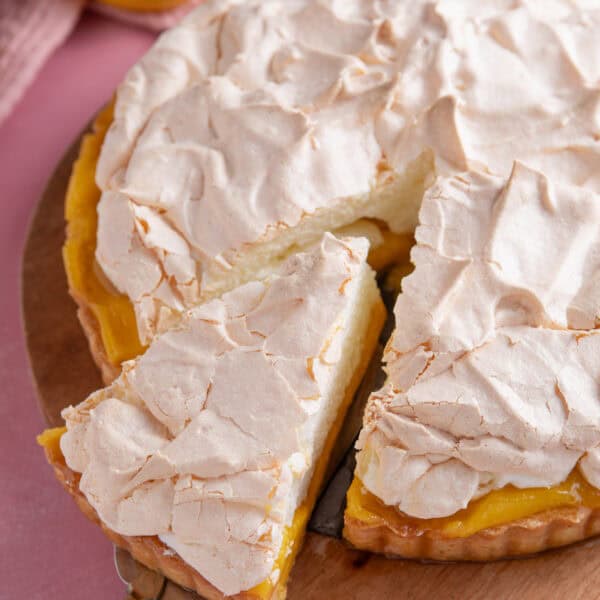
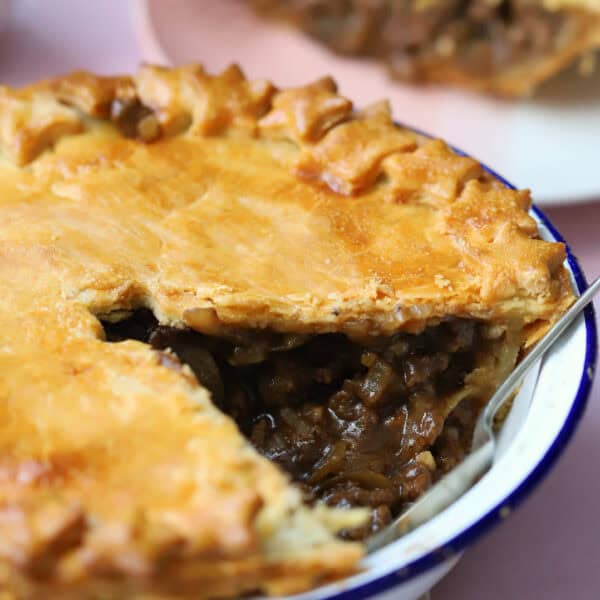
- Recipes Using My Gluten Free Pastry
- More Rave Reviews…
- You Might Also Like
Don’t just take my word for it…
CJ left a ⭐️⭐️⭐️⭐️⭐️ review and said: “This has to truly best pastry I have ever made. It’s light and if folded a few times becomes flaky. I have suffered for years with hard shop bought pies and struggled to make pastry soft. But this is to die for.”
Gaynor made mince pies with this gluten free pastry recipe and said: “Lovely pastry really easy to work with and tastes amazing.”
Josie also left ⭐️⭐️⭐️⭐️⭐️ and said: “This gluten free shortcrust pastry tecipe is amazing….the pastry is easy to make and super easy to roll and tastes delicious, it melts in the mouth. Definitely the go to recipe for me for pastry.“
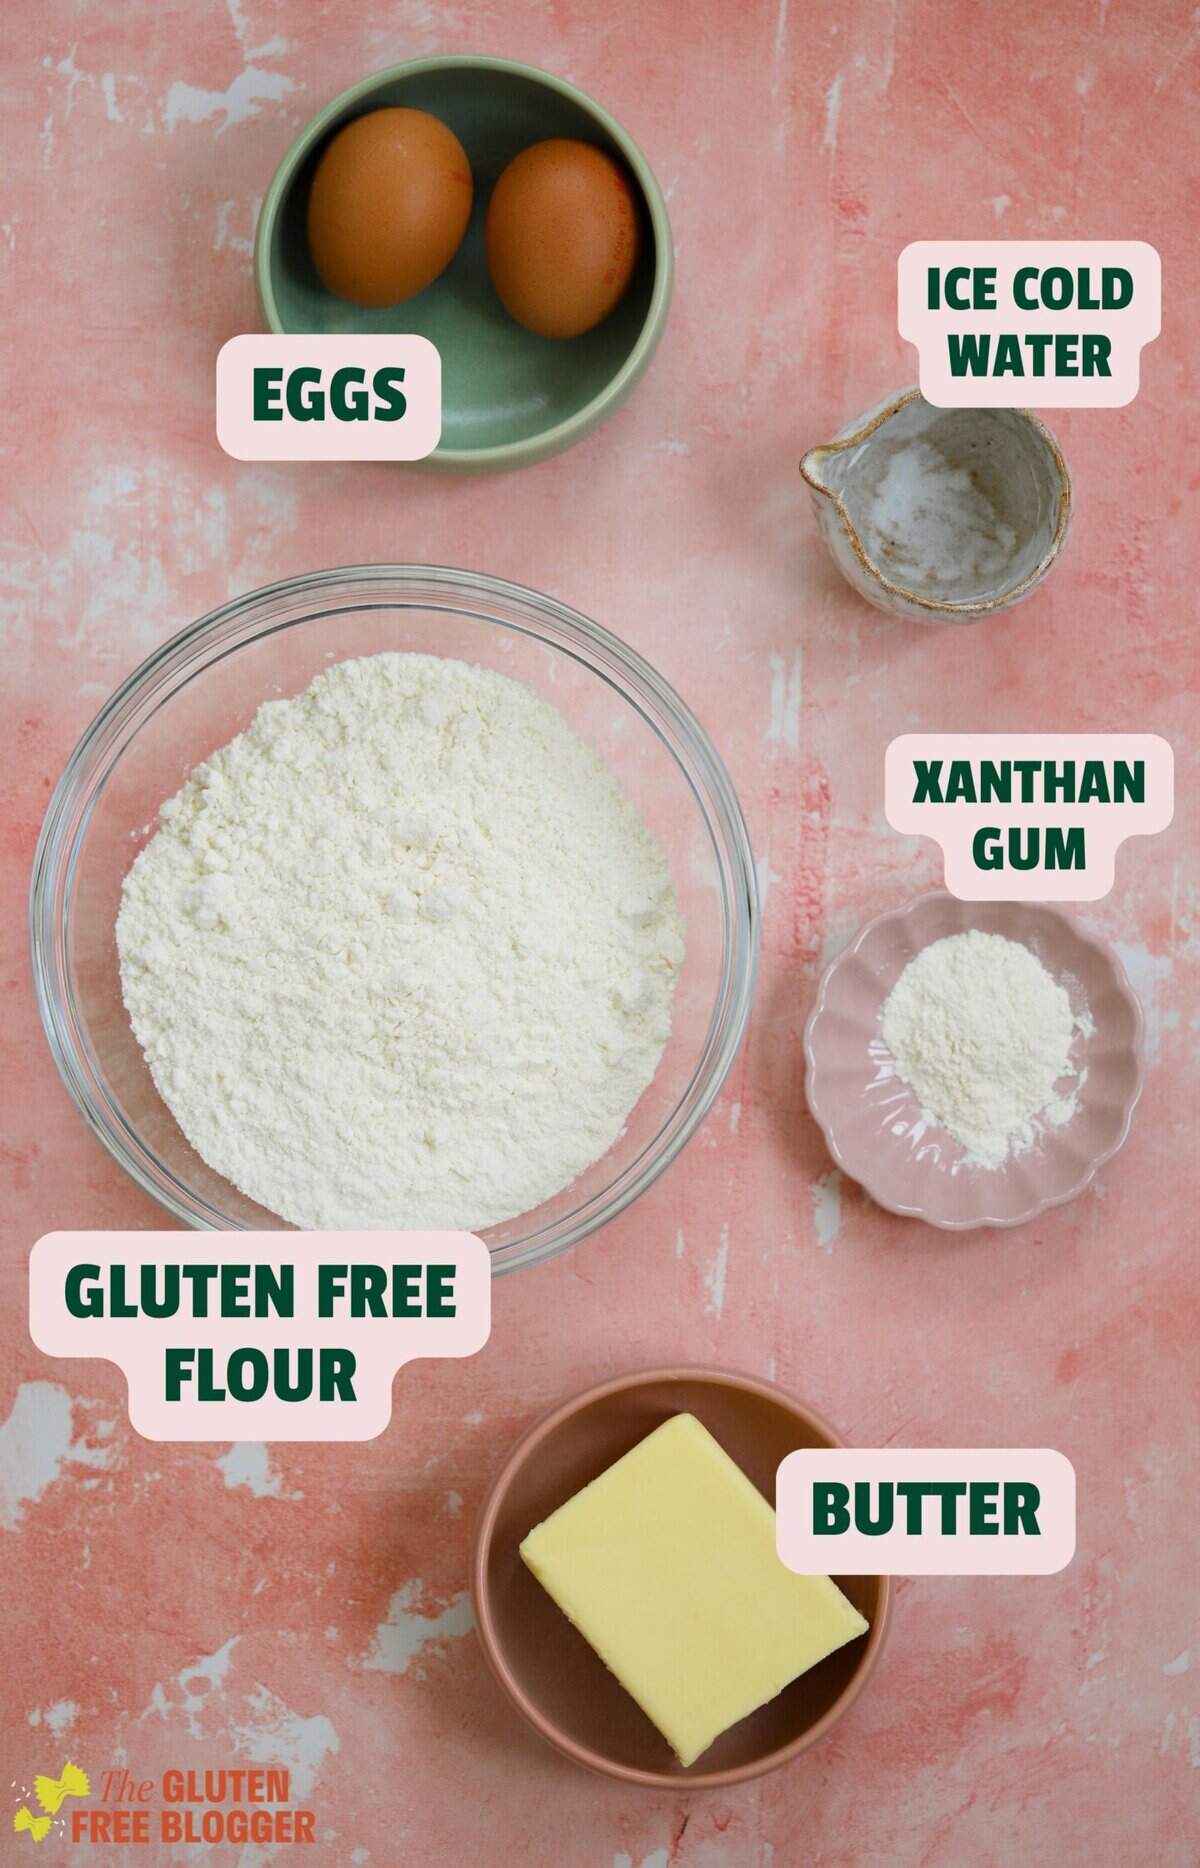
Ingredients and Substitutions
How To Make Gluten Free Pastry
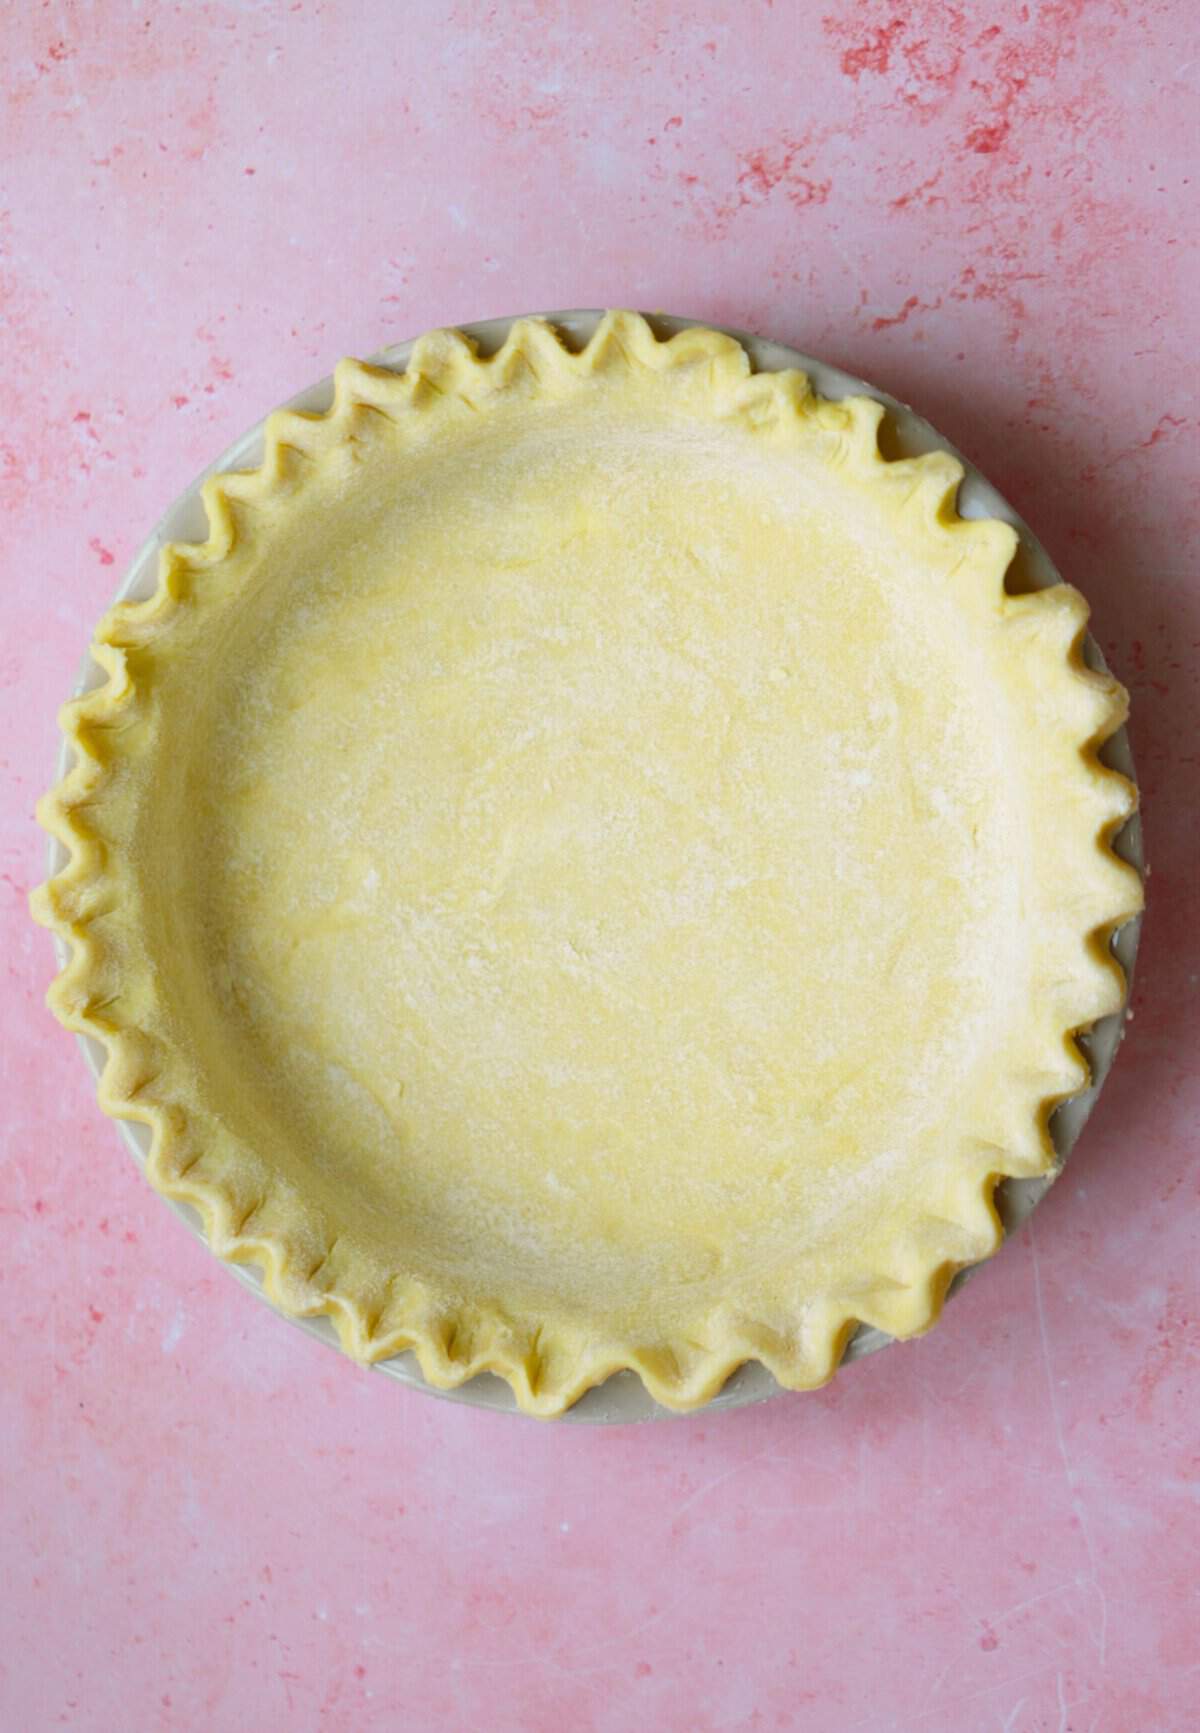
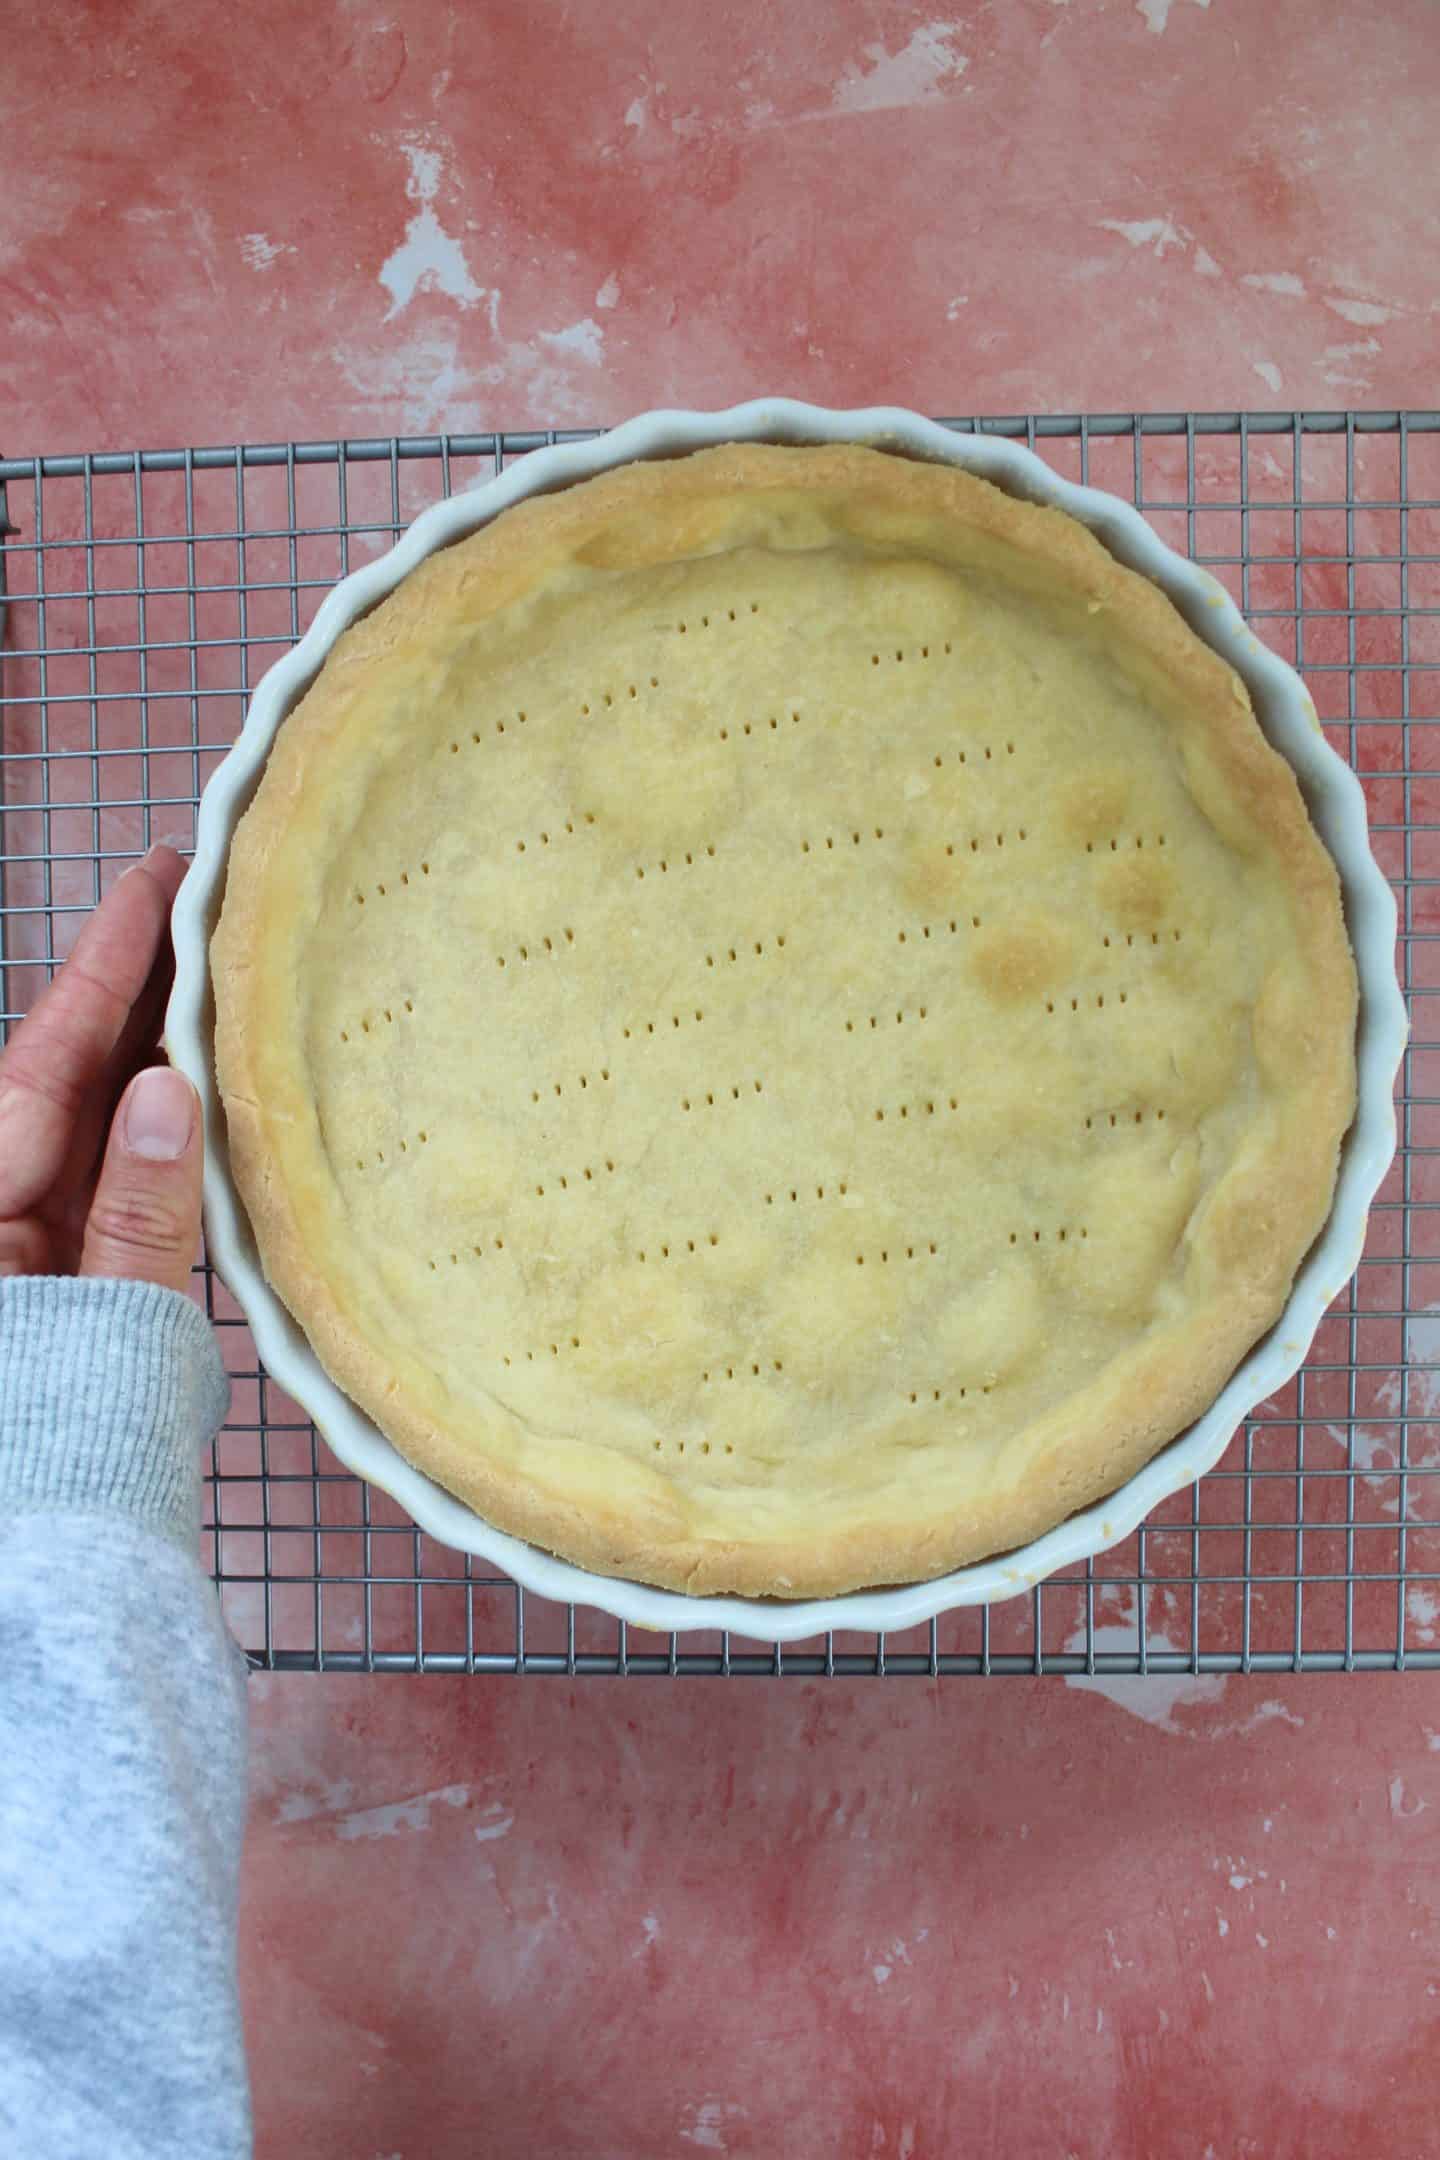
There’s a printable recipe card for this pastry recipe below. But here are some step-by-step photos to guide you through how this pastry recipe should look at each stage:
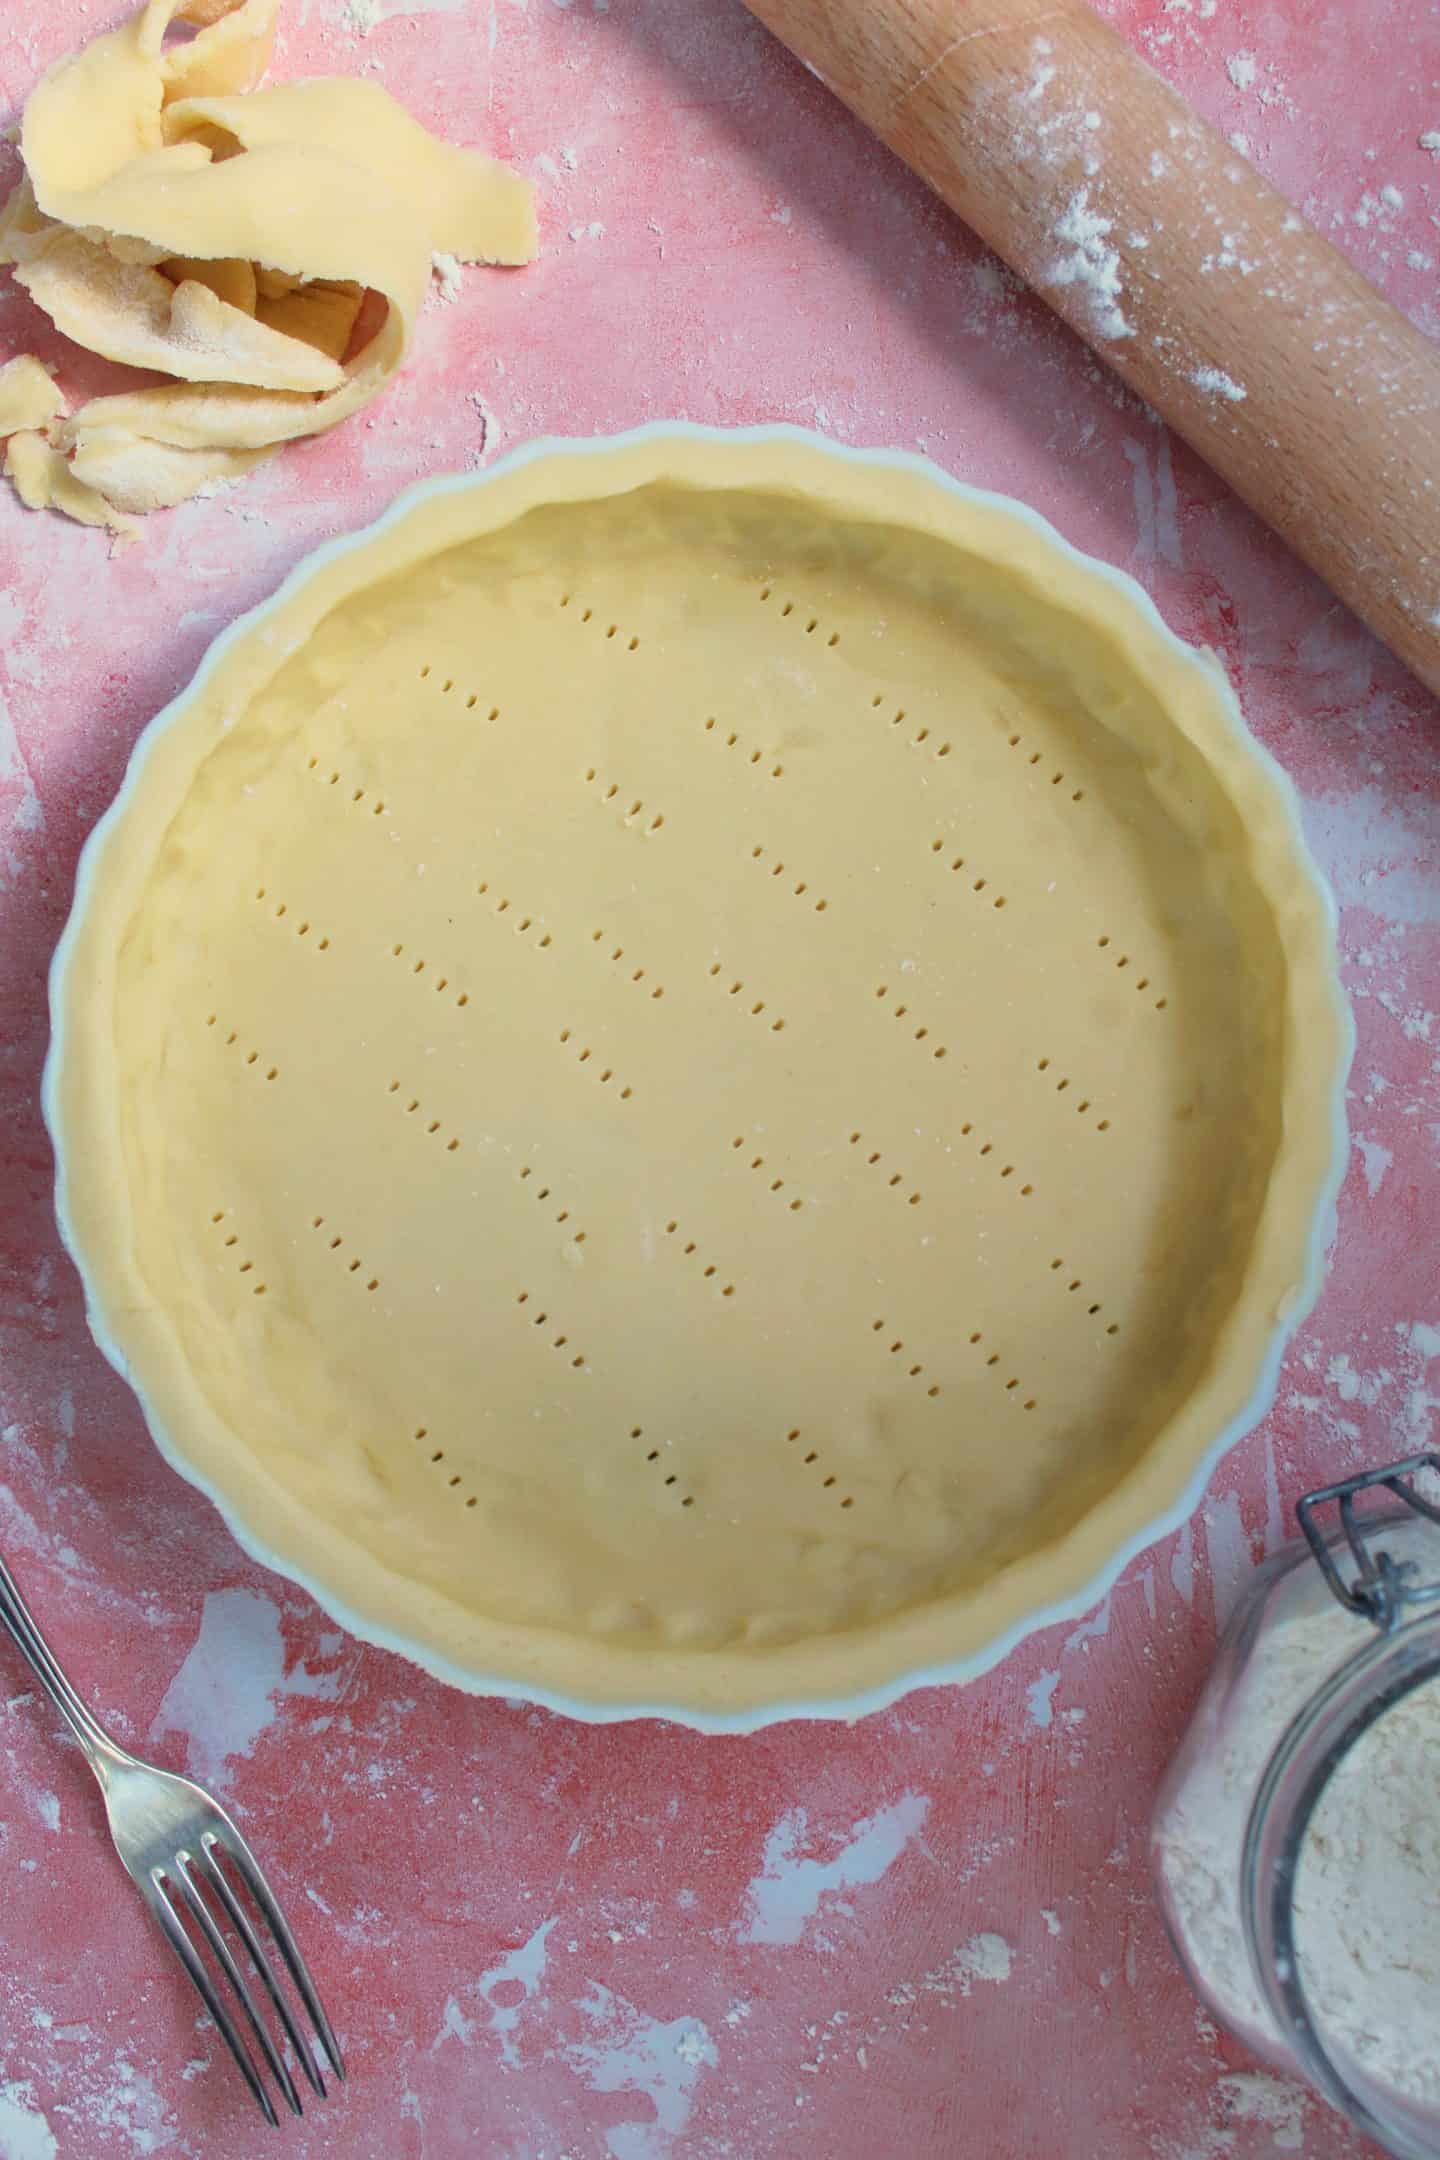
Once chilled, roll the pastry out on either a well-floured work surface, or between two sheets of clingfilm (plastic wrap) or parchment paper.
You can then cut out your desired shapes, lift it into a pie dish, or blind bake it (if making a tart or quiche recipe) – check out my guide on how to blind bake pastry for more details.
At A Glance: Tips For Perfect Gluten Free Pastry
If you are making this gluten free shortcrust pastry, my top take-away tips are:
- Keep It Cold: Trying to make pastry on a hot day is an effort, so always ensure you’re giving the pastry some extra time to chill if it’s becoming too sticky.
- Warm Hands? Run your hands under some cold water before handling the pastry dough if you typically have hot hands.
- Easy Option: If you struggle to use your hands to work the butter into the flour, you can either use a food processor or grate the butter into the mix to make it easier to work with. I recommend freezing the butter before coarsely grating.
- Use Plastic Wrap: Place the dough between two pieces of clingfilm to roll it out easily. It also makes it easier to lift the pastry into a dish without breakages.
Storing and Freezing Instructions
You can easily make gluten free pastry ahead of time then refrigerate or freeze it ready for when you want to use it. A great time-saver!
TO STORE: Simply make the pastry dough it to the point of chilling and then keep in the fridge for up to 3 days before rolling out and baking.
TO FREEZE: To freeze gluten free pastry dough, wrap the ball of pastry dough in cling film or plastic wrap and freeze for up to 6 months. Defrost and roll out ready to bake as normal.
Recipe Troubleshooting
Making this gluten free shortcrust pastry is really easy, but I’ve added this troubleshooting section to address any issues you may run into, and how to solve them.
Why is my gluten free pastry crumbly and falling apart?
If you’ve re-rolled the pastry a few times it may dry out due to the floured work surface.
Simply wet your hands and knead it a few times and it will become pliable once again! Or roll the pastry between clingfilm to avoid using any extra flour.
Why is my gluten free pastry too sticky and difficult to handle?
It’s VERY important to keep gluten free pastry cool, as the gluten free pastry dough can become sticky and unworkable when it’s too warm.
You can also roll the pastry dough between clingfilm if you find it is sticking to the work surface, and this may help make it a bit easier.
Why is my gluten free pastry tough once baked?
This pastry should be buttery, short and slightly flaky. If it is tough, it’s likely either it has been over-baked, or the pastry dough got too warm.
It’s always important not to over-handle your dough so the pastry stays cool, and to bake it for the correct time and at the correct oven temperatures stated in the recipe.
Frequently Asked Questions
In case you have any other questions about making shortcrust pastry, I’ve tried to answer as many as possible here and to troubleshoot this gluten free pie crust recipe.
The xanthan gum is really crucial to this recipe. I tested multiple variations of this gluten free pastry and without the xanthan gum it just crumbles. It helps to replicate the texture of gluten – it’s what makes this shortcrust pastry so pliable!
Yes! If you struggle to use your hands to rub the pastry mixture together, or just don’t want the mess, you can simply use a food processor to blitz the flour and butter mixture to a breadcrumb consistency instead.
Don’t waste them! You can easily roll the scraps up and re-use them. I like to use them to make gluten free jam tarts – or you can freeze them to use at a later date.
This recipe is completely gluten free and safe for people with coeliac disease. However if you’re making this in a shared kitchen, be sure to avoid any risk of cross contamination, by wiping down surfaces and using clean utensils. There are lots of extra tips and guidance on the Coeliac UK website to help with this.
I have a full tutorial on how to blind bake gluten free pastry, but in short: roll the pastry out and pop it in your pie dish. Cover with baking paper and fill with baking beans (or dried rice/lentil). Bake at 180C for 10 minutes, remove the paper and beans, then bake for another 10 minutes before removing, filling and baking your recipe of choice. This technique is common with quiches and tarts.

Gluten Free Shortcrust Pastry Recipe
Equipment
Ingredients
- 340 g plain gluten free flour, (I use the FREEE Plain Gluten Free Flour)
- 2 tsp xanthan gum
- 2 large eggs
- 2 tsp ice cold water, (as cold as possible!)
- 220 g unsalted butter, (make sure this is SUPER cold. For dairy free, use lard, Cookeen or Trex)
- Pinch salt
Optional:
- 1 tbsp caster sugar, (for sweet pies and tarts)
- 1 egg, (beaten, to brush the tops of your pies and stick down the pie lids.)
Instructions
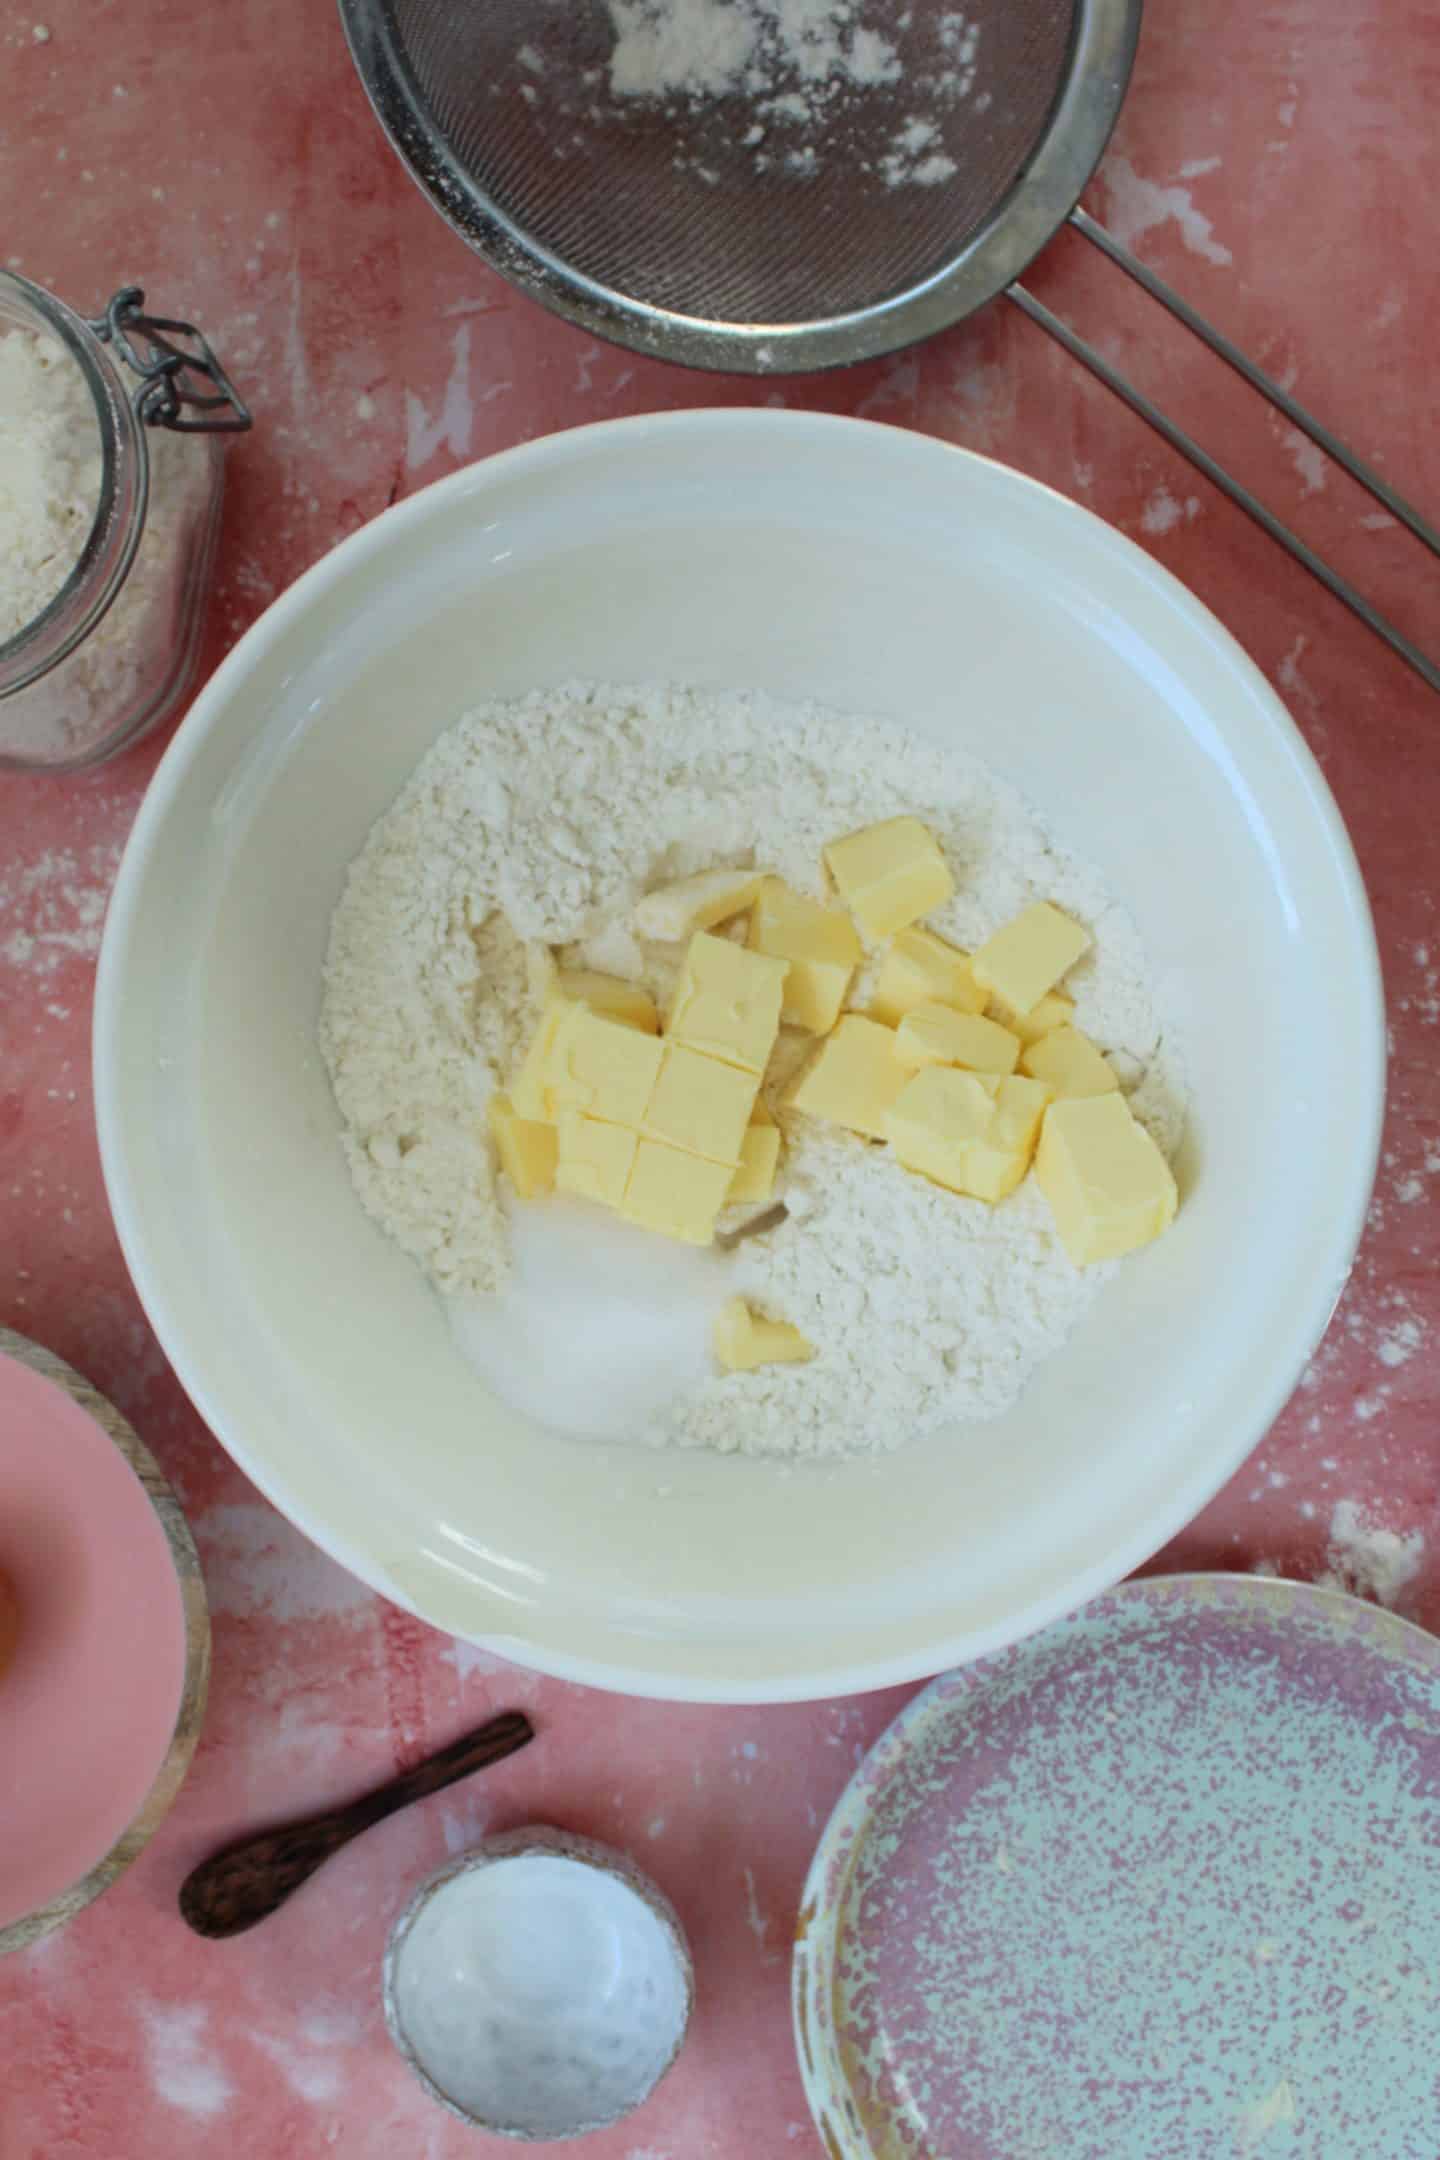
- Add the flour, xanthan gum, salt (and sugar if using) to a large mixing bowl and stir together.
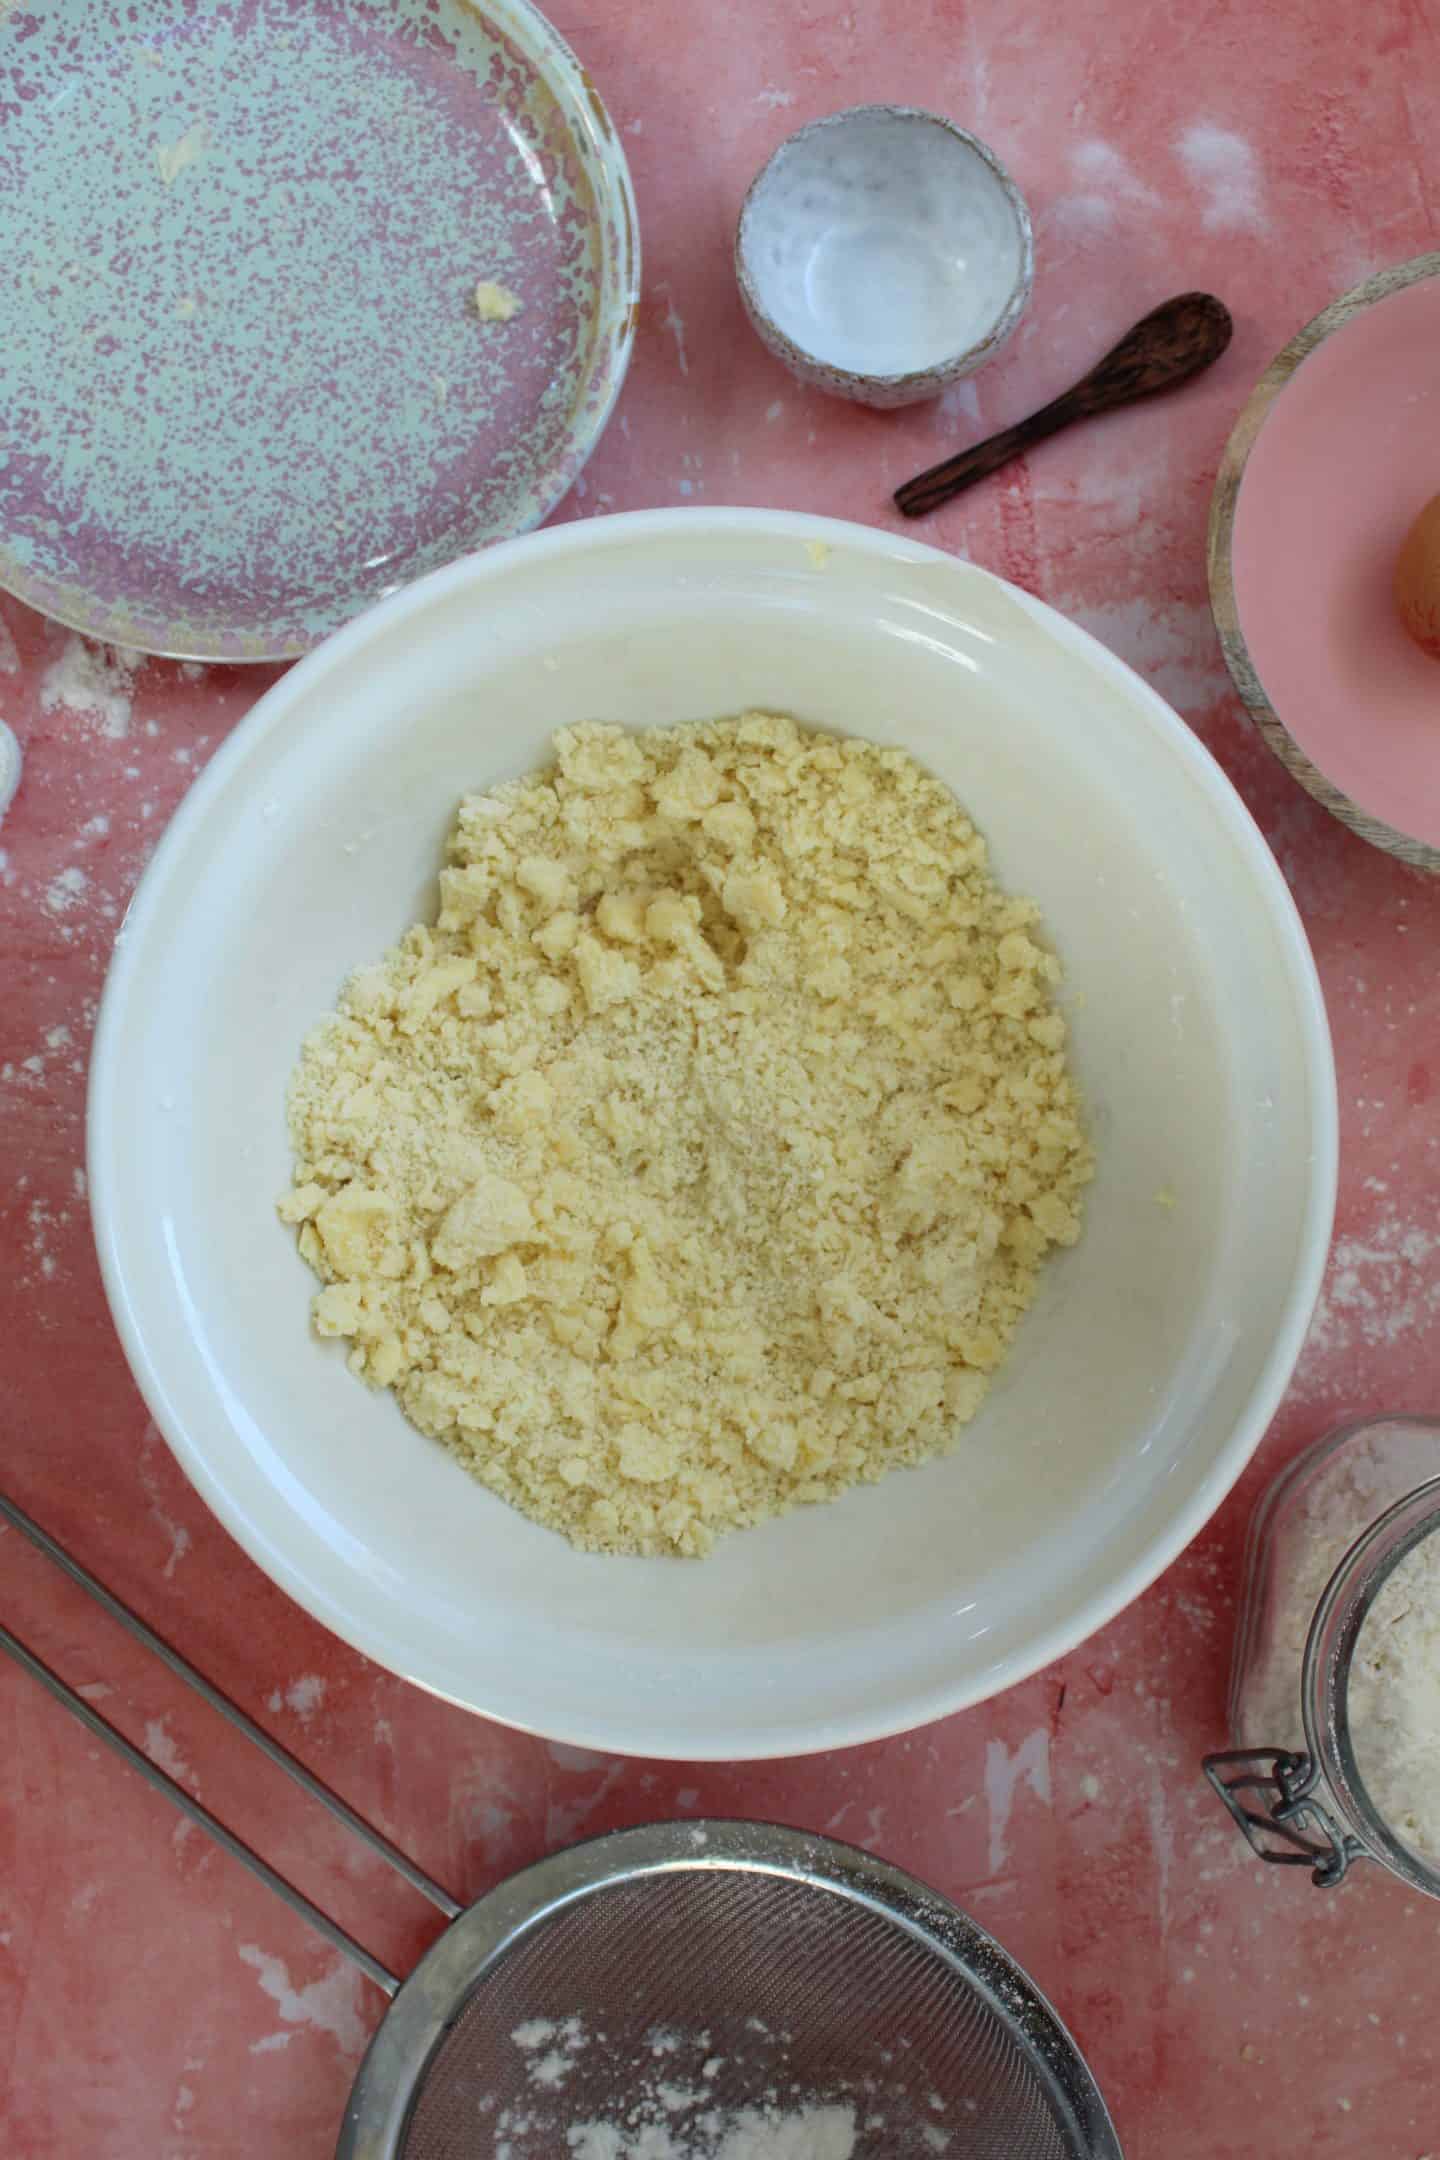
- Cut the COLD butter into cubes and then add to the bowl. Using your fingers, rub the mix together until it resembles breadcrumbs.
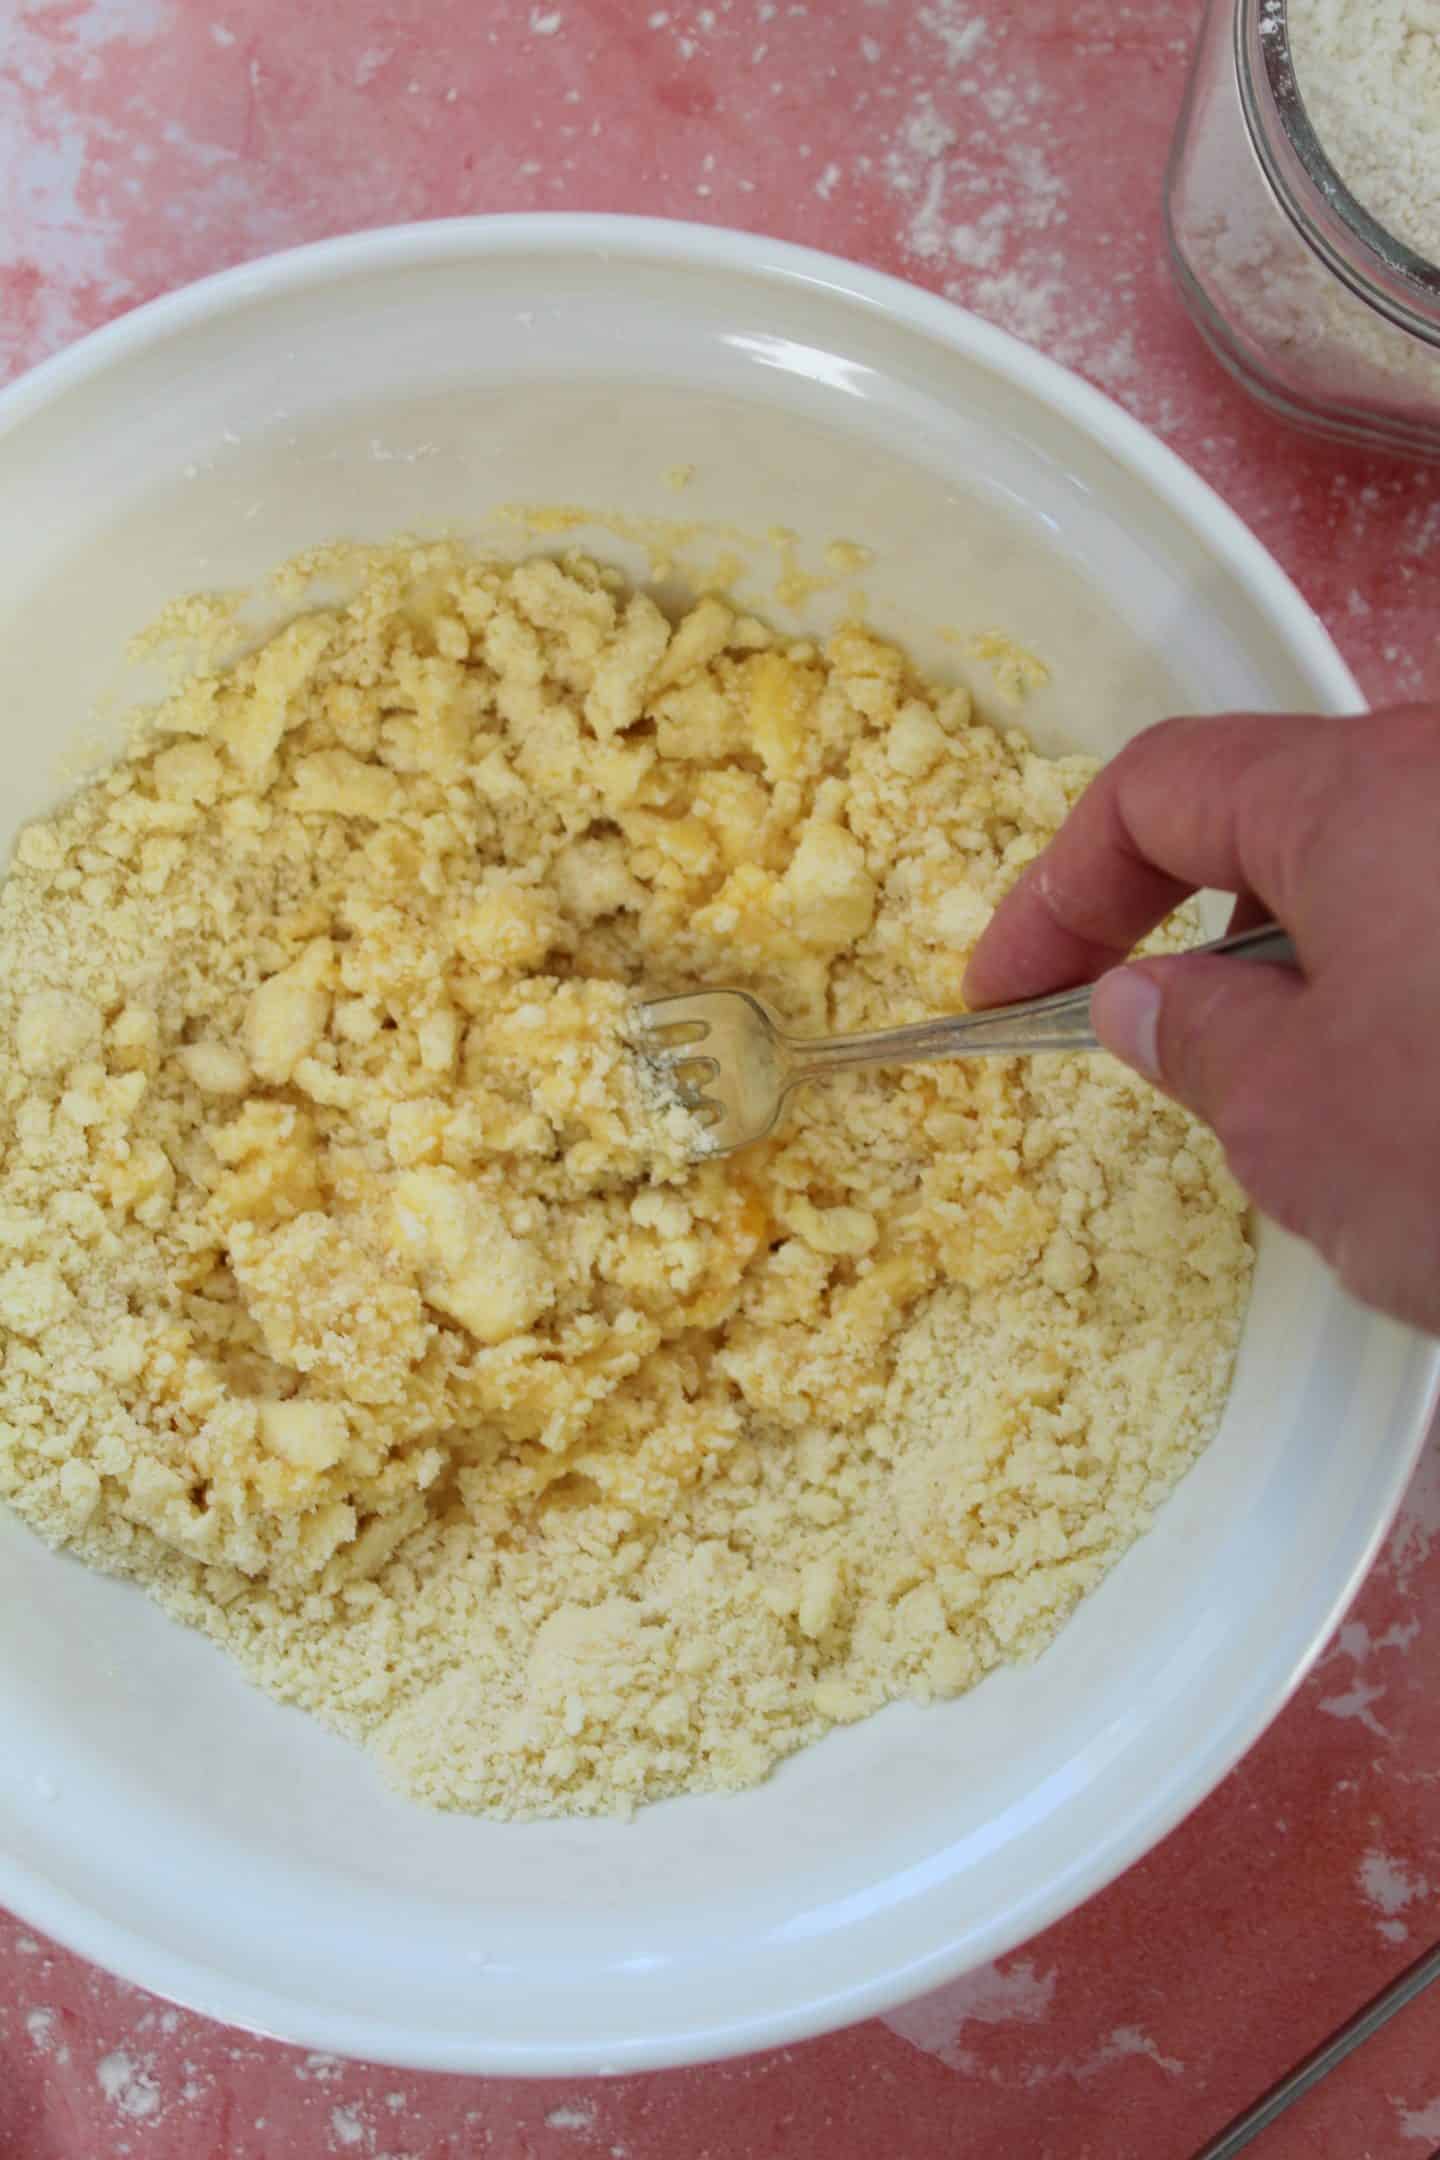
- Crack the eggs into a bowl or mug and add the cold water. Whisk together until just combined. Then add to the mix and use a fork to start to ‘mush’ the mixture together. You’ll see it start to form a sticky dough.
- Once it becomes harder to use the fork to mix, use your hands to bring the mixture together into a smooth dough. You should be able to pick this up easily without it being too sticky.
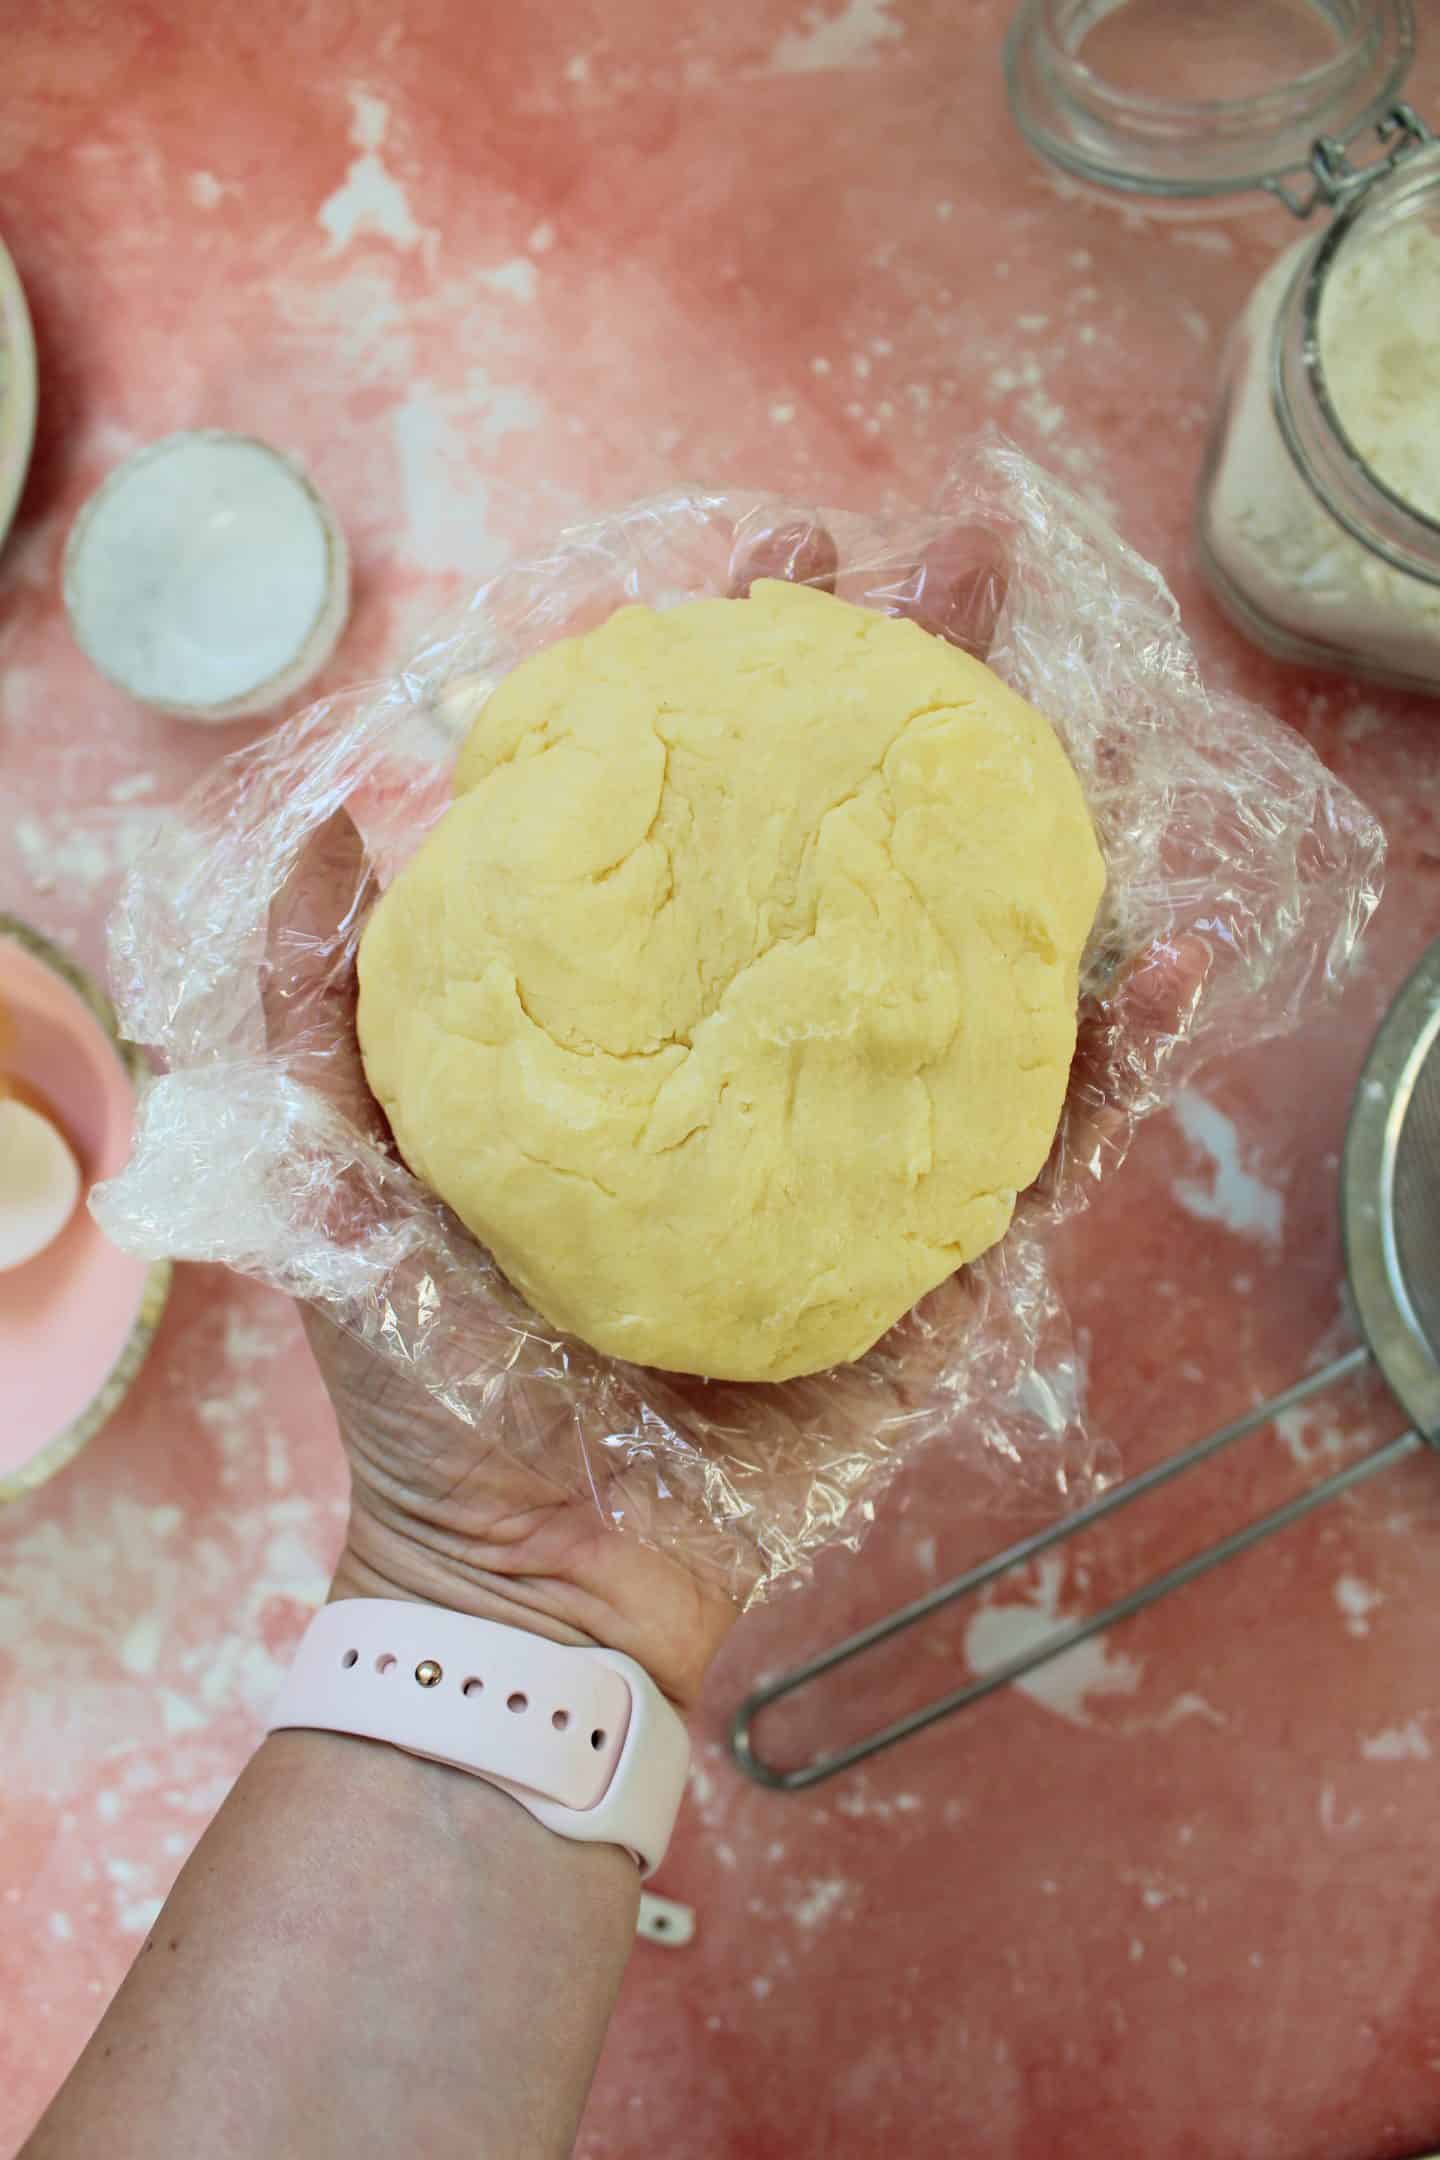
- Wrap the dough in clingfilm and chill in the fridge for at least 30 minutes. This is a really important stage – you need the dough to chill a bit so it is easier to roll!
- Once chilled, knead the dough on a lightly floured work surface until it is pliable. Keep the surface well-floured as you roll out the pastry dough to the desired thickness – or you can roll it between two sheets of clingfilm if you find it easier. You can now use it for your recipe of choice – I have lots of suggestions linked below this recipe card in my blog post, both sweet and savoury!
Video
Notes
- Blind Baking? Check out my full detailed explainer on how to blind bake pastry for a step-by-step instructions on this process.
- Top Tip: Always use cold butter in this recipe and never skip the chilling. Otherwise you could end up with a sticky mess!
- Weighing Scales vs Cups: You can toggle this recipe card to convert the ingredients into cups. However, I always recommend using weighing scales – these are cheap to buy and much more accurate. And in gluten free baking, a tiny variation can make a huge difference!
Nutrition
Recipes Using My Gluten Free Pastry
Savoury Gluten Free Pastry Recipes
Sweet Gluten Free Pastry Recipes
Don’t forget to try my gluten free puff pastry and gluten free choux pastry as well.
More Rave Reviews…
Annette left ⭐️⭐️⭐️⭐️⭐️ saying: “I made this shortcrust pastry for a chicken pie I was making. It was delicious so delicious my eldest son who usually won’t eat anything wheat & gluten free loved it and even took left over slices for his lunch at work.”
And Anne left a ⭐️⭐️⭐️⭐️⭐️ review and said: “The gluten free pastry recipe is the best I’ve come across in my 20 years of being a coeliac and one I make time again.”


I love all Sarah’s recipes and have the book! Scones are the biggest thing I’ve missed since being diagnosed 6 years ago so I was delighted to find such an easy and tasty recipe
All your recipes are amazing thankyou