This post may contain affiliate links for which I earn a small commission at no extra cost to you. For more info, check out my Disclosure Policy. Thank you for your support!
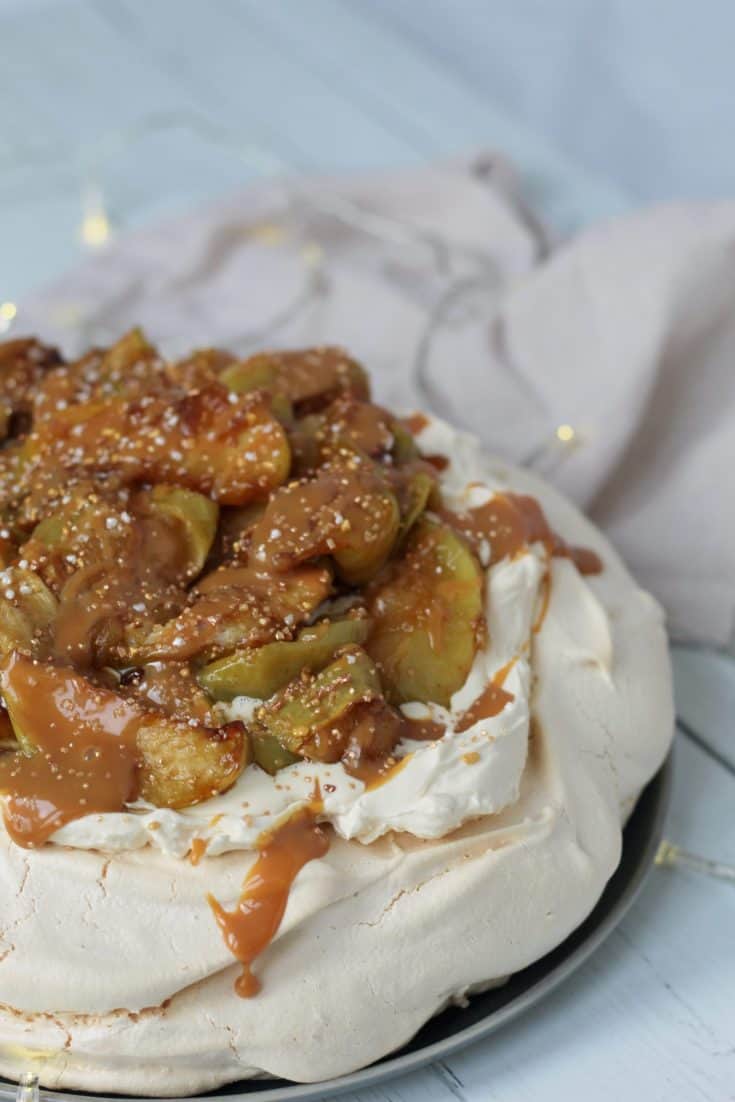
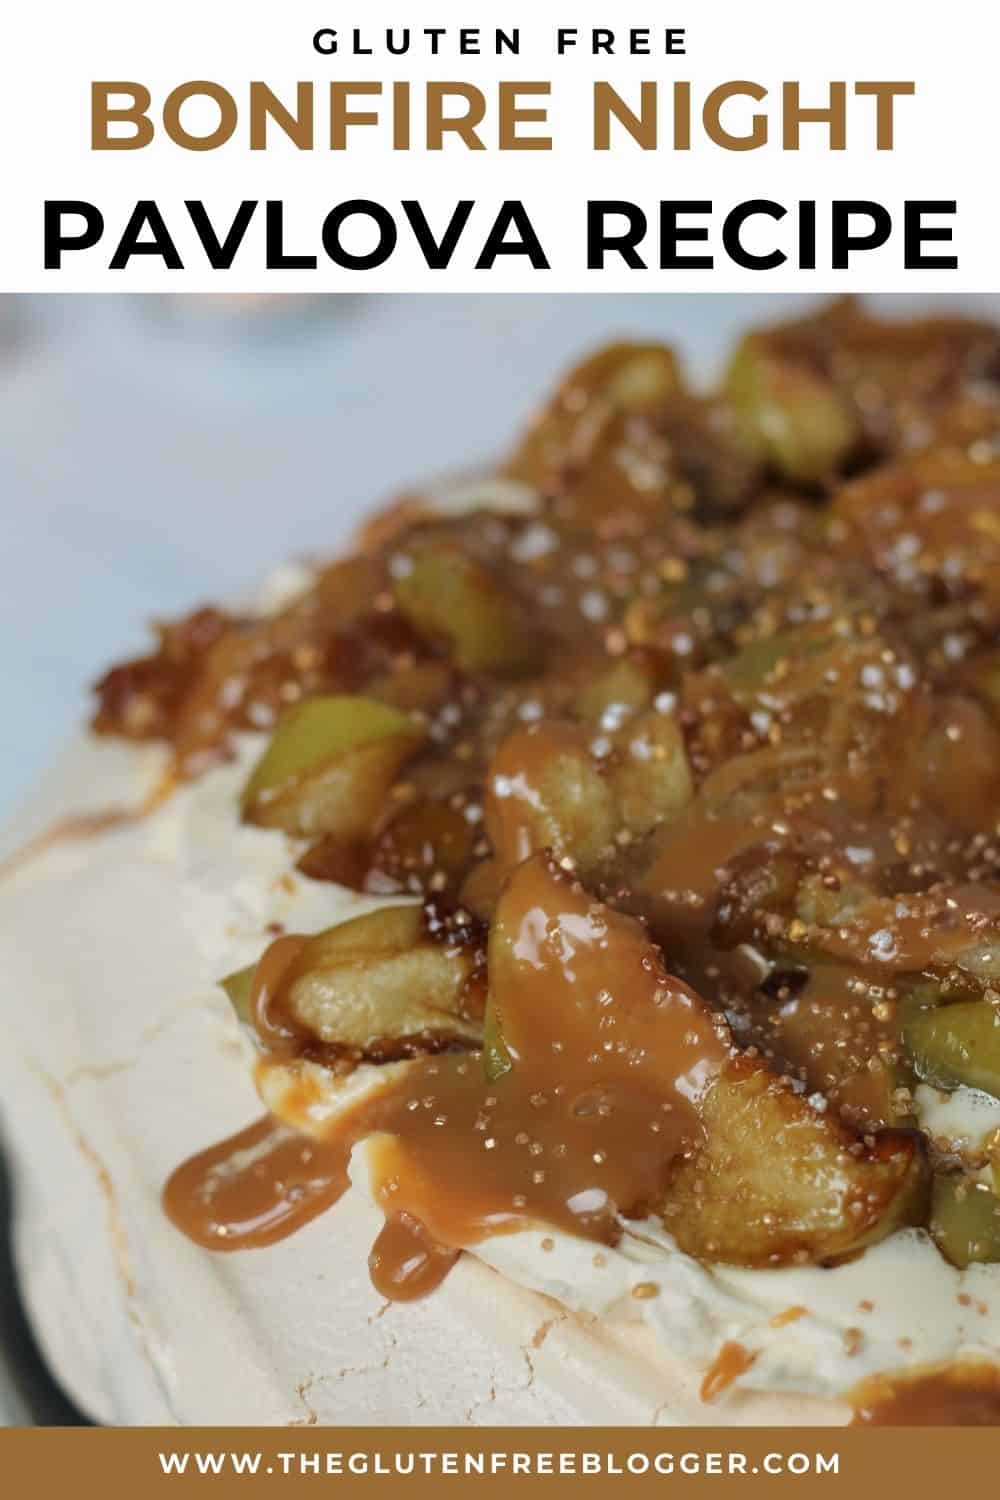
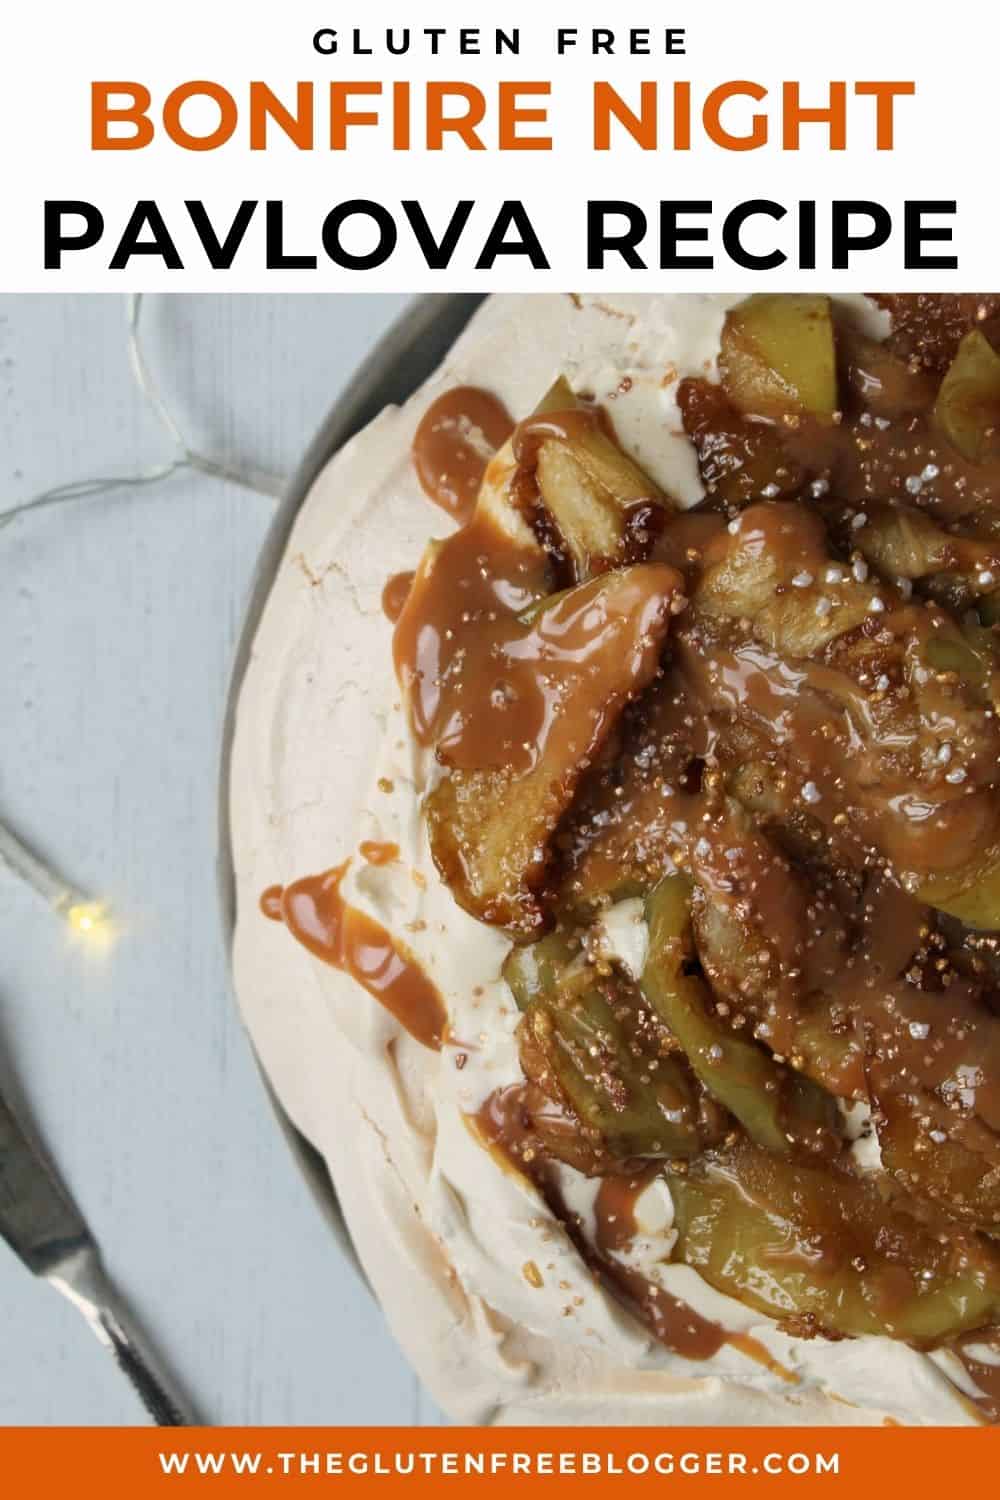
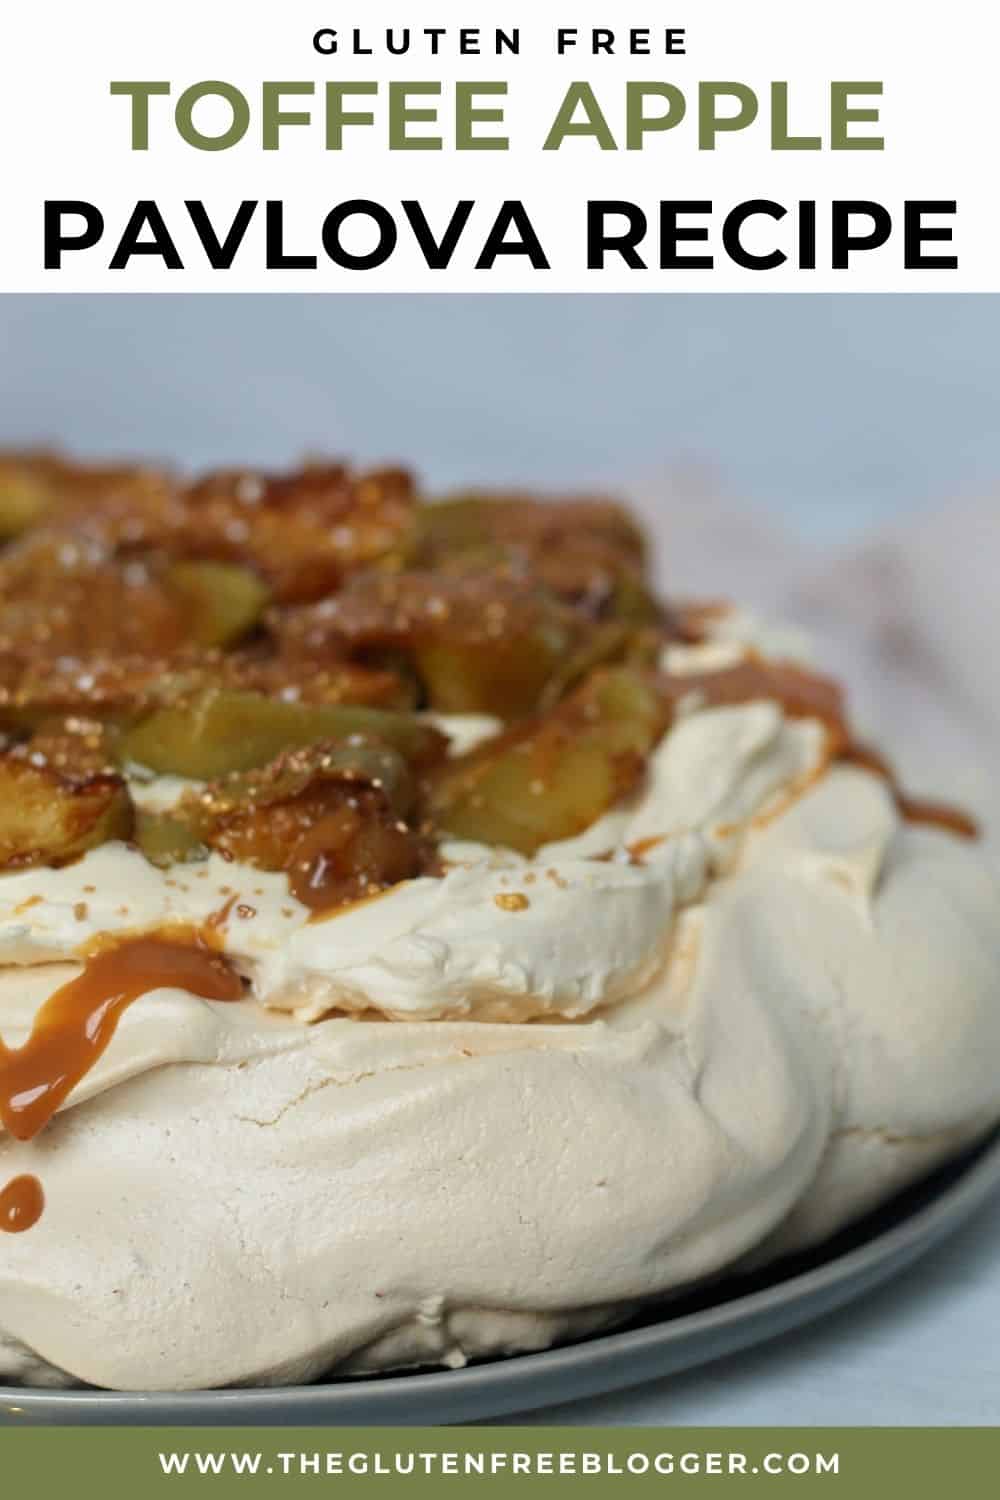
Although it’s going to look a little different this year, Bonfire Night is one of my favourite nights of the year – and I love celebrating it with my Bonfire Night Pavlova.
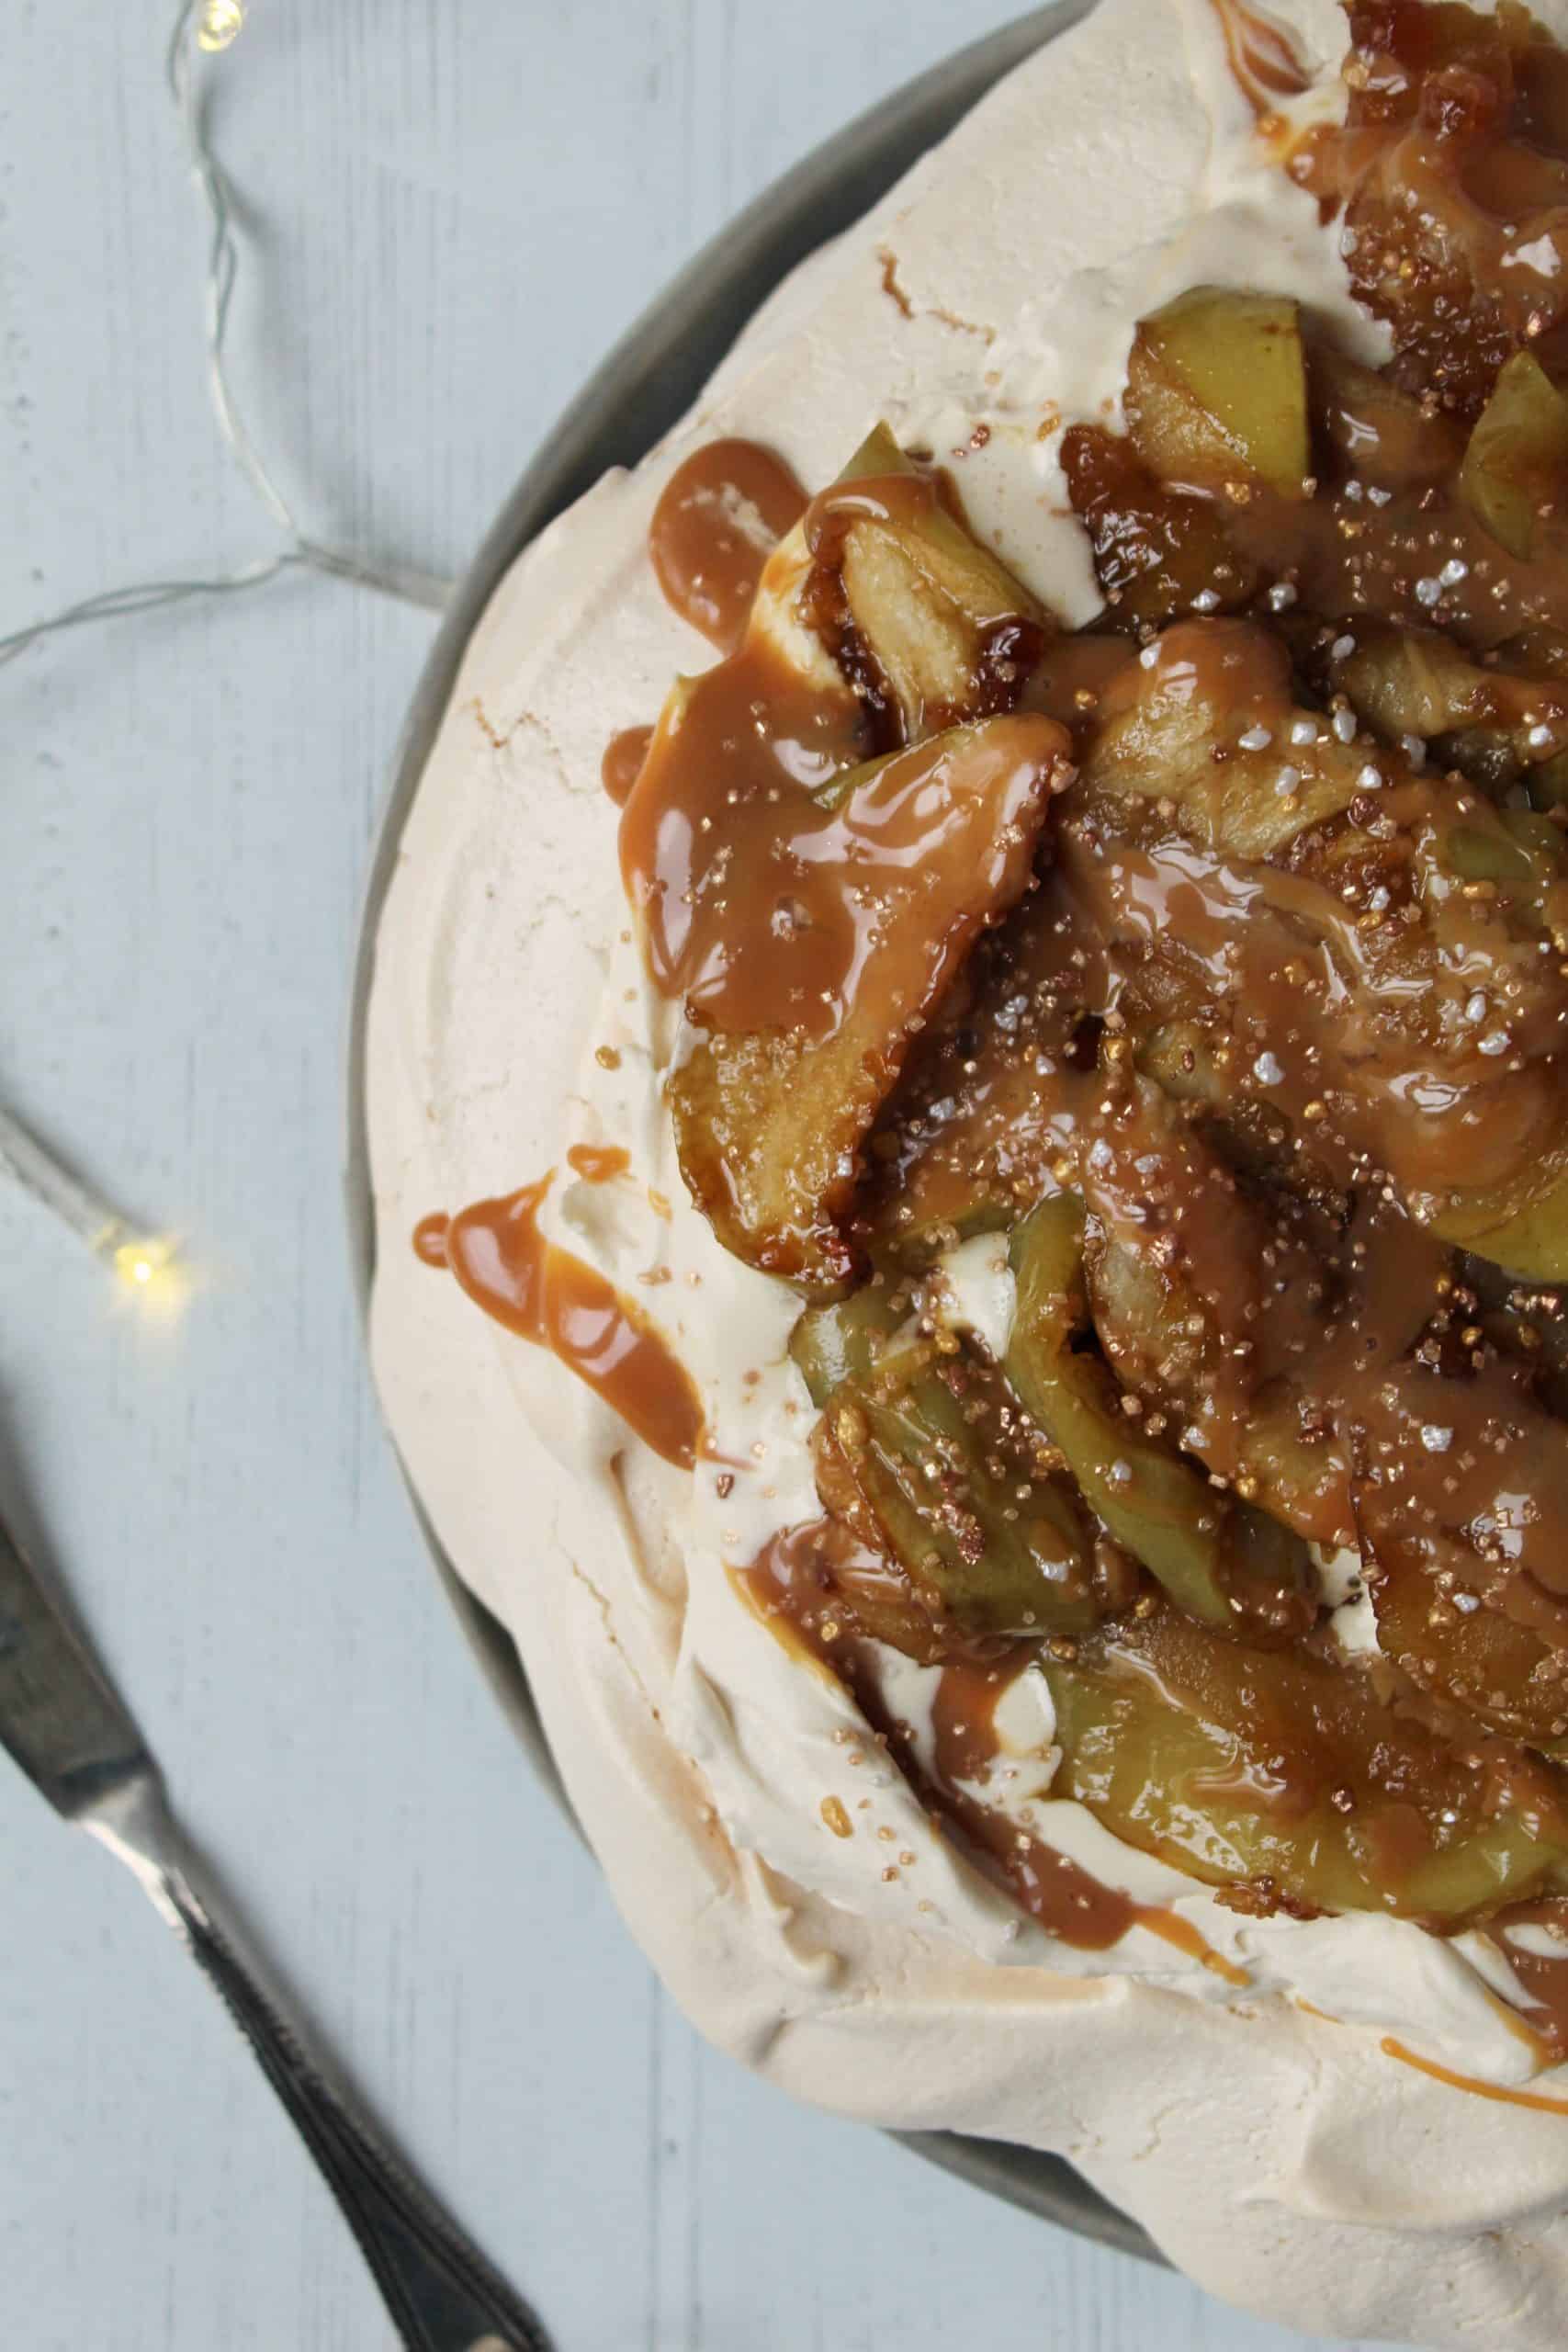
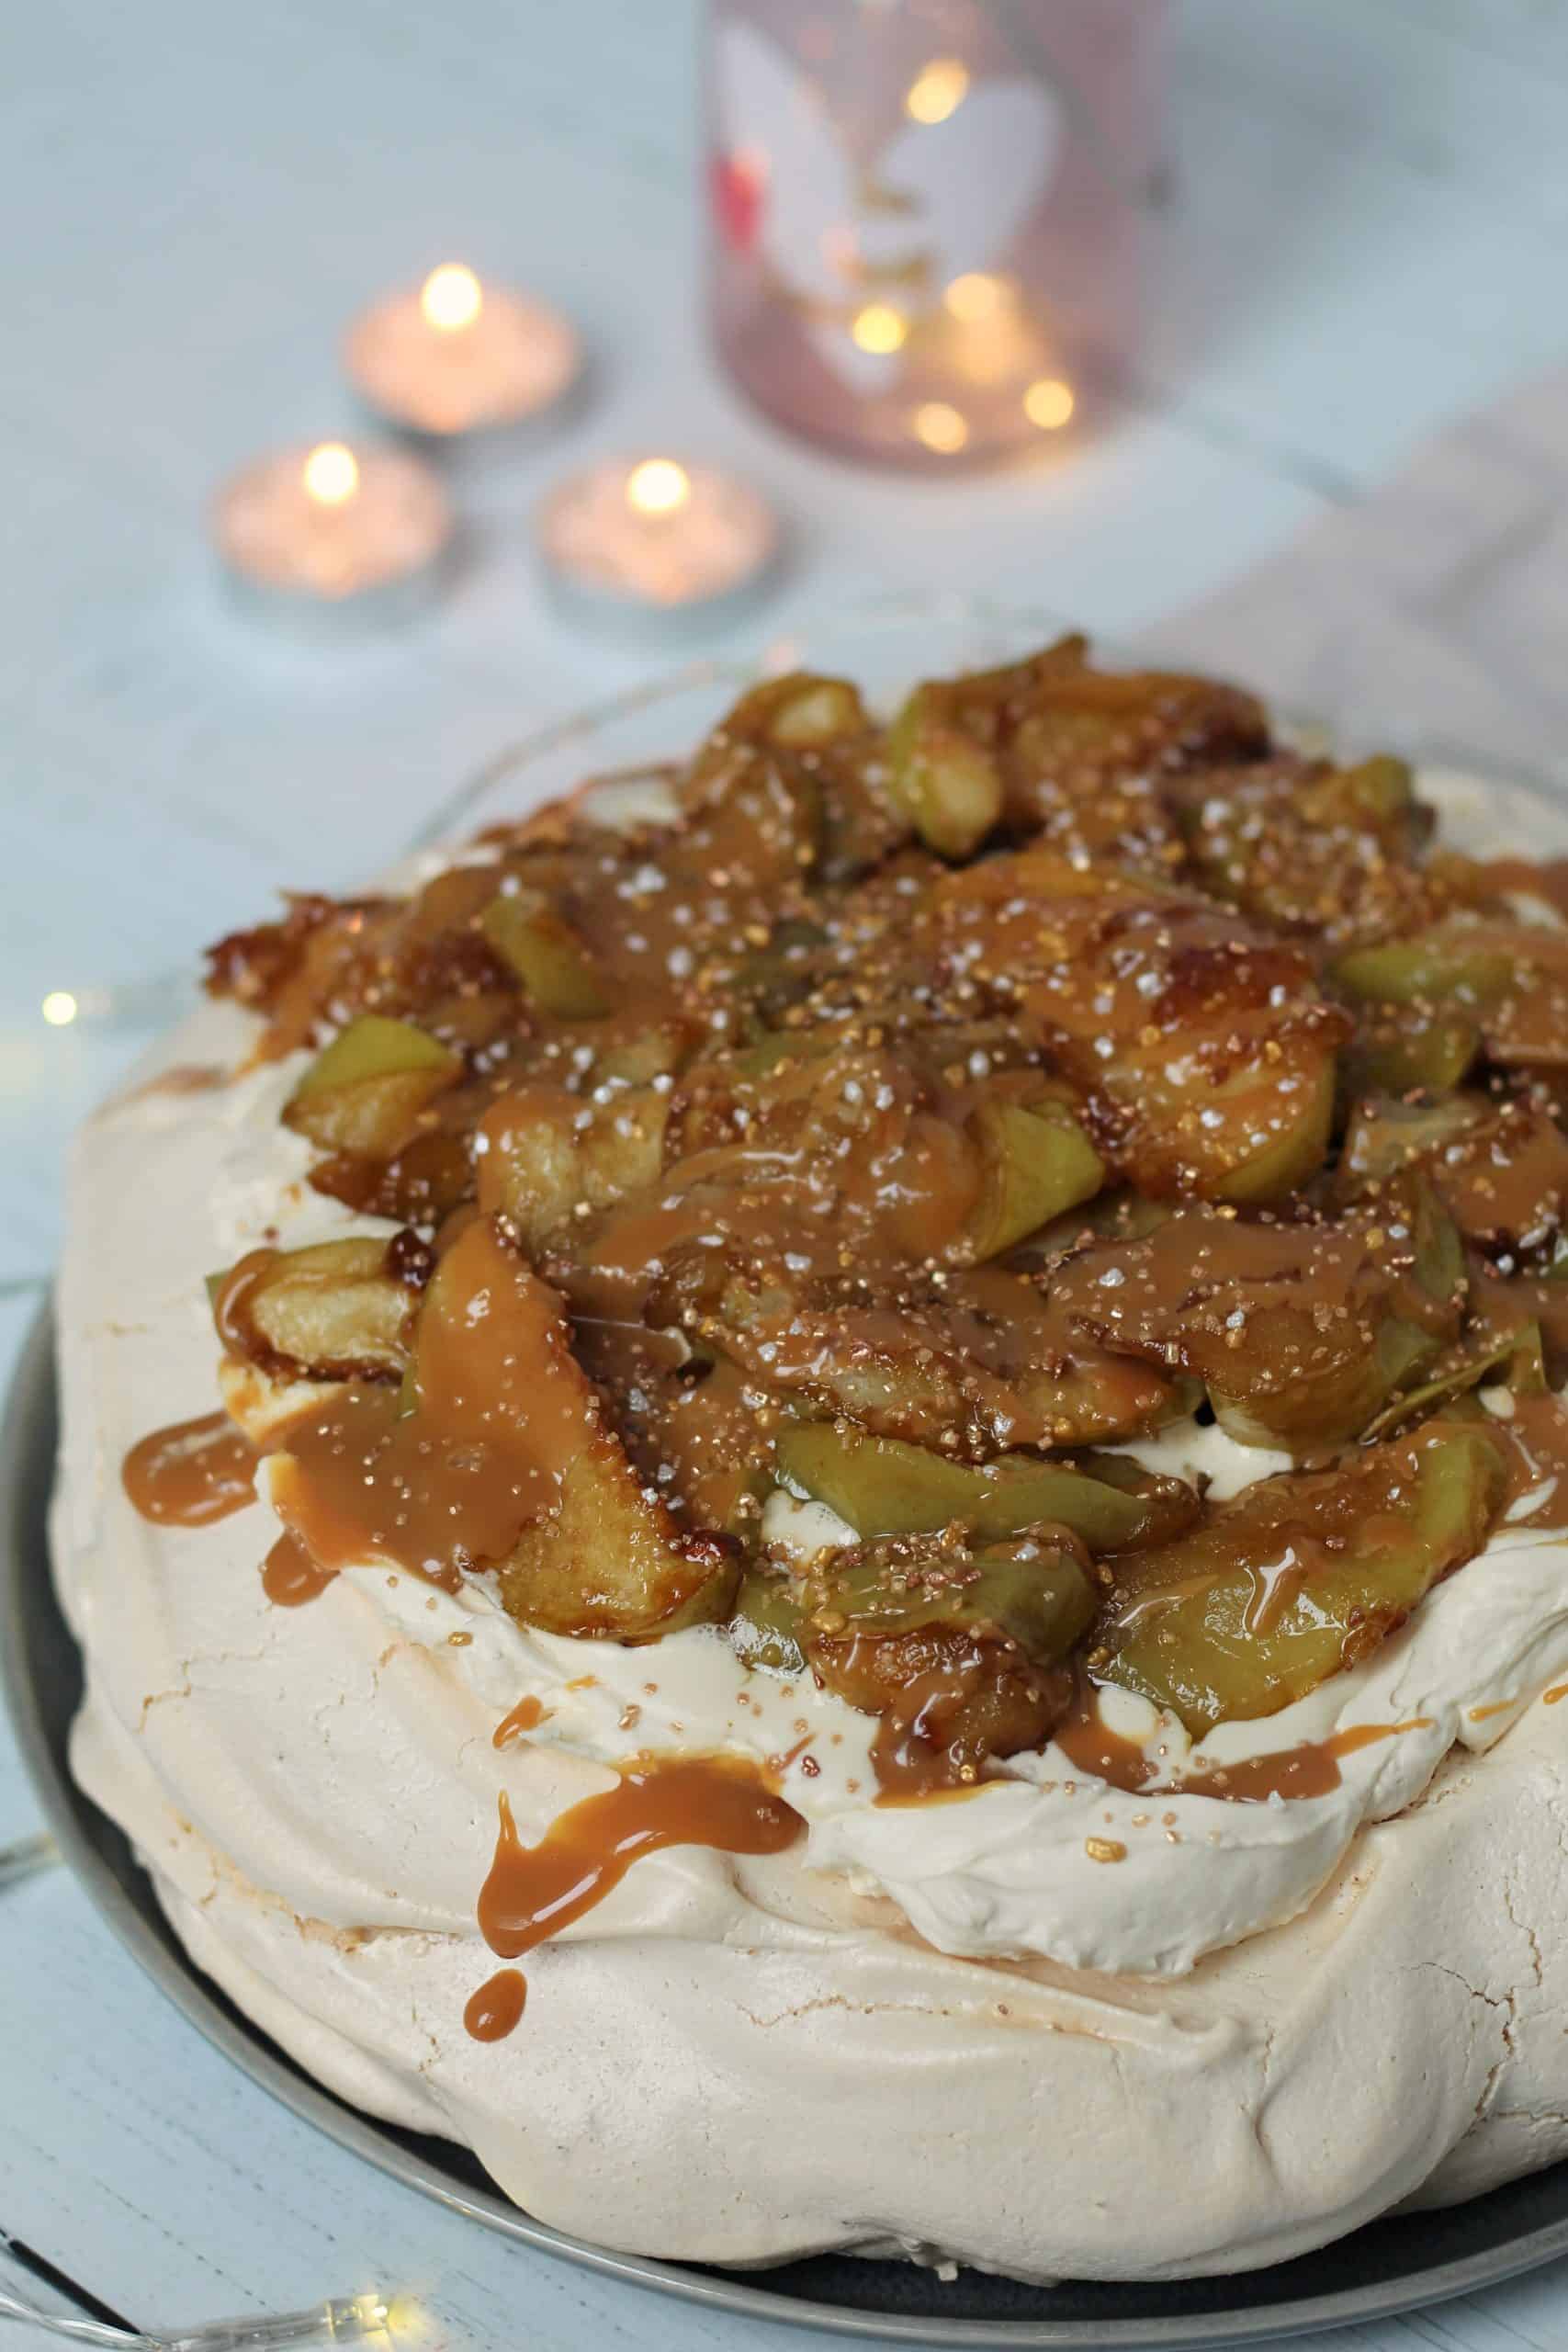
Topped with sweet roasted apples, a caramel cream and lashings of caramel sauce, this is a celebration of all my favourite seasonal things.
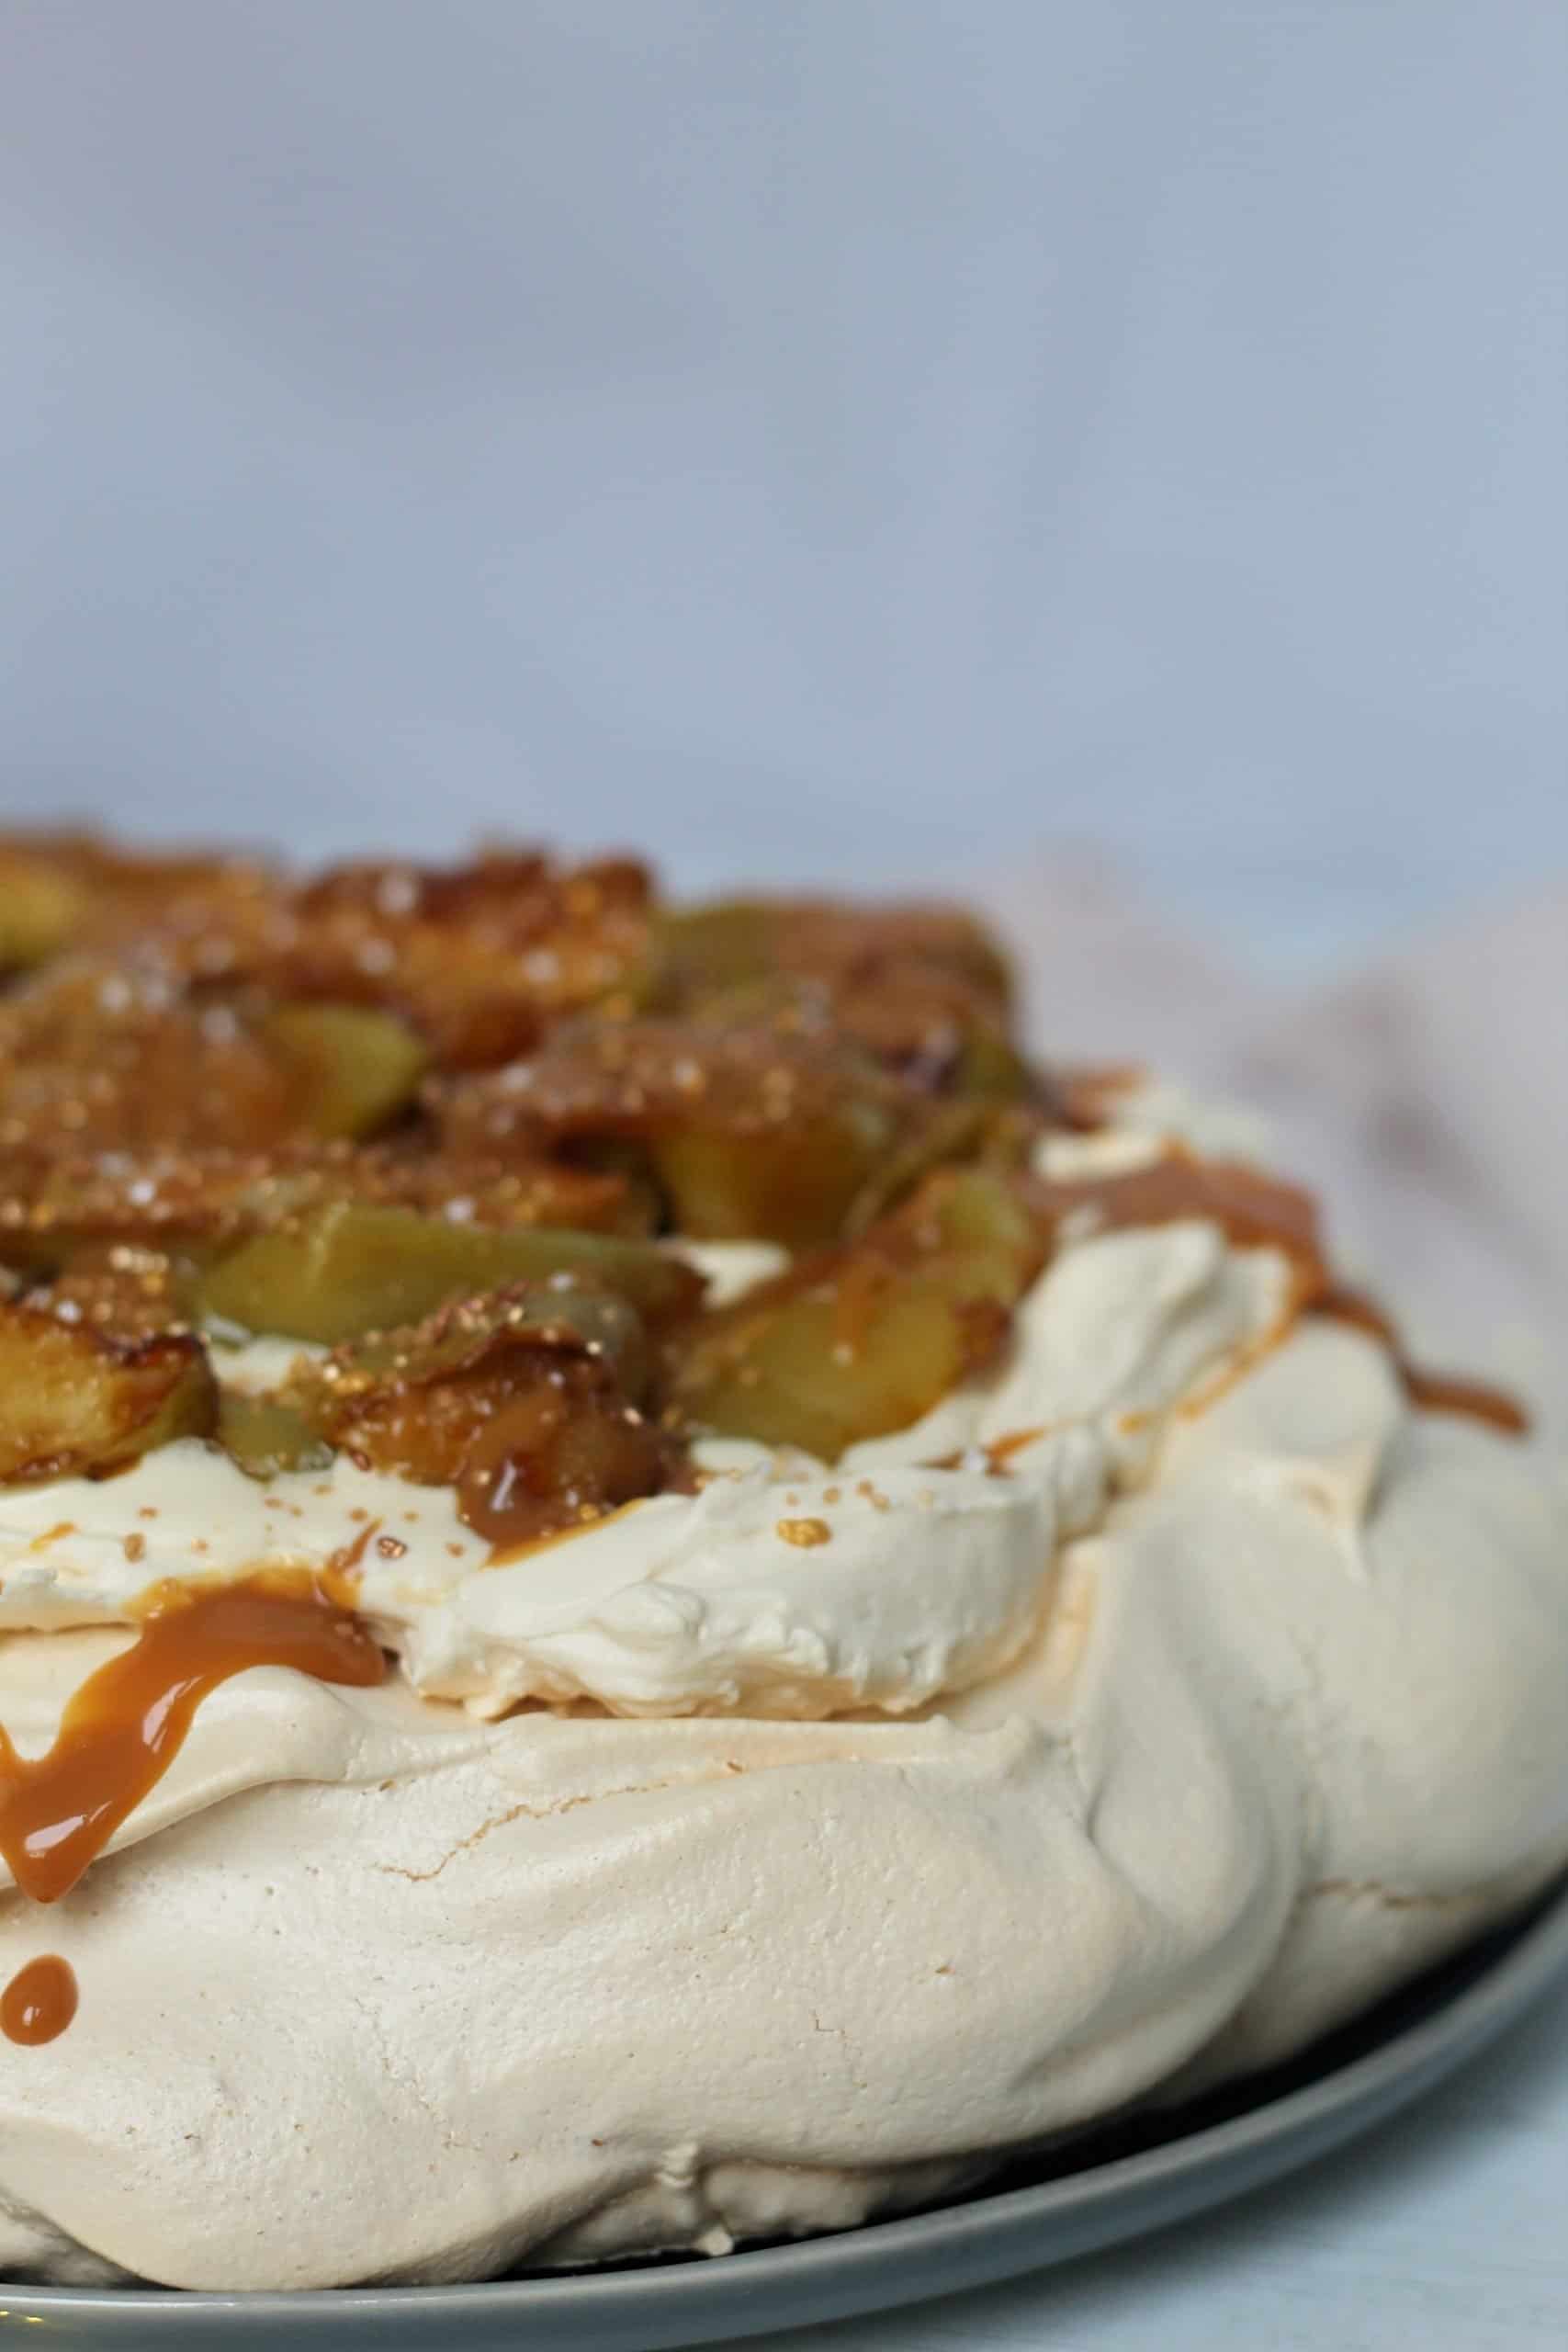
The meringue base is super light and airy – crunchy on the outsides and chewy in the middle, just as it should be.
Pavlova is so commonly a summer dessert but to me there’s never a bad time to eat meringue, so this is the perfect marriage of the seasons as we transition through autumn.
What is a Bonfire Night pavlova?
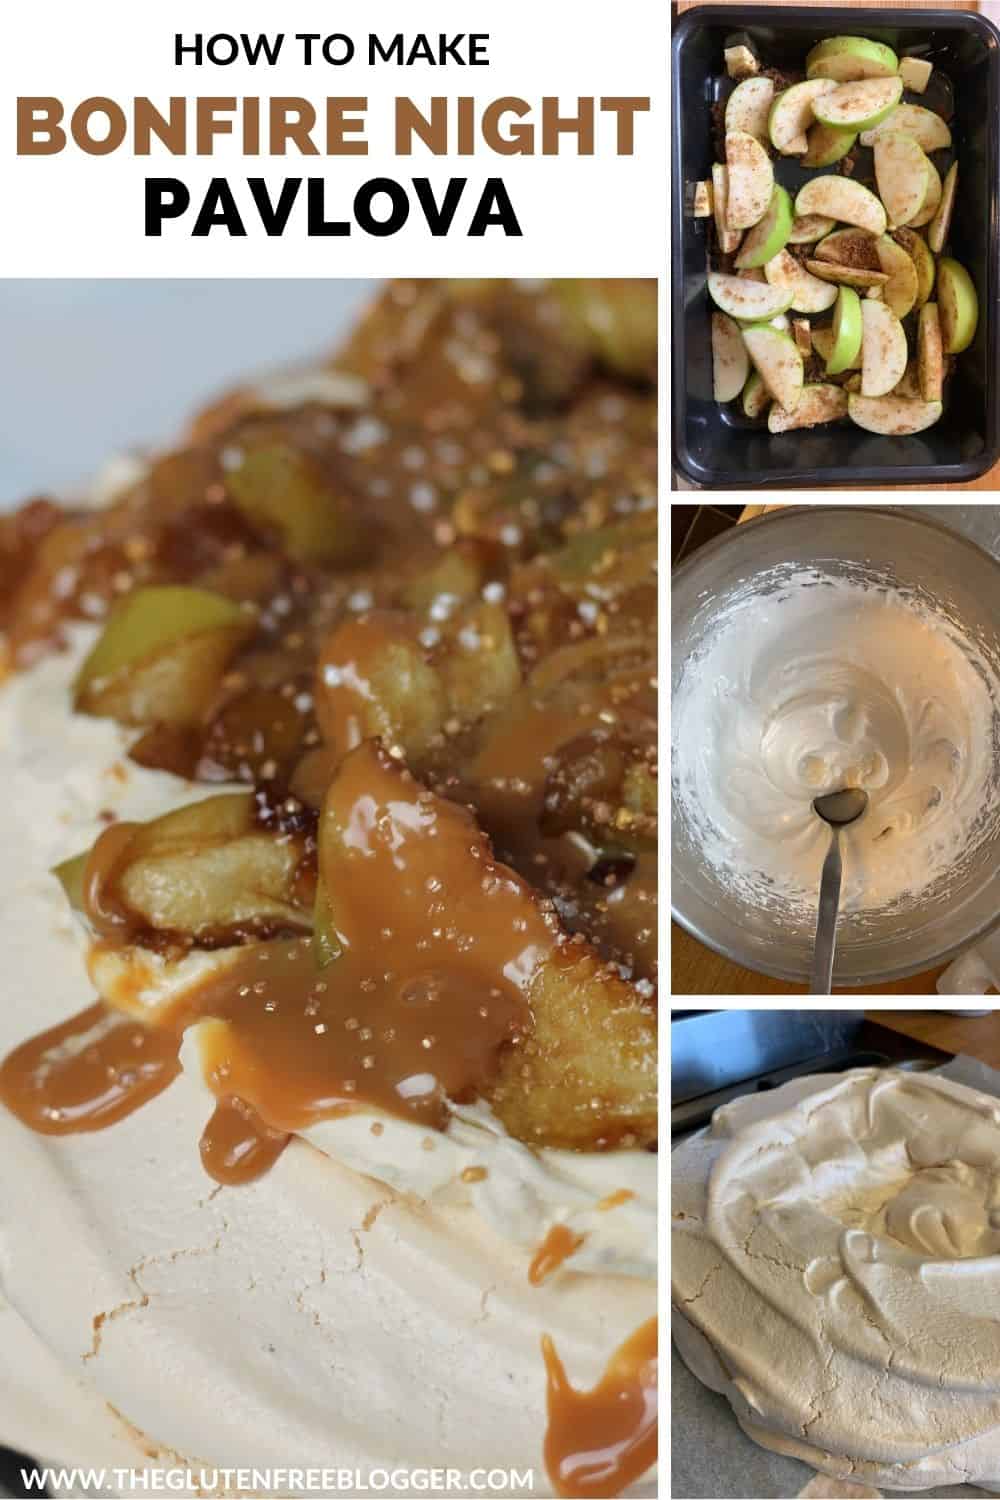
Toffee apples are of course synonymous with Bonfire Night, so it seemed only right to create a toffee apple topping for my meringue crown.
And my Gluten Free Apple and Salted Caramel Cake proves these two flavours go so well together – who doesn’t love lashings of caramel sauce?
With the perfect combination of crunchy meringue, light-as-air whipped up cream and tangy apples, this is a dessert which is decadent but not too heavy.
How to make a gluten free pavlova
The components of my gluten free meringue base are simple: egg whites, caster sugar and cornflour.
I find the cornflour helps to stabilise the meringue a bit more, so you still get that lovely, chewy centre.
Making the meringue is simple. First you want to whip the egg whites until they form stiff peaks.
This essentially means if you were to turn the bowl upside down, the egg whites wouldn’t budge at all.
At this stage continue to whisk, adding the caster sugar one spoon at a time, then finally adding the cornflour.
Once it’s all whisked up, your perfect meringue should look white and glossy, like this:

Tips for baking your meringue
At this stage it’s about baking it super slowly at a low heat – allowing for the outsides to get that gorgeous, puffed-up crunch.
The meringue should go lightly golden brown but inside it’s still super fluffy and marshmallowy.
One important factor in baking the meringue is to turn the oven off and allow it to cool SLOWLY – for at least an hour – in the oven before you take it out.
If you just take the meringue straight out of the oven it will crack.
It’s nothing that can’t be solved with some careful patching up with the toppings, but leaving it to cool slowly will definitely produce a better finish.
While the meringue is cooling, you can get together all the other bits you need for your toppings.
My baked apple topping
The main star of the show for this Bonfire Night Pavlova recipe is the sweet and tangy baked apples on top.
I use Bramley (cooking) apples for this, but you can use any sort really.
Just be aware than a sweeter, dessert apple will cook a lot quicker than cooking apples, so you may need to adjust the time.
I like to cut the apples into wedges, leaving the skin on (though you can remove it if you prefer) and bake them in brown sugar and butter.
Dark brown sugar gives them a gorgeous toffee flavour, and the butter helps them go decadently soft.
Once baked, allow the apples to cool before topping the meringue, otherwise your cream will start to melt.
I like to bake the apples before the meringue so they are completely cool by the time it comes to serving.
Top tips for making this pavlova recipe
Making this gluten free pavlova is fairly foolproof, as long as you follow the steps in the recipe.
The place you have to be the most careful is when separating your eggs, as you don’t want any yolk in the meringue mix or it will be ruined.
The best way to do this is to separate each egg into a small bowl, before pouring that into your main mixing bowl.
That way you won’t get three-eggs-in and then accidentally drop some yolk in and have to start all over again.
If you do get some yolk in the mix don’t worry – simply pop the eggs into a container in the fridge and use them in an omelette for your next meal!
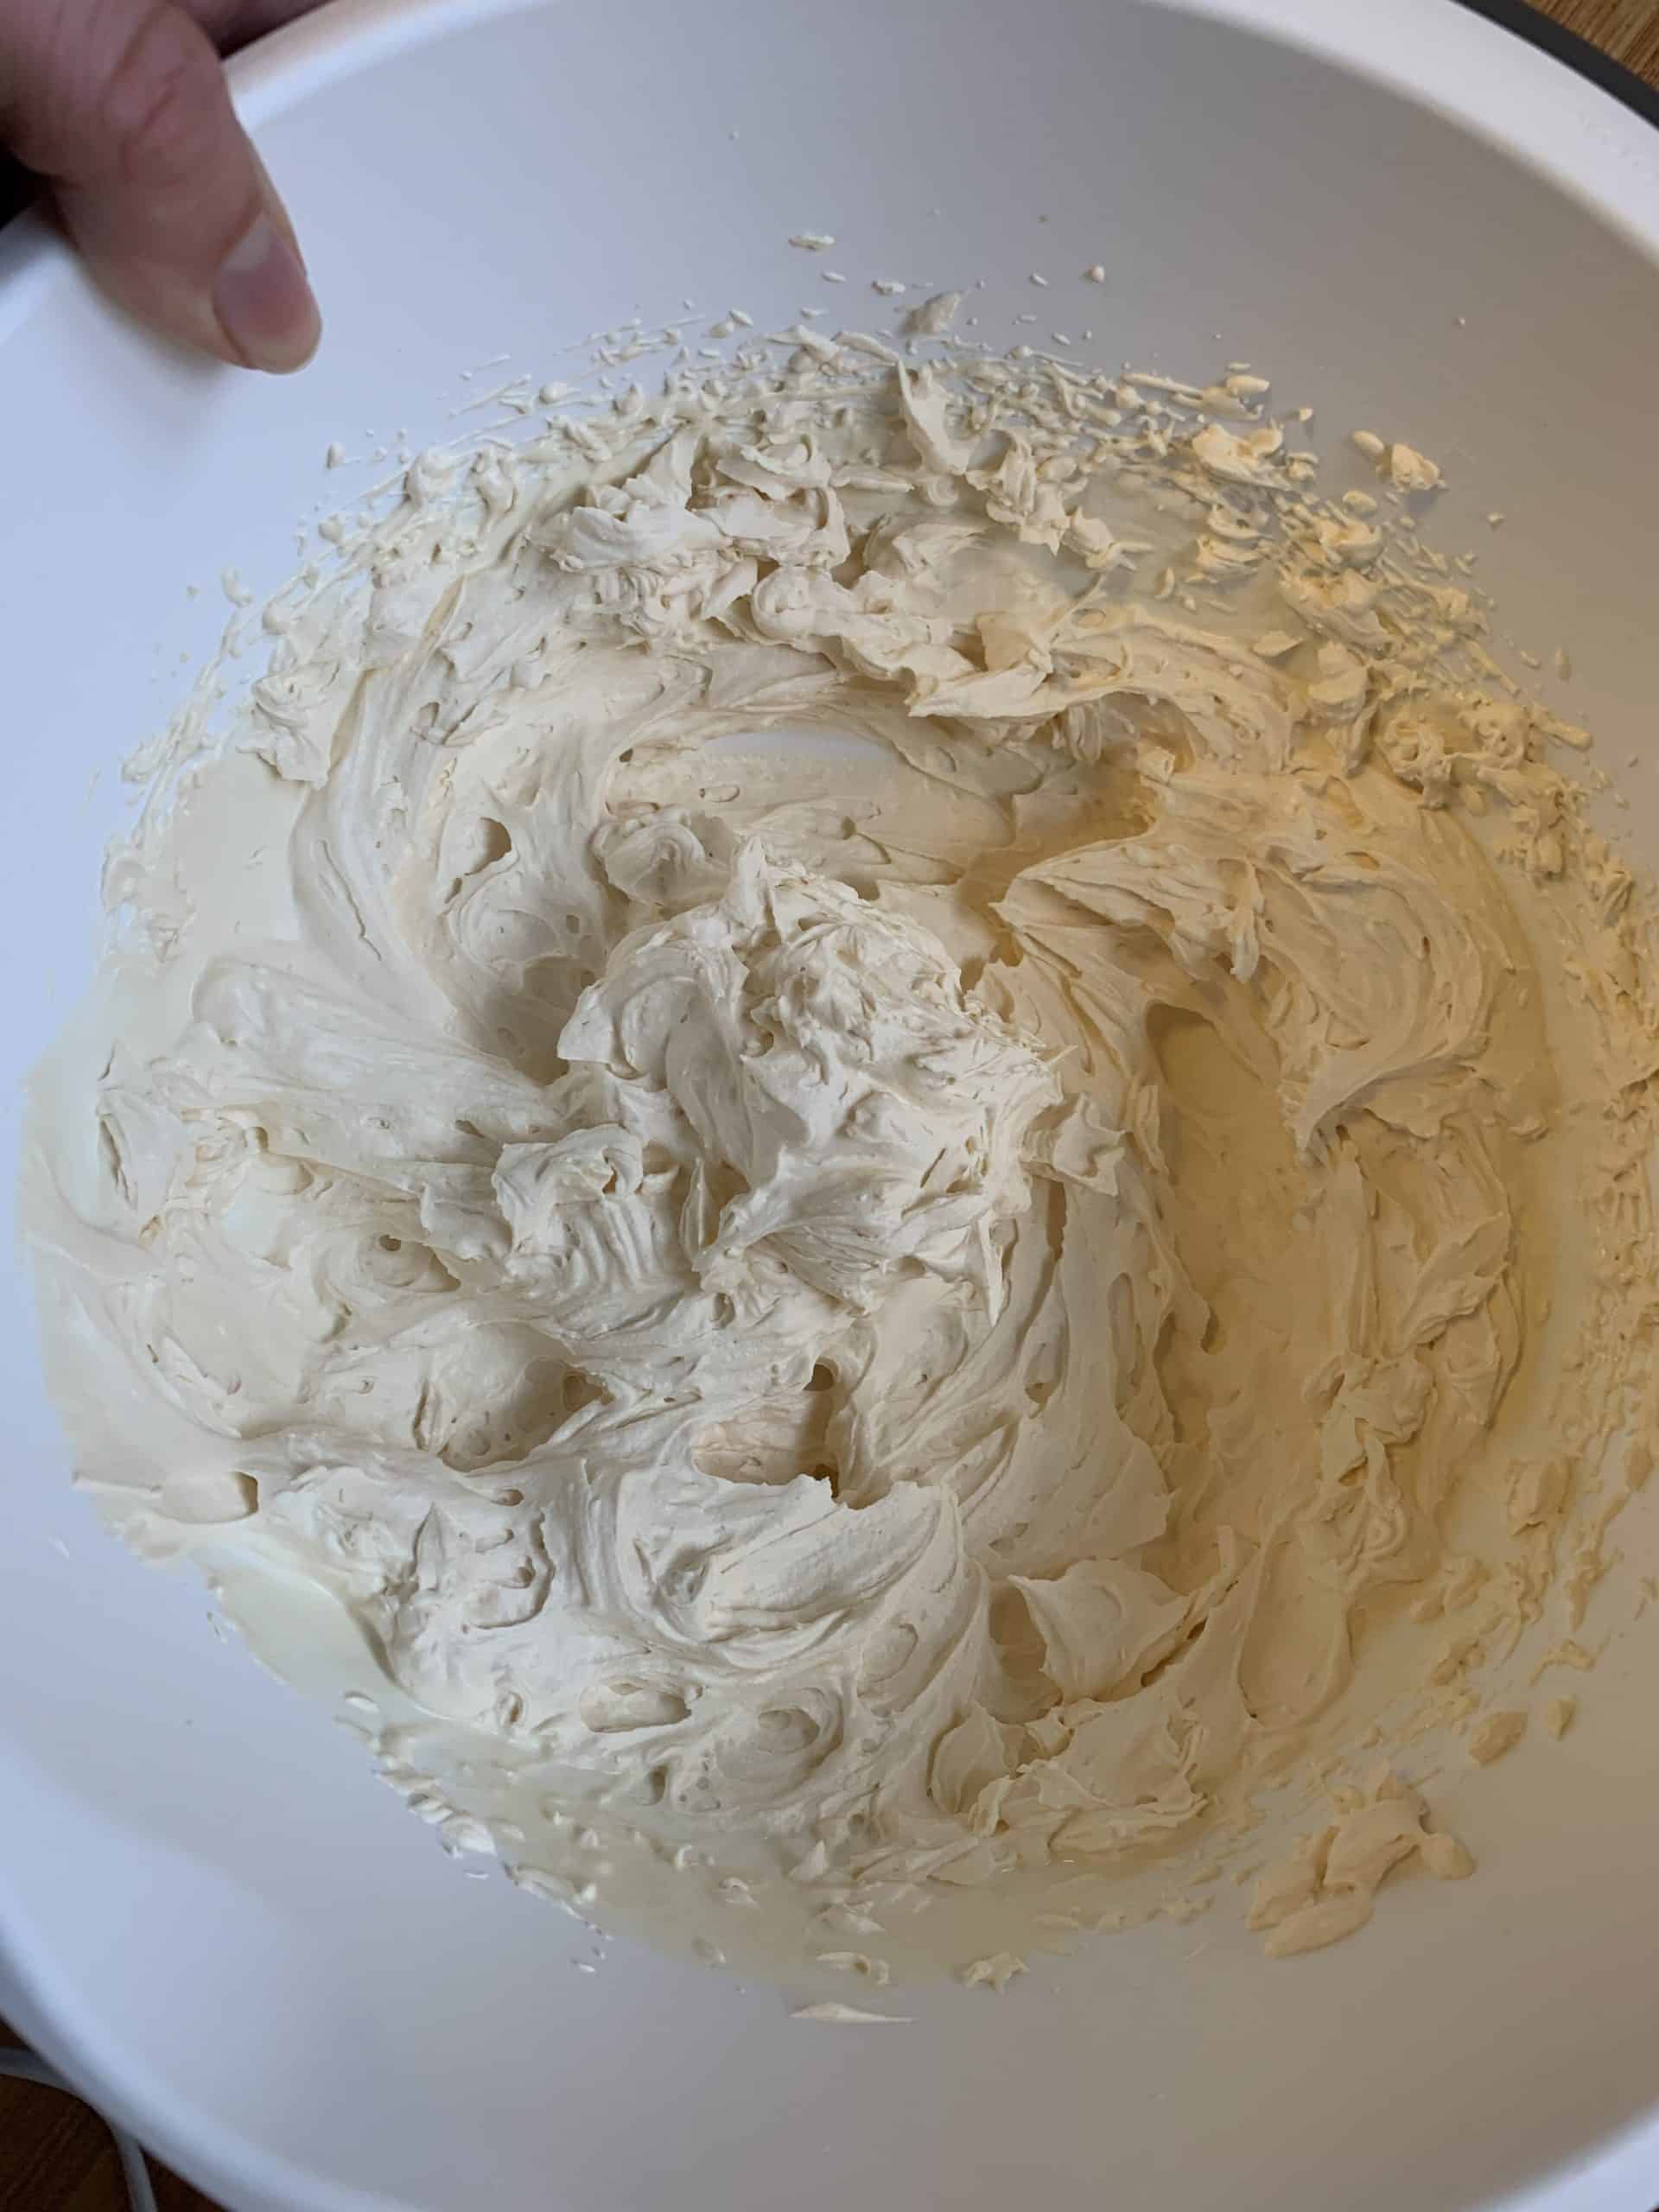
In terms of the whipped cream topping, my top tip would be not to over mix it.
You want it to form soft peaks, like the image below – if you continue to whip after this it will go quite firm and while still edible, it won’t be as light and fluffy.
My Bonfire Night Pavlova Recipe
This Bonfire Night Pavlova is a dreamy gluten free dessert and I promise once you make it, you’ll want to eat the whole thing!
Crunchy meringue with a toffee apple topping and caramel sauce. This makes a large pavlova to serve 8-10 people, depending how big you want the portions.
If you make this recipe and love it, please do let me know by tagging me on my Instagram or using #theglutenfreeblogger. I love seeing your bakes!
And please do leave a review to let others know you loved it too! It would mean the world to me.
Bonfire Night Pavlova
This Bonfire Night Pavlova is a dreamy gluten free dessert. Crunchy meringue with a toffee apple topping and caramel sauce. This makes a large pavlova to serve 8-10 people, depending how big you want the portions! Total time does not including cooling time for the meringue.
Ingredients
For the meringue:
- 220g caster sugar
- 4 egg whites
- 1 tbsp cornflour
For the topping:
- 2 large Bramley apples (approx 800g)
- 50g unsalted butter
- 65g dark brown sugar
- 4 tbsp caramel (I use the Carnation tinned caramel)
- 300ml double cream
- Gluten free sprinkles
Instructions
- First make the toffee apples for the topping. Preheat the oven to 180'C / Fan 160'C / Gas Mark 6. Core the apples, cut into quarters and then cut each quarter into four wedges. Add the wedges to a roasting tin.
- Chop the butter into small cubes and add to the roasting tin along with the dark brown sugar. Toss to coat the apples. Bake for 15 minutes, turn the apples gently with a spoon, and then bake for another 15 minutes. Remove from the oven and cool while you make the meringue.
- To make the meringue, turn the oven heat down to 150'C /Fan 130'C / Gas Mark 2. Cut a piece of baking paper to line a large, flat baking tin. Lay a large dinner plate (around 25-30cm) onto the paper and draw around the edges. Set to one side.
- Add the egg whites (see notes for tips on separating the eggs) into a large, clean mixing bowl. Use an electric whisk to beat until they form stiff peaks - this is when you should be able to turn the bowl upside down and the egg whites won't budge at all. This will take several minutes using an electric whisk, so be patient.
- Turning the whisk onto a low setting, add the caster sugar, 1 tablespoon at a time, whisking continuously until all the sugar has been added. Whisk for an extra 30 seconds, and then add the cornflour. Continue to whisk for another minute - the dry ingredients should be completely mixed in and the meringue should be smooth and glossy.
- Take a tiny amount of the meringue mixture and dot it in the corners and centre of the baking tray, then place the paper, drawing side down, on the baking tray - you should be able to see the circle still through the paper, and the meringue mix should stick the paper down.
- Spoon the mixture onto the baking tray and use the back of a metal spoon or a palette knife to shape the mixture gently into the circle shape. You want to have more mixture around the edges so it forms a sort of well in the middle for your toppings.
- Place the meringue in the oven and bake for 1 hour - it should be lightly golden on top. Turn the oven off and let the meringue cool IN THE OVEN for at least an hour - ideally until the meringue is completely cold. Resist the temptation to open the door or take it out, or the meringue will crack.
- When the meringue is cool, add the double cream and 2 tablespoons of caramel to a large mixing bowl and whisk with an electric whisk until it forms soft peaks - so it is thick but soft and still spreadable.
- Decorate the pavlova by first spooning the cream mixture into the 'well' of the meringue. Spoon the cooled, baked apples on top and then drizzle over the remaining caramel. Finish with some gold and silver sprinkles. Serve straight away!
Notes
- When separating the eggs, it is best to separate each egg into a small bowl first, and then add to the mixing bowl, before separating the next egg. If you get any yolk in the mixture you'll have to start again (but make sure you keep it to make an omelette so there's no waste!)
Nutrition Information:
Yield:
8Serving Size:
1Amount Per Serving: Calories: 373Total Fat: 19gSaturated Fat: 12gTrans Fat: 0gUnsaturated Fat: 6gCholesterol: 56mgSodium: 76mgCarbohydrates: 51gFiber: 1gSugar: 48gProtein: 3g
More Gluten Free Dessert Recipes...
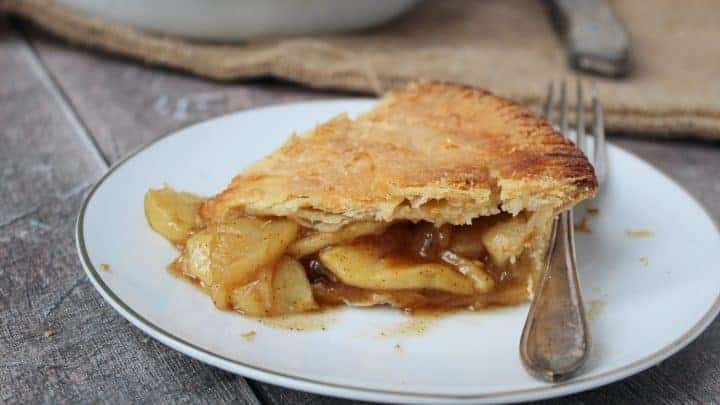
Gluten Free Apple Pie
A gluten free apple pie with a buttery shortcrust gluten free pastry and a sweet and tangy apple filling, spiced delicately with cinnamon. This recipe serves six - cooking time does not include chilling time.

Plum and Amaretto Crumble
A simple gluten free plum crumble with a cheeky twist of amaretto in the mix, giving it a sweet, warming flavour. Pure comfort food!
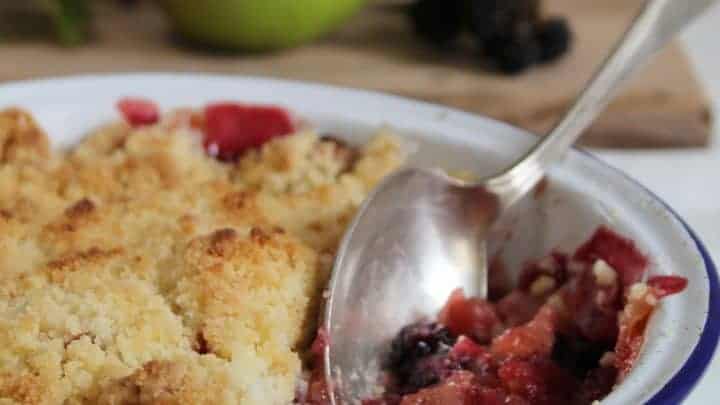
Gluten free apple and blackberry crumble
This easy gluten free apple and blackberry crumble is the perfect way to use up any blackberries you've managed to pick.
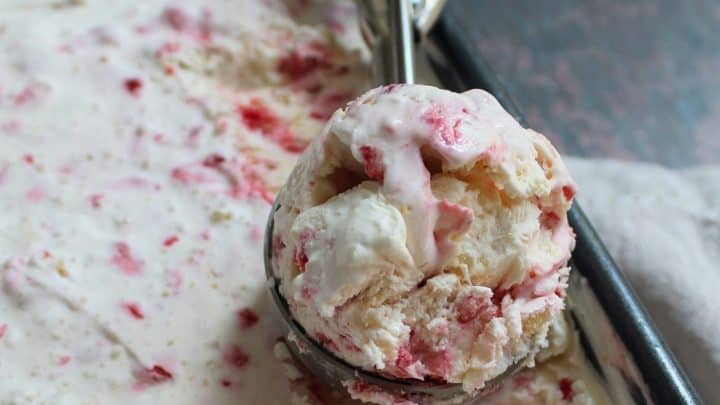
Gluten free strawberry cheesecake ice-cream
A no-churn gluten free strawberry cheesecake ice-cream. Made with fresh strawberries and crumbled gluten free shortbread. A perfect summer dessert - no ice-cream maker required! Makes approximately 10-12 servings.
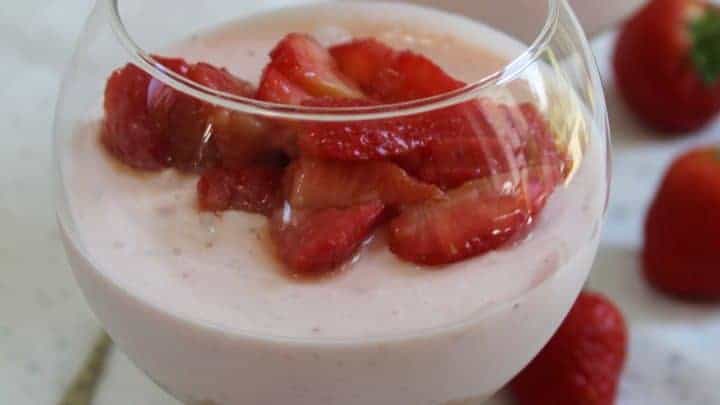
Gluten free strawberry and Pimms cheesecake
My easy gluten free strawberry and Pimms cheesecake is an easy, no-bake cheesecake with a gluten free biscuit base. Topped with Pimms-soaked strawberries.
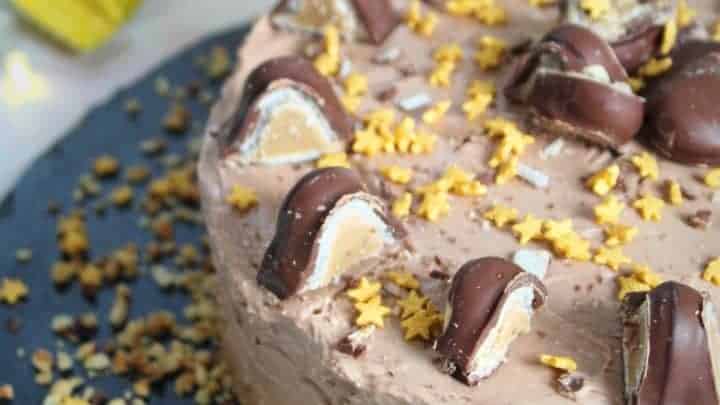
Gluten free Meltos cheesecake
My gluten free Meltos cheesecake is a hazelnut buttery biscuit base, with a chocolate hazelnut topping and chunks of Schär Meltos. Perfect as a festive dessert option.
Need some more gluten free dessert inspiration?
Want to have a go at some of the other gluten free dessert recipes on the blog?
Give some of these other gluten free sweet recipes a try!
There are plenty to choose from – here are a couple of autumnal baking ideas to get you going:
- Gluten free apple pie
- Berry Pavlova
- Apple and blackberry crumble
- Key Lime Pie recipe
- Bueno Cheesecake
If you do make this recipe please let me know! I’d love to see your photos using #theglutenfreeblogger, share them in my Facebook group or tag me on Instagram.
And if you have any recipe suggestions, please let me know in the comments what you’d like to see next!
Like this Gluten Free Bonfire Night Pavlova recipe? Make sure you pin these recipe cards below for later!


This recipe is always a success and completely foolproof. I’ve made it twice and I’m making it for a 3rd time on Saturday.
It’s a great alternative to summer Pavlova. Great for those who have a very sweet tooth.