This post may contain affiliate links for which I earn a small commission at no extra cost to you. For more info, check out my Disclosure Policy. Thank you for your support!
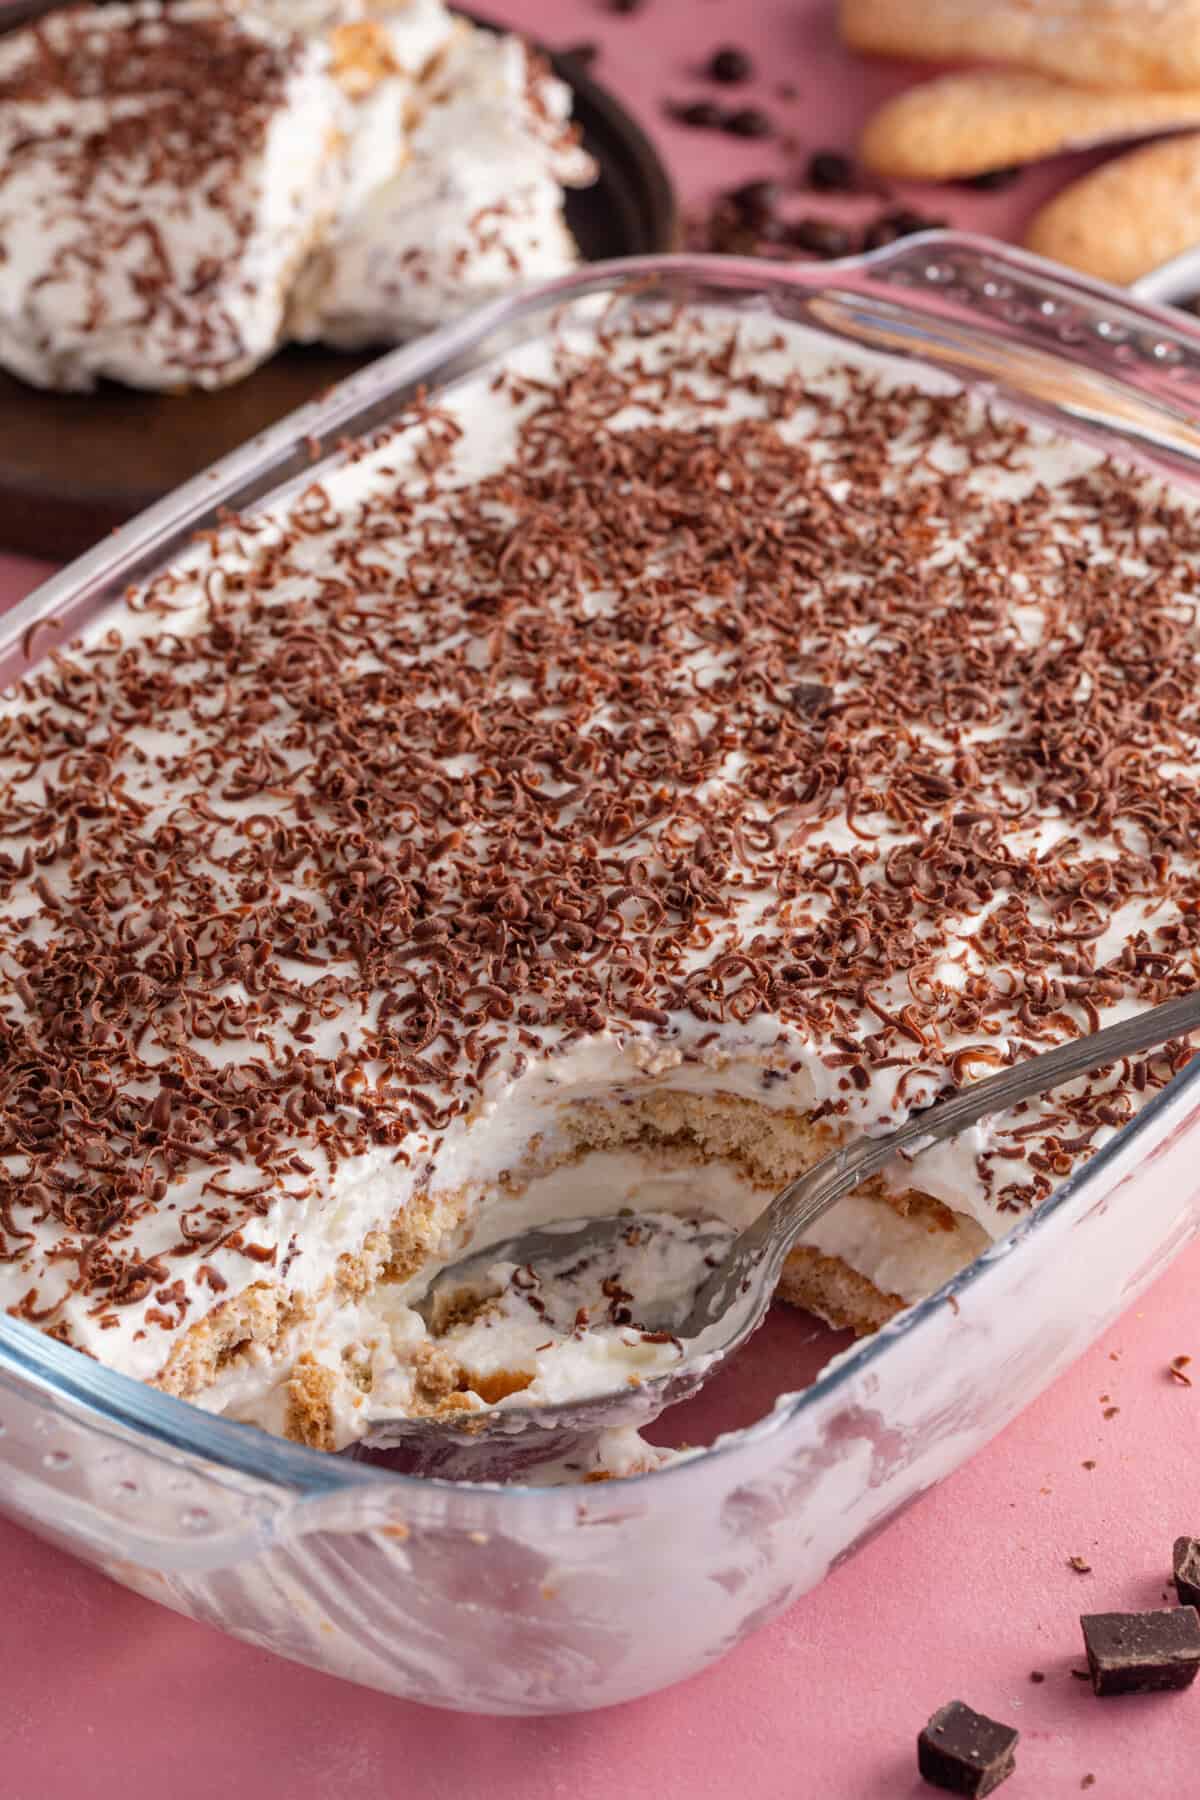
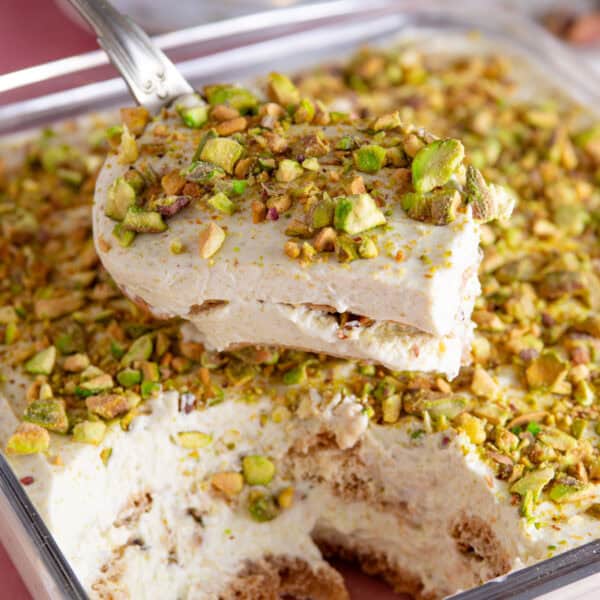
This Gluten Free Tiramisu recipe is my quick and easy spin on a classic dessert, with espresso-soaked gluten free sponge fingers and layers of sweet, whipped mascarpone cream. A simple tiramisu recipe with no raw egg and a cheeky Tia Maria twist.
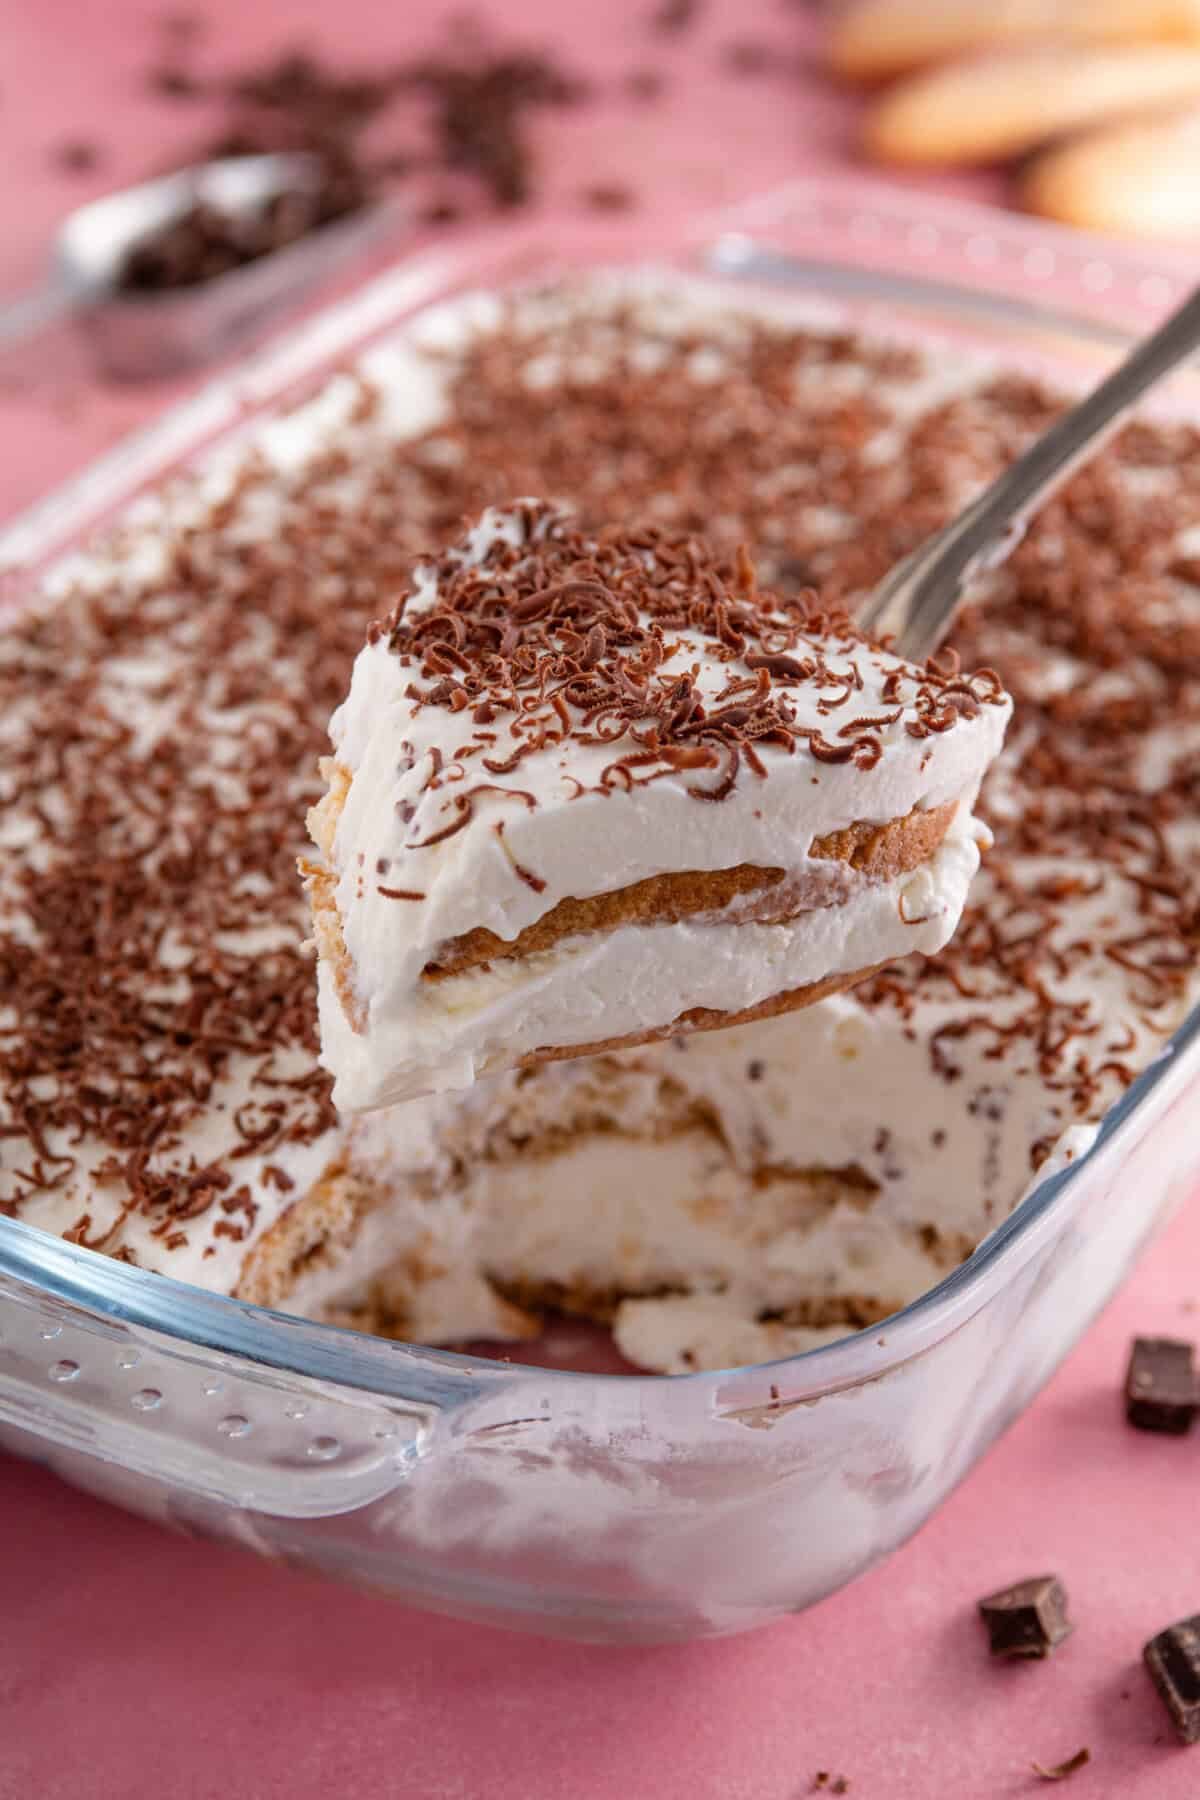
My Easy Gluten Free Tiramisu Recipe – No Raw Egg!
- Why choose this recipe? Not only is this gluten free tiramisu recipe completely coeliac-safe, it’s also a tiramisu without raw egg. It’s may not be 100% authentic, but it’s just as delicious and nobody will even know it’s gluten free and coeliac-safe. The homemade gluten free lady fingers really make it.
- A Quick Twist on a Classic: Traditionally tiramisu is made by whipping mascarpone with raw egg white and yolks. But lots of you asked me for a quick and easy version, without the need to use raw eggs or the extra time and faff of pasteurising the eggs. So that’s why I developed this recipe!
- Gluten Free Ladyfingers: I used my homemade gluten free lady fingers recipe for this bake as it’s difficult to find shop-bought in the UK. They’re much easier than you might think and you can make them ahead of time and freeze them too.
- Updated for 2025? This recipe has been loved by readers since 2022, but now I’ve added new step-by-step photos, a preparation timeline to help you get ahead, and FAQs to make it even easier to follow.
Table of Contents
Ingredients and Substitutions
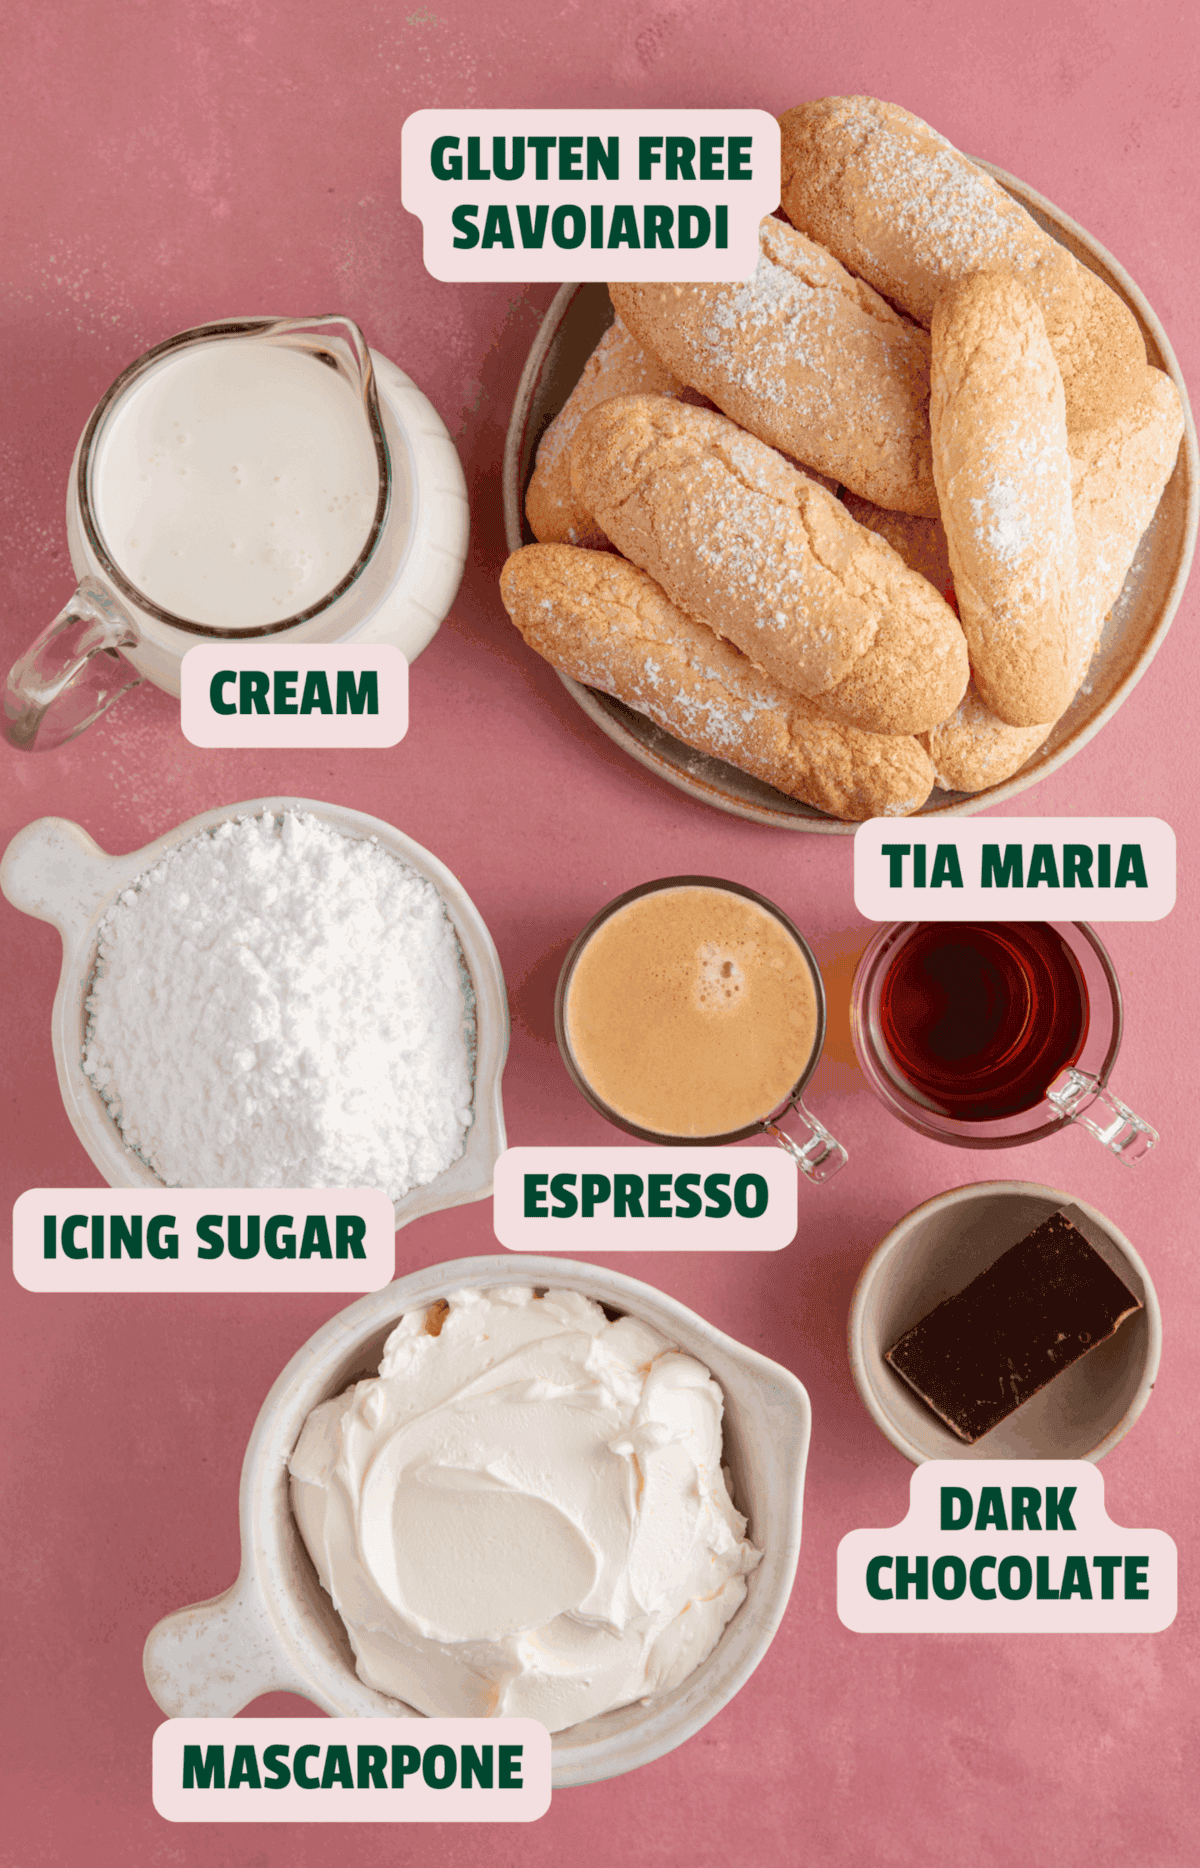
There’s a printable recipe card below for this easy gluten free tiramisu recipe with the full quantities. But here are the main ingredients and ideas for any swaps.
- Gluten Free Savoiardi: I recommend making my easy homemade Gluten Free Lady Fingers as I’ve never seen these in the shops. I did find some on Amazon which are quite pricey. Unfortunately the Schär gluten free ladyfingers aren’t on sale in the UK but are available across Europe.
- Mascarpone Cheese: You could use a standard, full-fat cream cheese if you can’t get hold of mascarpone.
- Icing Sugar: An authentic tiramisu made with raw eggs would use caster or granulated sugar. However because we’re using cream instead I find icing sugar creates a much lighter consistency and taste. In the US look for powdered sugar.
- Double Cream: Whipping up double cream (heavy cream) is my equivalent of using whipped up eggs and it creates a lovely, creamy taste and texture, without the faff of having to work with raw eggs or pasteurise the eggs.
- Espresso: I recommend using espresso coffee but if you have to, you could make a strong coffee using around 2-3 tbsp of instant coffee in a mug of hot water.
- Tia Maria: Traditional tiramisu usually uses Marsala, so you could use this instead. I prefer the twist of using a coffee liqueur like Tia Maria or Kahlúa. You could also omit this for an alcohol-free version and replace with the extra amount of espresso.
- Dark Chocolate: You can use a dusting of cocoa powder if you prefer.
At A Glance: Tiramisu Preparation Timeline
If you want to get ahead, here’s my at-a-glance timeline for preparing your tiramisu. I’ve included some step-by-step photos below to help make the process visual!
- 2-3 days before: Make the gluten free lady fingers and leave them, uncovered, to go slightly stale. Trust me, it’ll make them absorb the coffee so much better! You can also make these up to 6 months before and freeze them – defrost and leave out to go slightly stale before using.
- 24 hours before: Make the mascarpone cream, soak the lady fingers and layer up the tiramisu in the dish.
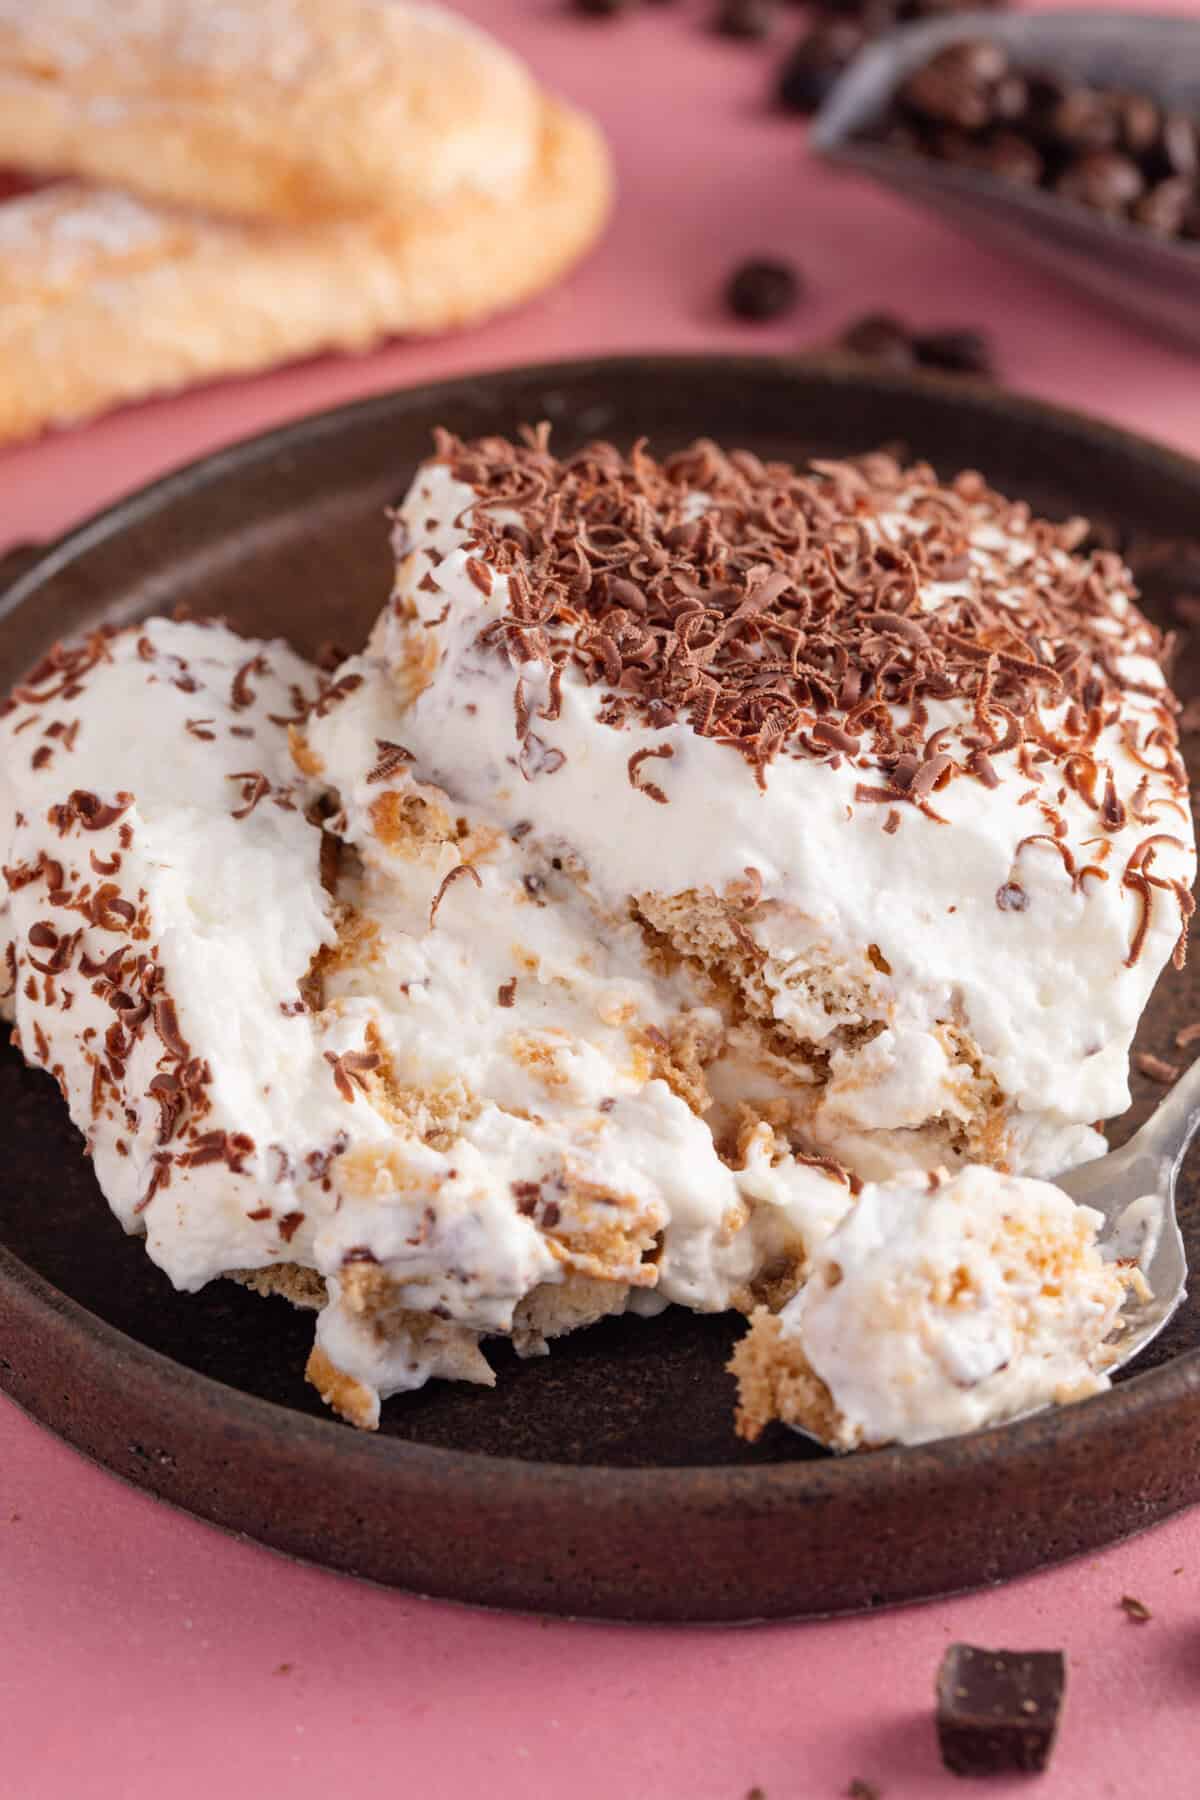
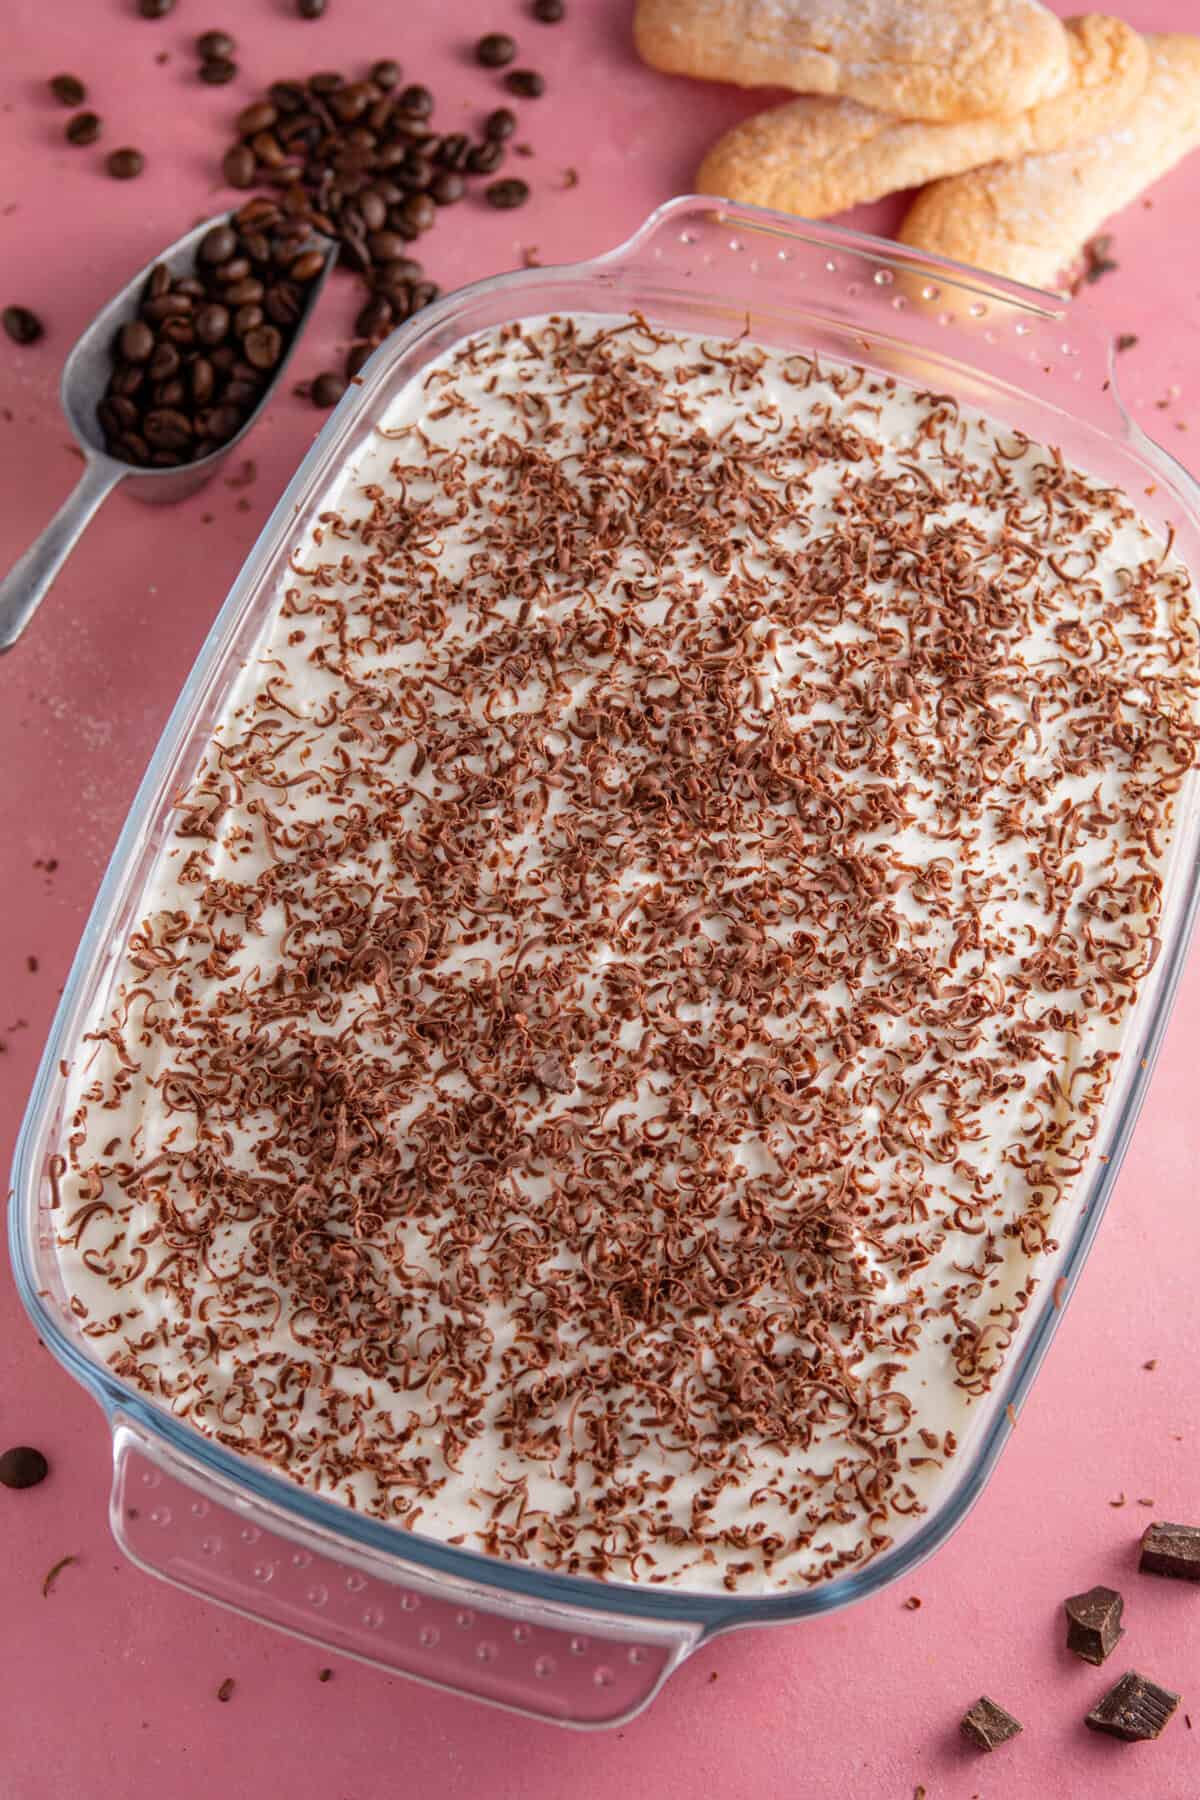
- Just before serving: Sprinkle with extra grated dark chocolate and serve!
How to Make Gluten Free Tiramisu
There’s a printable recipe card below with the method. But here are some step-by-step photos to show you how easy this gluten free Tiramisu is to make.
Storing and Freezing Instructions
TO STORE: Any leftovers of my gluten free tiramisu can be kept in the fridge for 1-2 days. Any longer and you may find it goes soggy! I wouldn’t recommend freezing.
Frequently Asked Questions
Here are some FAQs about this easy gluten free tiramisu recipe. If you can’t find the answer to your question here or in the post above, please comment and I’ll try answer!
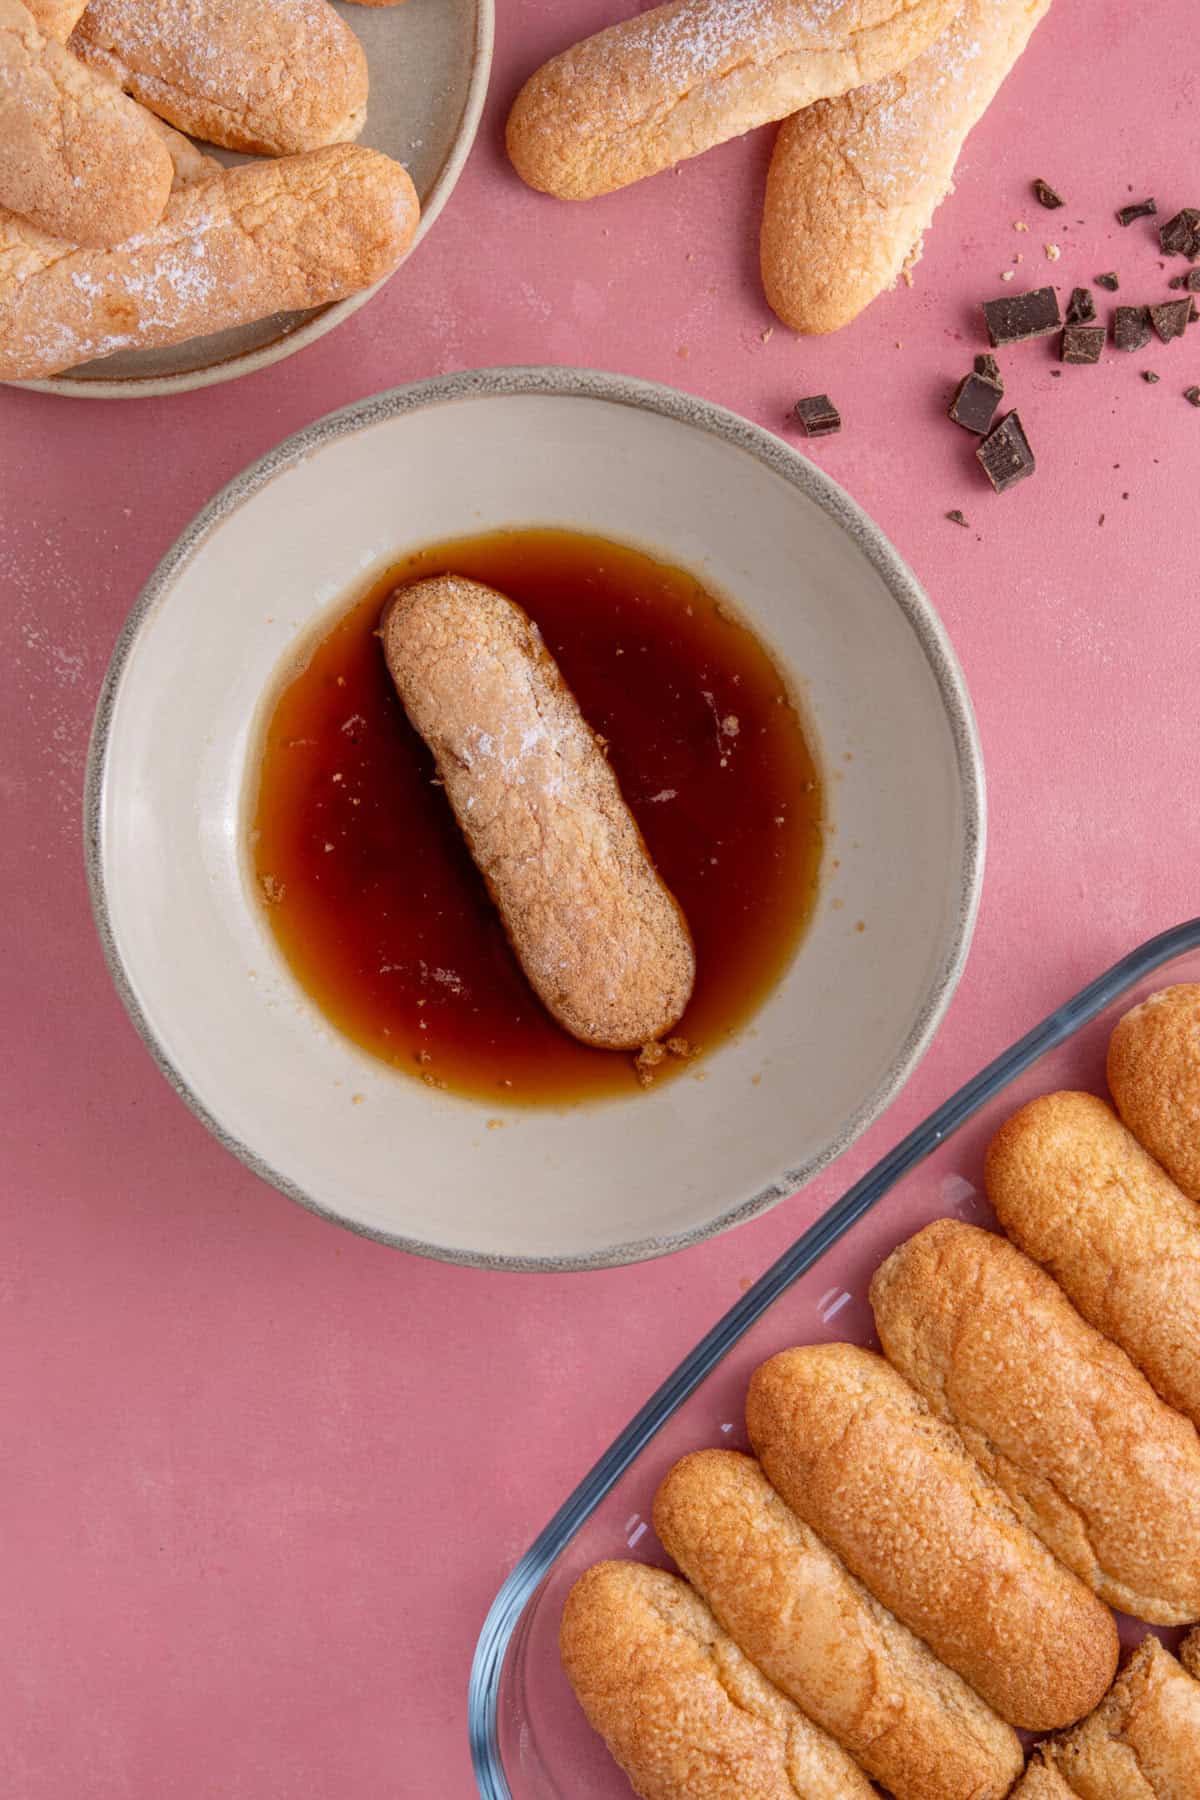
There’s definitely a knack to soaking your gluten free lady fingers – you want to quickly dip them in the coffee rather than leave them to soak. If you do accidentally dip them for too long and they become soggy, line them up on a baking tray and bake in a warm oven (100C / Gas Mark 0.25) until they firm up enough.
Firstly, it’s important to drain any excess liquid from the mascarpone before adding it to the mixture. Second, you may not have whipped the cream enough – it does take a little bit of patience and I recommend using an electric mixer to save your arms. A little extra icing sugar may help to thicken the mixture slightly.
It’s important to whip the cream slowly as it can quickly turn from beautiful, soft peaks to stiff peaks which are hard to spread. If this happens, firstly, stop mixing straight away! Add a few tbsp of extra, cold double cream to the mixture and gently fold it in using a spoon or spatula – this should help stabilise it.
Of course! For a gluten free, alcohol free tiramisu, simply swap the Tia Maria for the same quantity of espresso. It’ll still taste just as delicious!

Gluten Free Tiramisu Recipe
Equipment
Ingredients
- 18-20 Gluten Free Ladyfingers, (using my homemade recipe)
- 75 ml espresso coffee, (cooled – see notes for using instant coffee)
- 60 ml Tia Maria, (or Marsala wine. For alcohol-free, replace with espresso)
For the Cream Layer:
- 250 ml double cream, (heavy cream)
- 125 g icing sugar
- 250 g mascarpone cheese
- Dark chocolate
Instructions
- Make the gluten free lady fingers and then allow to cool completely. The are actually best made at least a day or two before making the tiramisu – they absorb the coffee better if left to stale slightly!
- Make the espresso and allow to cool to room temperature.
To make the cream layer:
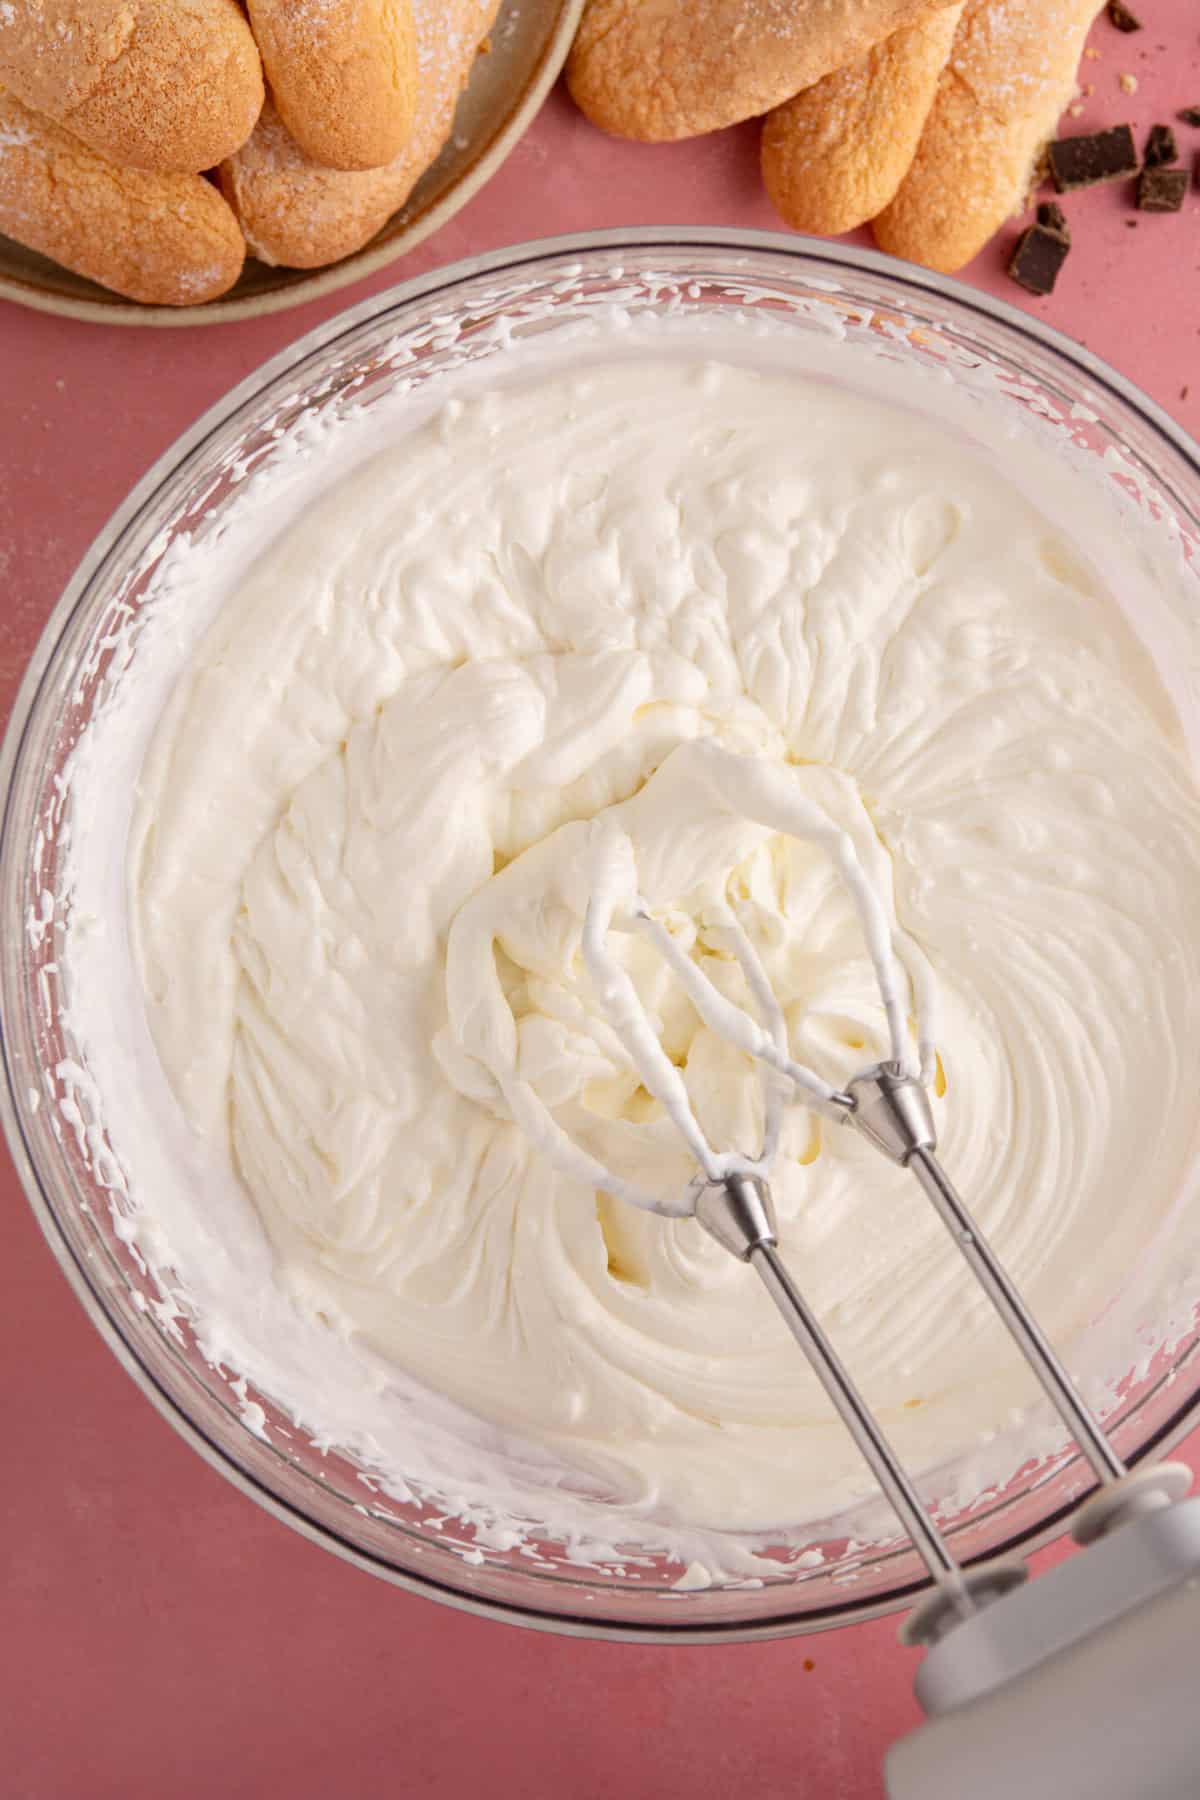
- Add the double cream to a large mixing bowl and sift in the icing sugar. Using an electric whisk, whip until it forms soft peaks. Be careful not to over-whip (it can change fast!) – you don't want the cream to be too stiff.
- Drain any excess liquid from the mascarpone cheese then add to the cream. Beat with the electric whisk for a minute or until combined with no lumps. It should still be quite thick but spoonable.
To construct the dessert:
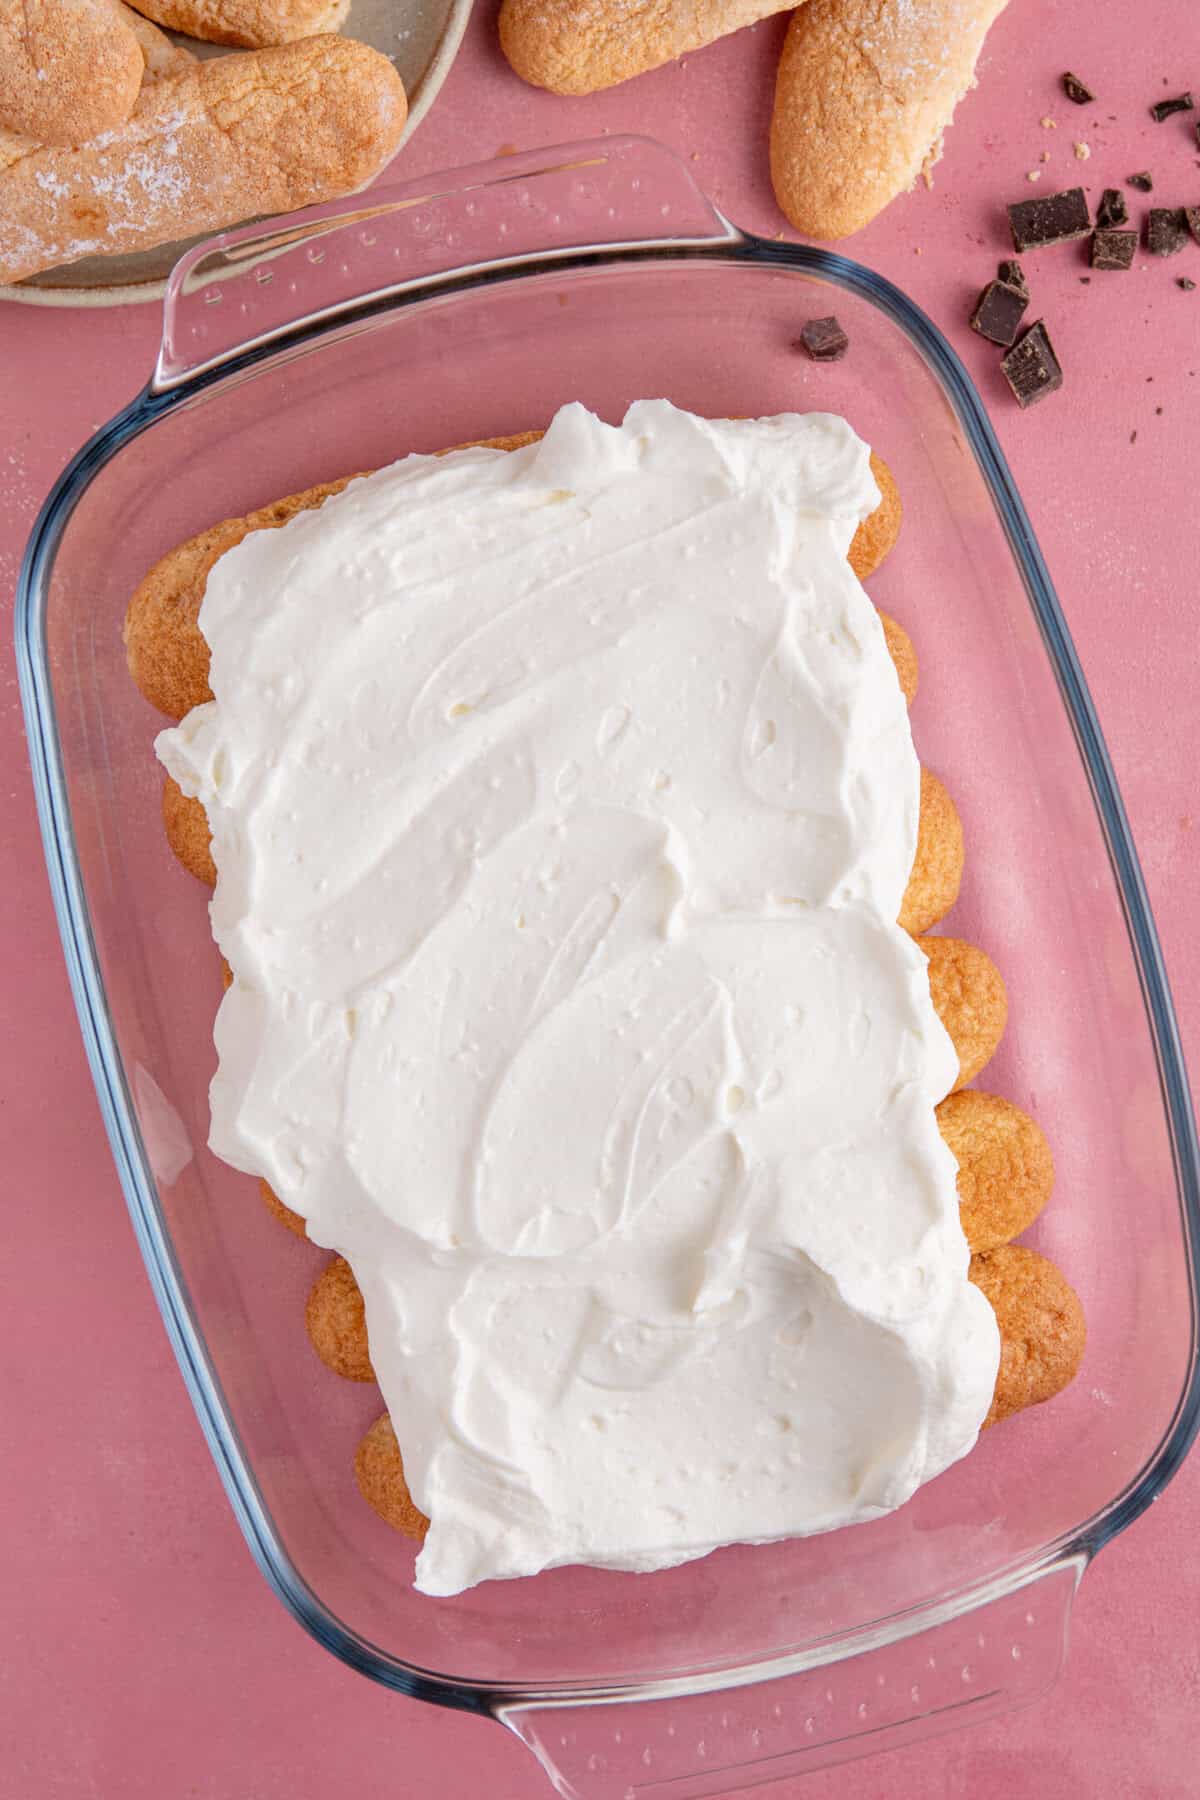
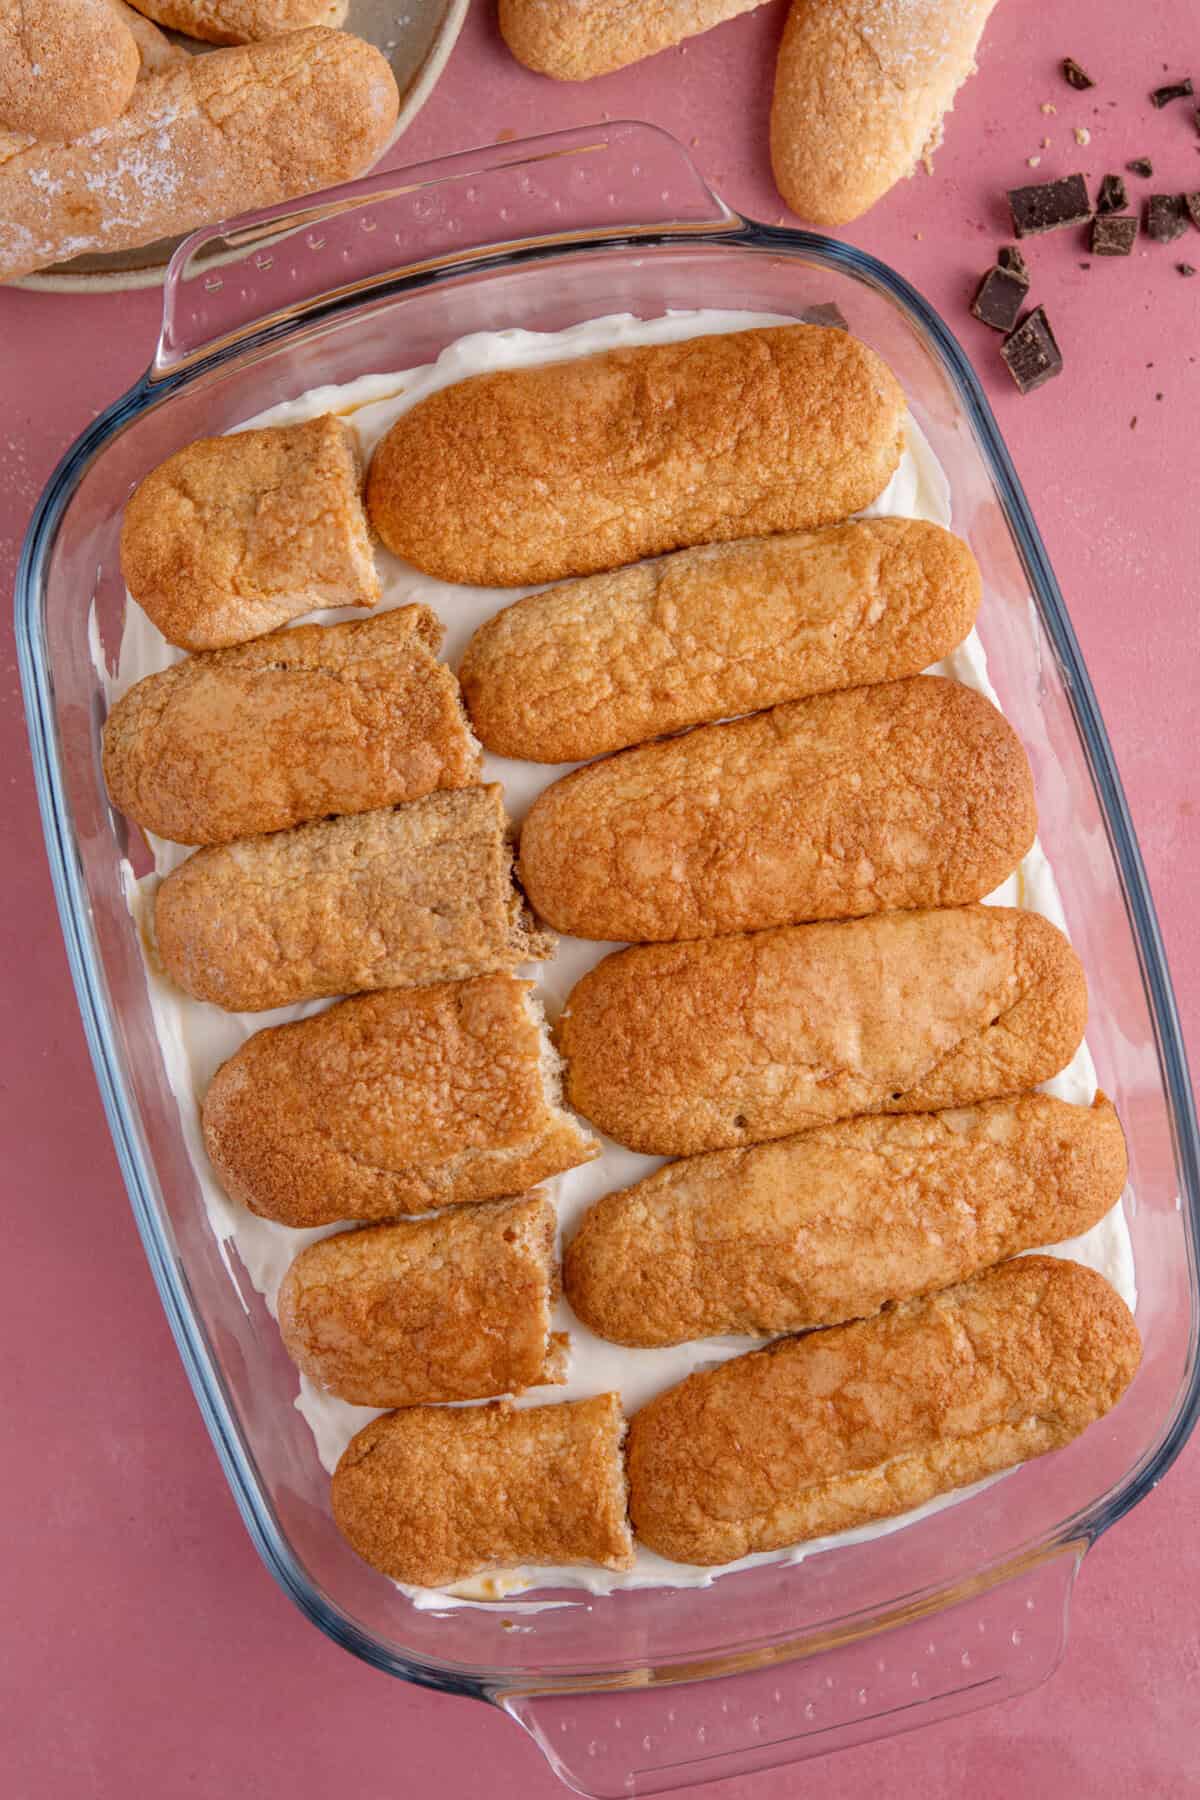
- Pour the espresso into a large, shallow bowl and add the Tia Maria. Get your serving dish ready (I used a 20cm x 30cm rectangular dish).TOP TIP: I find it helps to work out how the sponge fingers best fit in an even layer BEFORE soaking them. In my dish I wanted them all facing the same way, so had to cut some of the fingers in half before soaking)
- Working one-at-a-time, dip a sponge finger into the coffee, quickly turn it over then remove from the coffee and place in your serving dish. These absorb the coffee VERY quickly so do NOT leave them to soak! Keep going until you have created an even layer in the serving dish.
- Spoon half the cream mixture over the top of the sponge fingers and then use a palette knife to smooth it into one even layer.
- Repeat steps 5 and 6 with the remaining sponge fingers and then the remaining cream, so you have 2 more layers. Liberally grate the dark chocolate over the top and then place in the fridge for at least 4 hours. Don't skip this step, I know it's hard – once chilled, serve and enjoy!
Video
Notes
- To Use Instant Coffee: If you can’t get hold of espresso coffee, mix 2-3 tbsp strong instant coffee in a mug of hot water and leave to cool before measuring out what you need.
- Storing: You can make the lady fingers 2-3 days in advance, and the tiramisu up to 24 hours in advance. Any leftovers will keep for 1-2 days in the fridge.
Nutrition
More Gluten Free Dessert Recipes
If you like this gluten free tiramisu then make sure you check out these other gluten free dessert recipes too…
- Of course if you’re a fan of tiramisu, you have to try my Pistachio Tiramisu recipe next!
- These Gluten Free Profiteroles are a great dessert option, with homemade gluten free choux pastry filled with whipped cream and topped with chocolate sauce.
- For more Italian dessert inspiration, try my Gluten Free Zeppole – aka Italian Festival Donuts. They’re deep fried bites of deliciousness, ready in 30 minutes!
- If you love a no-bake cheesecake this Gluten Free White Chocolate and Raspberry Cheesecake is a really easy dessert with the perfect blend of sweet and tangy.
- My Gluten Free Sticky Toffee Pudding is another classic gluten free dessert, with a delicious date sponge, smothered in thick, toffee sauce.
- This Gluten Free Key Lime Pie is a real crowd-pleaser, with a zesty and sweet lime filling and a butter biscuit base.
- For another no-bake dessert try my Gluten Free Banoffee Pie, with a biscuit base, thick caramel layer, slices of fresh banana and fresh whipped cream.
- If you’re a coffee-lover then I have some cake recipes you’ll also love! My Chocolate and Coffee Cake has a rich ganache frosting, and my Gluten Free Coffee and Walnut Cake is an absolute classic!
Have you tried this recipe?
I have a huge favour to ask! It’s getting more and more difficult to get my recipes out there to the world – so if you try this and love it, it would mean a HUGE amount if you’d come back and leave a ⭐️⭐️⭐️⭐️⭐️ review and a little comment telling me what you thought! Just 30 seconds of your time would be such a huge support! 💛
Want to connect further?
- Tag me on Instagram with your amazing creations so I can share them!
- Join my Facebook group to meet other awesome gluten free people.
You Might Also Like


Get my cookbook!
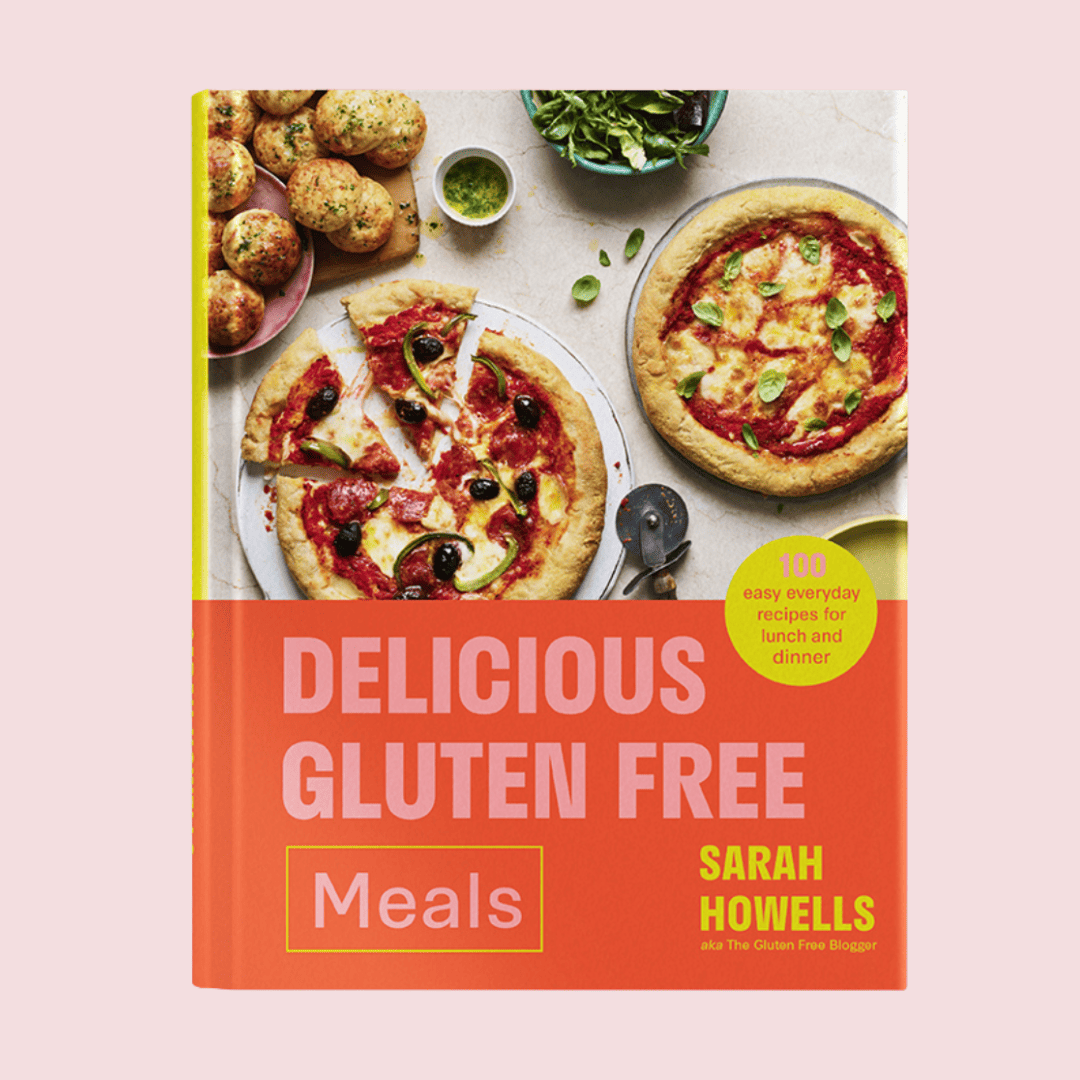
Want more gluten free meals inspiration? My debut cookbook, Delicious Gluten Free Meals, has 100+ gluten free recipes, from breakfast and lunch ideas to dinners, desserts and sides.


GF Ladyfingers are really easy to bake, and for this recipe you don´t even have to bake them in the finger form, just slap the batter on your baking sheet and cut to size after baking or break up in pieces. Have made alternatives to this also with fresh fruit and the mascarpone mix with a tad of limoncello in stead of the coffee liquer. If you let your imagination run freely, this could be a basic staple recipe with many tweak version for special occasions. Imagine this with candied orang peels and orange blossom water as fragrant variety for a wedding!
This is delicious!! I used Scar GF lady fingers which we can get in Canada! I wasn’t sure it would all work but it did and tasted amazing! The only thing I found was I had to double the whipping cream and mascarpone to get enough to spread but my pan was an inch larger too! Thanks so much for this amazing recipe !