This post may contain affiliate links for which I earn a small commission at no extra cost to you. For more info, check out my Disclosure Policy. Thank you for your support!
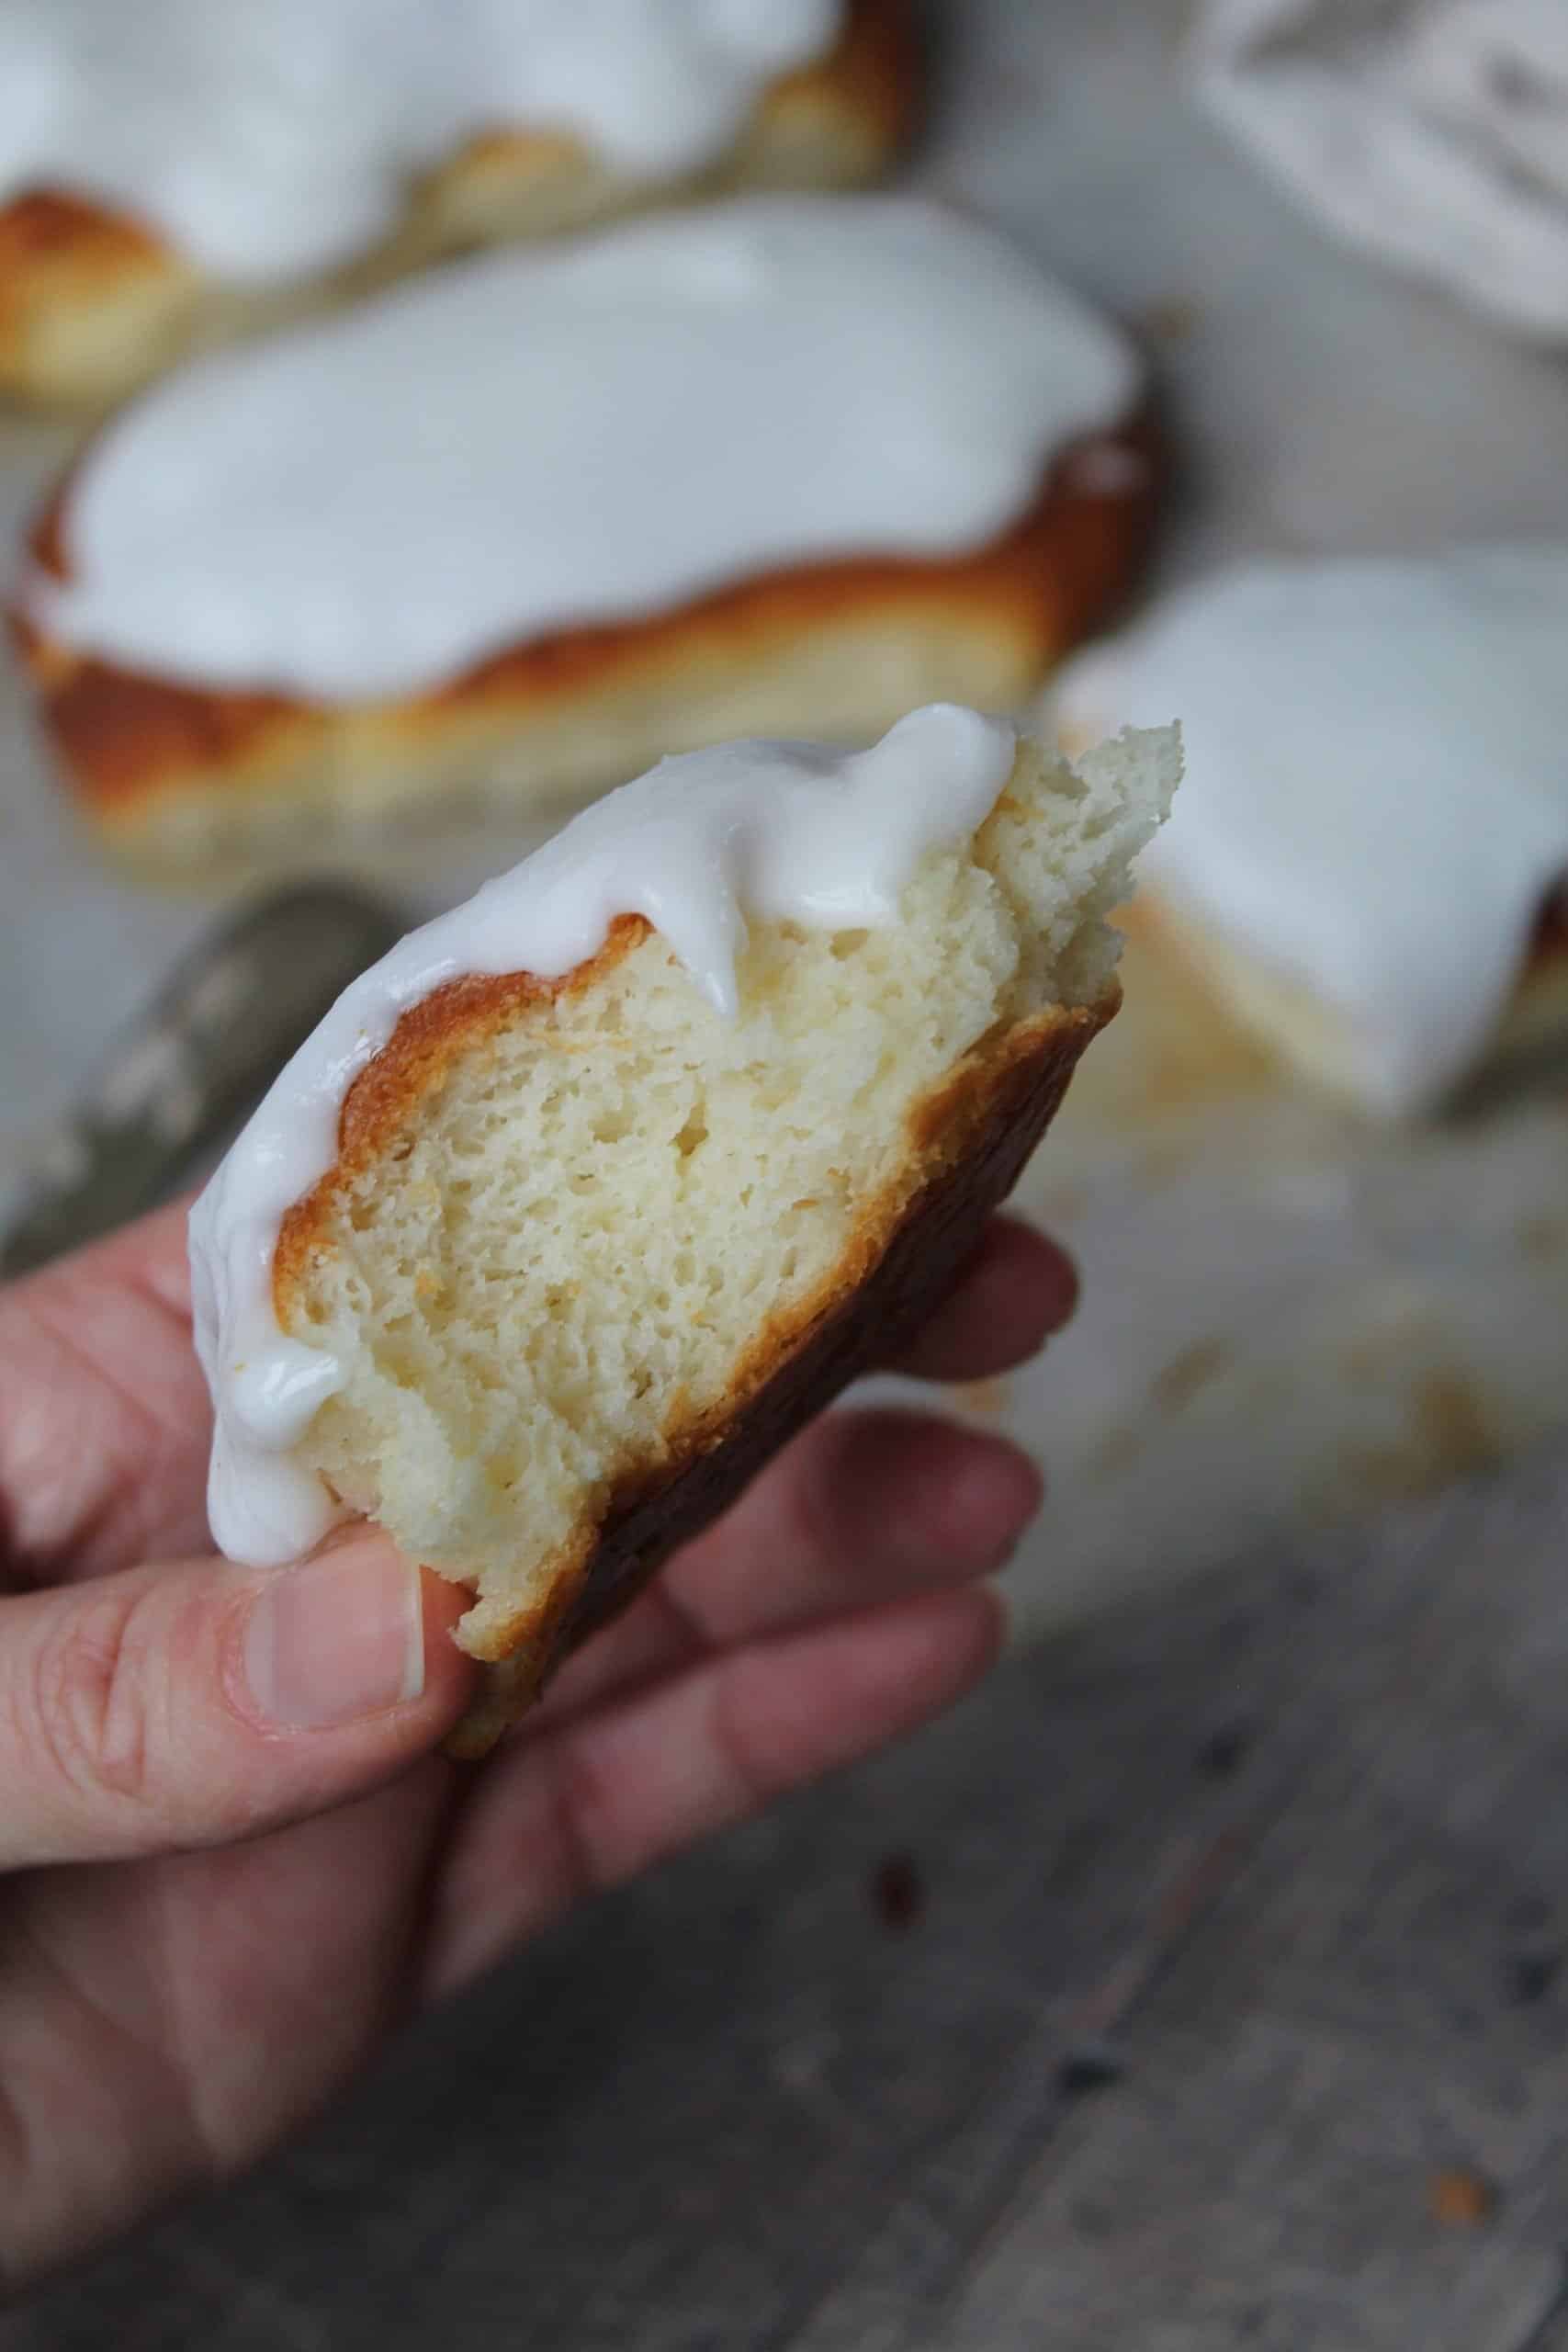
If there’s one recipe that takes me right back to my childhood with a single bite it’s gluten free iced buns.
There were the gluten-filled treat of my youth and now I’m so excited to finally reveal a recipe which is as good as the original!
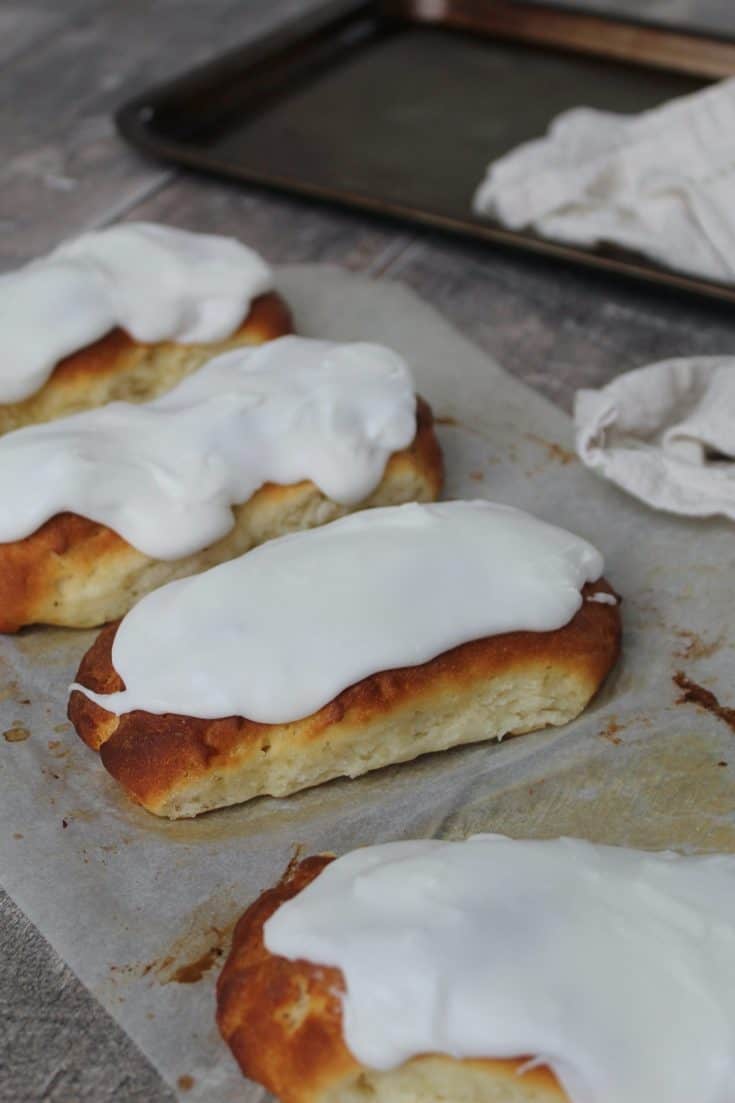
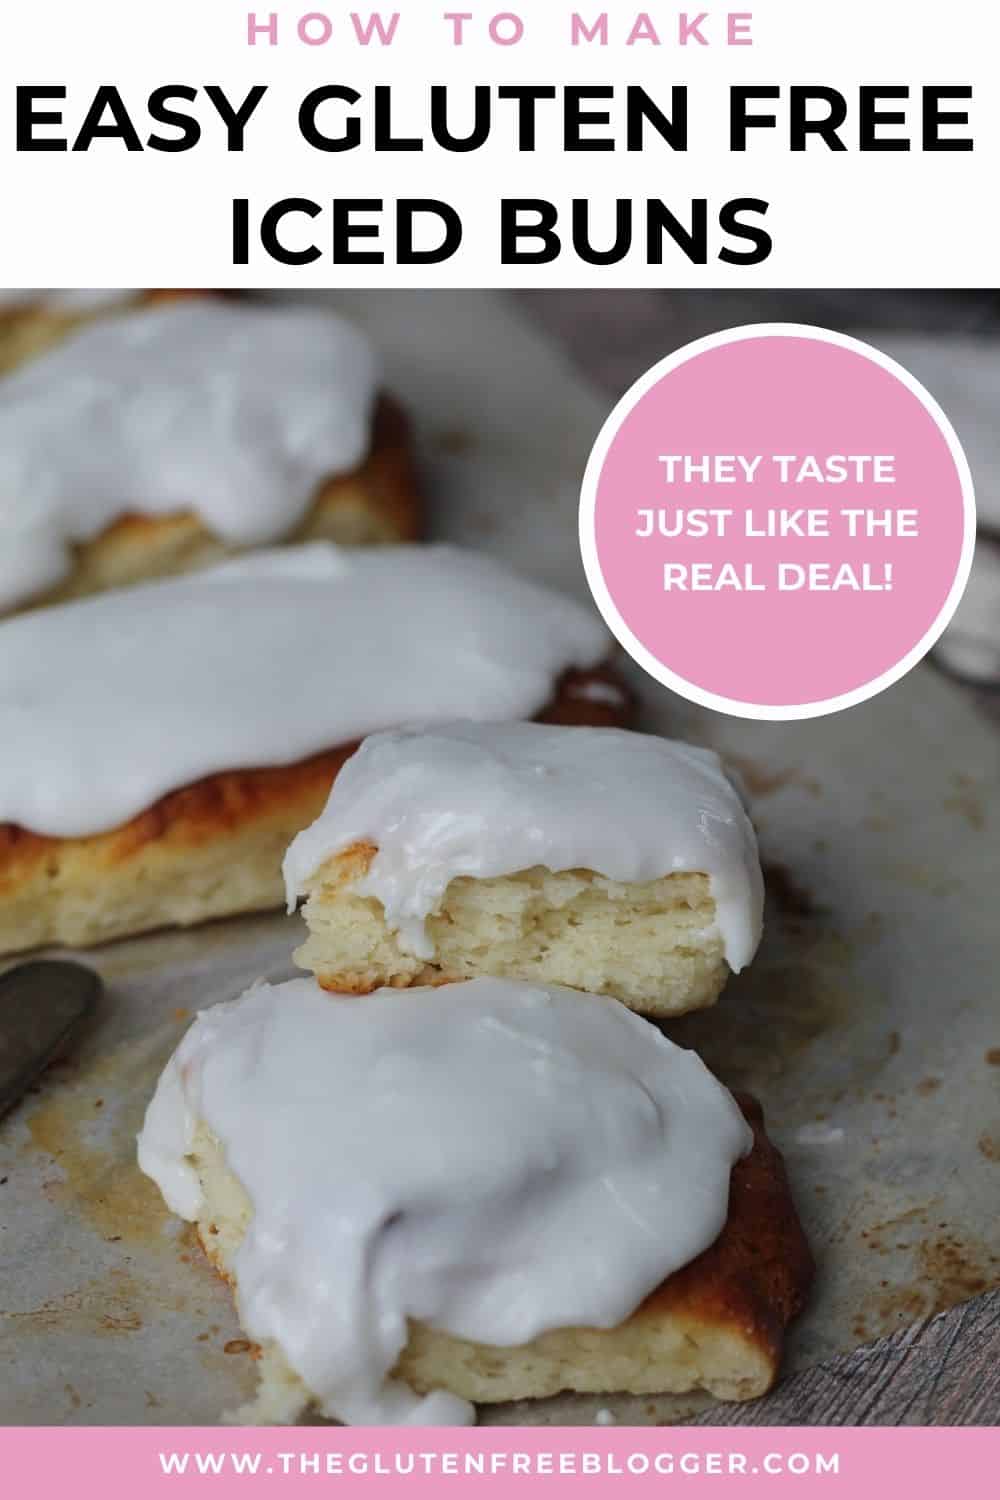
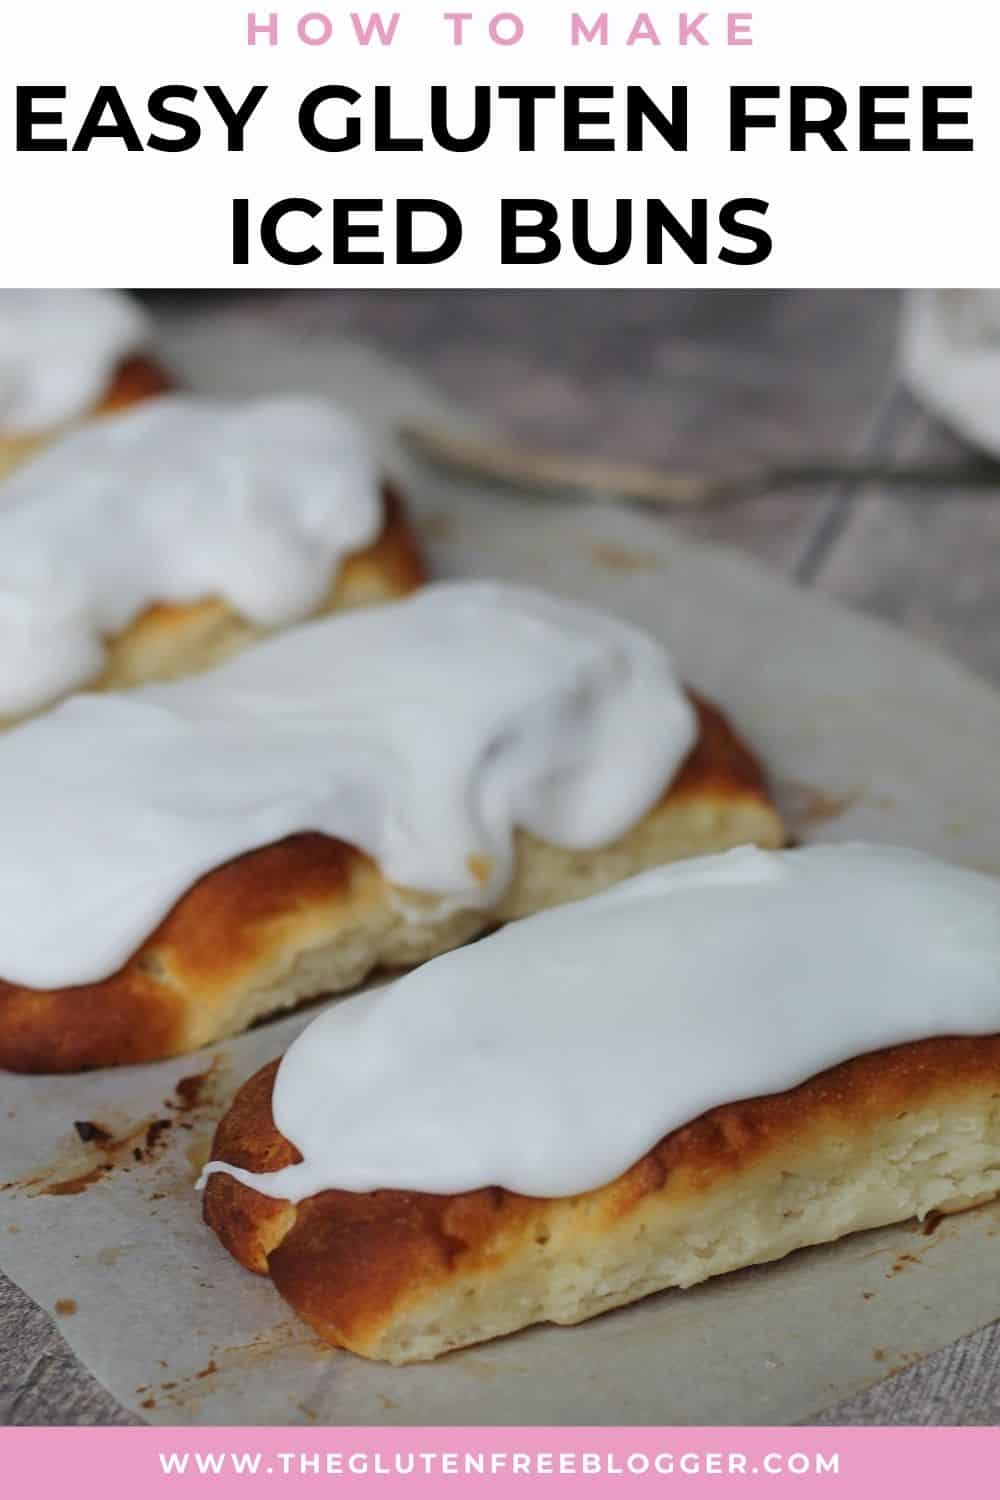
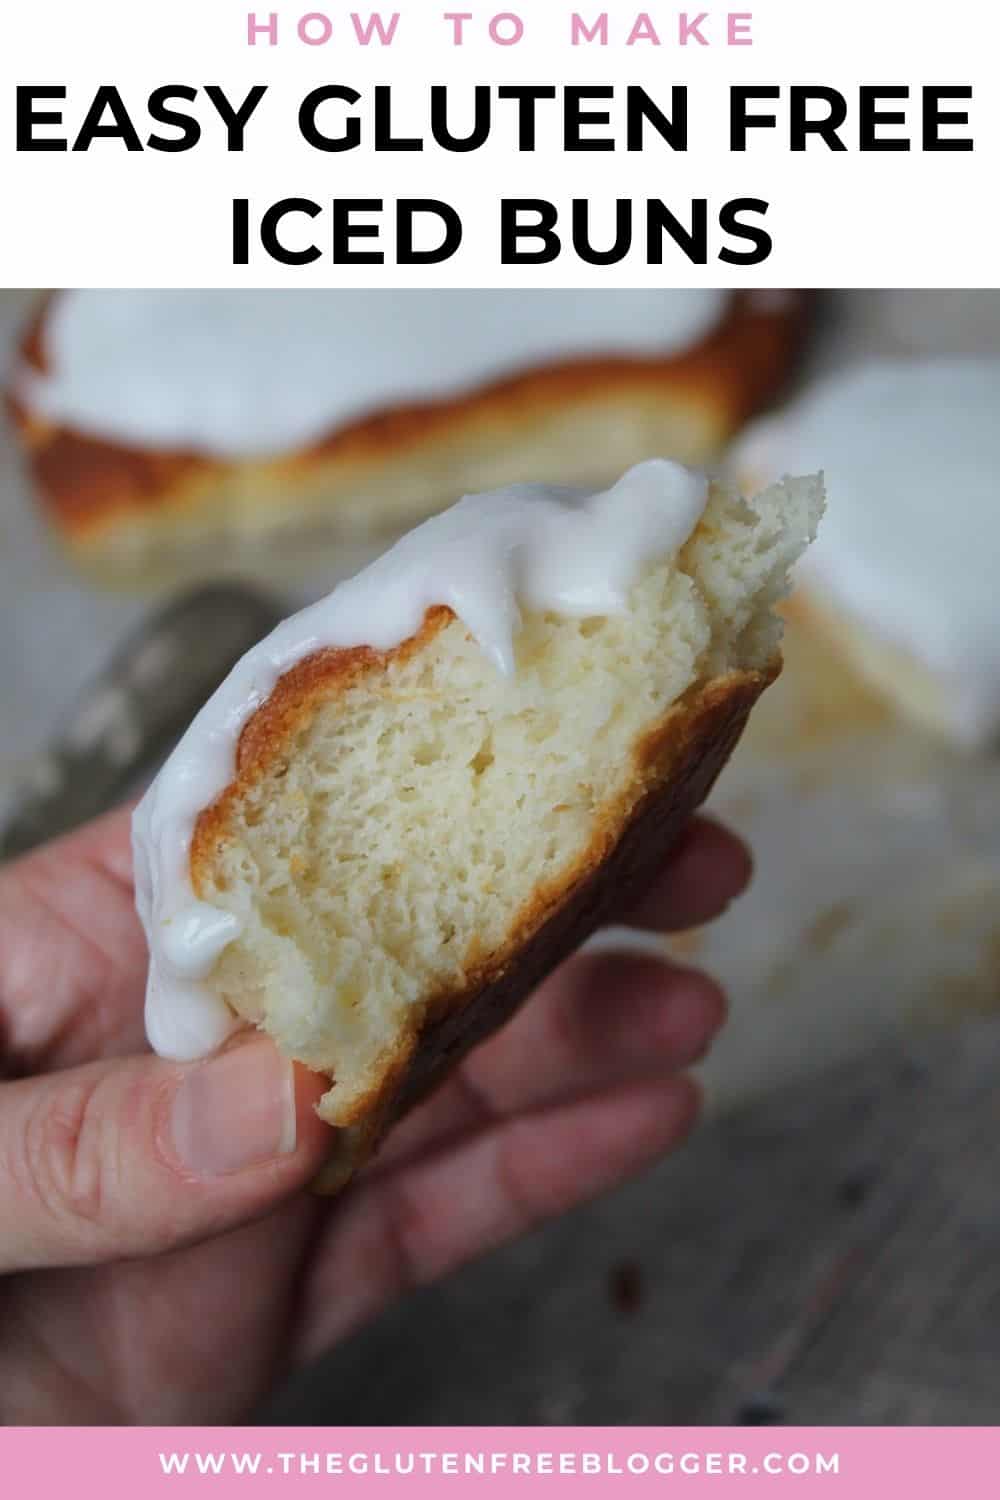
Eaten freshly baked and slathered with a thick icing, my gluten free iced buns are the REAL DEAL!
Perfect gluten free iced buns
I’ve been doing a lot of baking with yeast lately and when I finally nailed my gluten free bread rolls, I needed a new project.
But these bread rolls got me thinking.
Because they’re so soft and pillowy, I thought if I could make a sweet version, they’d be perfect for gluten free iced buns.
Fast forward many attempts and tweaks later and I’m SO happy with these.
Just one bite of these gluten free iced buns and I could suddenly remember the real thing, which I haven’t had in over 20 years.
I even fed them to my hoard of gluten-eating guinea pigs (my boyfriend and his Mum) and they both agreed they taste like the real deal.
So if you’ve been missing iced buns, you don’t have to worry anymore.
Plus they are a lot easier to make than you think – once you’ve made one batch you won’t be able to stop!
How to make gluten free bread dough
Making gluten free iced buns is actually pretty similar to making gluten free bread.
They are, essentially, a soft, sweet bread roll topped with thick and sticky icing.
Gluten free bread dough can be tough to handle – you can’t knead and shape it like ‘normal’ bread.
That’s because it’s the gluten which makes the dough stretchy, so you’ll find gluten free dough is more of a thick, sticky batter.
But that’s ok, because to make good gluten free bread dough, you need there to be the extra moisture.
You may wonder how on earth this sticky mess will make a perfect dough but trust me – when you taste it you’ll see!
In gluten free baking I always use xanthan gum – this helps to replicate a little of the gluten-like texture.
Even if your flour already has xanthan gum in it, you’ll need to add the extra as per the recipe to get the best texture.
What do I need to make gluten free iced buns?
To make this gluten free iced buns recipe, you’ll need similar ingredients to my bread, but in slightly different quantities.
There’s a full printable recipe card below, but for the shopping list you will need:
- 150ml full fat milk
- 35g caster sugar
- 4g dried quick yeast
- 200g gluten free bread flour (I used FREEE)
- 1/2 tsp xanthan gum
- 1/2 tsp salt
- 1 large egg
- 1/2 tsp apple cider vinegar
- 2.5 tbsp vegetable oil
- 15g butter (melted)
For the sticky icing on top, you’ll also need:
- 250g icing sugar
- 2-3 tbsp water
Tips and substitutions
I always use the FREEE bread flour because I personally find it gives the best finish.
I’ve not tried this recipe using a plain gluten free flour blend – I don’t think it would alter the recipe hugely.
A lot of people have tried my other bread recipes with plain flour and reported that it works well, so I’m confident this would work too.
To make this recipe dairy free you could use a dairy free milk alternative and a dairy free butter substitute to brush the rolls before baking.
Eggs are pretty integral to this recipe as they help with the texture of gluten free bread and give it moisture.
I haven’t tested any egg replacements in this so I couldn’t attest to how they’d work – if you do try any then please let me know how you get on!
When using quick yeast, I usually use the Doves Farm one which is certified gluten free, or the Allinson’s quick yeast which also scans as gluten free on the Coeliac UK app.
How to make the BEST gluten free iced buns
The full method for this recipe is down below but there are a few parts of this gluten free bread rolls recipe which I think were best illustrated through photos.
So here are a few step-by-step photos to guide you through making these gluten free iced buns.
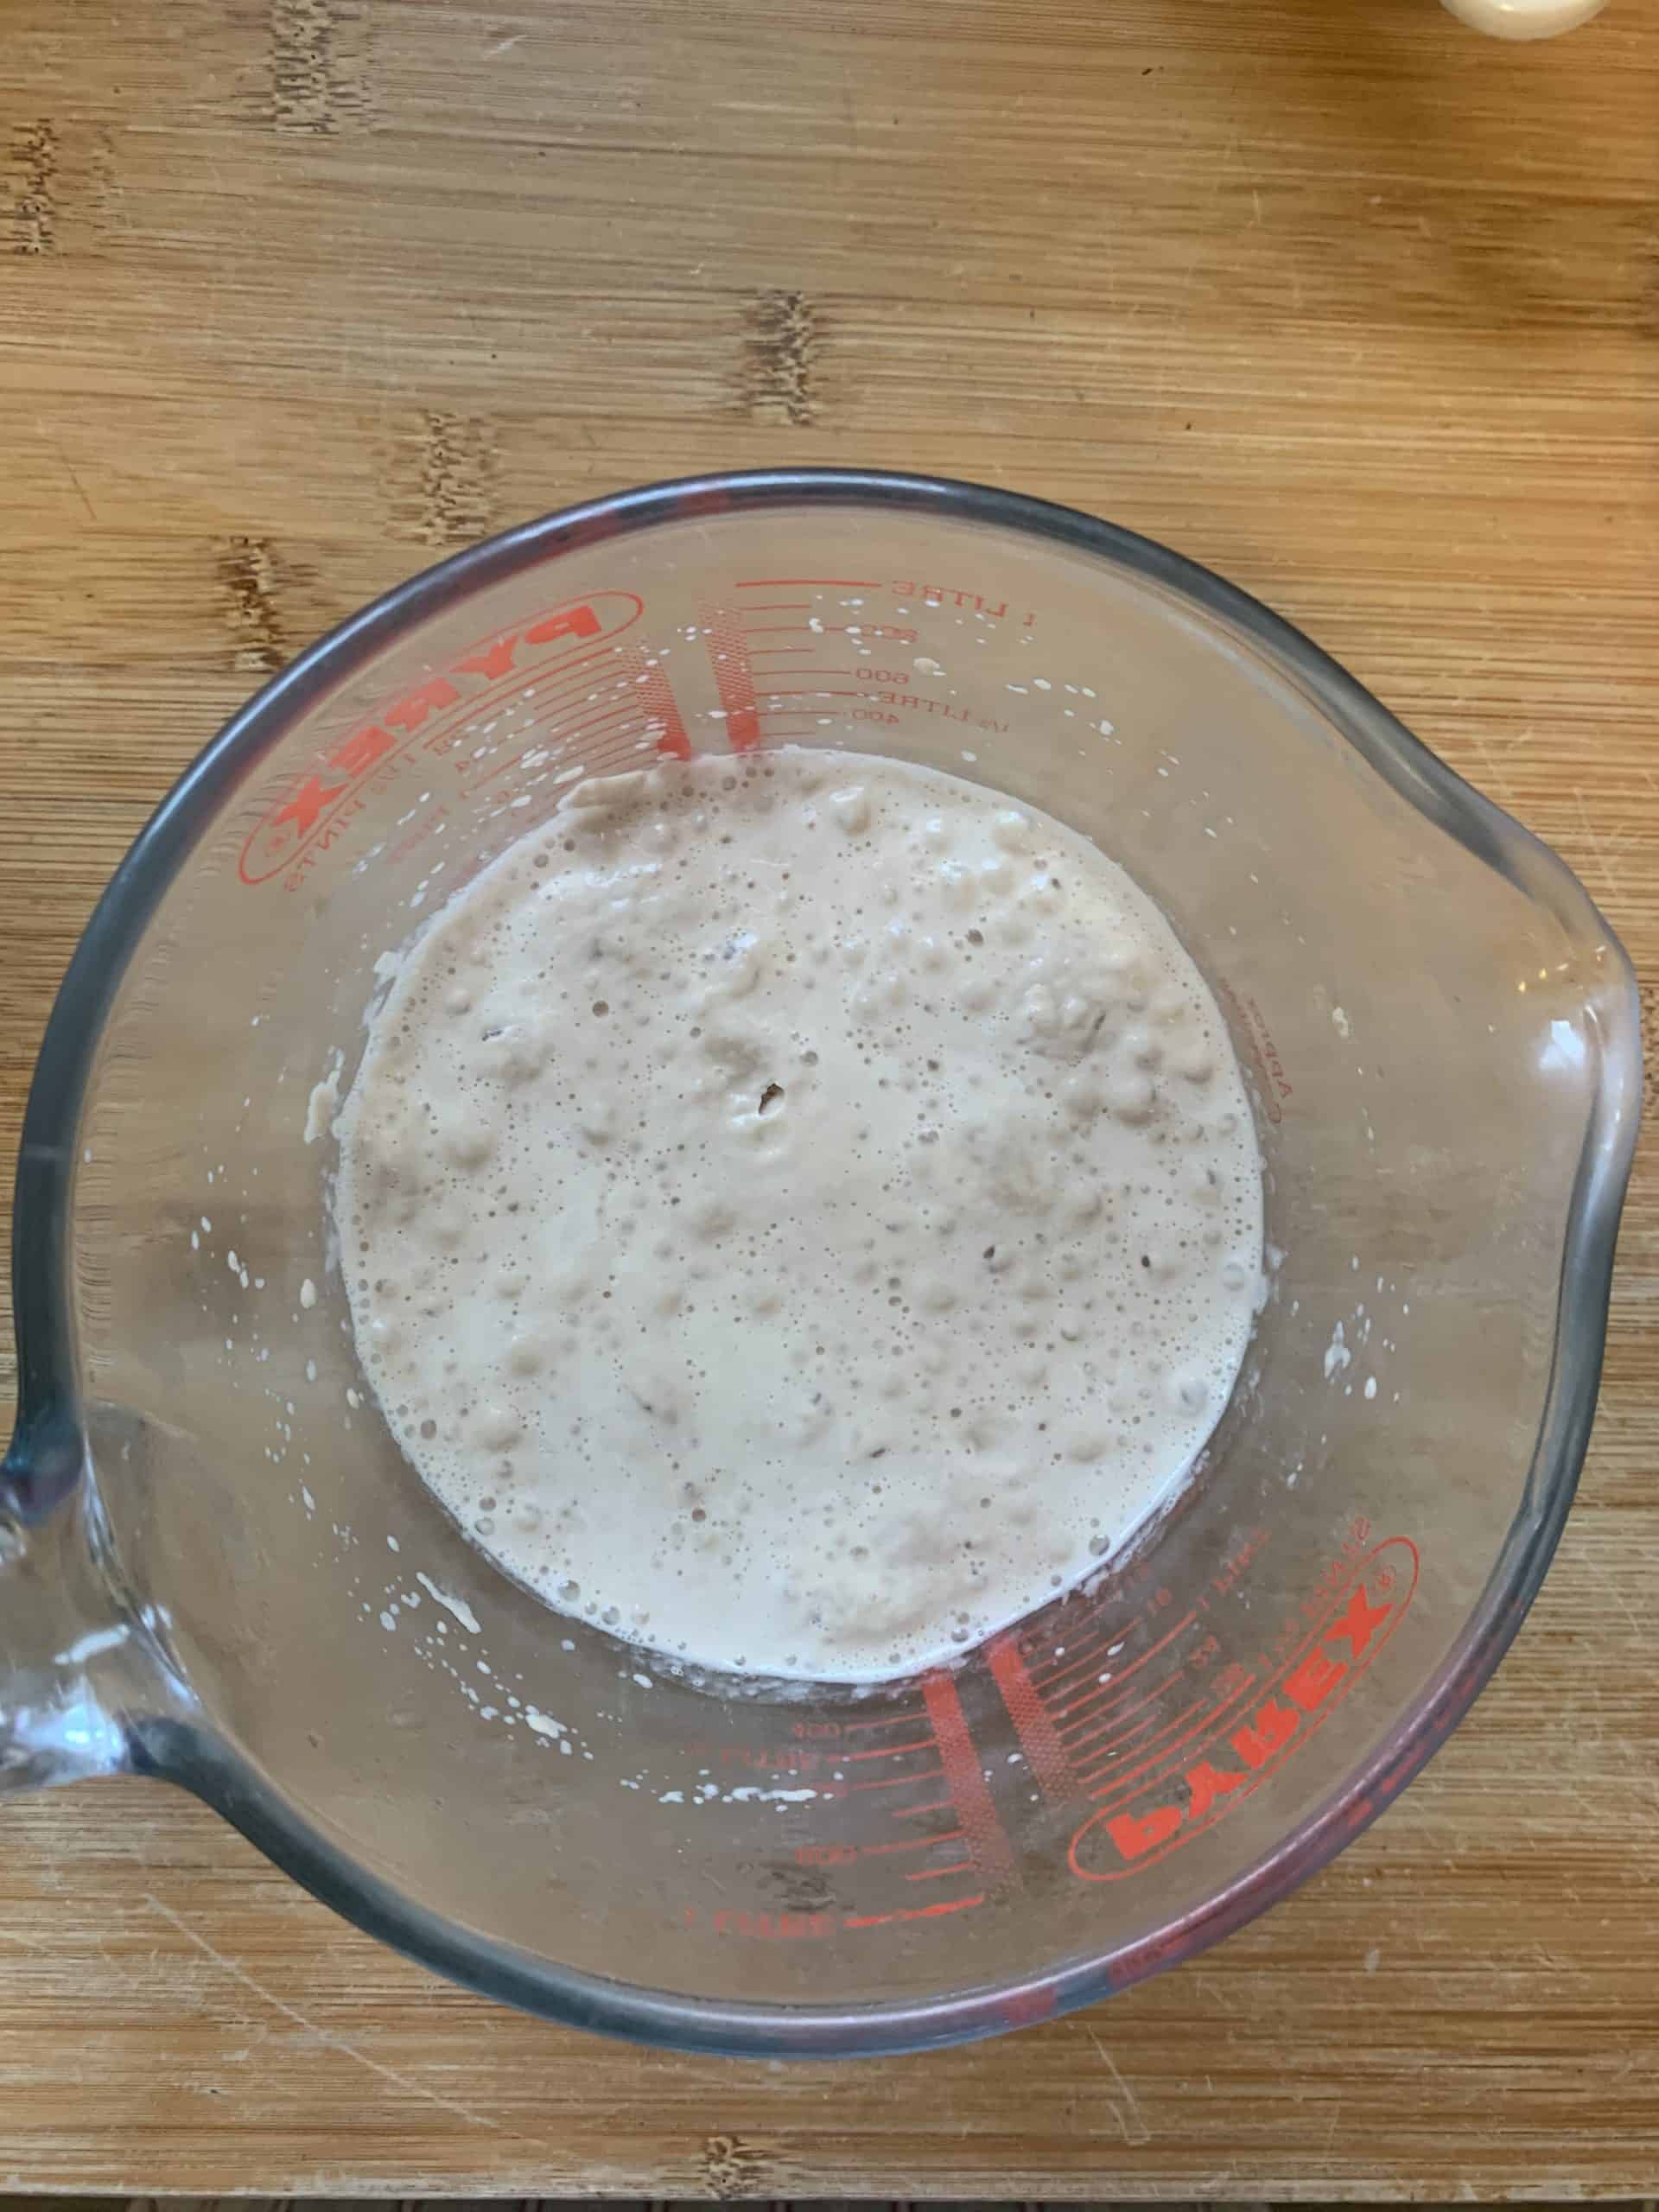
First activate the yeast
To do this, warm the milk so it’s around the same temperature as your skin – i.e. when you put your finger in it, you can’t feel that it’s hot or cold.
Once it’s warm, stir in the sugar then add the yeast – you want a quick yeast for this recipe – and stir.
Cover and leave the yeast mixture for 5-10 minutes and it should form a froth on top, kind of like the head on beer.
If it doesn’t, it’s likely either the milk was too hot and killed the yeast, or your yeast has died.
You’ll need to discard the mixture and start again with fresh yeast – it might be worth checking it’s in date if this doesn’t work.
The frothy yeast mixture should look like this when it’s ready…
Making your gluten free dough
The flour and remaining dry ingredients go into one bowl, the wet ingredients are all mixed together separately before you add them to the mix with the yeast mixture.
When you mix everything together, you’ll need a wooden spoon and a bit of elbow grease!
Traditional bread dough is kneadable and stretchy – but gluten free bread dough is very different, more of a thick batter!
Once you have your thick batter, it’s time to start shaping your rolls ready for proving.
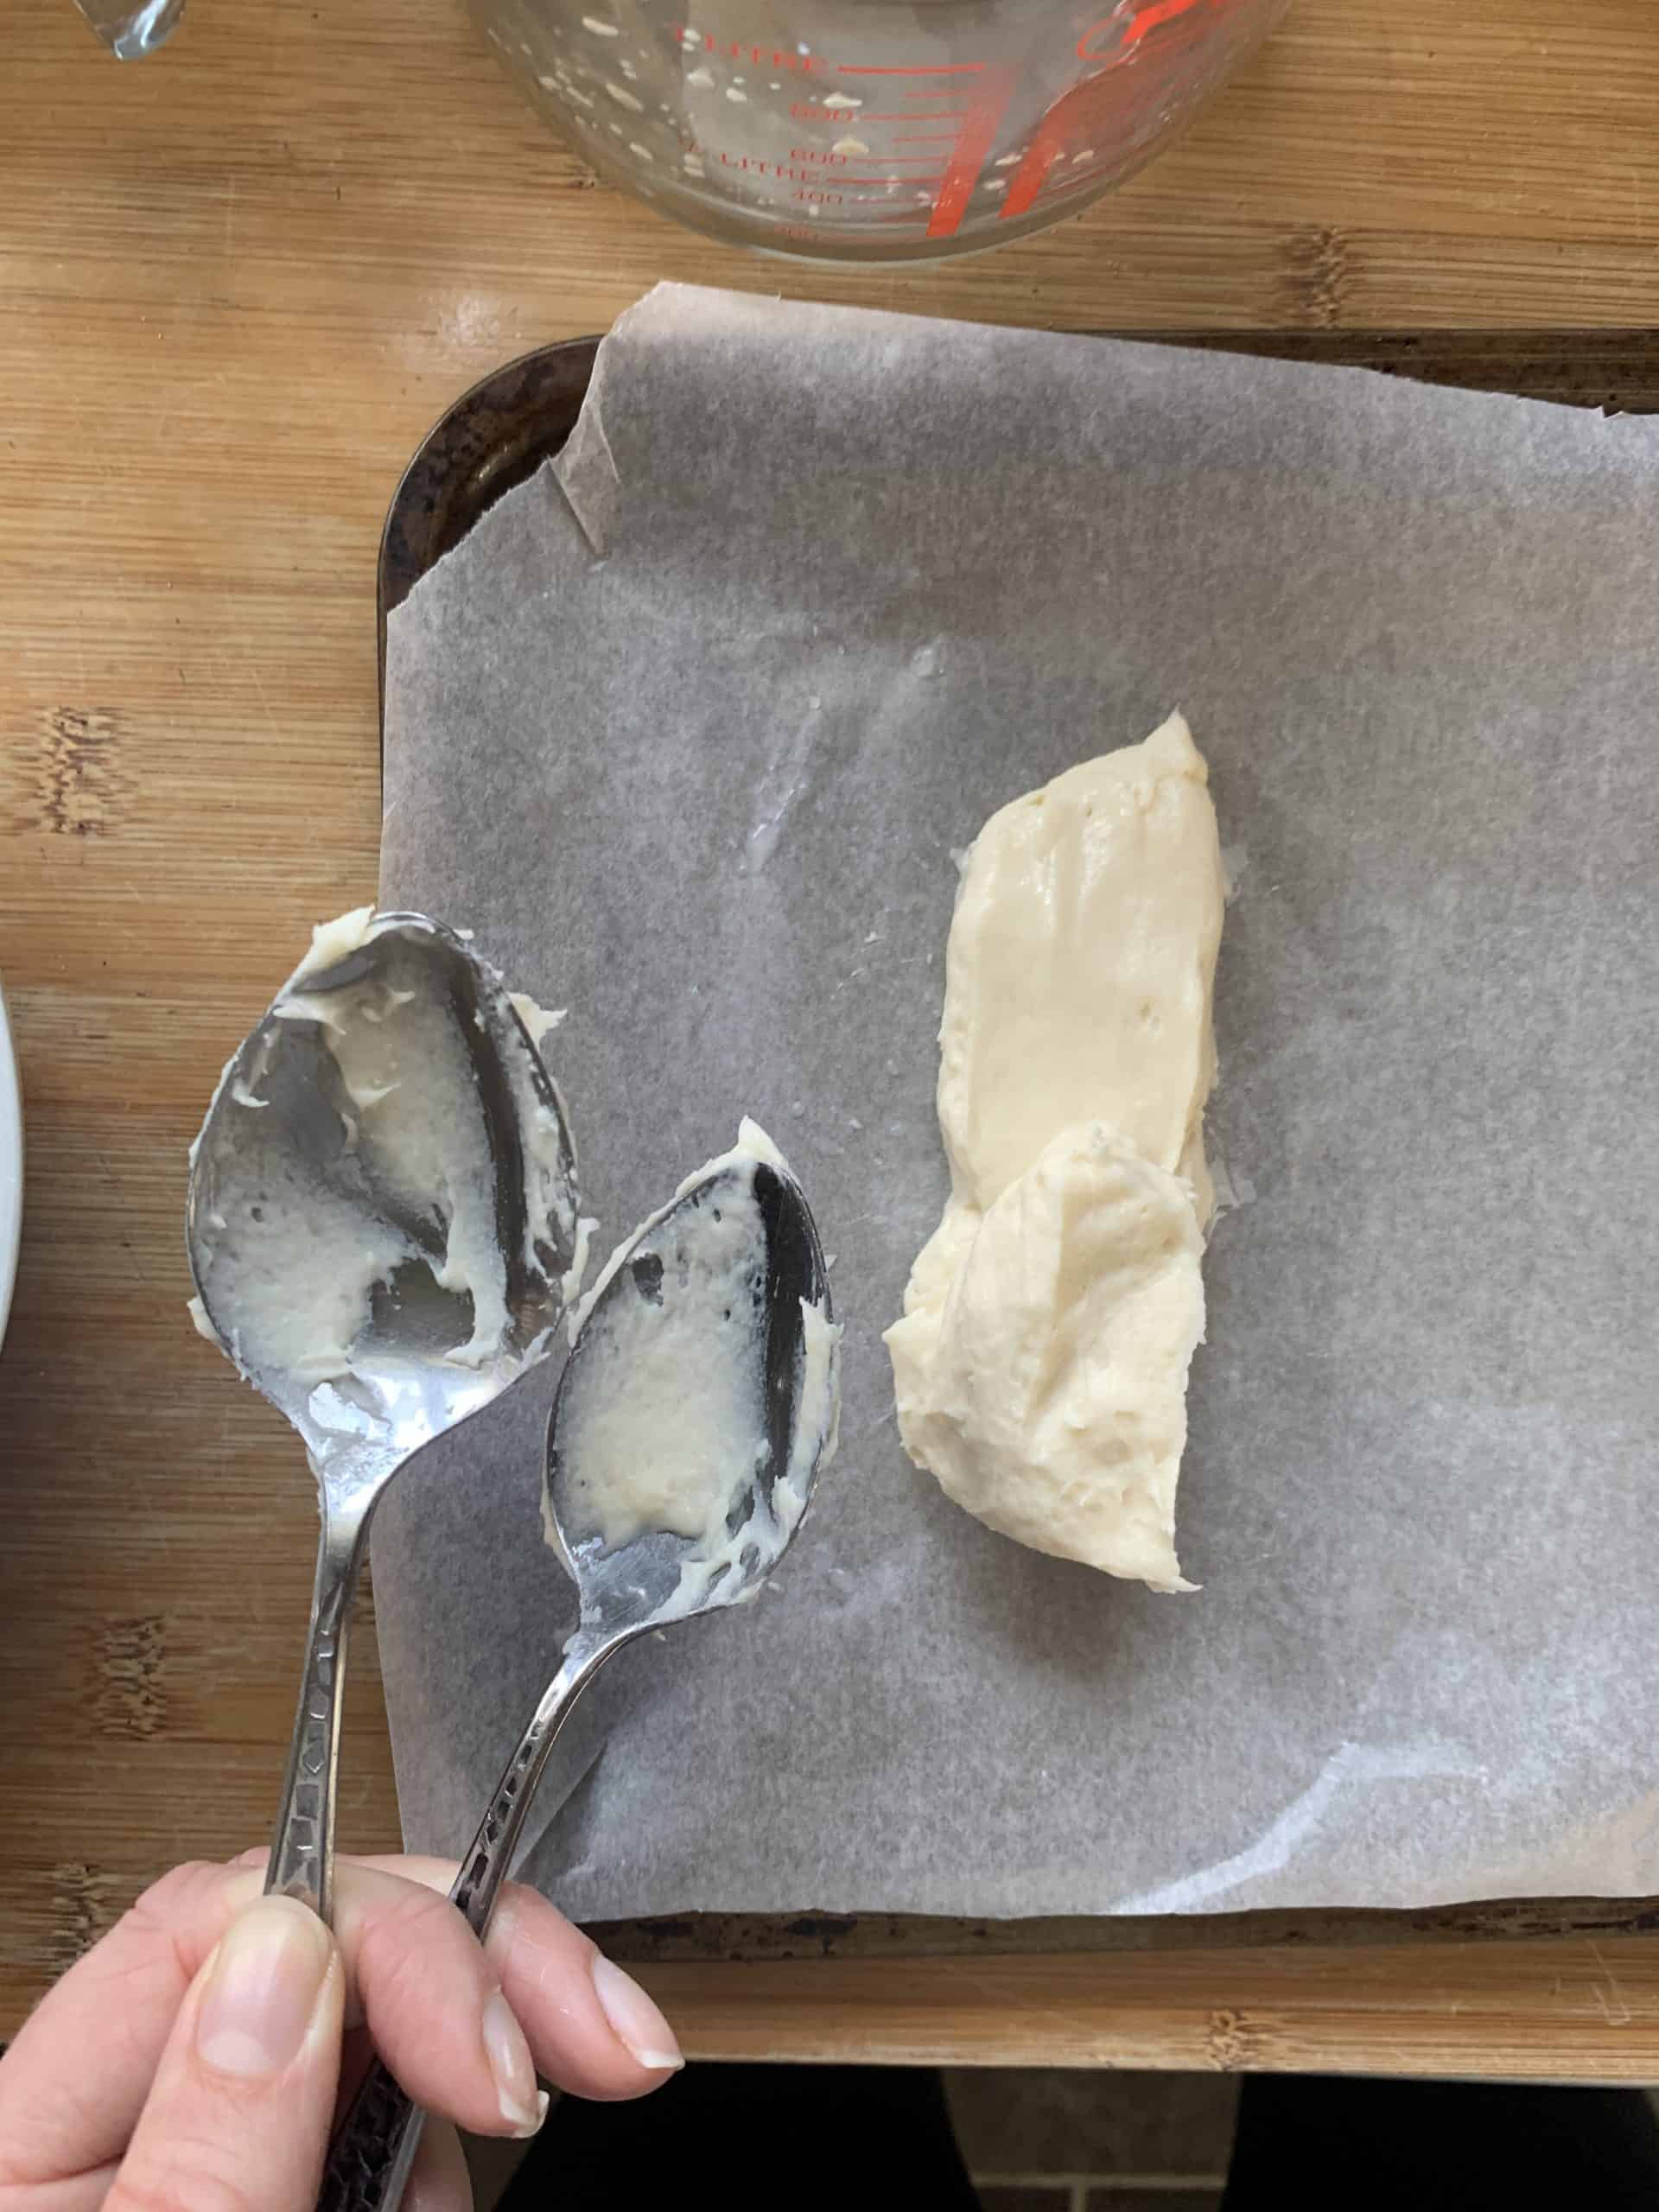
How to shape your gluten free iced buns
Line a baking tray with baking paper ready for your buns.
Using two spoons, roughly ‘dollop’ a quarter of the bread mixture onto the tray (approx 112g of mix) into a rough, sausage-like shape.
It should look a little like the photo below…
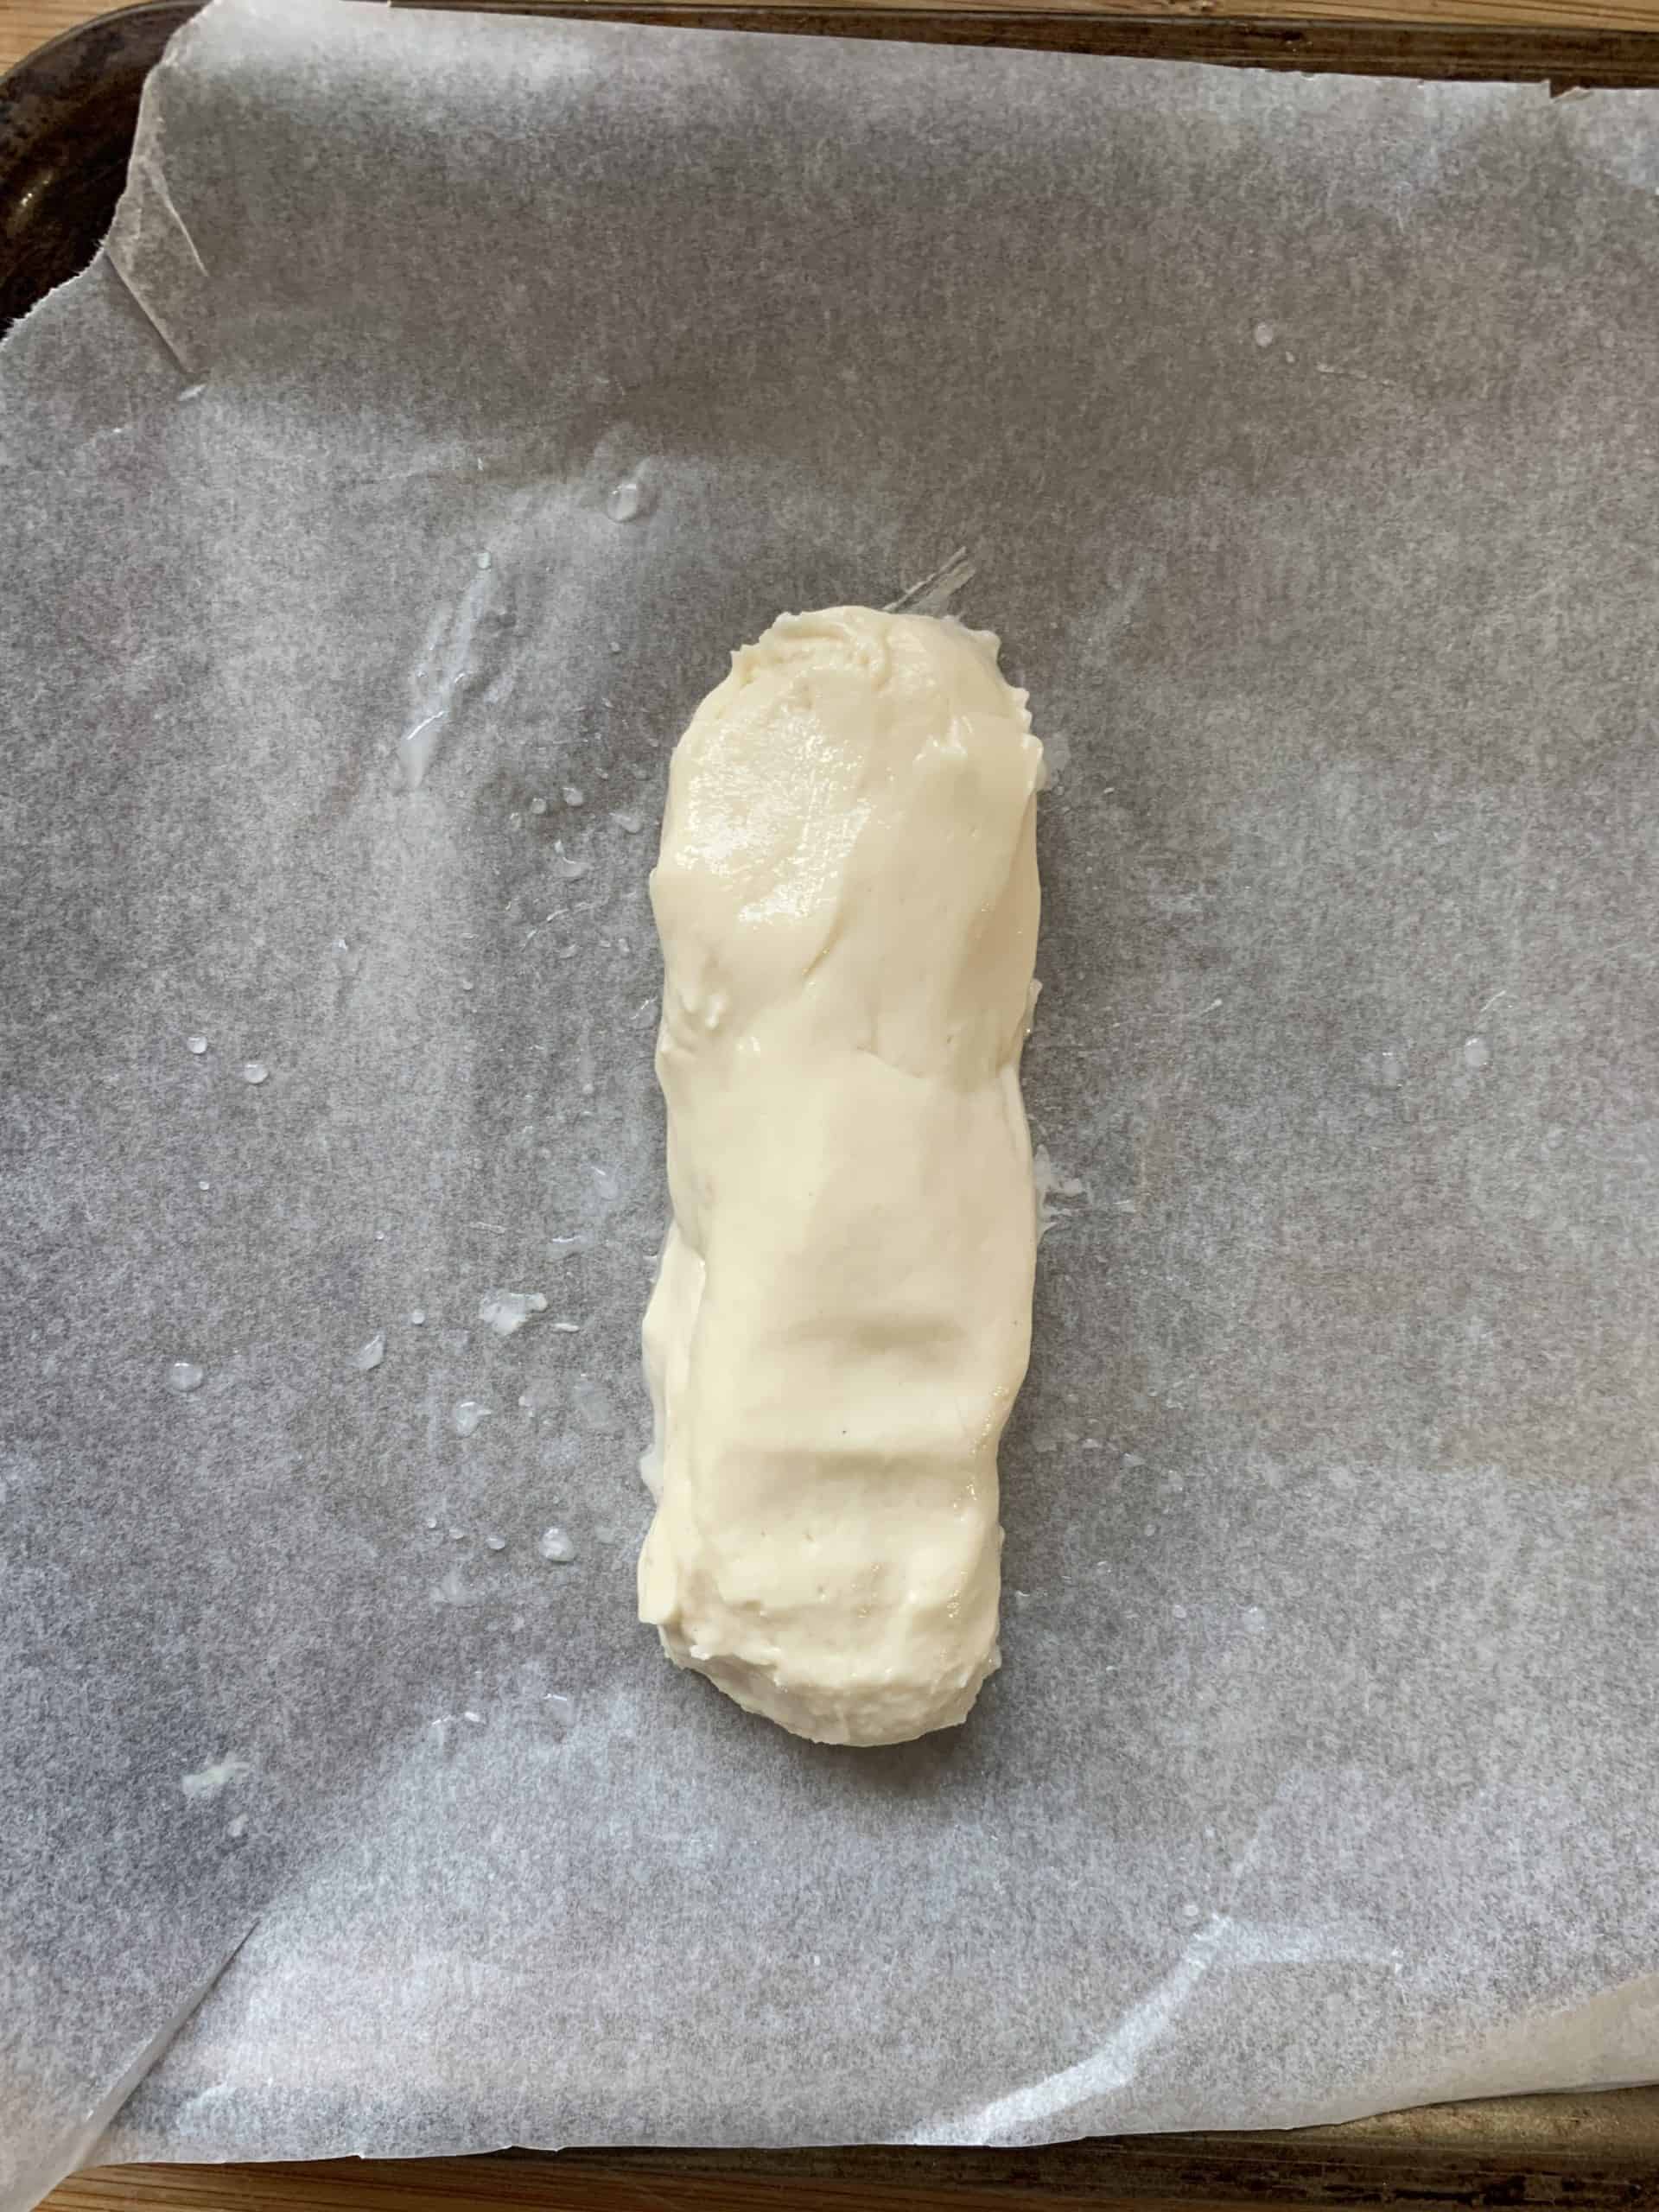
Wet your hands with cold water and carefully shape the mixture into a roll-like shape.
The moisture on your hands will stop the dough from sticking to you – just make sure you don’t get the dough too soaking wet!
Once you’ve shaped your bun it should look a little like this…
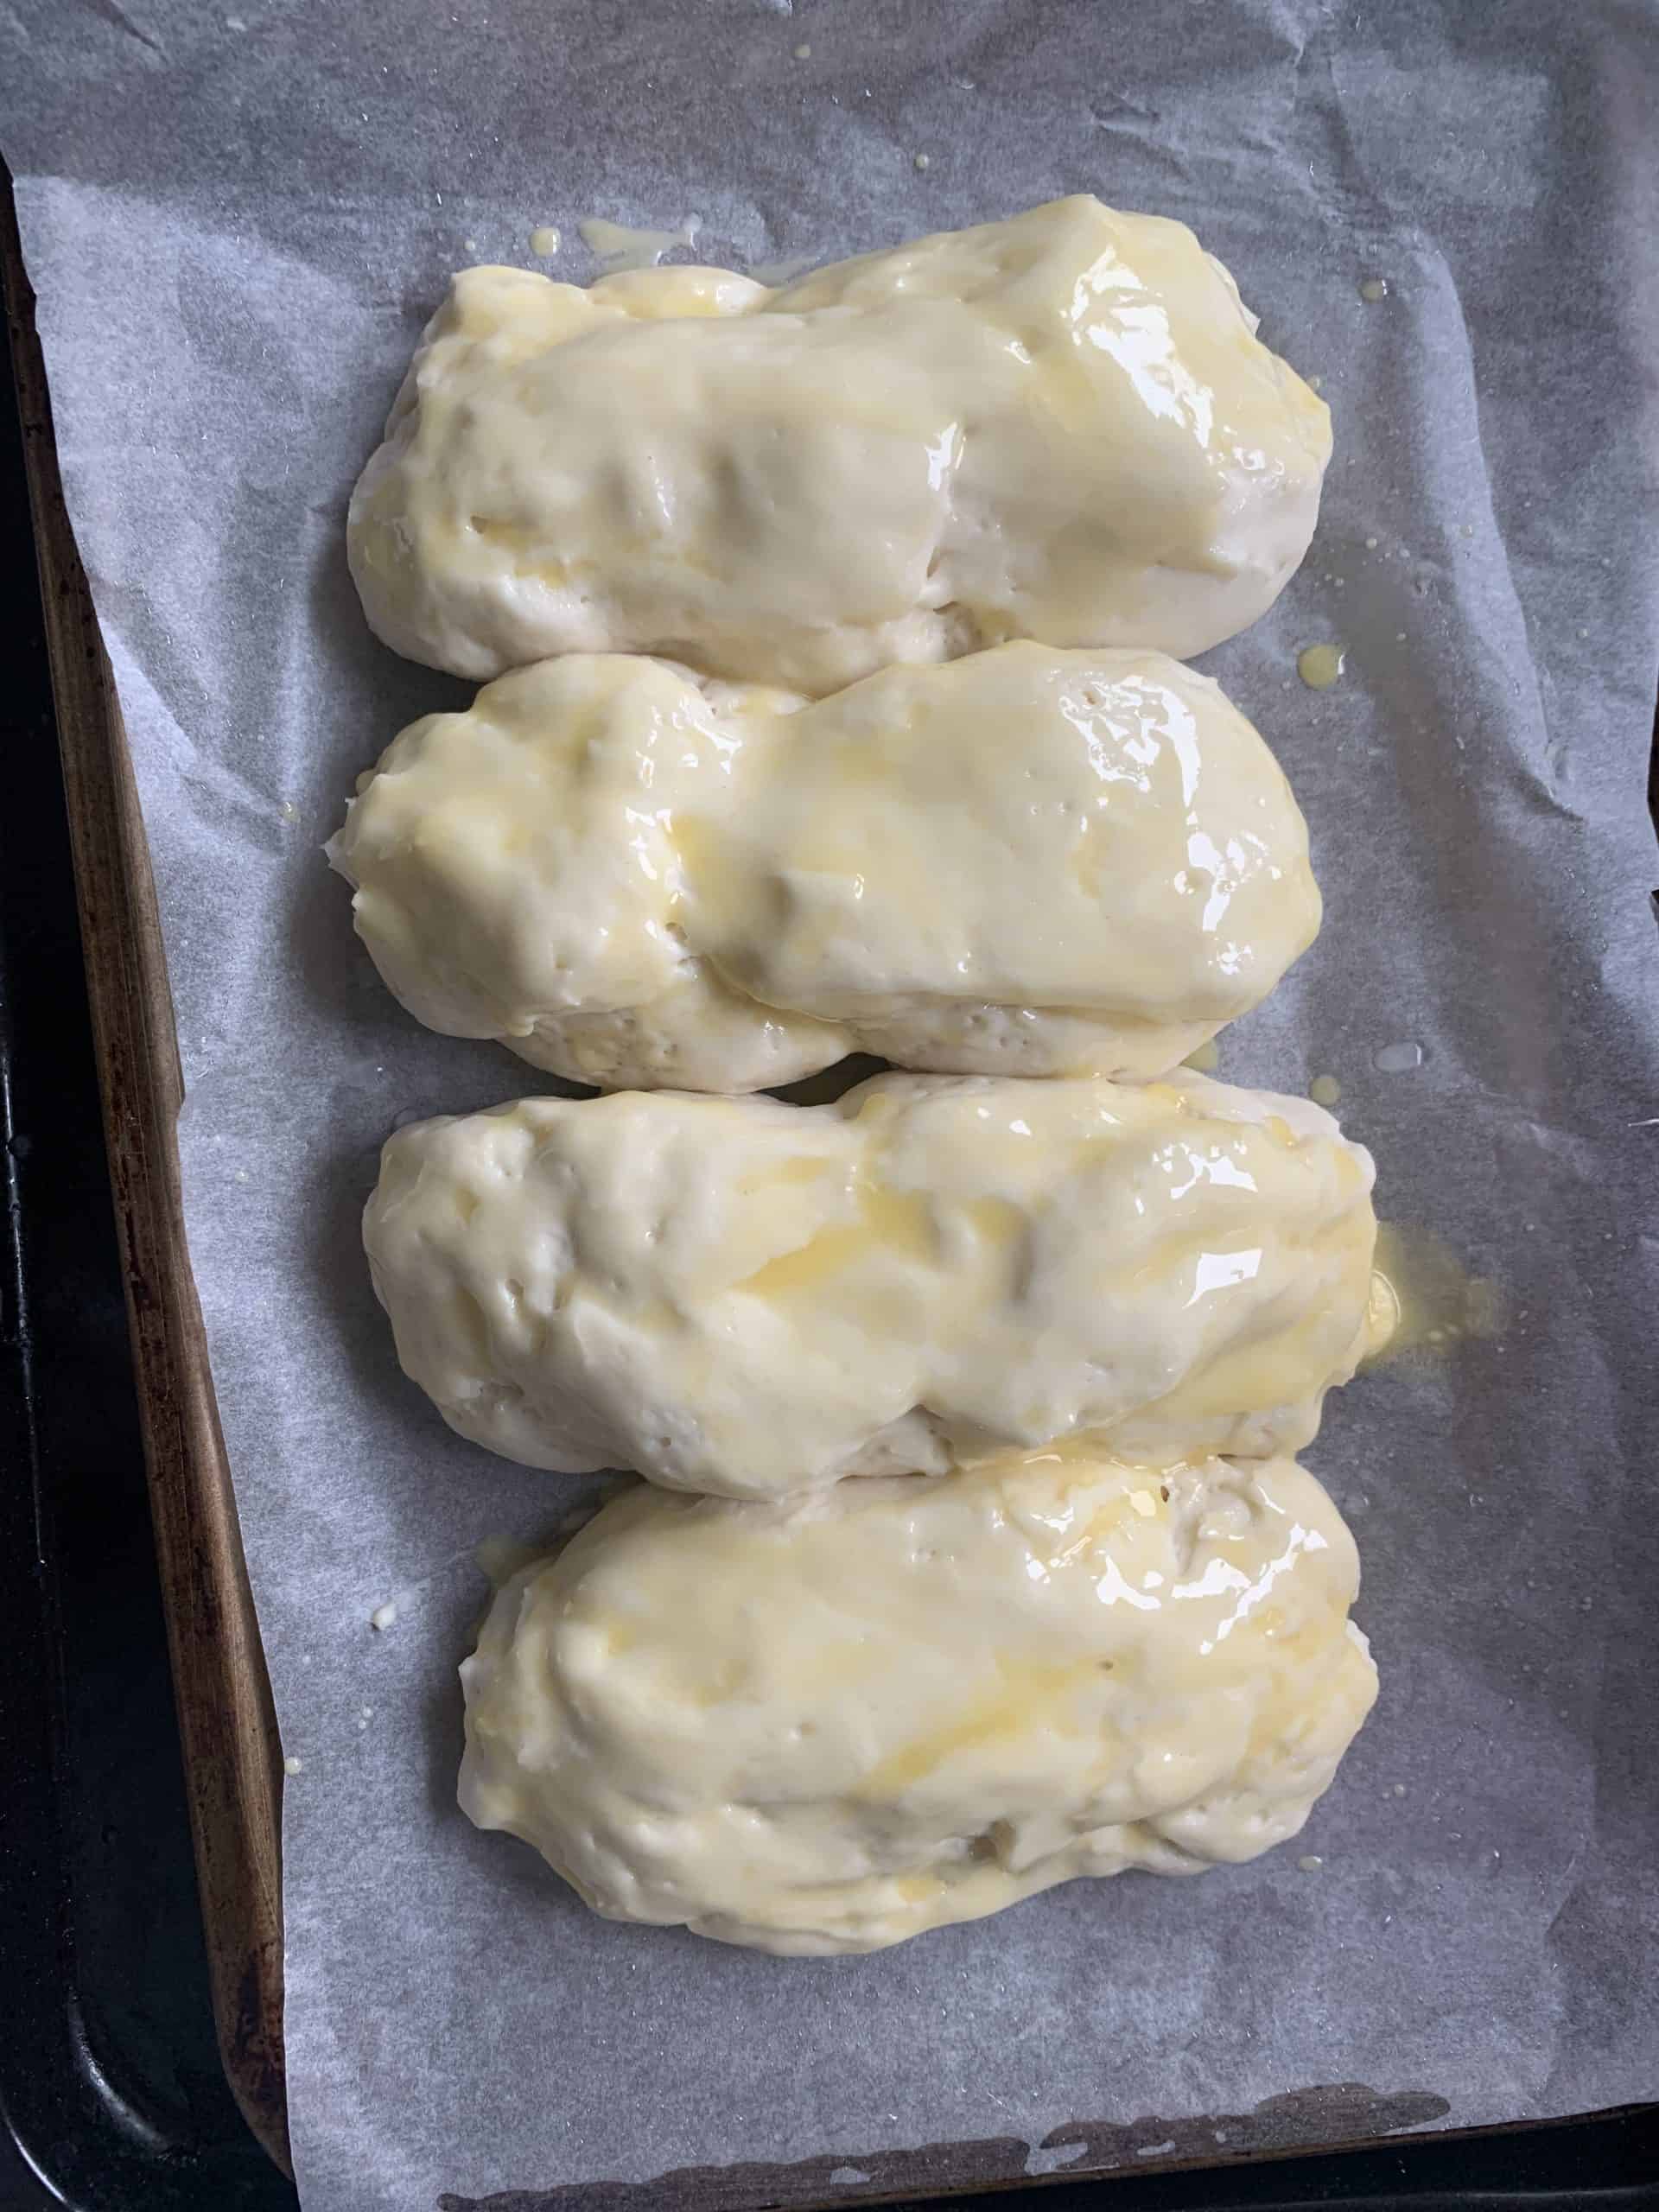
Repeat this with the rest of the mixture so you have 4 rolls of dough in a row, around 1-2 cm apart from each other.
Don’t worry too much about neatness – with this sort of dough it’s dough to get the buns super smooth.
Plus you can hide all manner of sins with a thick layer of icing!]
Once shaped the dough buns should look like this – this is then the stage where you wrap them in clingfilm and prove in a warm place.

Providing your gluten free iced buns
I prove my dough for around an hour but you may find it takes more of less time, depending on how warm your house is.
You want the buns to have expanded so that they are touching and they should look and feel puffed up.
If your dough ‘explodes’ then you have proved them for too long – so keep an eye on them during the first time of baking these gluten free iced buns.
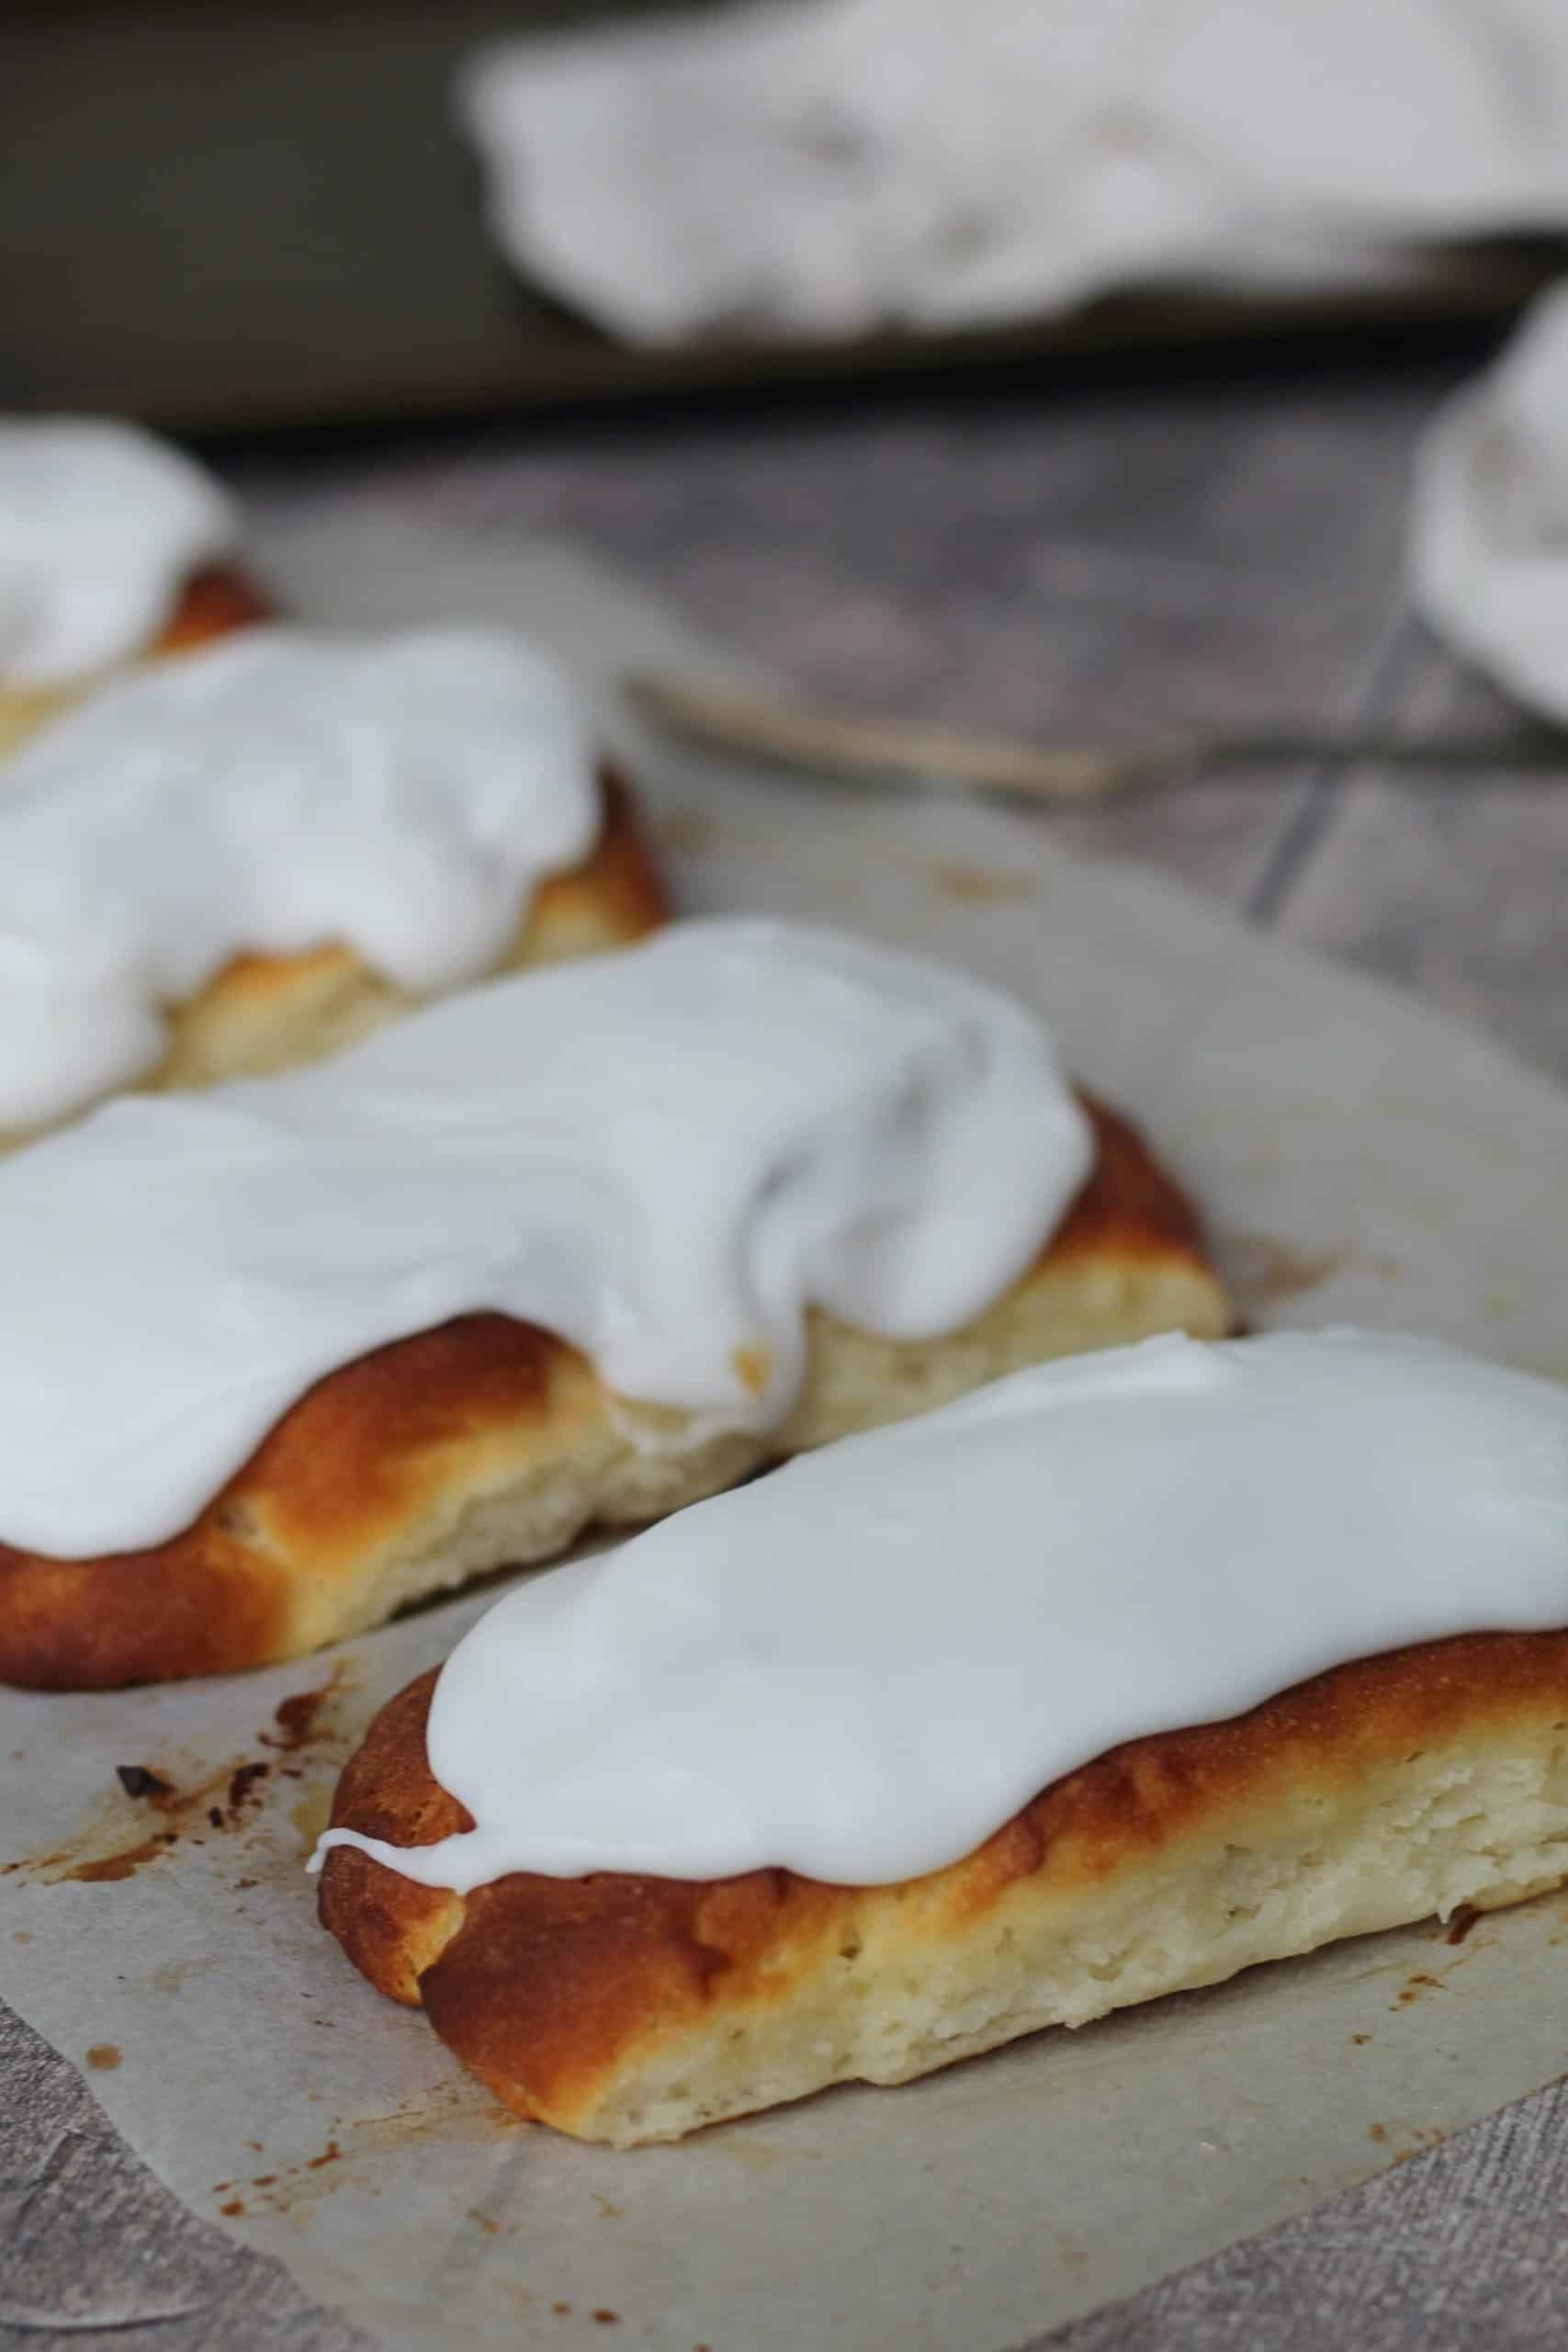
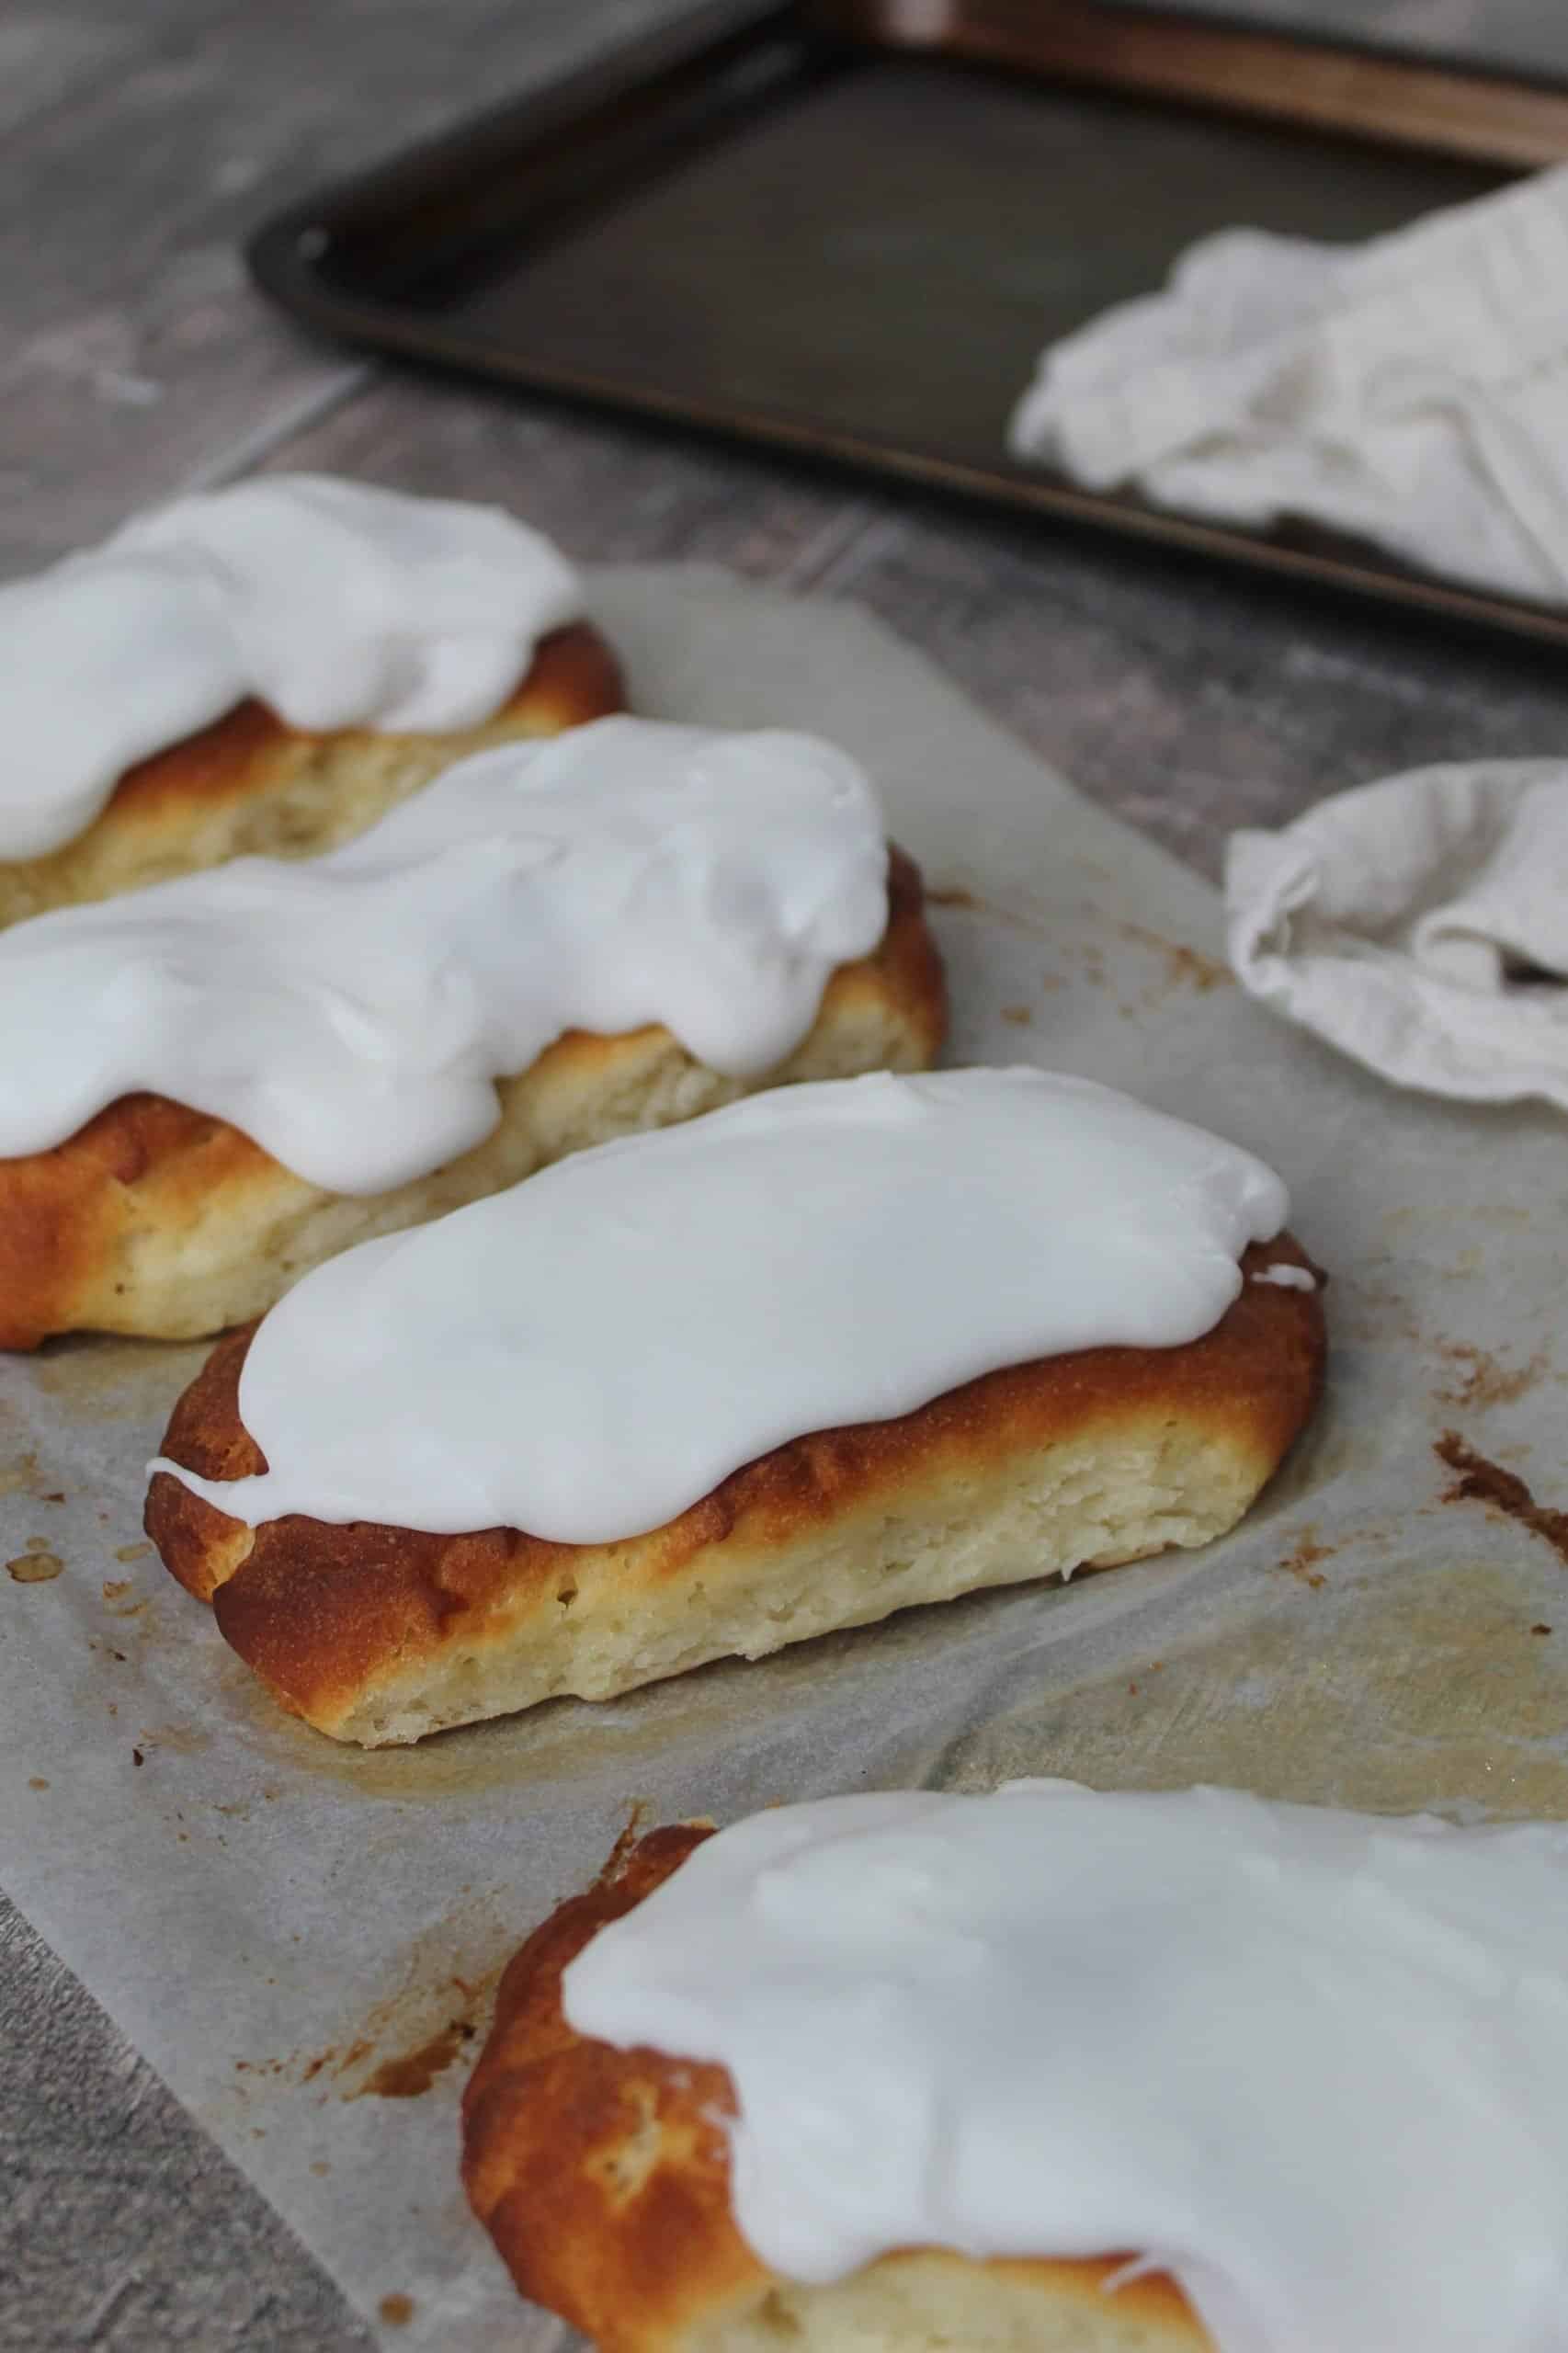
Once proved and brushed with melted butter, they should look like this…
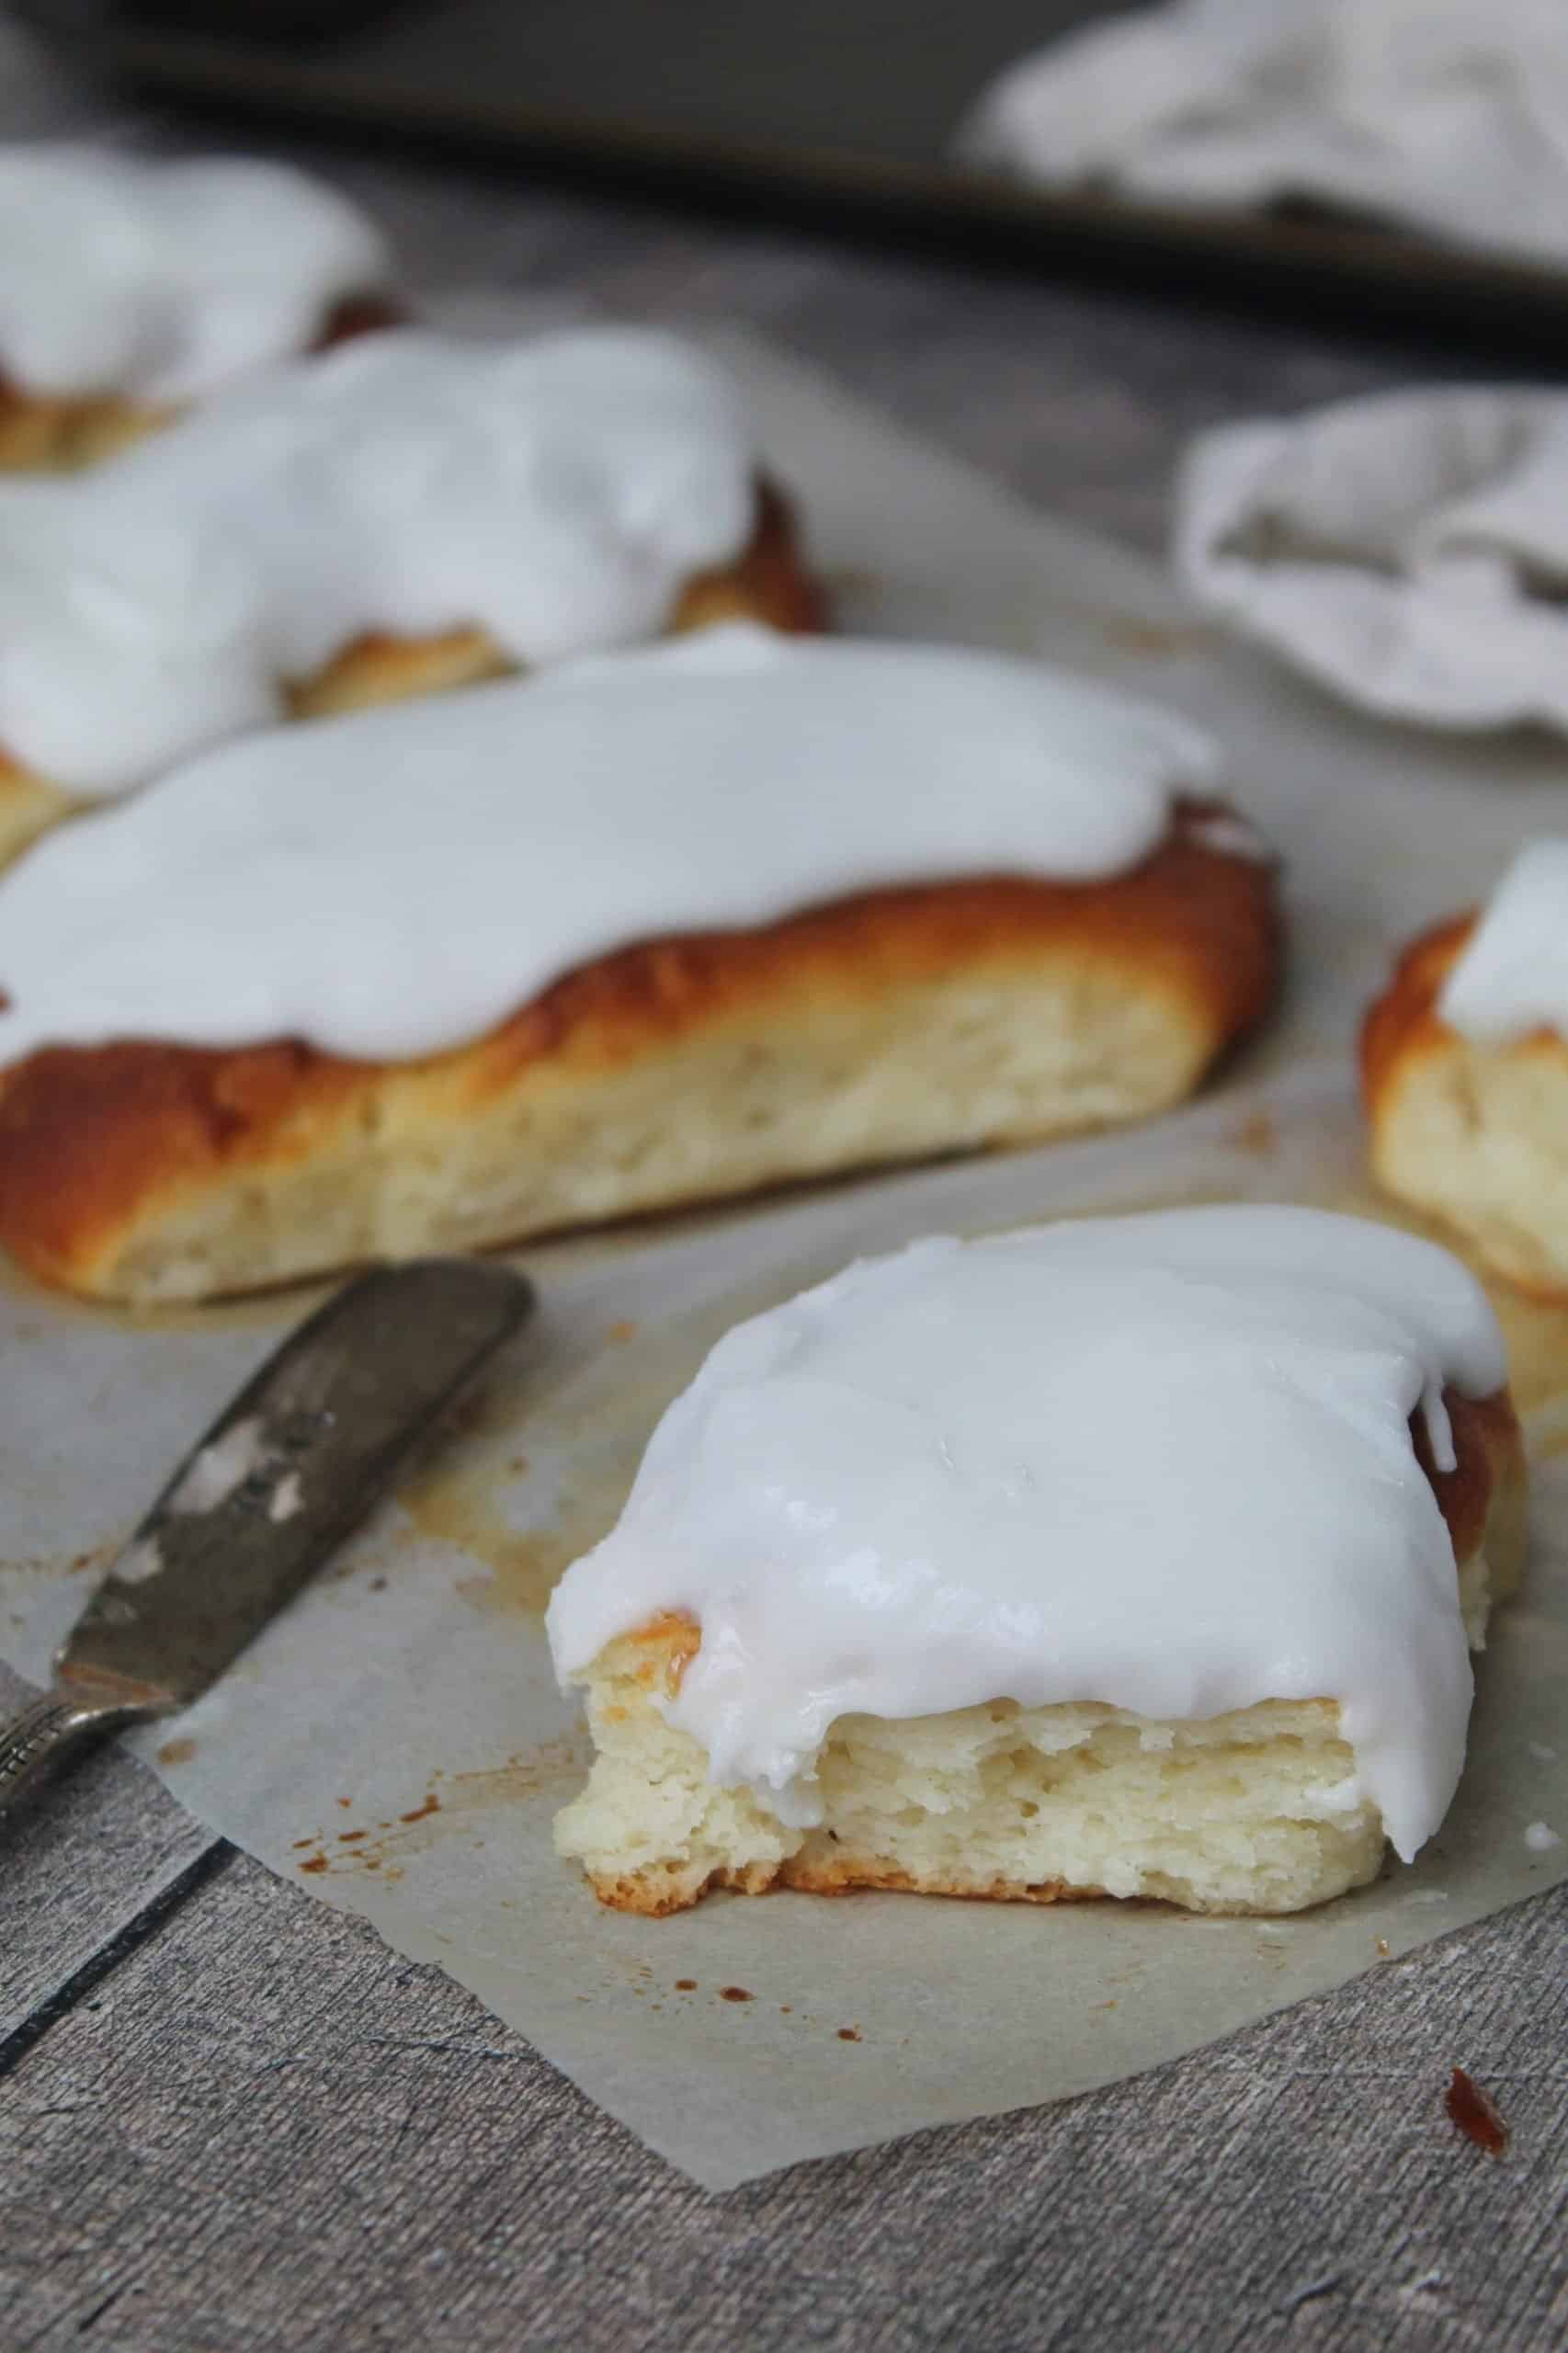
Bake them until they’re golden brown and then allow them to cool a little before icing.
You want to add the water to the icing sugar gradually, so you get a nice thick paste which you can spread.
Too thin and it will just run off the iced buns – they’ll taste nice but won’t be as authentic.

My gluten free iced buns recipe
This recipe makes enough for four gluten free iced buns which are big and squishy just like the ones in the bakery!
You could make eight smaller ones but you’ll need to adjust the cooking time accordingly – see the recipe notes.
If you make this recipe and love it, please do let me know by tagging me on my Instagram or using #theglutenfreeblogger. I love seeing your bakes!
And please do leave a review to let others know you loved it too! It would mean the world to me.
Gluten Free Iced Buns
My gluten free iced buns are the perfect treat! Sticky, sweet buns with a thick icing on top - just like the iced buns from the bakery! This recipe makes four large buns but you could make eight smaller ones - see recipe notes.
Ingredients
- 150ml full fat milk
- 35g caster sugar
- 4g dried quick yeast
- 200g gluten free bread flour (I used FREEE)
- 1/2 tsp xanthan gum
- 1/2 tsp salt
- 1 large egg
- 1/2 tsp apple cider vinegar
- 2.5 tbsp vegetable oil
- 15g butter (melted)
For the icing:
- 250g icing sugar
- 2-3 tbsp water
Instructions
- Measure out the milk into a small pan and warm it on a very low heat until it is at skin temperature - i.e. you can't really feel the heat when you dip your finger in. Remove from the heat and pour into a jug.
- Stir the sugar into the warm milk and until dissolved, then add the yeast and stir again. Leave in a warm spot for 5-10 minutes for the yeast to activate. It should form a lovely froth on top when it's ready.
- Add the gluten free bread flour, xanthan gum and salt to a large mixing bowl and stir to mix together.
- In a separate mug or bowl, add the eggs, oil and vinegar and lightly whisk to combine.
- Once the yeast/milk mixture is active (frothy), add it to the flour along with the egg/oil mixture. Using a wooden spoon, beat the mixture together vigorously to combine it into a thick, sticky dough.
- Line a baking tray with baking paper. Using two spoons, roughly 'dollop' a quarter of the bread mixture onto the tray (approx 112g of mix) into a rough, sausage-like shape. Wet your hands with cold water and carefully shape the mixture into a roll-like shape (see blog post above for photos). Repeat with the rest of the mixture so you have 4 rolls of dough in a row, around 1-2 cm apart from each other.
- Cover the tray with oiled clingfilm and then leave in a warm spot to prove. It will take about an hour and the rolls should almost double in size and be touching each other.
- When the dough has nearly proved, preheat the oven to 200'C / Fan 180'C / Gas Mark 6. Remove the clingfilm and brush the tops of the dough with the melted butter. Place the tin in the centre of the oven.
- Bake for around 20-25 minutes until the tops of the buns are golden brown. If you find the buns go brown too quickly, cover with some tinfoil. Once baked, remove from the oven and leave to cool for around half an hour.
- Once the buns have cooled, mix the icing sugar with the water to form a thick paste which is just spreadable. Add the water a little at a time until you get the desired consistency.
- Spread the icing over the buns in a thick layer and leave to set before eating.
Notes
- I have made these iced buns in a small batch of four as they are best eaten fresh on the day of making.
- If you'd rather make 8 smaller iced buns, carry out the steps as above but bake for 15-20 minutes - keep an eye on them and remove once they're golden brown and cooked through.
Nutrition Information:
Yield:
4Serving Size:
1Amount Per Serving: Calories: 684Total Fat: 18gSaturated Fat: 4gTrans Fat: 0gUnsaturated Fat: 13gCholesterol: 58mgSodium: 614mgCarbohydrates: 123gFiber: 4gSugar: 76gProtein: 9g
Need some more gluten free baking inspiration?
If you want to have a go at some of the other gluten free baking recipes on the blog, why not give some of these a try? They’re perfect for baking away all of your troubles.
- My easy gluten free focaccia recipe
- Baked cinnamon doughnuts
- Gluten Free Jammy Dodgers
- Gluten free soda bread
If you do make this recipe please let me know! I’d love to see your photos using #theglutenfreeblogger, share them in my Facebook group or tag me on Instagram.
And if you have any recipe suggestions, please let me know in the comments what you’d like to see next!
Like this gluten free iced buns recipe? Pin this recipe card below for later!


These were fabulous. Do you think I could make honey buns using this recipe?