This post may contain affiliate links for which I earn a small commission at no extra cost to you. For more info, check out my Disclosure Policy. Thank you for your support!
These Gluten Free Breadsticks are perfectly golden and crisp on the outside, with a soft middle. Whether you’re making a charcuterie board, want dips and nibbles or are serving them as a side to saucy pasta, they’re so easy to make! Gluten free, dairy free and vegan!

Crispy on the outside, soft on the inside!
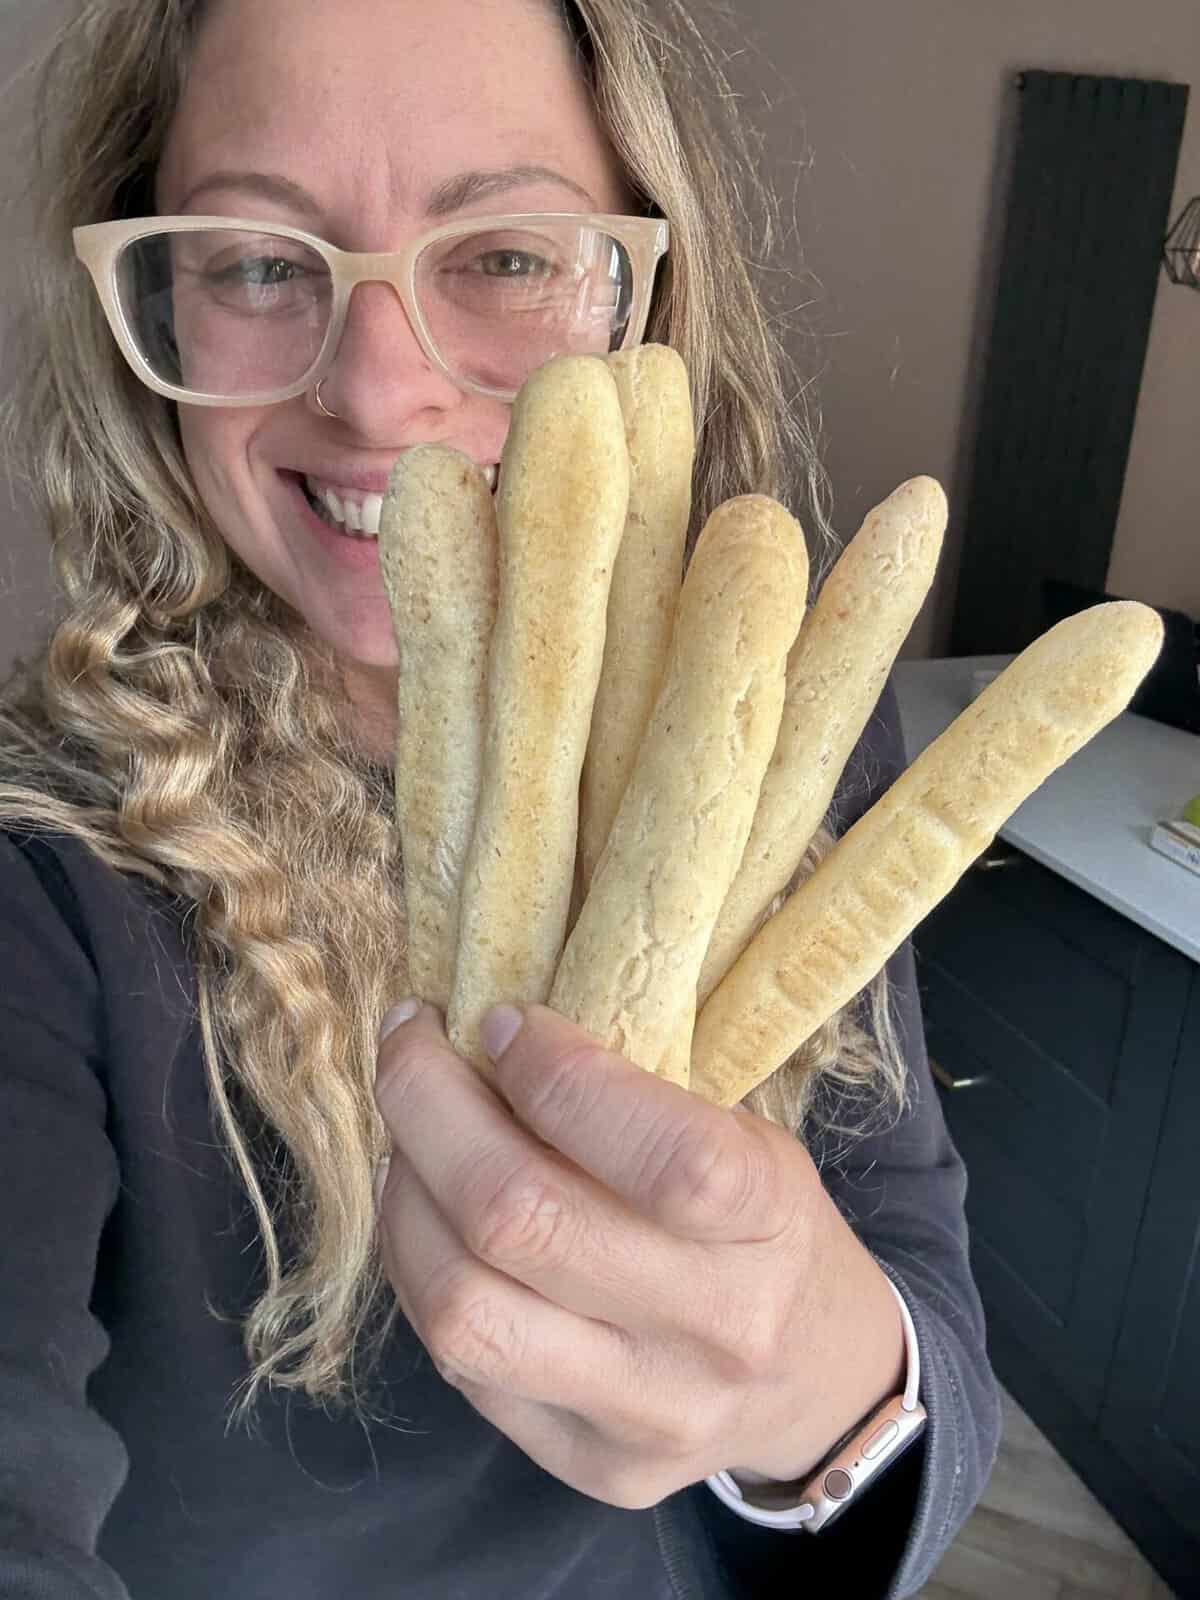
- Why choose this recipe? These gluten free breadsticks are a bit like me – under that crispy, golden exterior is a soft and chewy middle 😆 they are perfect for parties, picnics or cheeseboards, and something us gluten free folk shouldn’t miss out on.
- Top Tip: These soft gluten free breadsticks are definitely best served fresh. Always give them 15 minutes after baking for the gums to settle though!
- Serving Suggestions: Dip these breadsticks in tzatziki or homemade pesto, serve them alongside saucy pasta like spaghetti bolognese, or use them for dipping in your favourite gluten free soup. Perfect for everything from picnics to Christmas parties.
- Updated for 2025: I first published this recipe in 2019 in my Christmas ebook (which is no longer on sale!) but I’ve now tweaked improved the recipe for 2025 to make them easier to shape and so much tastier! Plus I’ve added some new photos and step-by-step images to make this recipe completely foolproof!
Table of Contents
Ingredients and Substitutions
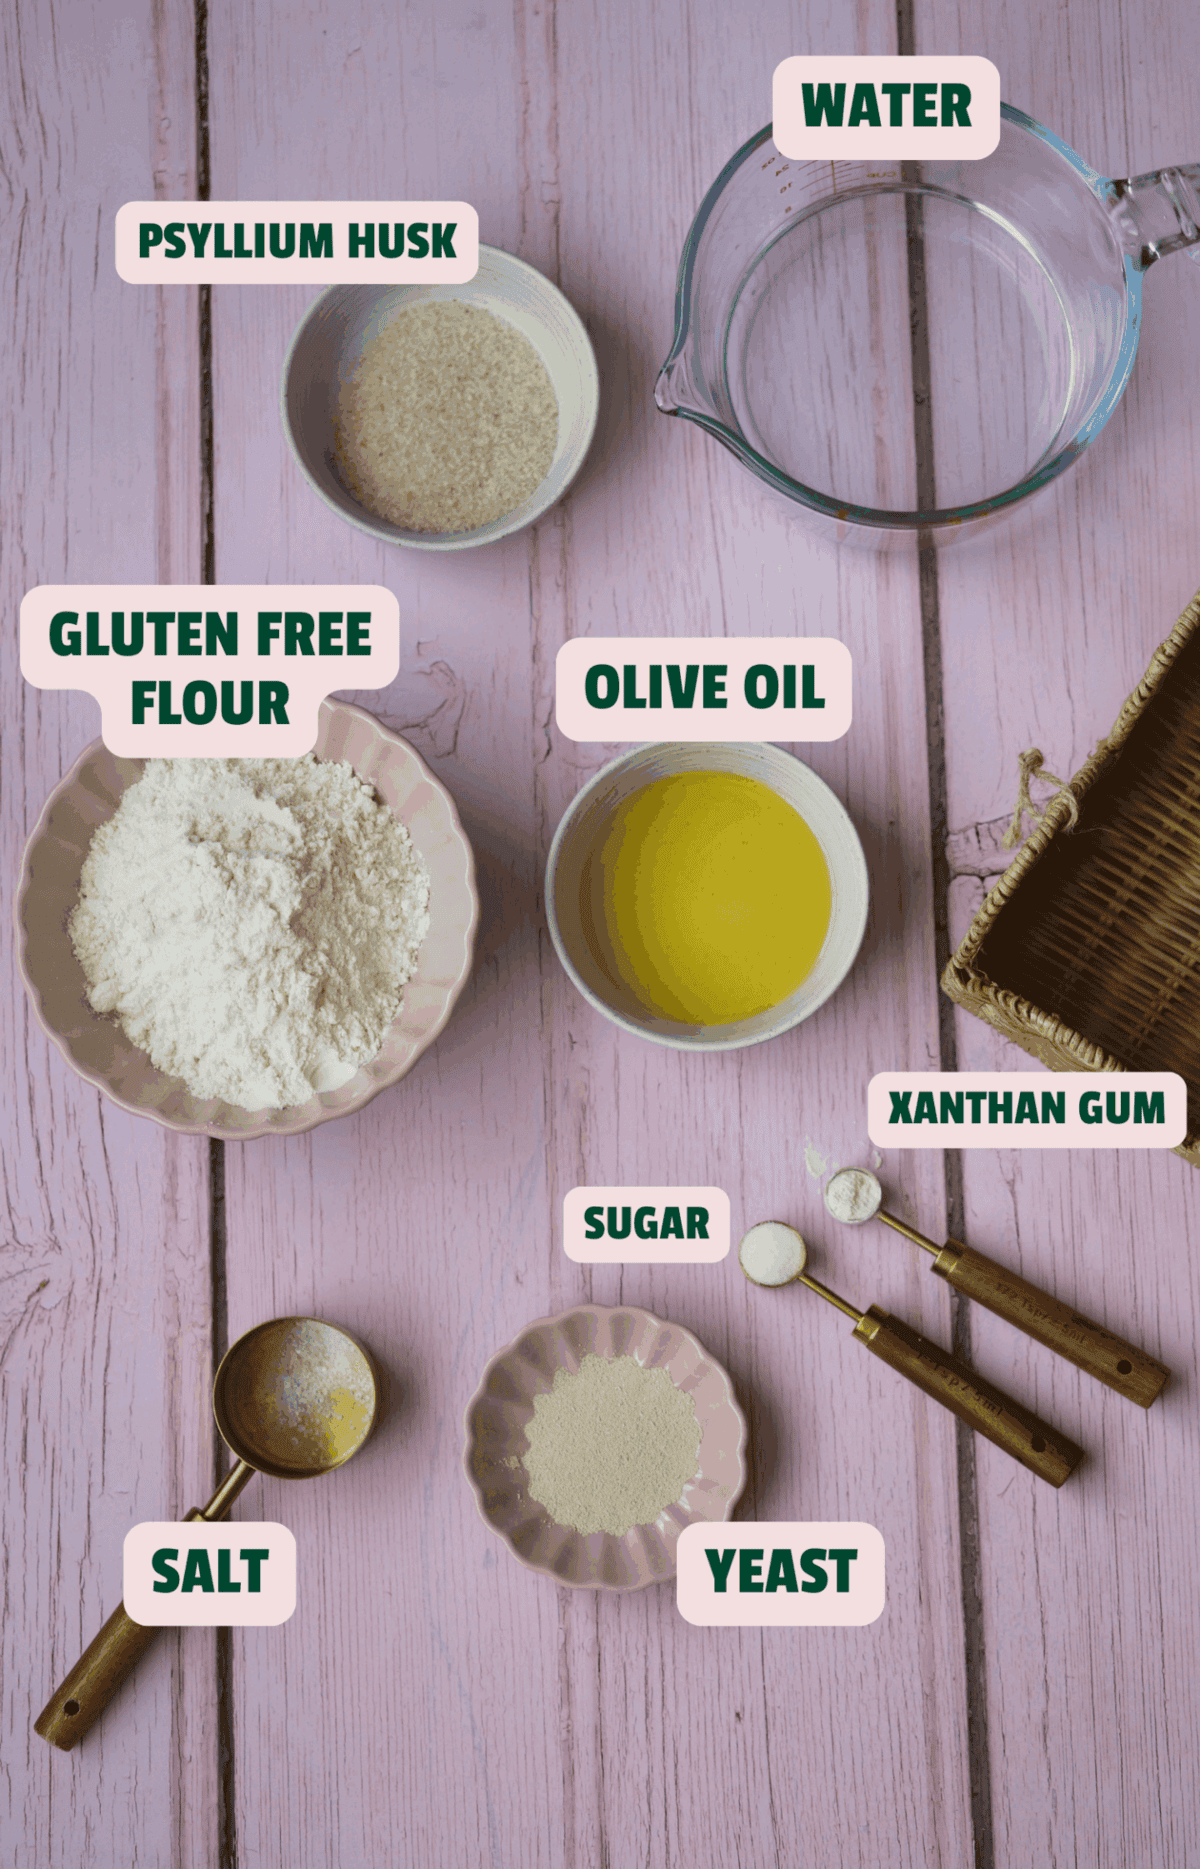
There’s a printable recipe card below for these gluten free breadsticks with the full quantities. But here are the main ingredients and ideas for any swaps.
- Yeast: I use the FREEE quick yeast from the free from aisle, or the Allinson’s easy bake yeast. Both are gluten free.
- Sugar: Use honey if you prefer, this is to help activate the yeast.
- Psyllium Husk: If you like making gluten free bread it is well worth buying some psyllium husk – a little goes a long way! It’s a great source of fibre and creates a gel which makes the dough so easy to handle. Make sure you get a whole blond psyllium husk otherwise your bread may turn purple!
- Plain Gluten Free Flour: I use the FREEE plain flour, but any supermarket blend will work. You can also use the FREEE gluten free white bread flour if you prefer.
- Xanthan Gum: This really helps with the texture of the dough.
- Olive Oil: Or mix it up with garlic or chilli oil if you want to flavour your breadsticks.
How to Make Gluten Free Breadsticks
There’s a printable recipe card below with the method. But here are some step-by-step photos to show you how easy this gluten free breadsticks are to make.
Storing and Freezing Instructions
TO STORE: These gluten free breadsticks are best eaten fresh while still warm. If making in advance, store in an airtight container and refresh them in the oven or air fryer before serving warm.
TO FREEZE: These breadsticks can be frozen and then defrosted at room temperature, or refreshed in the oven from frozen. Either way they will need to be served warm!
Frequently Asked Questions
Here are some FAQs about this gluten free bread sticks recipe. If you can’t find the answer to your question here or in the post above, please comment and I’ll try answer!
If you want to avoid yeast, follow my gluten free doughballs recipe using yoghurt and gluten free flour, and then roll the dough into sticks instead. Bake until golden brown and you’ll have gluten and yeast free breadsticks!
Serving Suggestions
These easy breadsticks are great for serving as part of a party platter for Christmas, Thanksgiving, picnics, birthdays, The Super Bowl – you name it!
If you’re inspired and want some ideas of things to serve with them, here are some of my favourite things to dish up with these breadsticks, from dips to buffet foods:
- Homemade Tzatziki
- Avocado and Pineapple Salsa
- Pear Chutney
- Caramelised Onion Houmous
- Gluten Free Ritz Crackers
- Gluten Free Blinis
- Gluten Free Crackers (for a cheeseboard spread)
- Gluten Free Twiglets
- Gluten Free Mini Cheddars
- Gluten Free Vol au Vents
Have you tried this recipe?
I have a huge favour to ask! It’s getting more and more difficult to get my recipes out there to the world – so if you try this and love it, it would mean a HUGE amount if you’d come back and leave a ⭐️⭐️⭐️⭐️⭐️ review and a little comment telling me what you thought! Just 30 seconds of your time would be such a huge support! 💛
Want to connect further?
- Tag me on Instagram with your amazing creations so I can share them!
- Join my Facebook group to meet other awesome gluten free people
Gluten Free Breadsticks Recipe
Equipment
Ingredients
- 5 g dried active yeast
- 1 tsp sugar
- 150 ml warm water
- 1 tbsp psyllium husk, + 3 tbsp warm water
- 250 g plain gluten free flour
- 0.5 tsp xanthan gum
- 1 tsp salt
- 1 tbsp olive oil, plus extra for brushing
Instructions
- Preheat the oven to 200C / Fan 180C / Gas Mark 6 / 392F. Line two large baking trays with parchment paper.
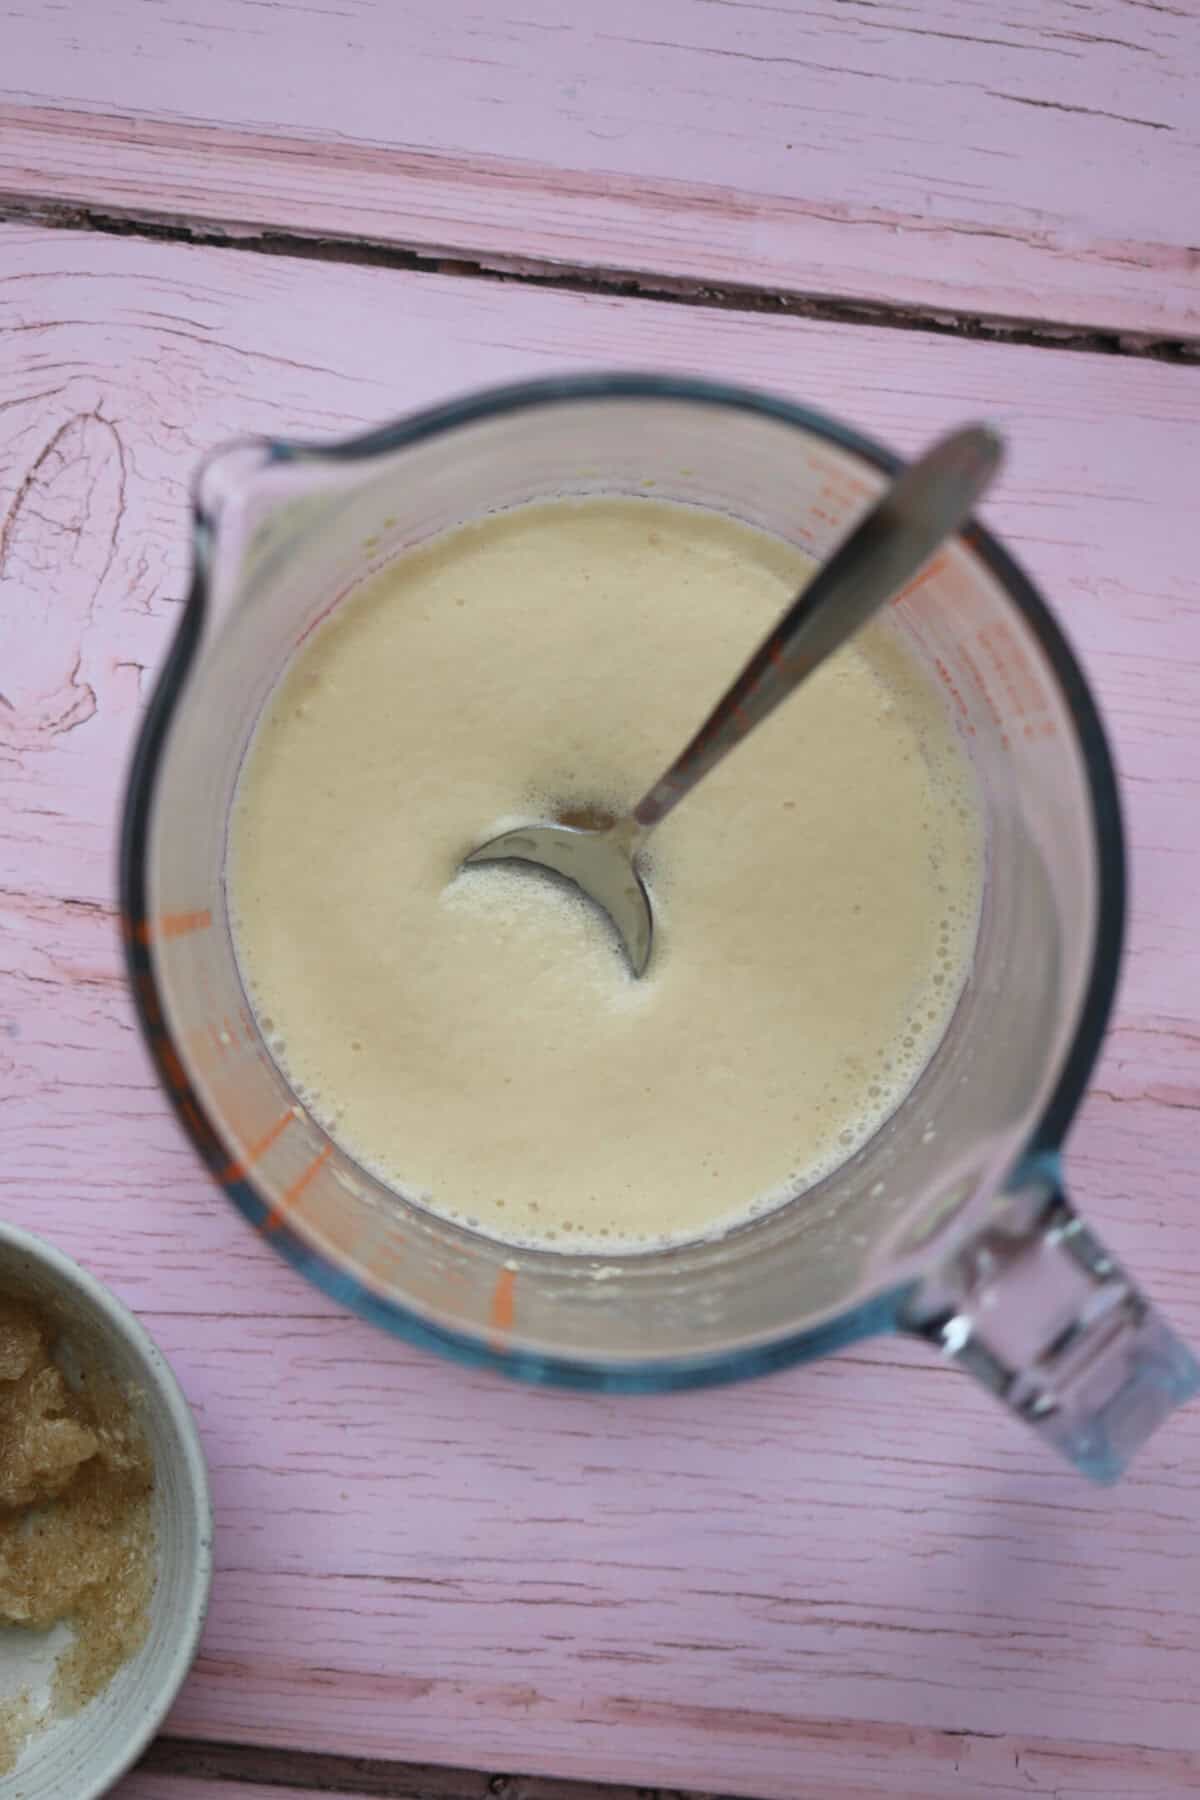
- Add the warm water (you want it to be around 40C) to a jug then stir in the sugar, Add the yeast, stir and cover for 5-10 minutes until it forms a frothy head.
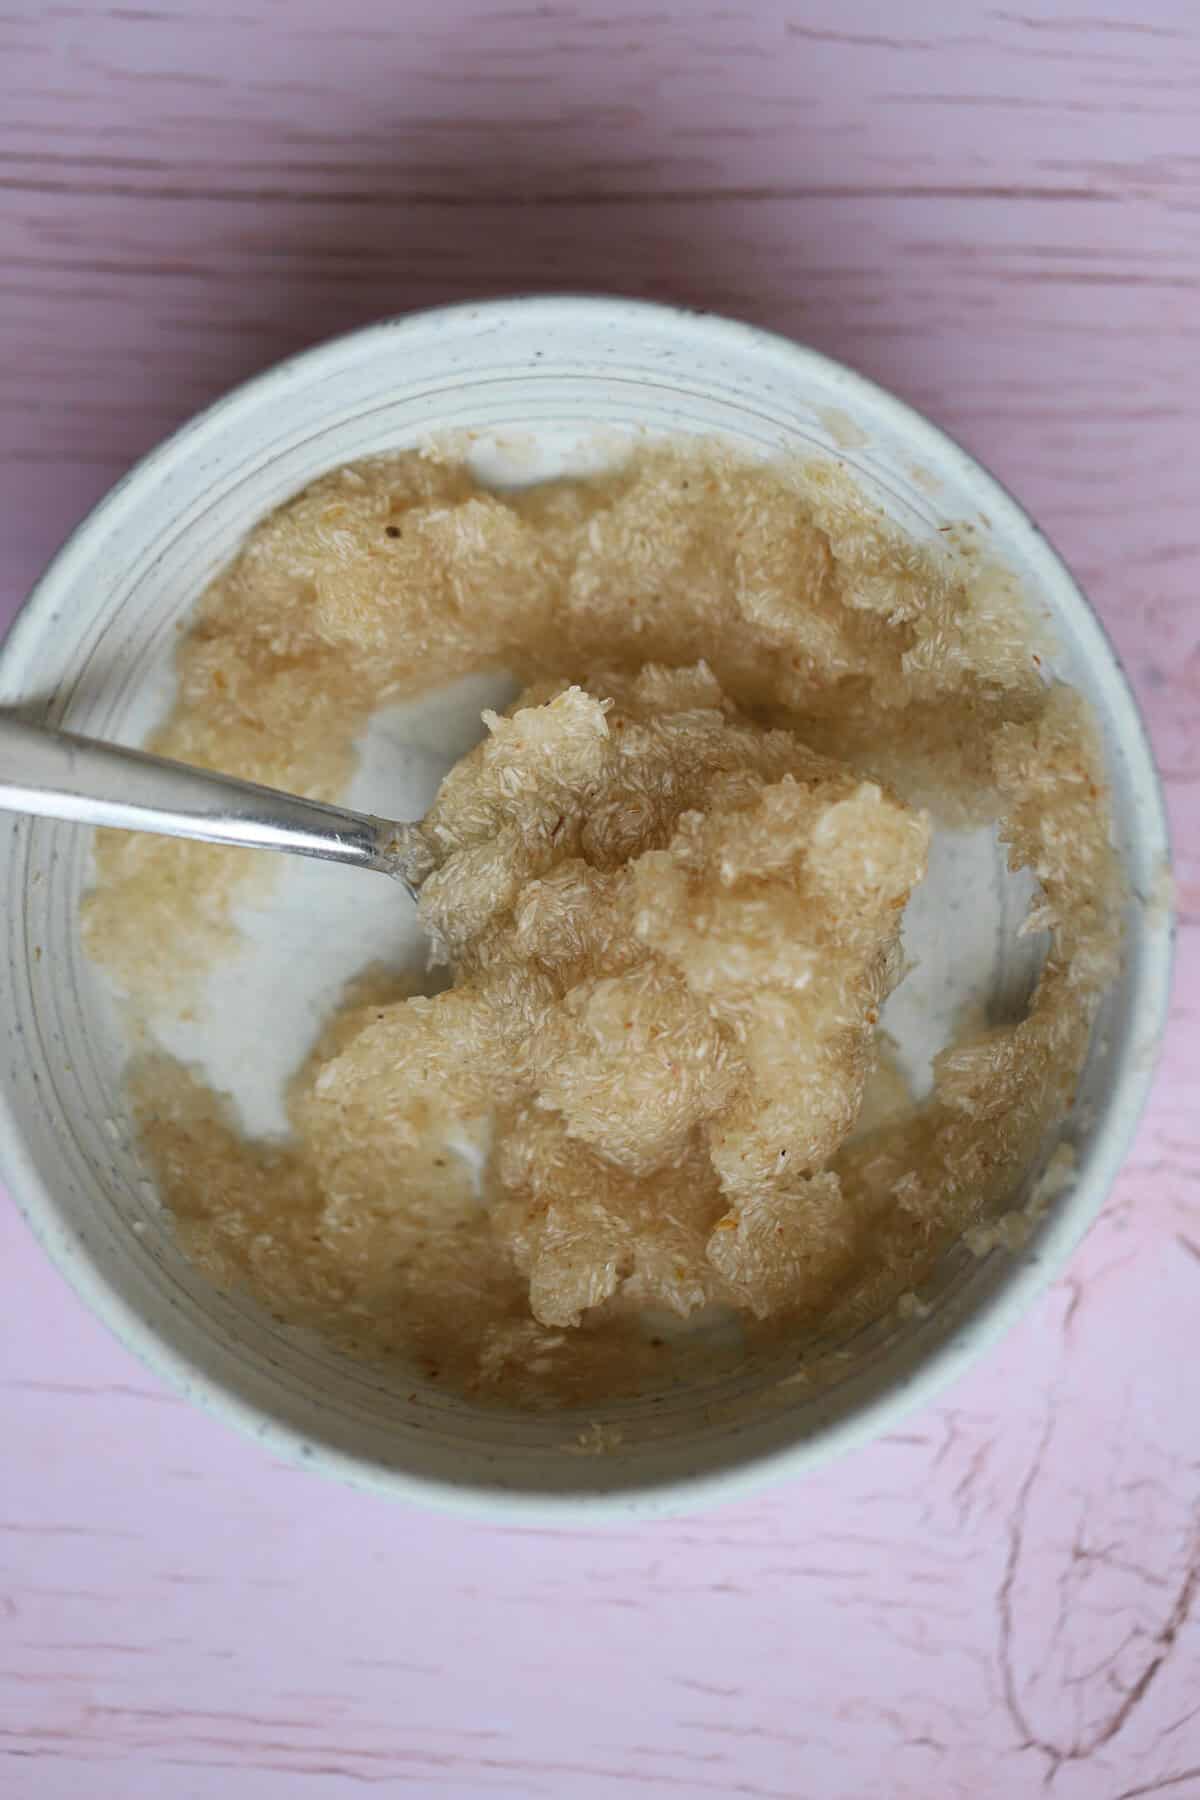
- While the yeast activates, mix the psyllium husk with 3 tbsp warm water in a separate bowl to form a thick gel. Set to one side until the yeast is ready.
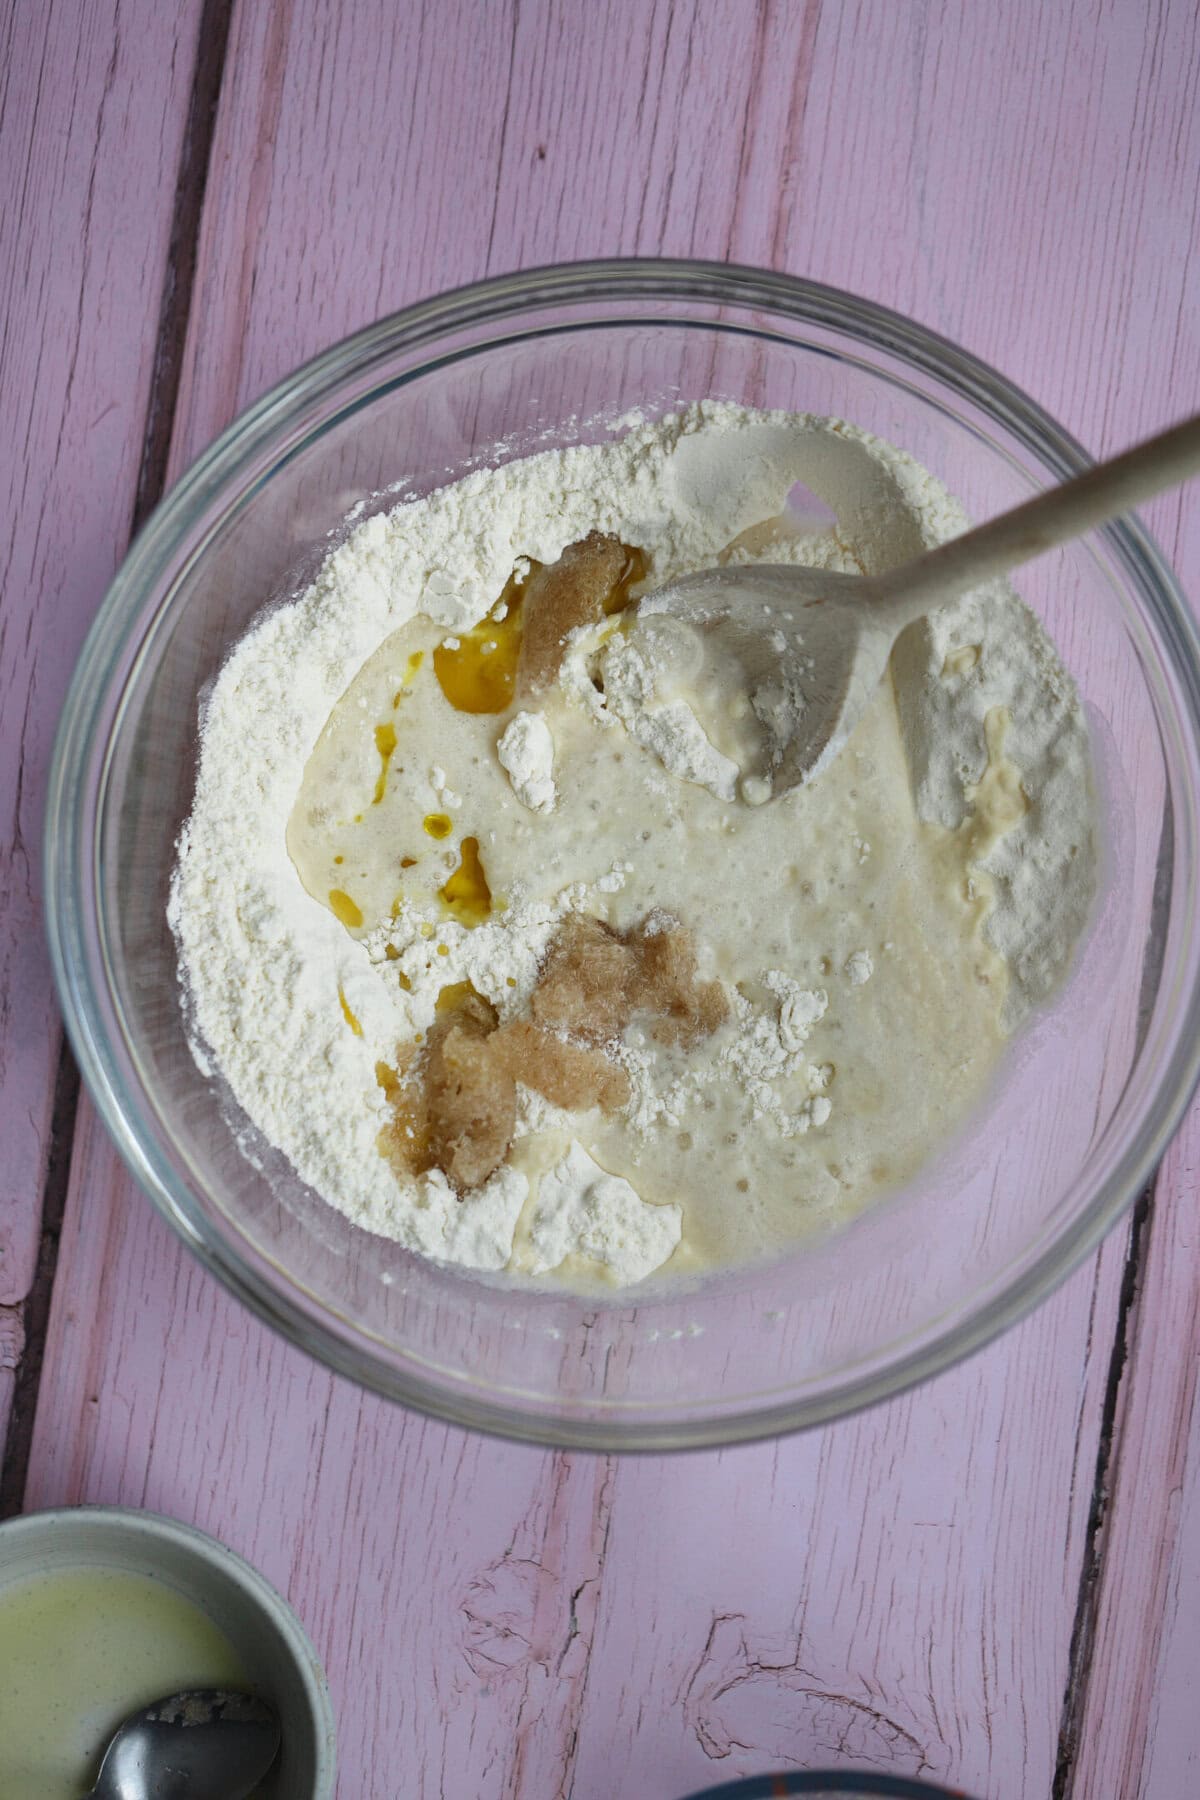
- Add the gluten free flour, salt and xanthan gum to a large mixing bowl and stir together.
- When the yeast is ready, add the mix to the dry ingredients, along with the psyllium husk gel and the olive oil. Mix together using a wooden spoon until it starts to form a sticky dough.
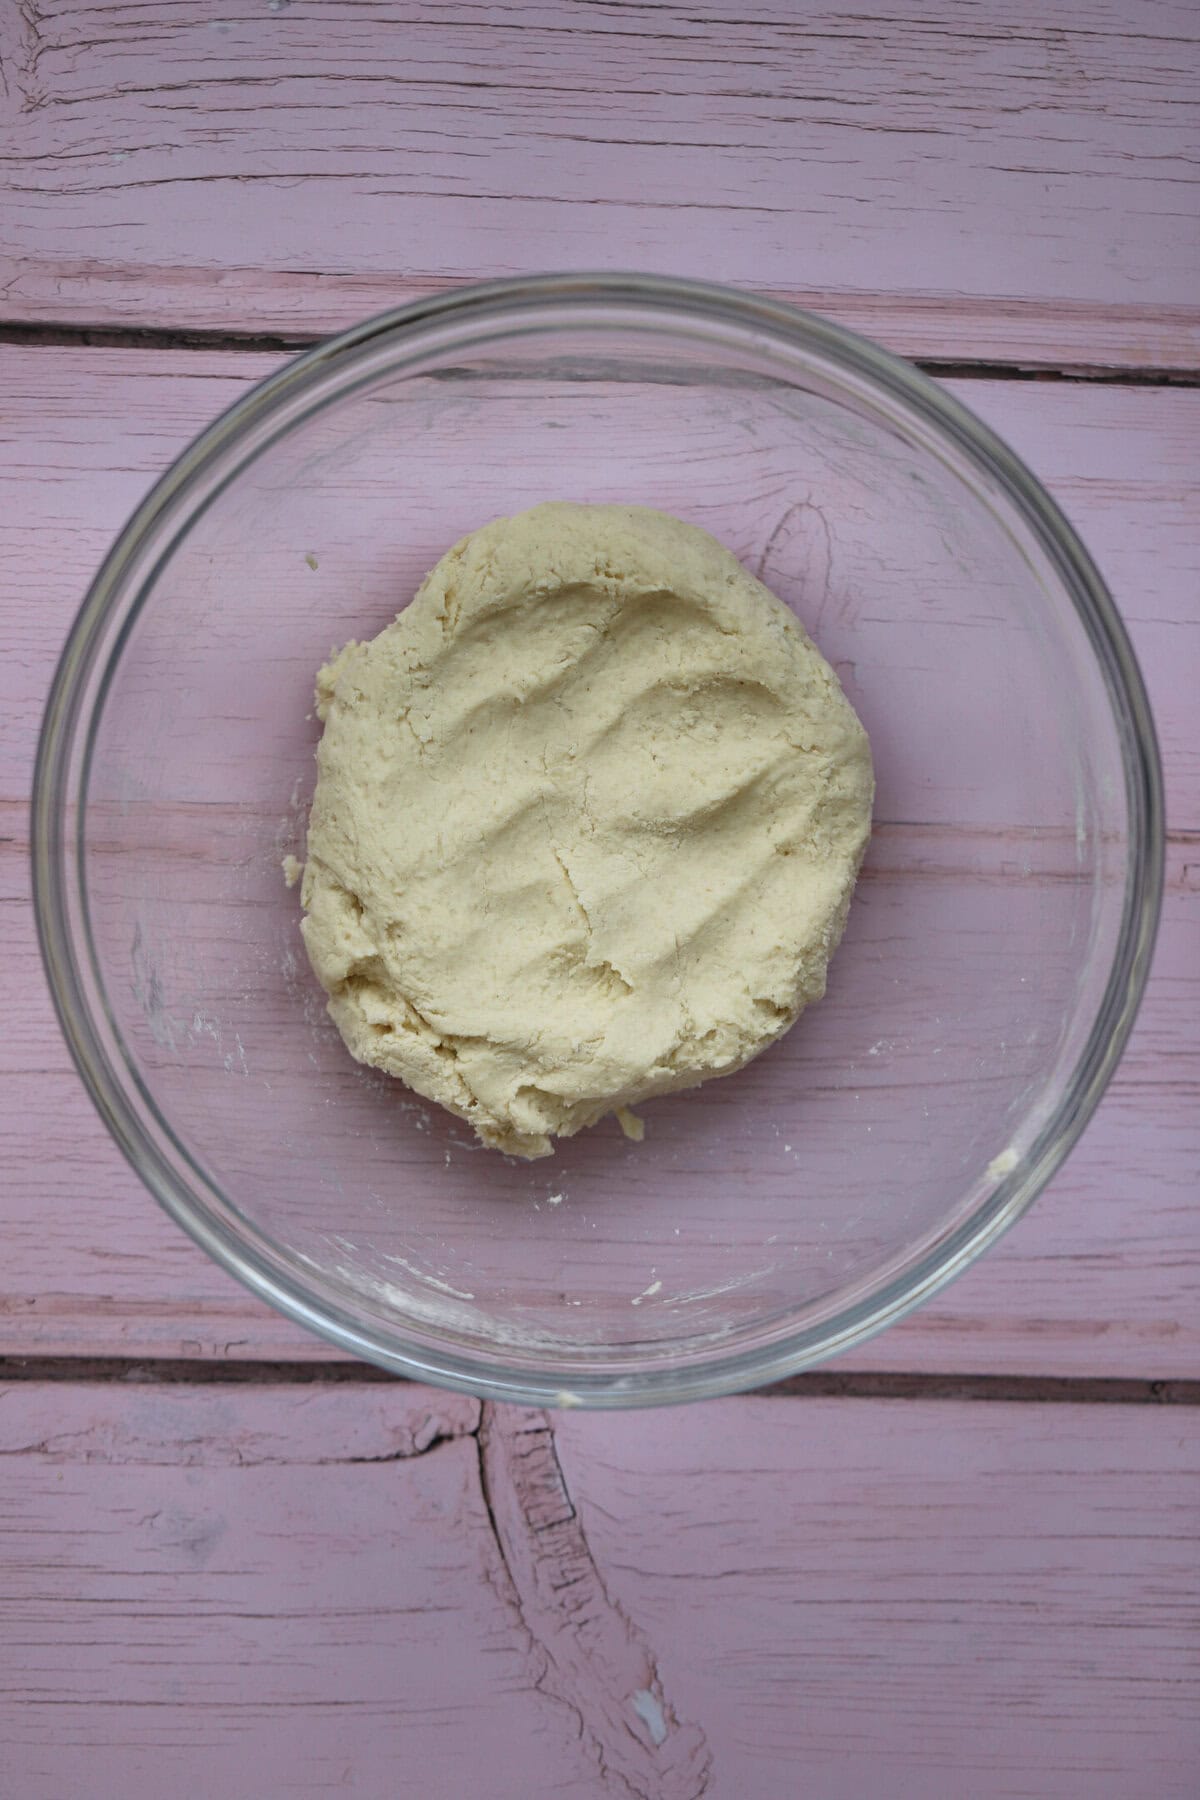
- Use your hands to bring the dough together into a ball then leave for 5-10 minutes to hydrate.
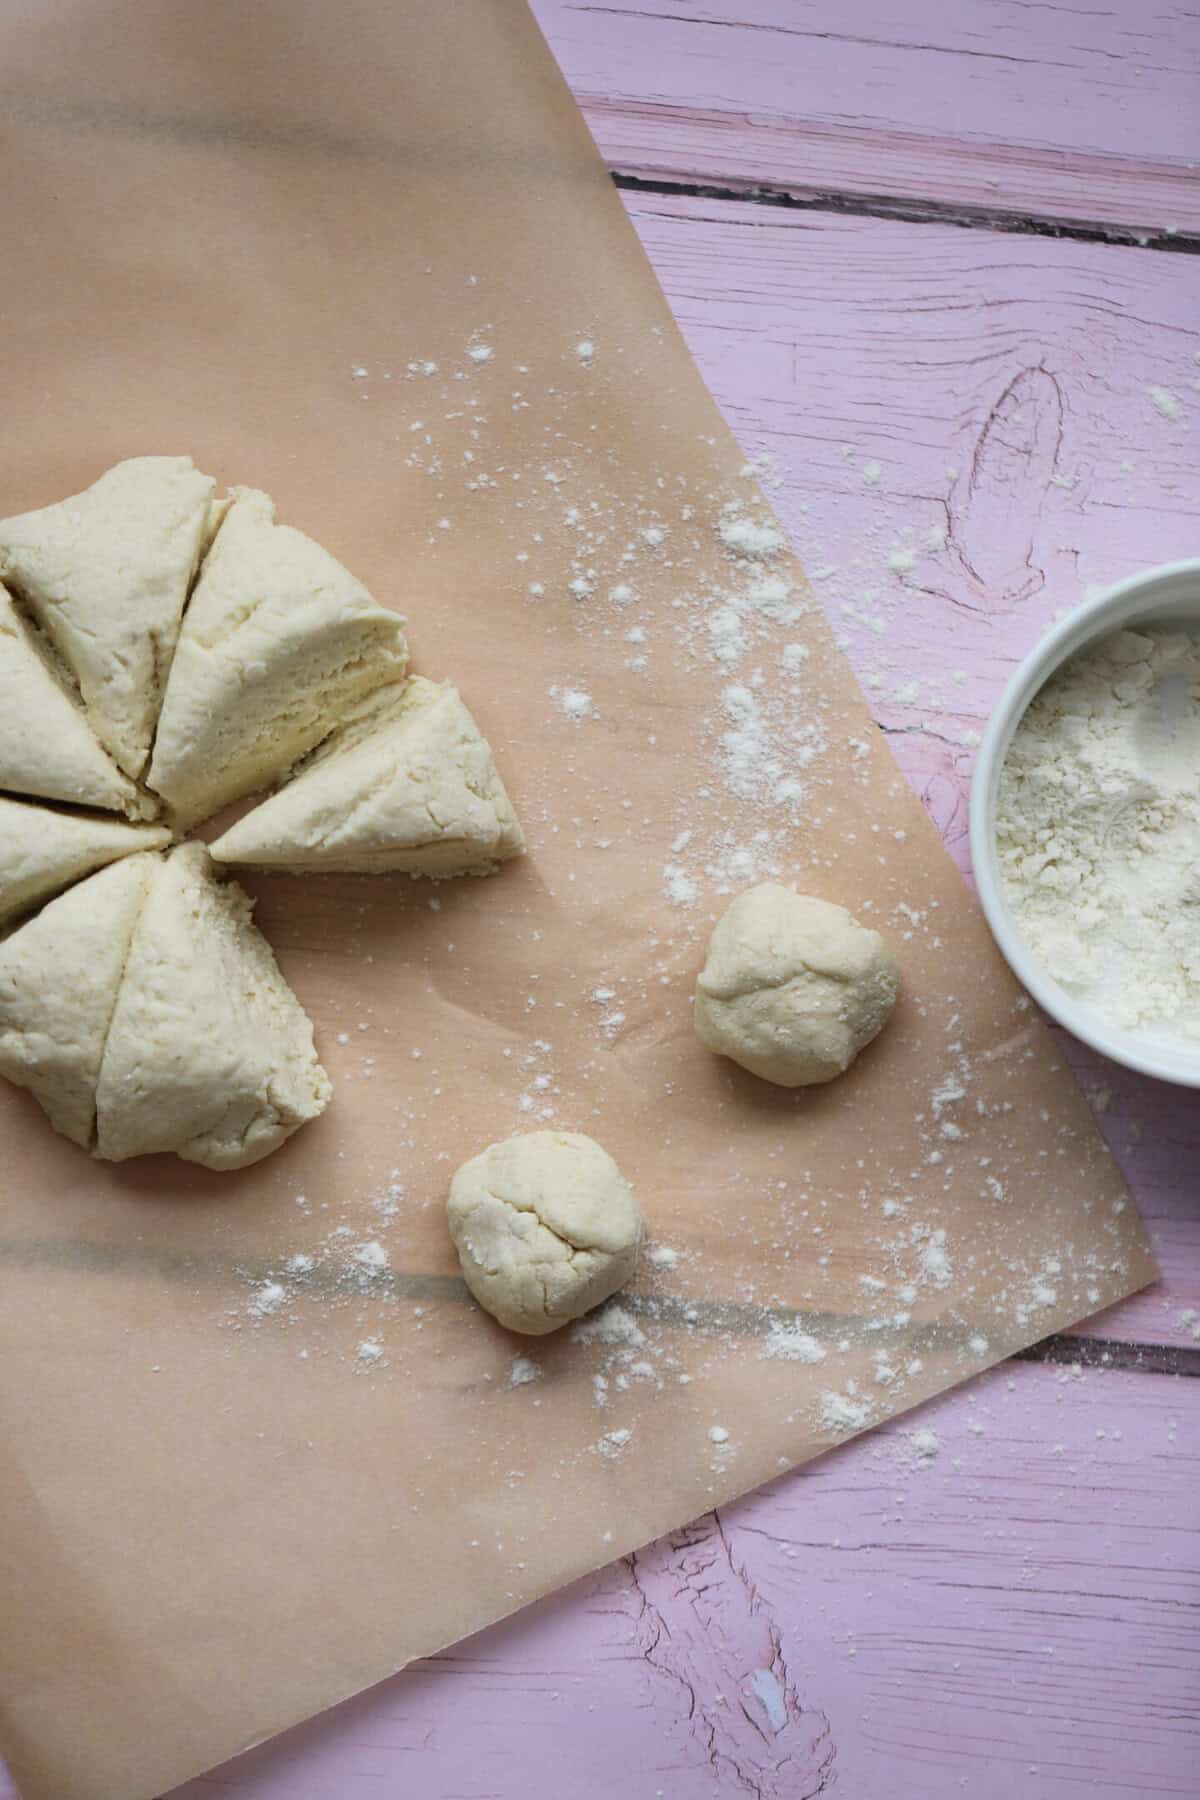
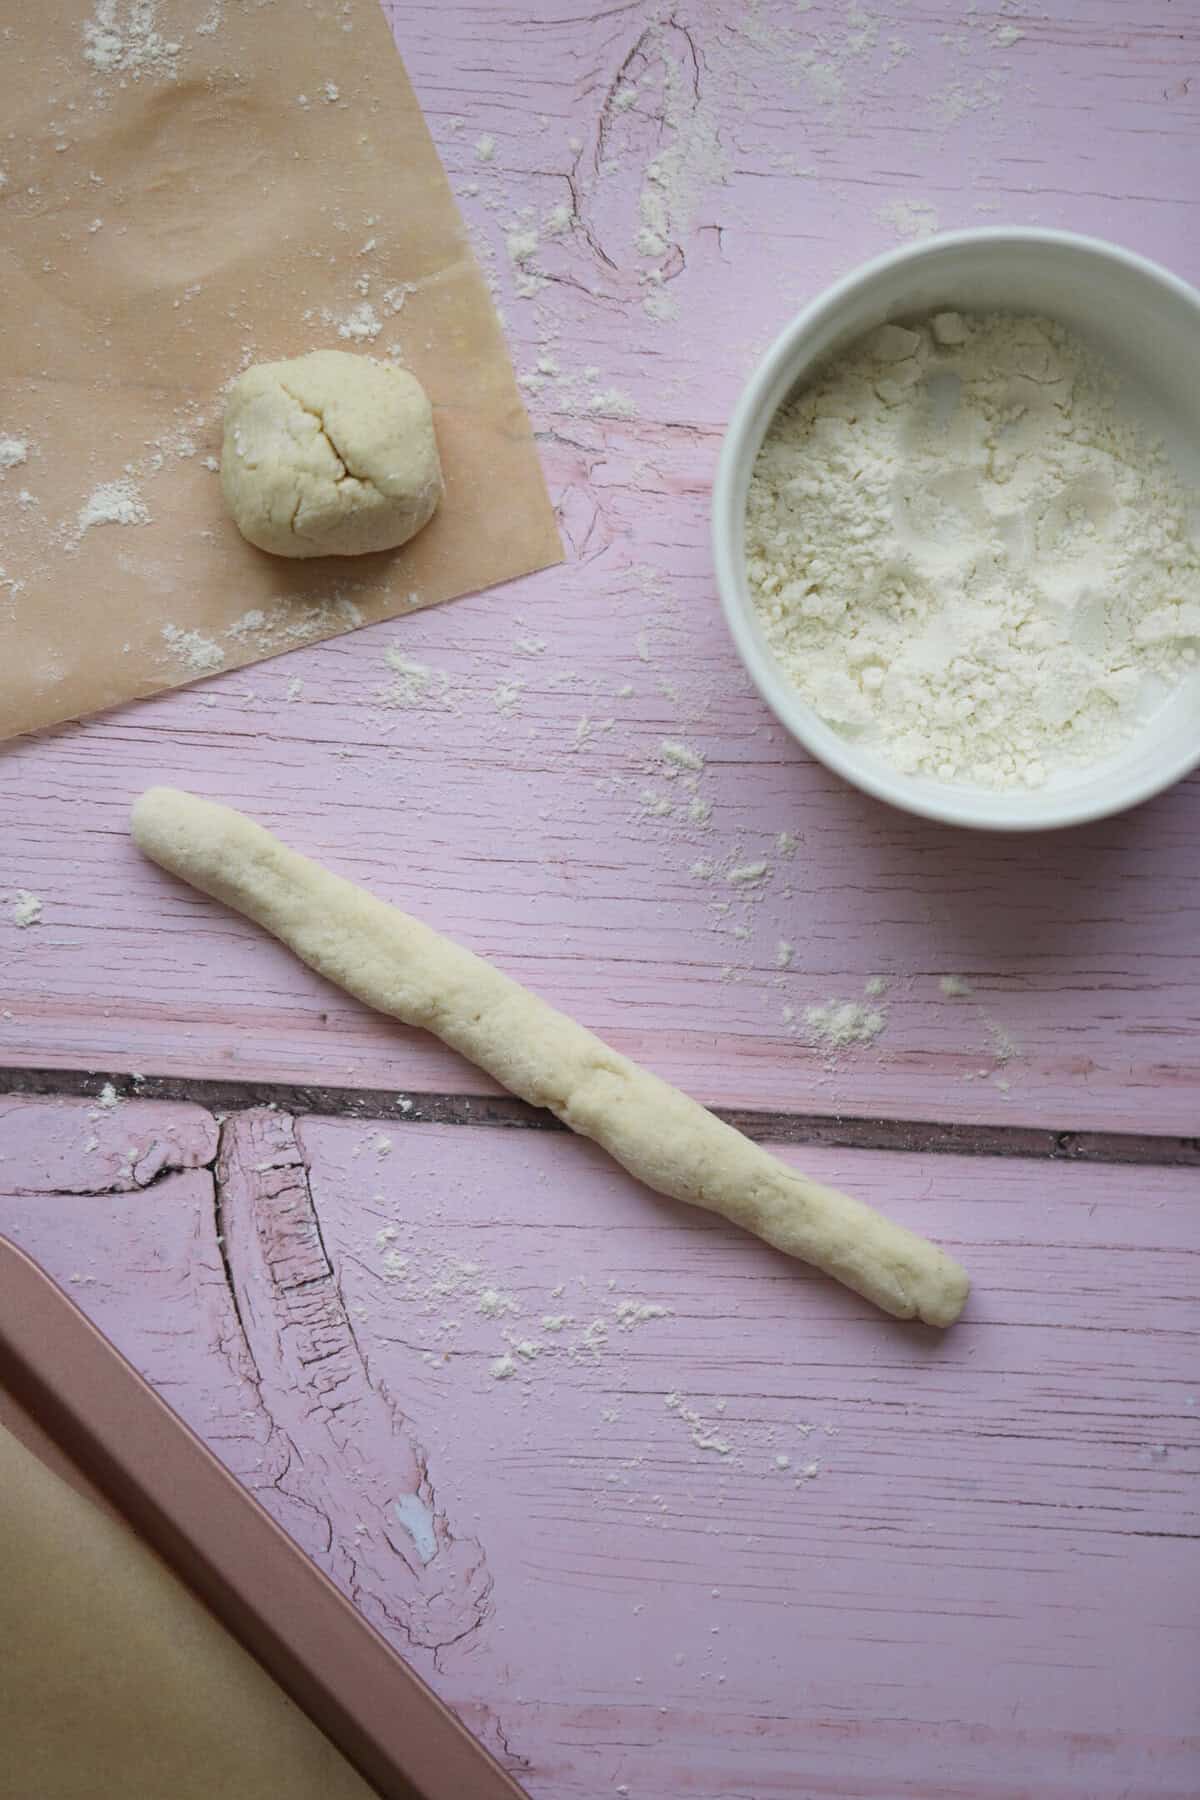
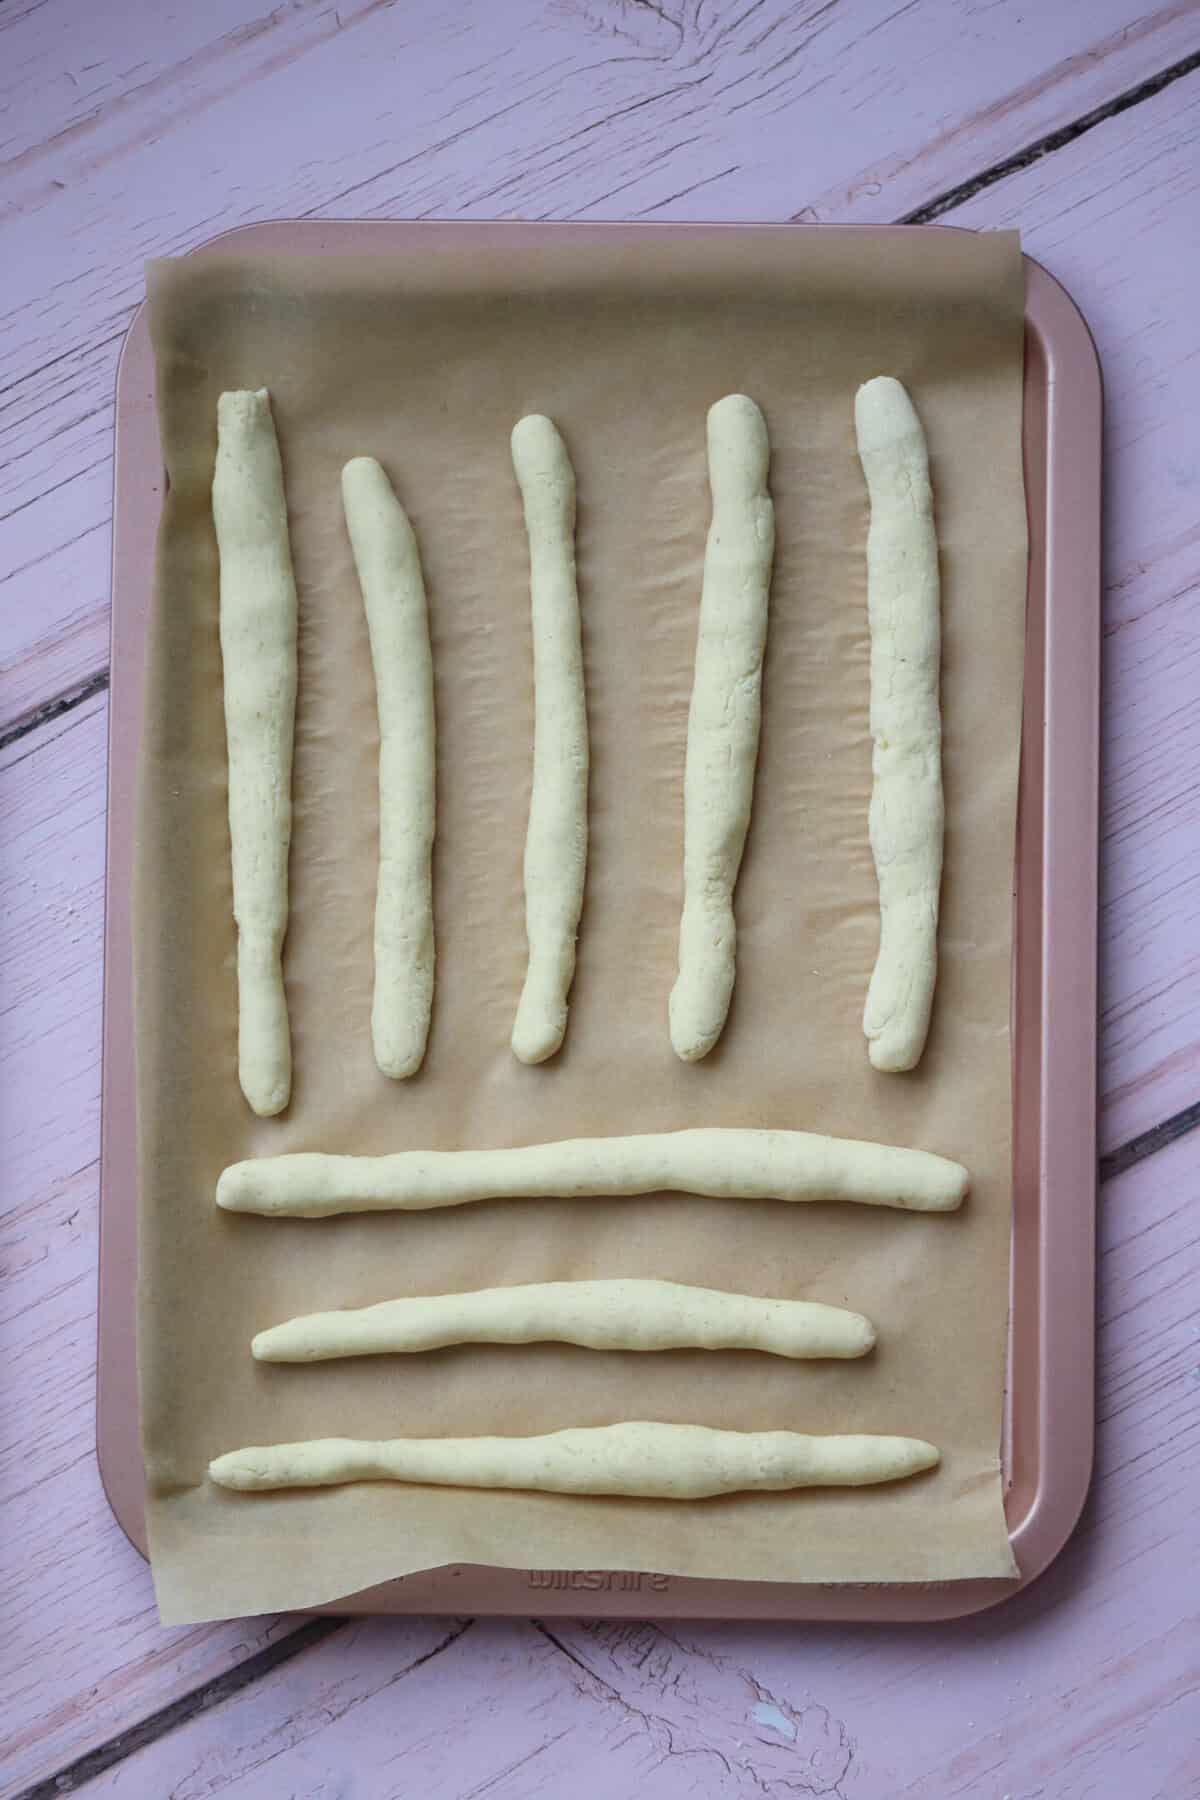
- Divide the dough into 16 equal potions, and roll each one into a ball. Then use your hands to roll it on the worktop into a long sausage, around 6-7 inches in length and around 1.25cm (0.5 inches) thick. You can use a little extra GF flour if needed but the dough should not be too stick at this stage.
- Carefully lay the breadsticks onto the lined baking trays with some space in between. Leave to prove, uncovered for 10-15 minutes (they will not rise much at all).
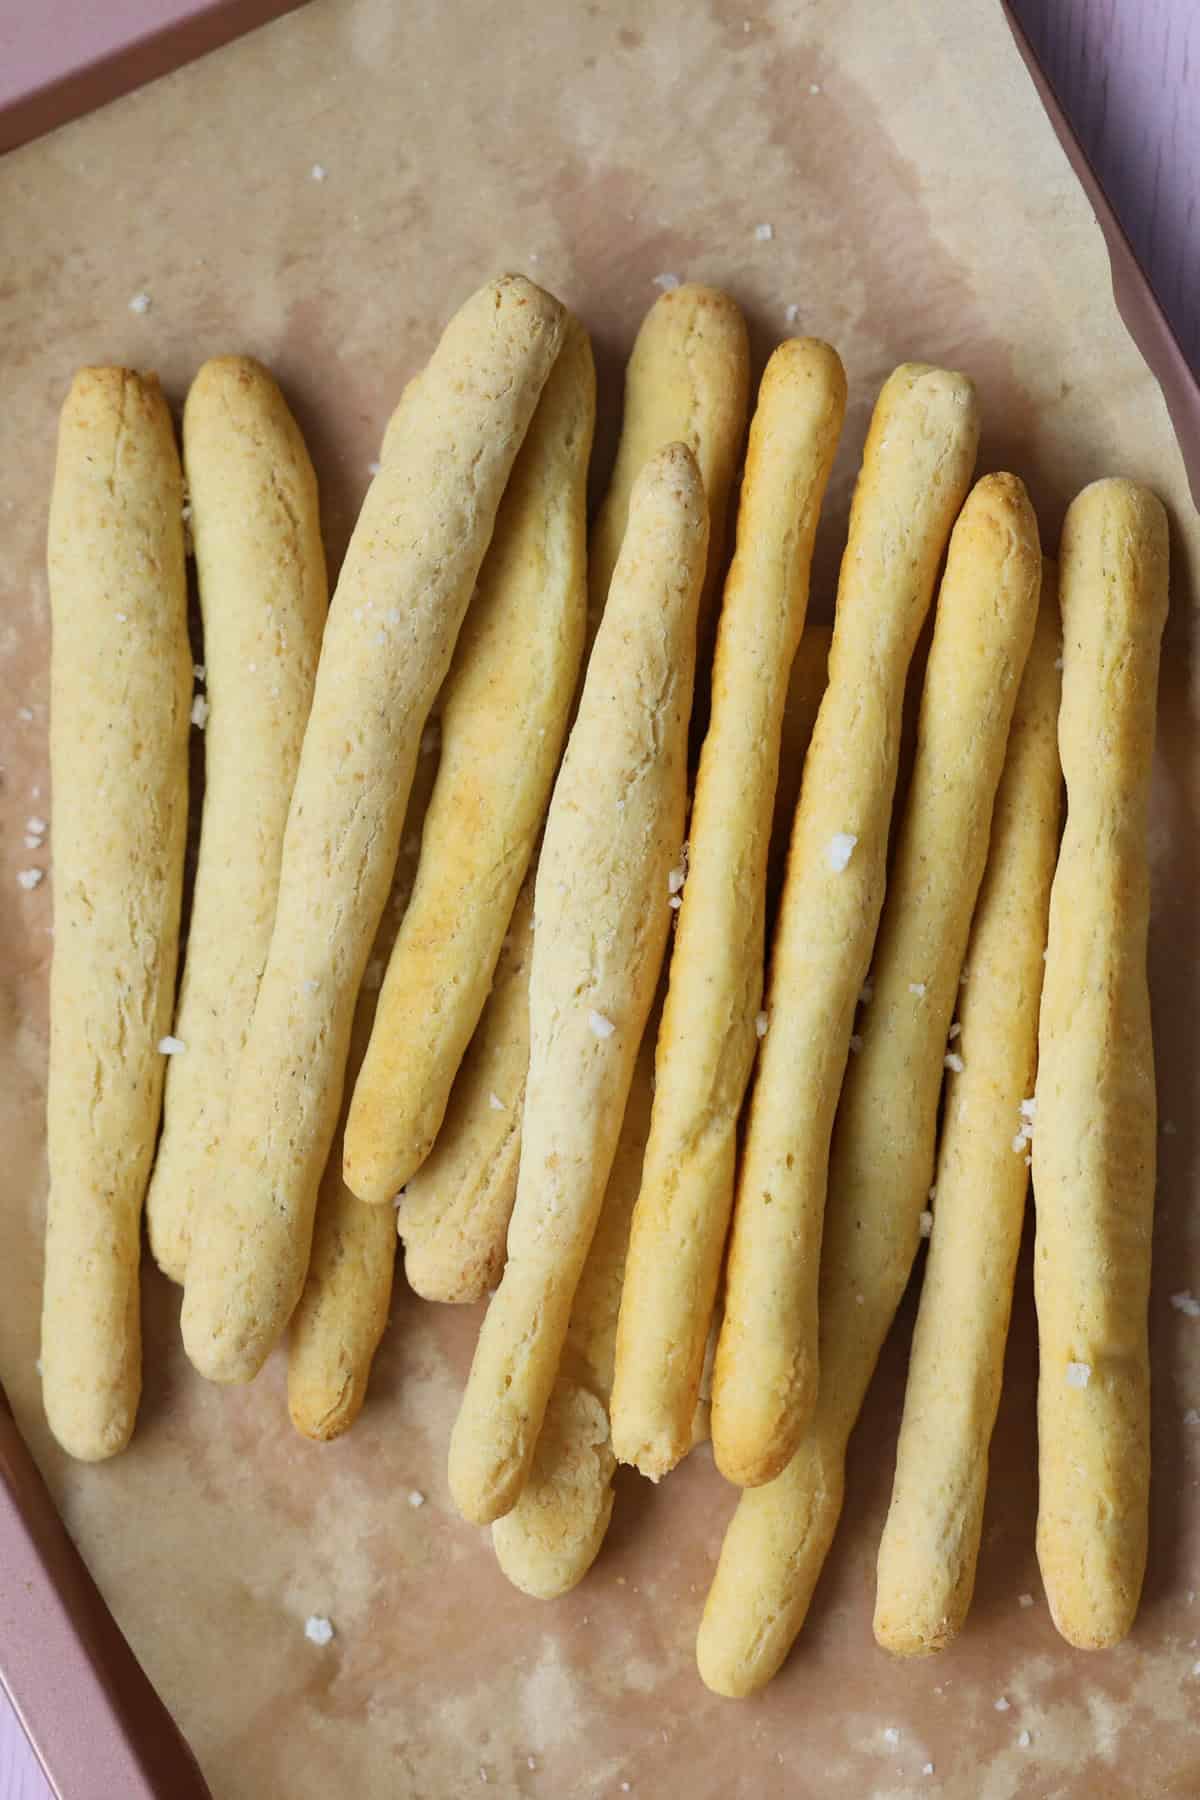
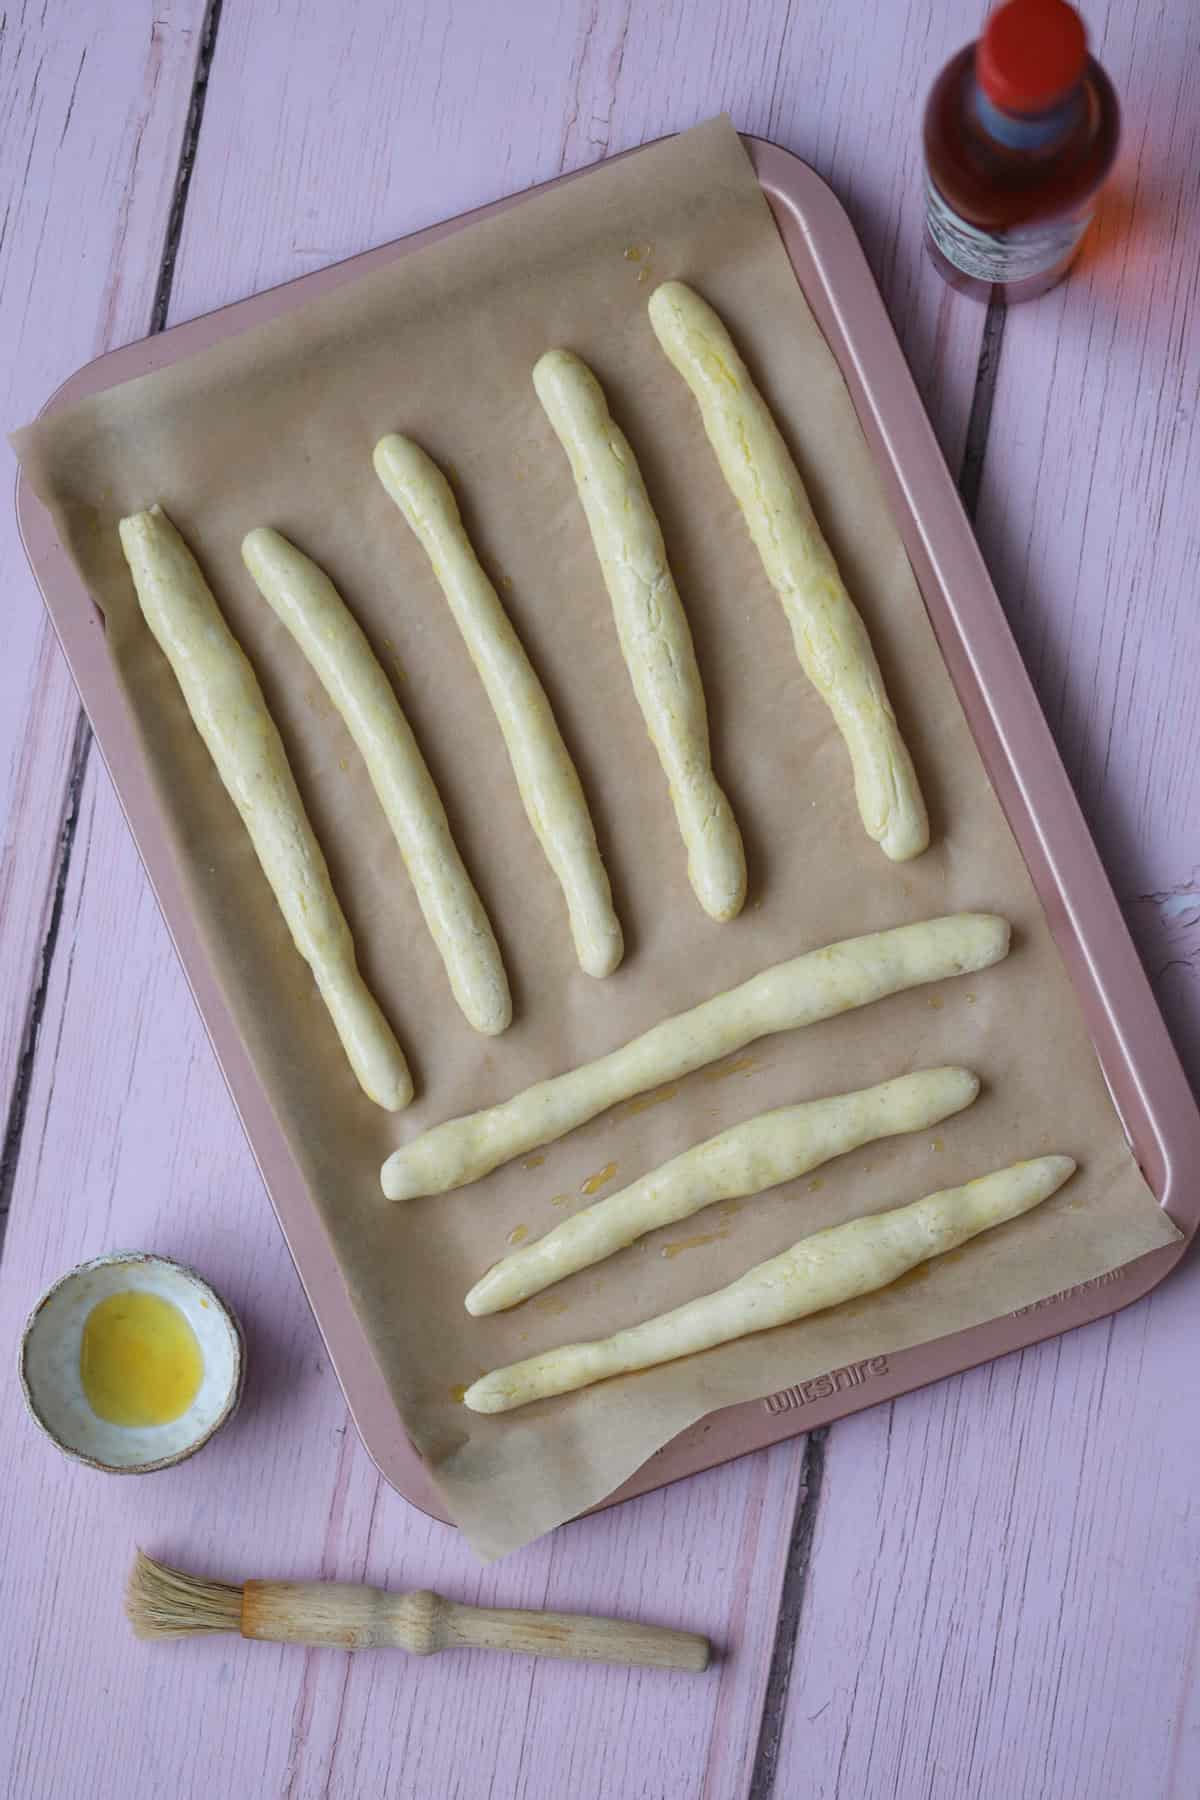
- Brush the breadsticks with olive oil and bake for 15-20 minutes (depending on the thickness) until golden brown. The outside should be crispy to the touch.
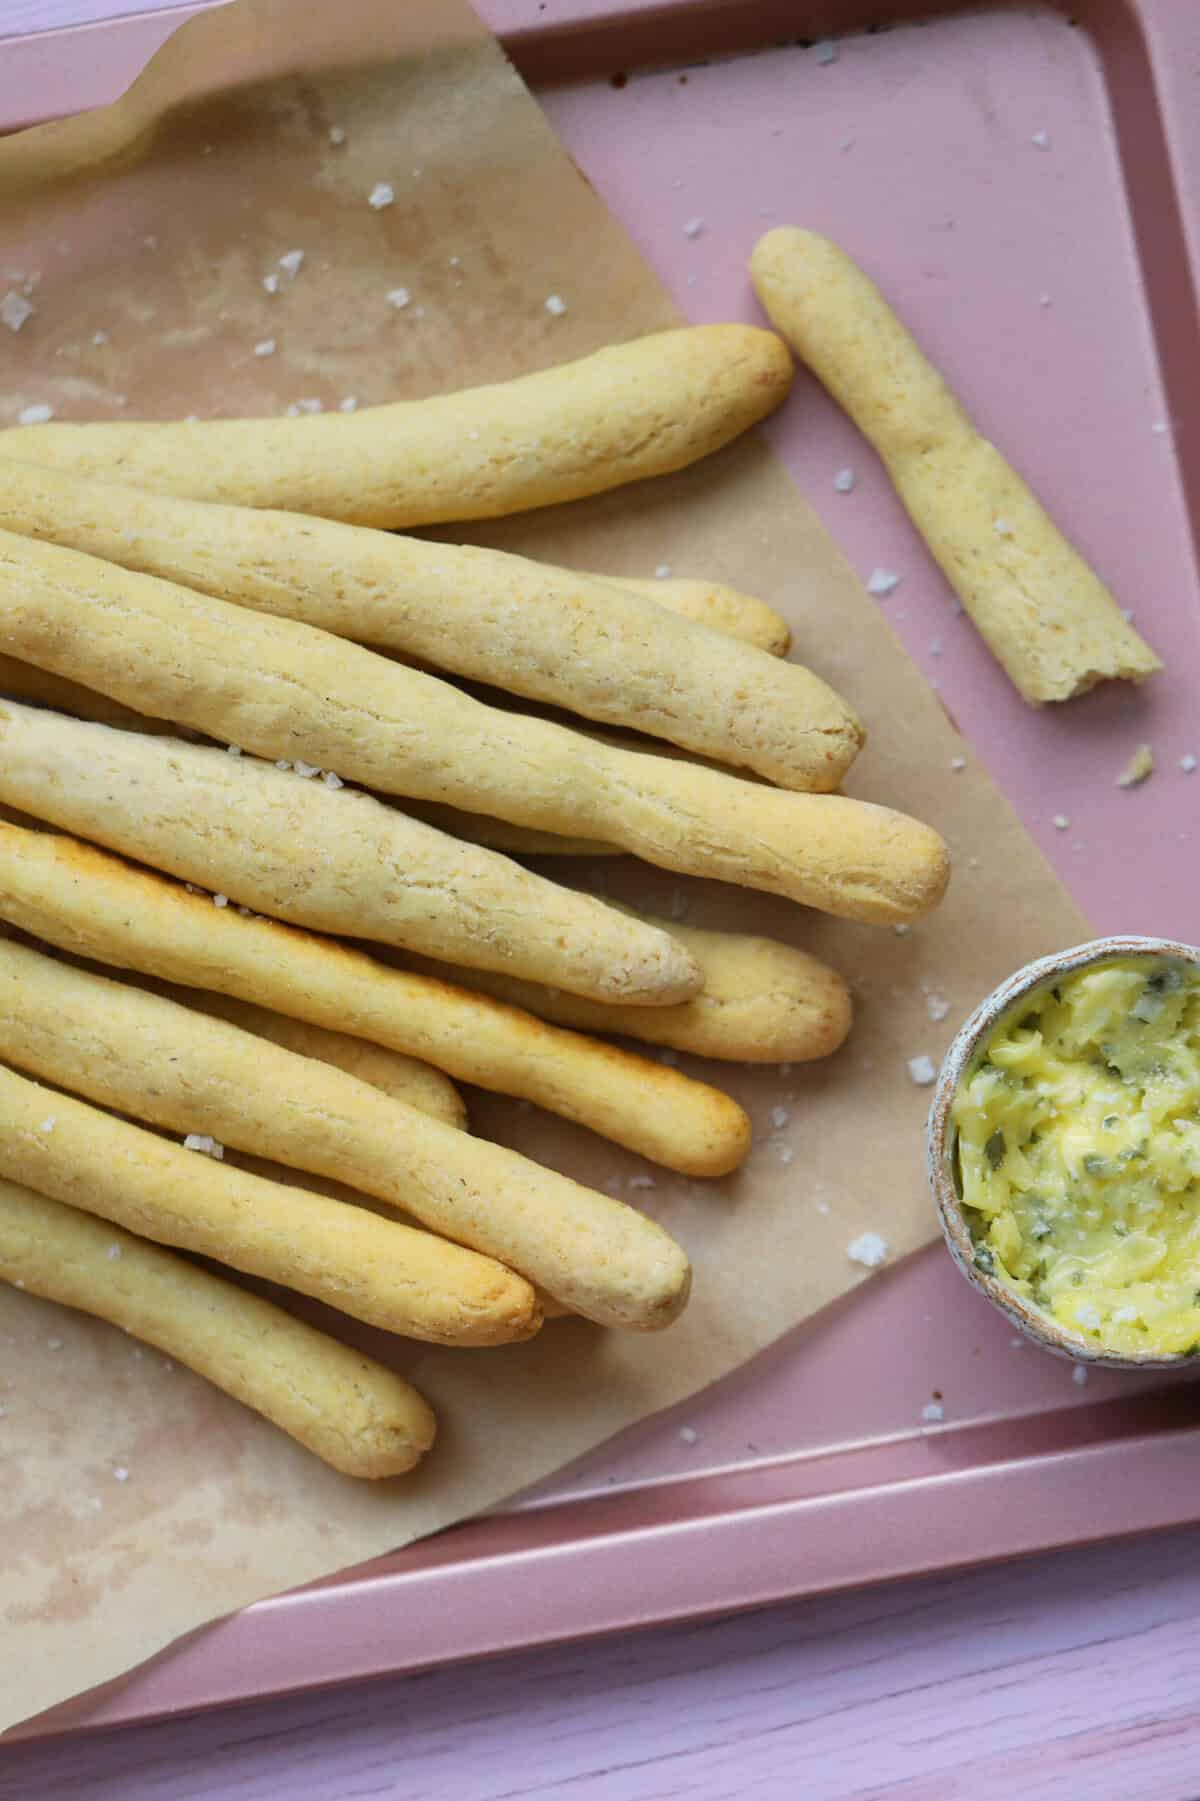
- Remove from the oven and leave to cool for 15 minutes before enjoying fresh.
Notes
- Variations: Try sprinkling the breadsticks with sesame seeds after brushing with oil, or use a garlic or chilli oil for extra flavour. You can also use this in the mixture – and add any herbs you like such as Italian seasoning, rosemary or oregano.
- Storing: These bread sticks are definitely best eaten fresh. If making ahead of time I recommend storing in an airtight container and refreshing in the oven to serve – the same goes if freezing them.
- Weighing Scales vs Cups: You can toggle this recipe card to convert the ingredients into cups. However, I always recommend using weighing scales – these are cheap to buy and much more accurate. And in gluten free baking, a tiny variation can make a huge difference!
- Step-by-Step Photos: Check out the blog post above for step-by-step photos to show how this breadsticks recipe should look at each stage.
- Like this Recipe? It would mean SO much to me if you could leave a 5* review and a little comment about this Gluten Free Breadsticks recipe. I’d love to know how you enjoyed yours or what toppings you chose, and any reviews REALLY help support my website. So thank you! xx
Nutrition
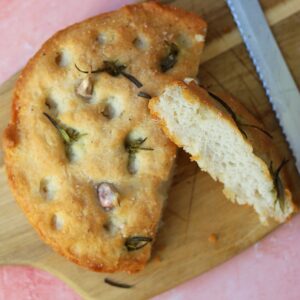
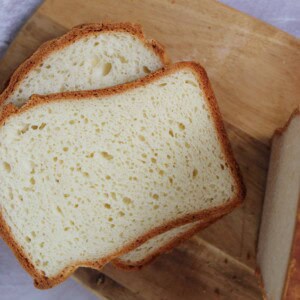
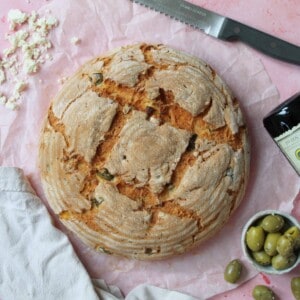
More Gluten Free Bread Recipes


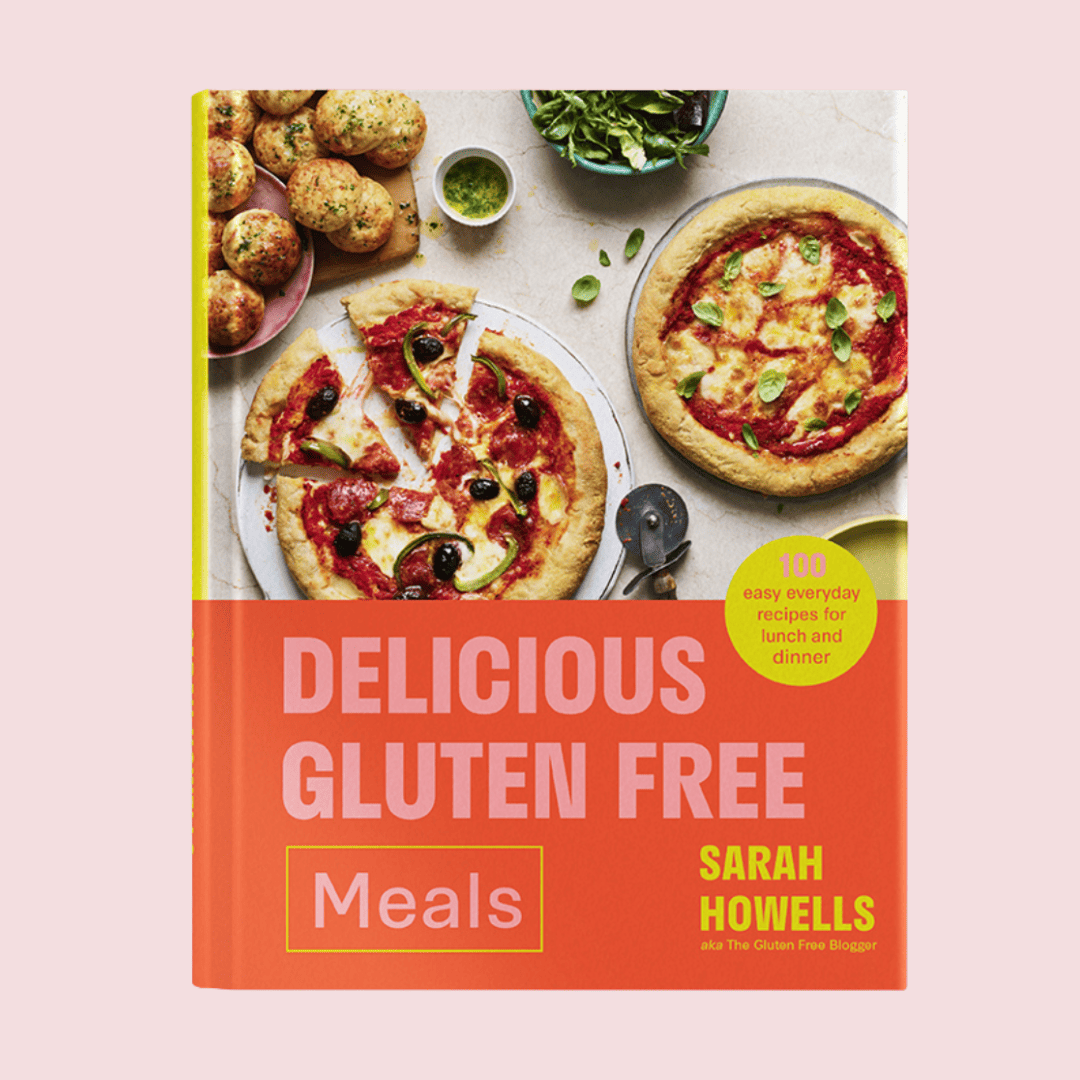
Get my cookbook!
Want more gluten free meals inspiration? My debut cookbook, Delicious Gluten Free Meals, has 100+ gluten free recipes, from breakfast and lunch ideas to dinners, desserts and sides.


The texture of these were really good and had real bite and chew. The recepie makes loads so I did some with sesame, some with poppy seeds and some with parmesan. Really recommend the parmesan. The only downside for me was the chilli flakes, ruined them in my opinium. Will definitely make again (minus the chilli)
We love making these in our house – I’d love to know what you serve yours up with!
Tried nearly all your recipies got to say your book is full of inspiration thank you.