This post may contain affiliate links for which I earn a small commission at no extra cost to you. For more info, check out my Disclosure Policy. Thank you for your support!
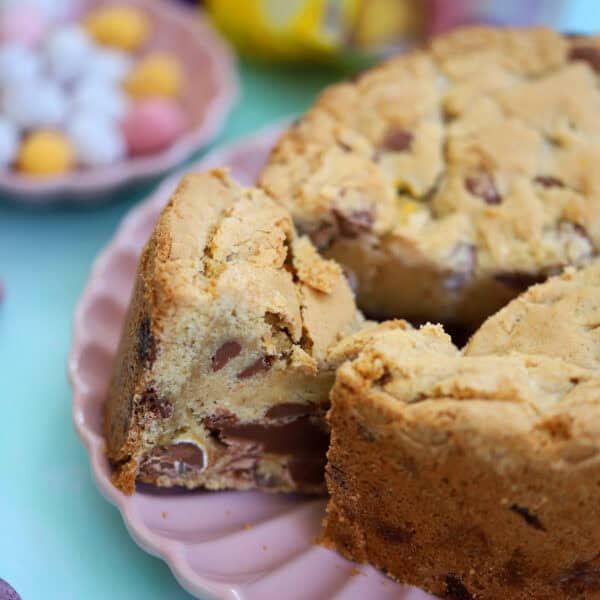
This no-bake, Gluten Free Mini Egg Cheesecake is THE Easter dessert recipe of dreams. A creamy and delicious no bake cheesecake, packed with chunks of Cadbury’s Mini Eggs. This gluten free Easter cheesecake is so easy to make and no-one will know it’s gluten free!

If you’re looking for Easter cheesecake ideas or simple Mini Egg desserts, look no further than this simple Mini Egg Cheesecake recipe.
Made with a buttery, gluten free biscuit base and a creamy vanilla and Mini Egg topping, this couldn’t be easier to throw together.
It’s the perfect no-bake dessert and ideal if you’re less confident in the kitchen as you don’t even have to turn the oven on.
This easy Mini Egg cheesecake can be put together in under 15 minutes and then it’s simply a case of leaving it to set overnight and serving it to your awe-struck guests.
Nobody will ever guess this is gluten free! Perfect for fans of my gluten free lemon cheesecake, my Oreo cheesecake or my no-bake Baileys cheesecake.

Ingredients
You only need 7 ingredients to make this simple Mini Egg cheesecake! Here’s what you need – and any swaps and substitutions you can make:
- Gluten Free Digestive Biscuits: Of course, you can use normal Digestives if you’re not gluten free. Or swap for shortbread or your favourite gluten free biscuit.
- Butter
- Cream Cheese: You must always use full-fat cream cheese in cheesecake, or the topping won’t set. I recommend Philadelphia as it’s consistently the best.
- Vanilla Extract
- Icing Sugar: Or confectioner’s sugar in the US.
- Double Cream: Or heavy cream in the US.
- Cadbury’s Mini Eggs: Yes, these are gluten free! But feel free to swap for your favourite miniature Easter eggs if you like. Check out my gluten free Easter eggs guide.

How to Make Mini Egg Cheesecake
There’s a printable recipe card below with the method. But here are some step-by-step photos to show you how easy this Mini Egg Cheesecake recipe is to make.
To make the cheesecake base:
Line the bottom of a deep, 20cm springform tin with baking paper. Melt the butter either in a pan over a low heat or in 10-second bursts in the microwave.

Blitz the gluten free Digestive biscuits in a food processor until they form a fine crumb. Add the melted butter and blitz again to combine.
Pour out the biscuit mix into the lined tin and press firmly into the base until it is level. You can pop this in the fridge while you make the topping.

To make the cheesecake topping:
Place the Mini Eggs in a sandwich bag and bash them with a rolling pin to break them up.
Just be careful not to hit them too hard or the bag will split! You can also do this in a pestle and mortar if you prefer. Set to one side.

Add the cream cheese, vanilla extract and icing sugar to a large mixing bowl and beat with an electric whisk until smooth.
Pour in the double cream and whisk again, starting on a slower speed and bringing the mixer up a speed every 20-30 seconds.

Continue to whisk until the mixture becomes very thick. It should look like the below photo on the left-hand side.
Fold the crushed Mini Eggs into the mixture using a spatula. Don’t over-mix – just enough so they are evenly distributed throughout.

Spoon the topping onto the biscuit base and spread it evenly using a spatula, ensuring there are no air bubbles.
Set the cheesecake in the fridge for at least 8-10 hours – preferable overnight.

Carefully remove the cheesecake from the tin (use a hot knife round the edges to loosen it before popping from the tin) and decorate with Mini Eggs to serve.
Storing and Freezing
This cheesecake must be stored in the fridge. It will last 3-5 days in the fridge and can easily be made ahead of time.
You can also freeze slices of this cheesecake and then defrost in the fridge before eating.

If you make this recipe and love it, please do let me know by tagging me on my Instagram or using #theglutenfreeblogger. You can also share your creations in my Facebook group! And please do leave a 5* review ⭐️⭐️⭐️⭐️⭐️ to let others know you loved it too! It would mean the world to me and really helps support my website.

Gluten Free Mini Egg Cheesecake
Equipment
Ingredients
For the base
- 300 g gluten free Digestive biscuits
- 100 g unsalted butter
For the cheesecake topping
- 560 g full-fat cream cheese, (2 x family packs of Philadelphia)
- 1 tsp vanilla extract
- 130 g icing sugar
- 300 ml double cream
- 270 g Cadbury's Mini Eggs, (plus extra to decorate)
Instructions
- Line the bottom of a deep, 20cm springform tin with baking paper. Melt the butter either in a pan over a low heat or in 10-second bursts in the microwave.
- Blitz the gluten free Digestive biscuits in a food processor until they form a fine crumb. Add the melted butter and blitz again to combine.
- Pour out the biscuit mix into the lined tin and press firmly into the base until it is level. You can pop this in the fridge while you make the topping.
For the cheesecake topping
- Place the Mini Eggs in a sandwich bag and bash them with a rolling pin to break them up. You can also do this in a pestle and mortar. Set to one side.
- Add the cream cheese, vanilla extract and icing sugar to a large mixing bowl and beat with an electric whisk until smooth.
- Pour in the double cream and whisk again, starting on a slower speed and bringing the mixer up a speed every 20-30 seconds. Continue to whisk until the mixture becomes very thick.
- Fold the crushed Mini Eggs into the mixture using a spatula. Don't overmix – just enough so they are evenly distributed throughout.
- Spoon the topping onto the biscuit base and spread it evenly using a spatula, ensuring there are no air bubbles.
- Set the cheesecake in the fridge for at least 8-10 hours – preferable overnight. Carefully remove the cheesecake from the tin (use a hot knife round the edges to loosen it before popping from the tin) and decorate with Mini Eggs to serve.
Notes
- Step-by-Step Photos: Check out the blog post above for step-by-step photos to show how this cheesecake recipe should look at each stage.
- Storing and Freezing: This cheesecake must be stored in the fridge. It will last 3-5 days in the fridge and can easily be made ahead of time.
- Like this Recipe? It would mean SO much to me if you could leave a 5* review and tell all your gluten free friends about this Mini Egg Cheesecake!
Nutrition
More Gluten Free Easter Recipes
 Gluten Free Creme Egg Brownies
 Gluten free Mini Egg cookies
 Mini Egg Cookie Pie
 Easter Egg Cheesecake
 Gluten Free Hot Cross Buns
 Gluten Free Mini Egg Pancakes
 Gluten Free Mini Egg Rocky Road
 Gluten Free Salted Caramel Hot Cross Buns
 Gluten Free Simnel Cake
 Gluten Free Easter Brownies
 Mini Egg Brownies
 Gluten Free Carrot Cake Cupcakes
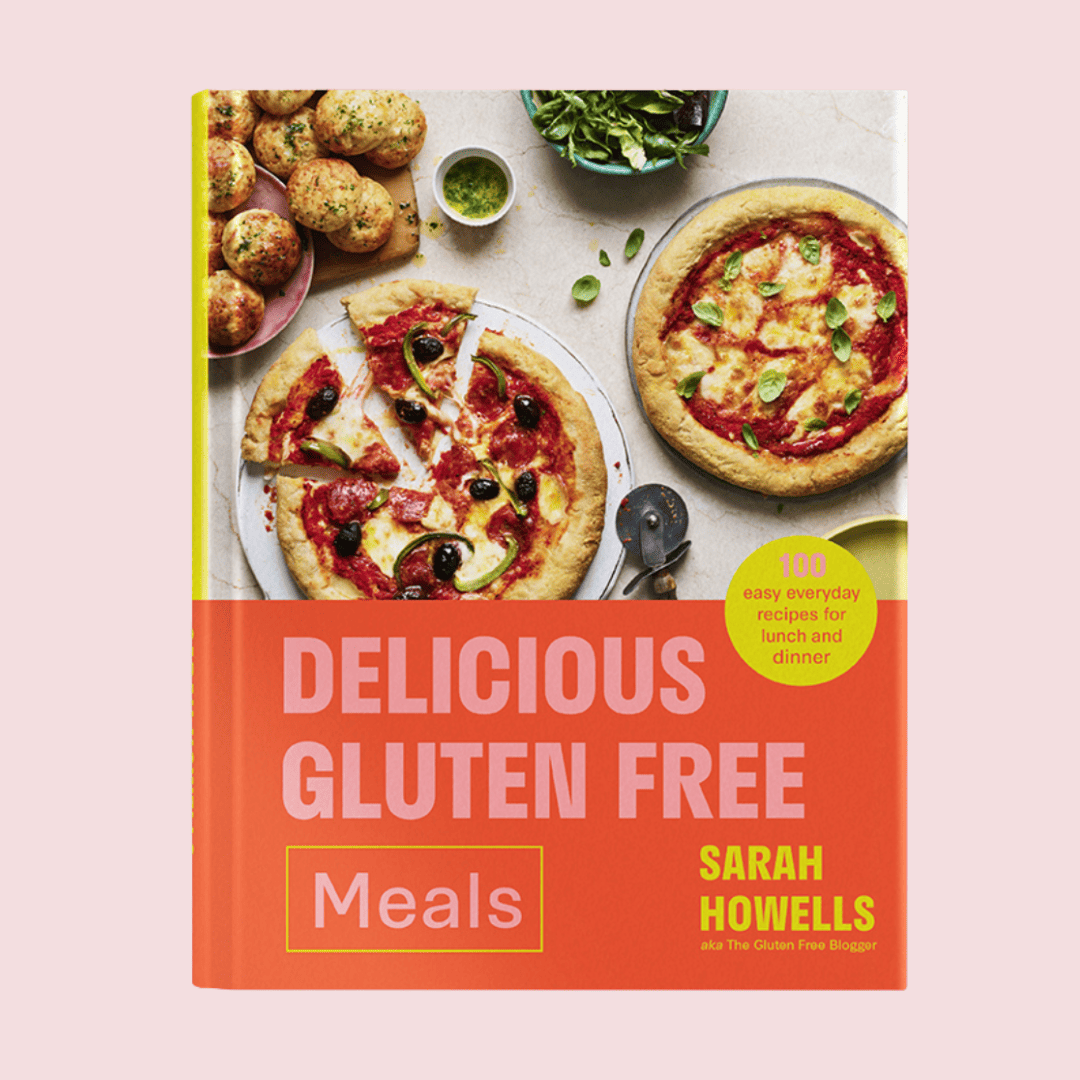
Get my cookbook!
Want more gluten free meals inspiration? My debut cookbook, Delicious Gluten Free Meals, has 100+ gluten free recipes, from breakfast and lunch ideas to dinners, desserts and sides.


What went wrong??? I creed the cheese, vanilla and vanilla (used vanilla bean paste) I then added the cream 18% ( I highest cream here in Canada) I then increased the speed every 30 seconds but the high it went it did not get thicker, it has actually liquified.