This post may contain affiliate links for which I earn a small commission at no extra cost to you. For more info, check out my Disclosure Policy. Thank you for your support!
It’s time for another pastry tutorial and today I am very excited to bring you my gluten free puff pastry recipe.
For years and years I was terrified of trying to make gluten free puff pastry.
I thought it would be impossible, that it would fall apart or make a sticky mess or just…not puff.
But when I finally nailed my gluten free shortcrust pastry recipe, it made me realise you can make gluten free pastry which is as good as the ‘normal’ version!
So I put my Big Girl Pants on and attempted to throw together a gluten free rough puff pastry.
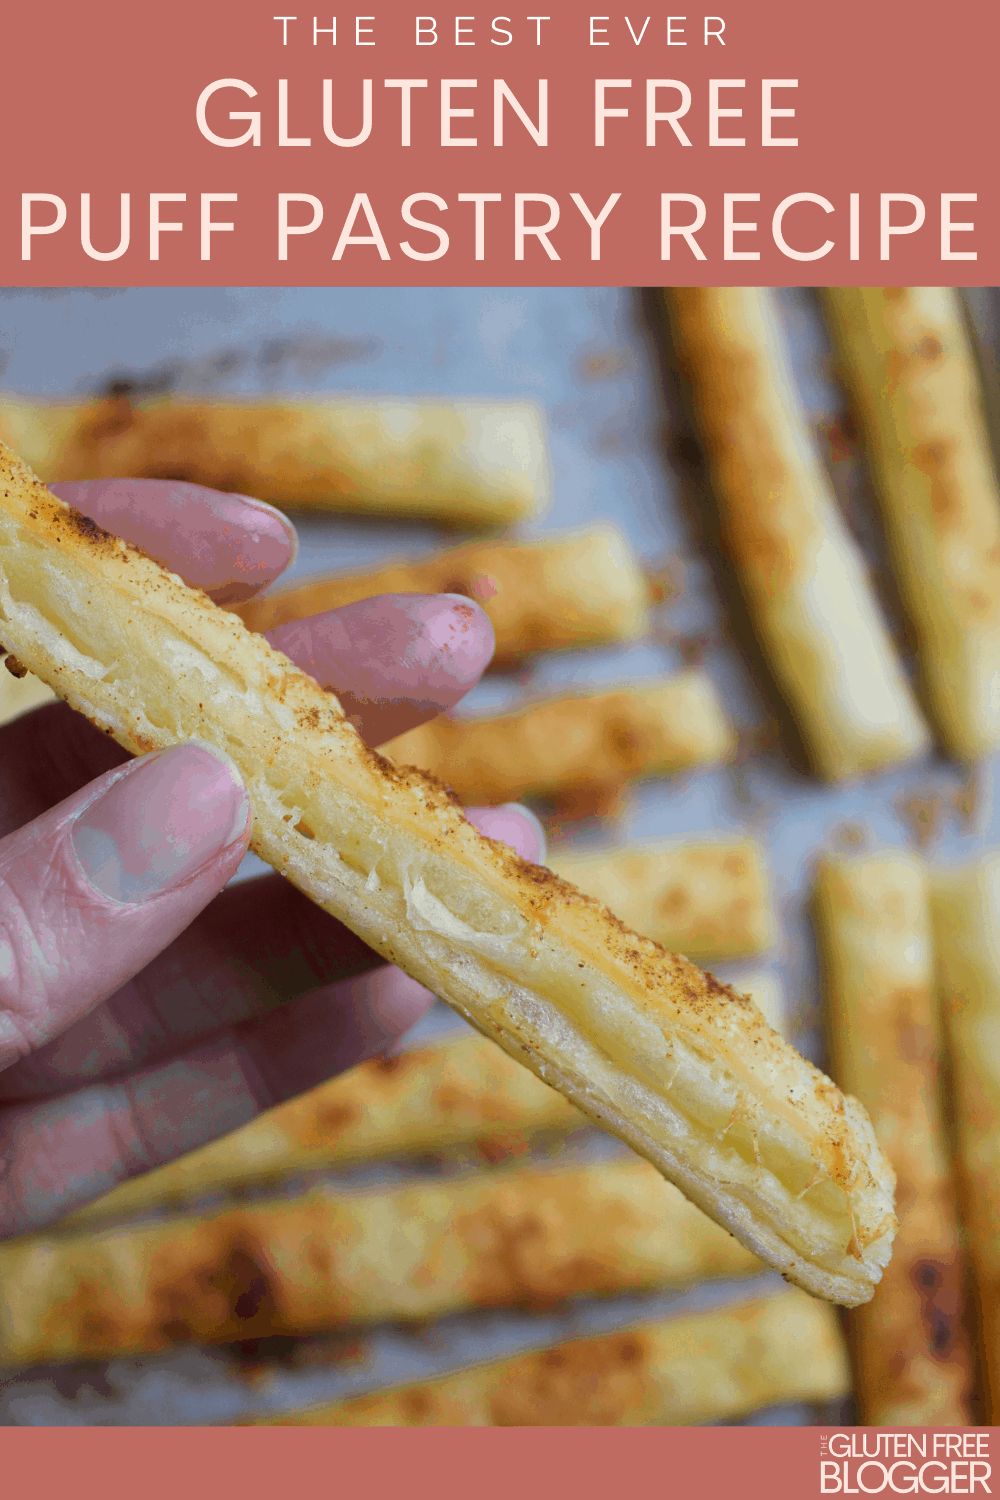
I cannot tell you how happy I was when I sat in front of the oven and watched it ACTUALLY PUFF.
That’s right, with a few tweaks this has now become my failsafe gluten free puff pastry recipe for sweet and savoury recipes.
It’s an easy gluten free rough puff pastry recipe and I am going to show you, with step-by-step photos and a video – exactly how to make it!

What is gluten free rough puff pastry?
Puff pastry is made by creating layers – this is called ‘laminating’ the pastry.
As it cooks, the butter (or lamination) between the layers of pastry melt, causing the pastry to puff up.
You may have seen this on Bake Off, with bakers talking about how they’re making a ‘rough puff’ instead of traditional puff pastry.
In short, ‘proper’ puff pastry is made when you place a flattened block of butter in the middle of the pastry and then fold it into the layers.
But rough puff pastry is a little easier and a little less technical.
You simply ensure there are lumps of butter throughout the pastry dough, so when you fold the layers, this marbles through the pastry.
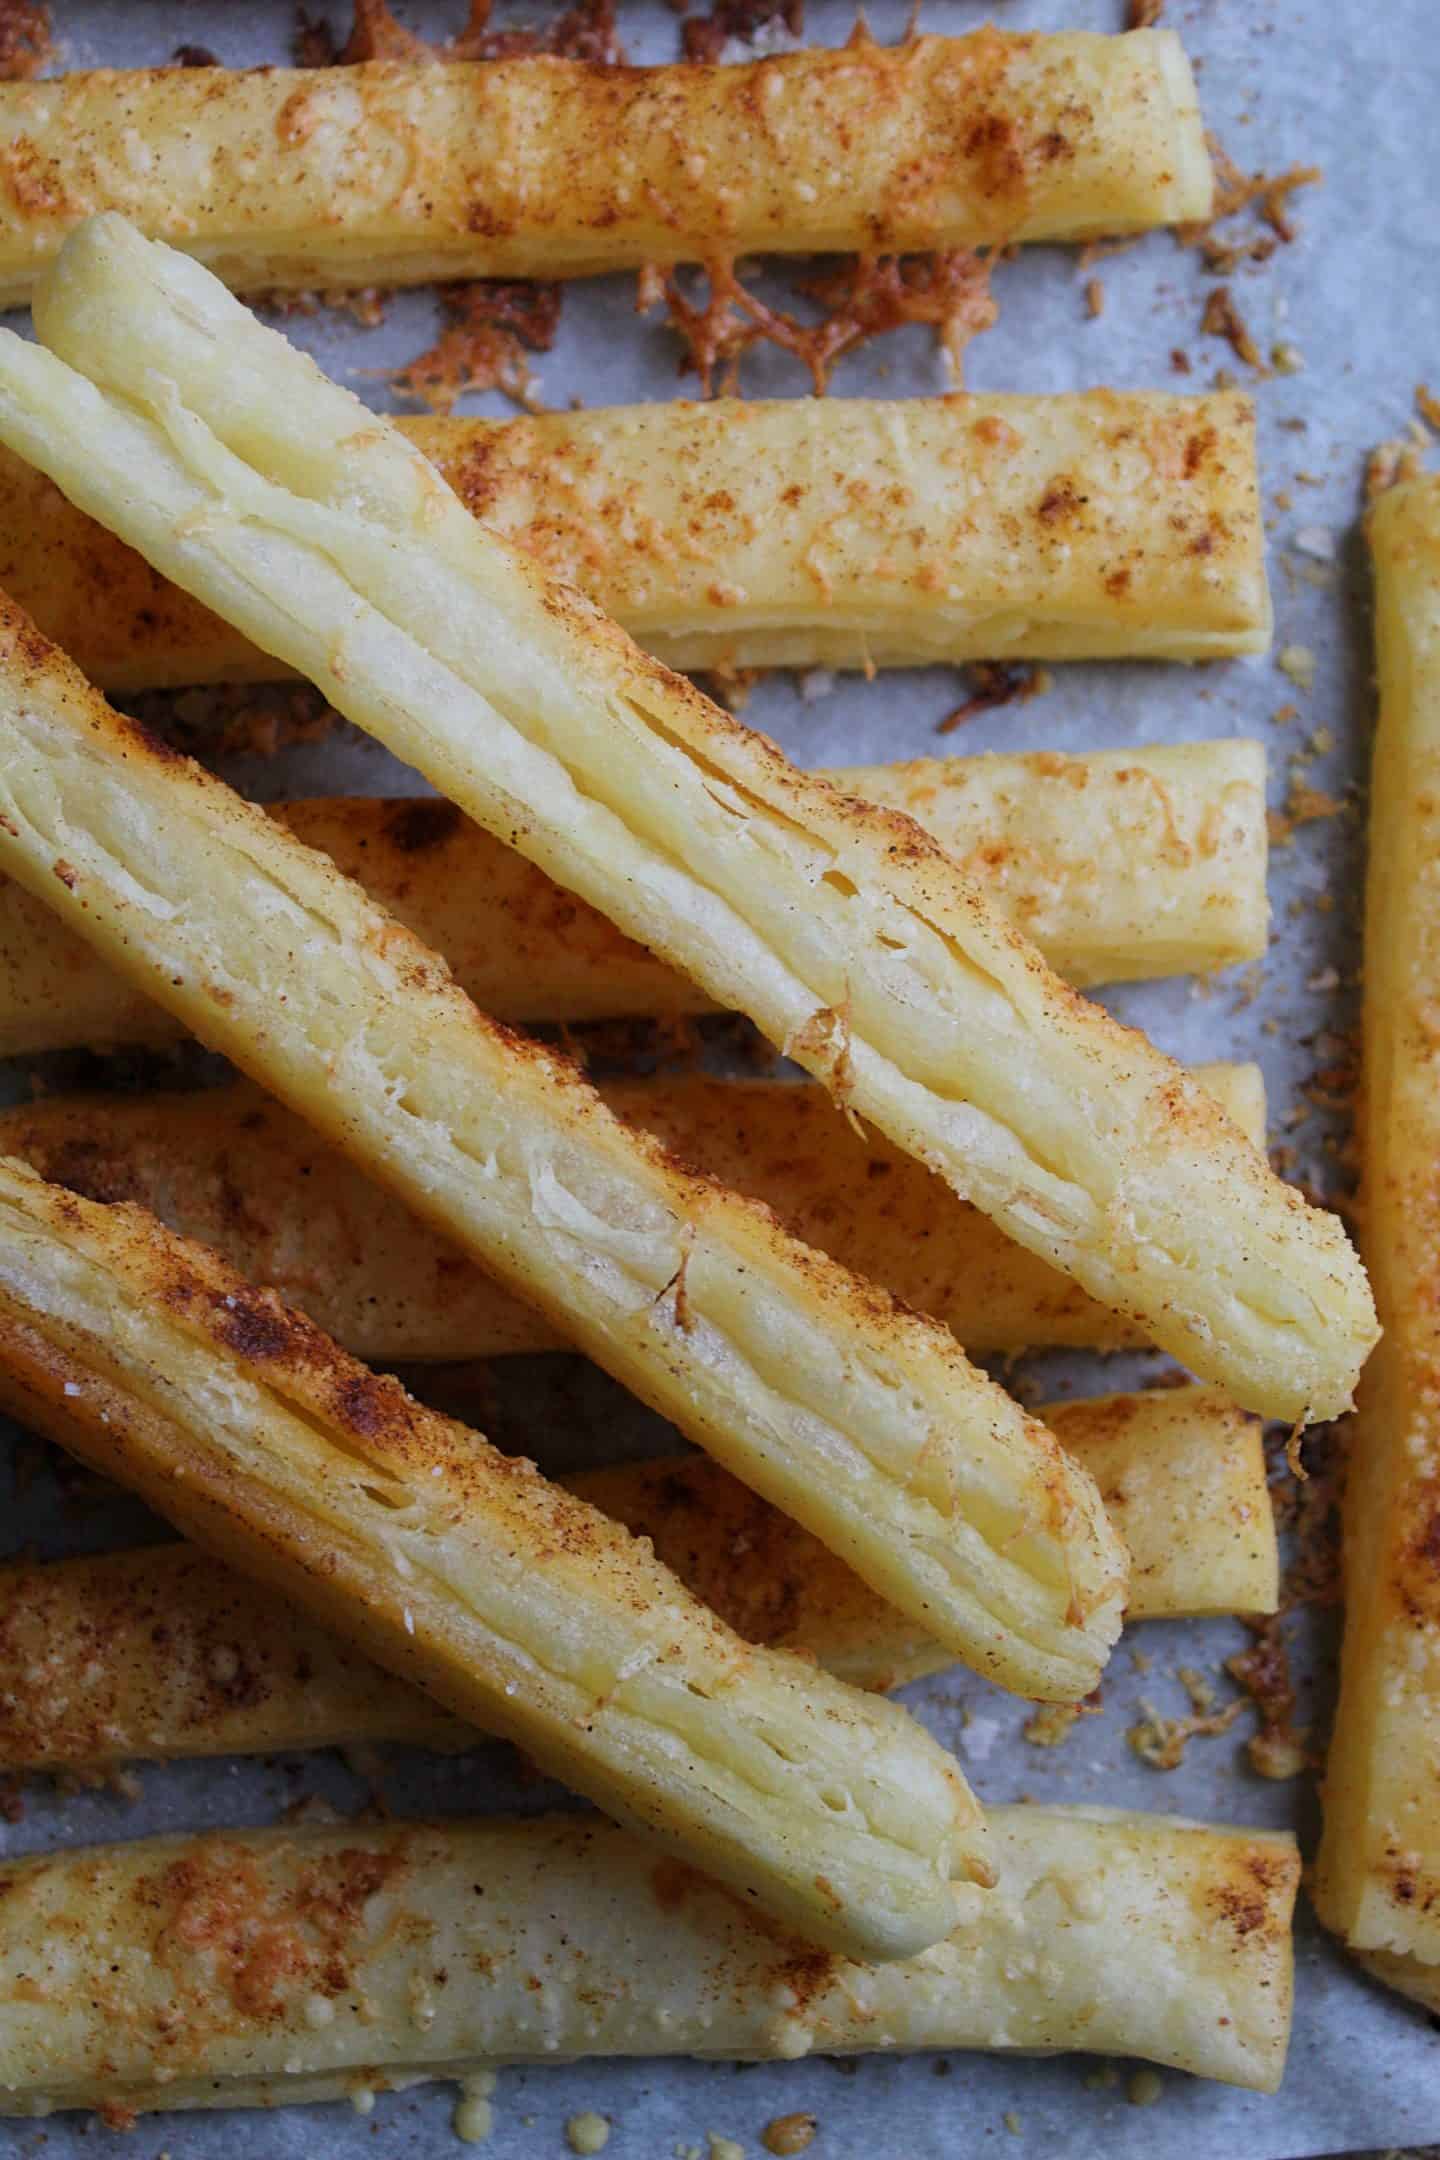
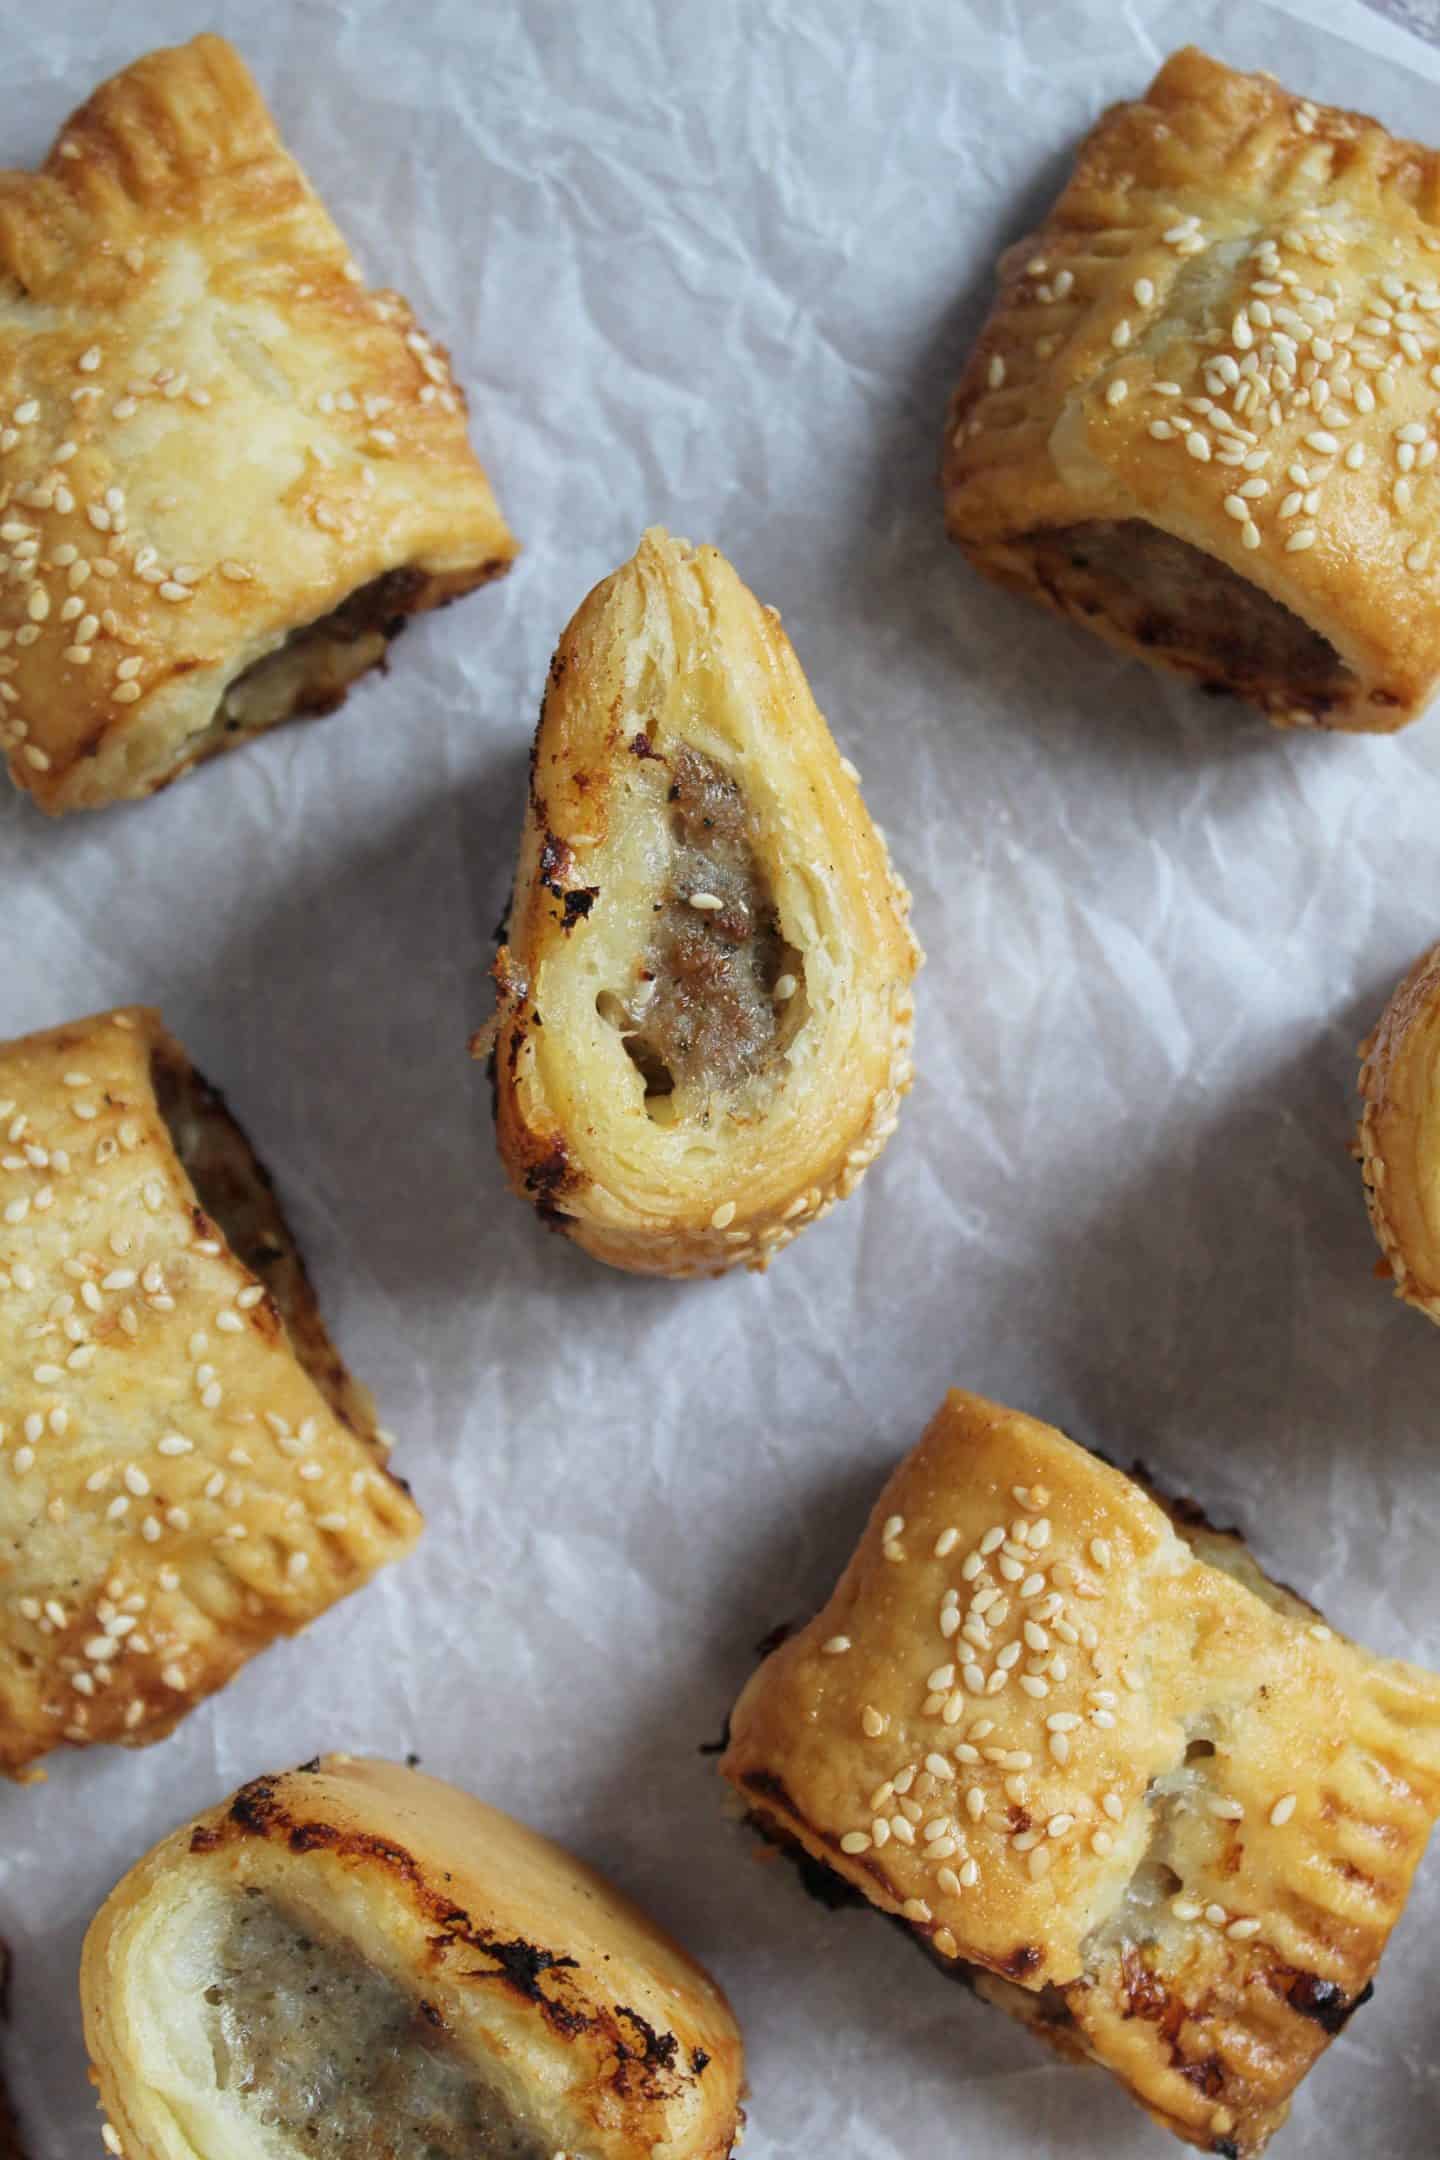
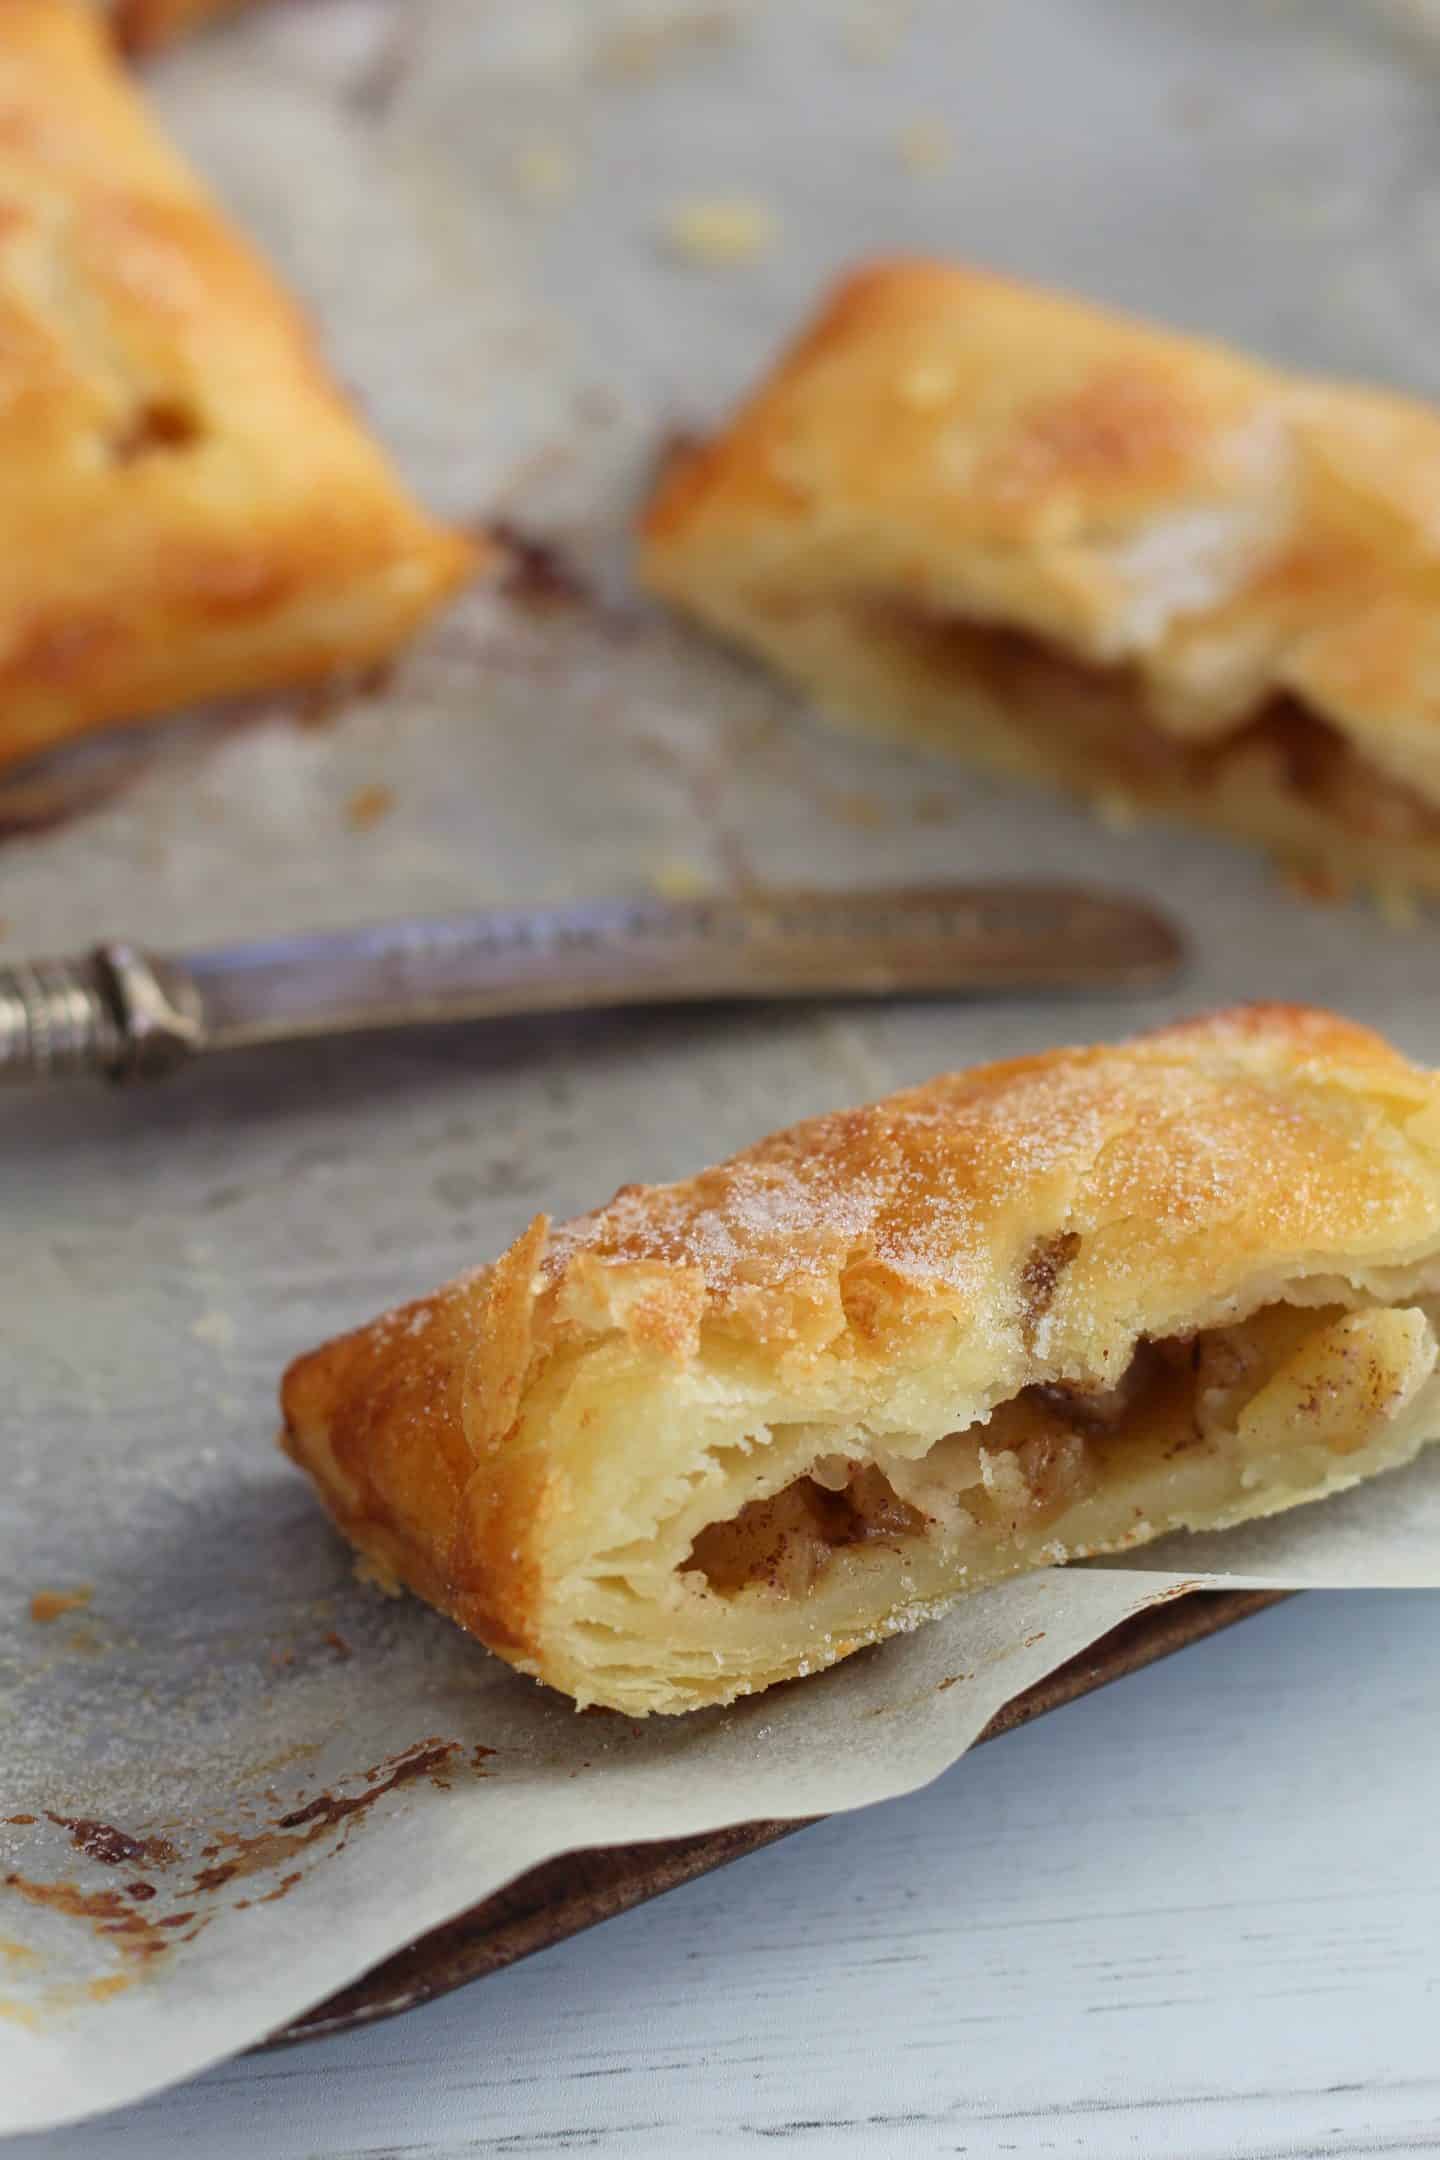
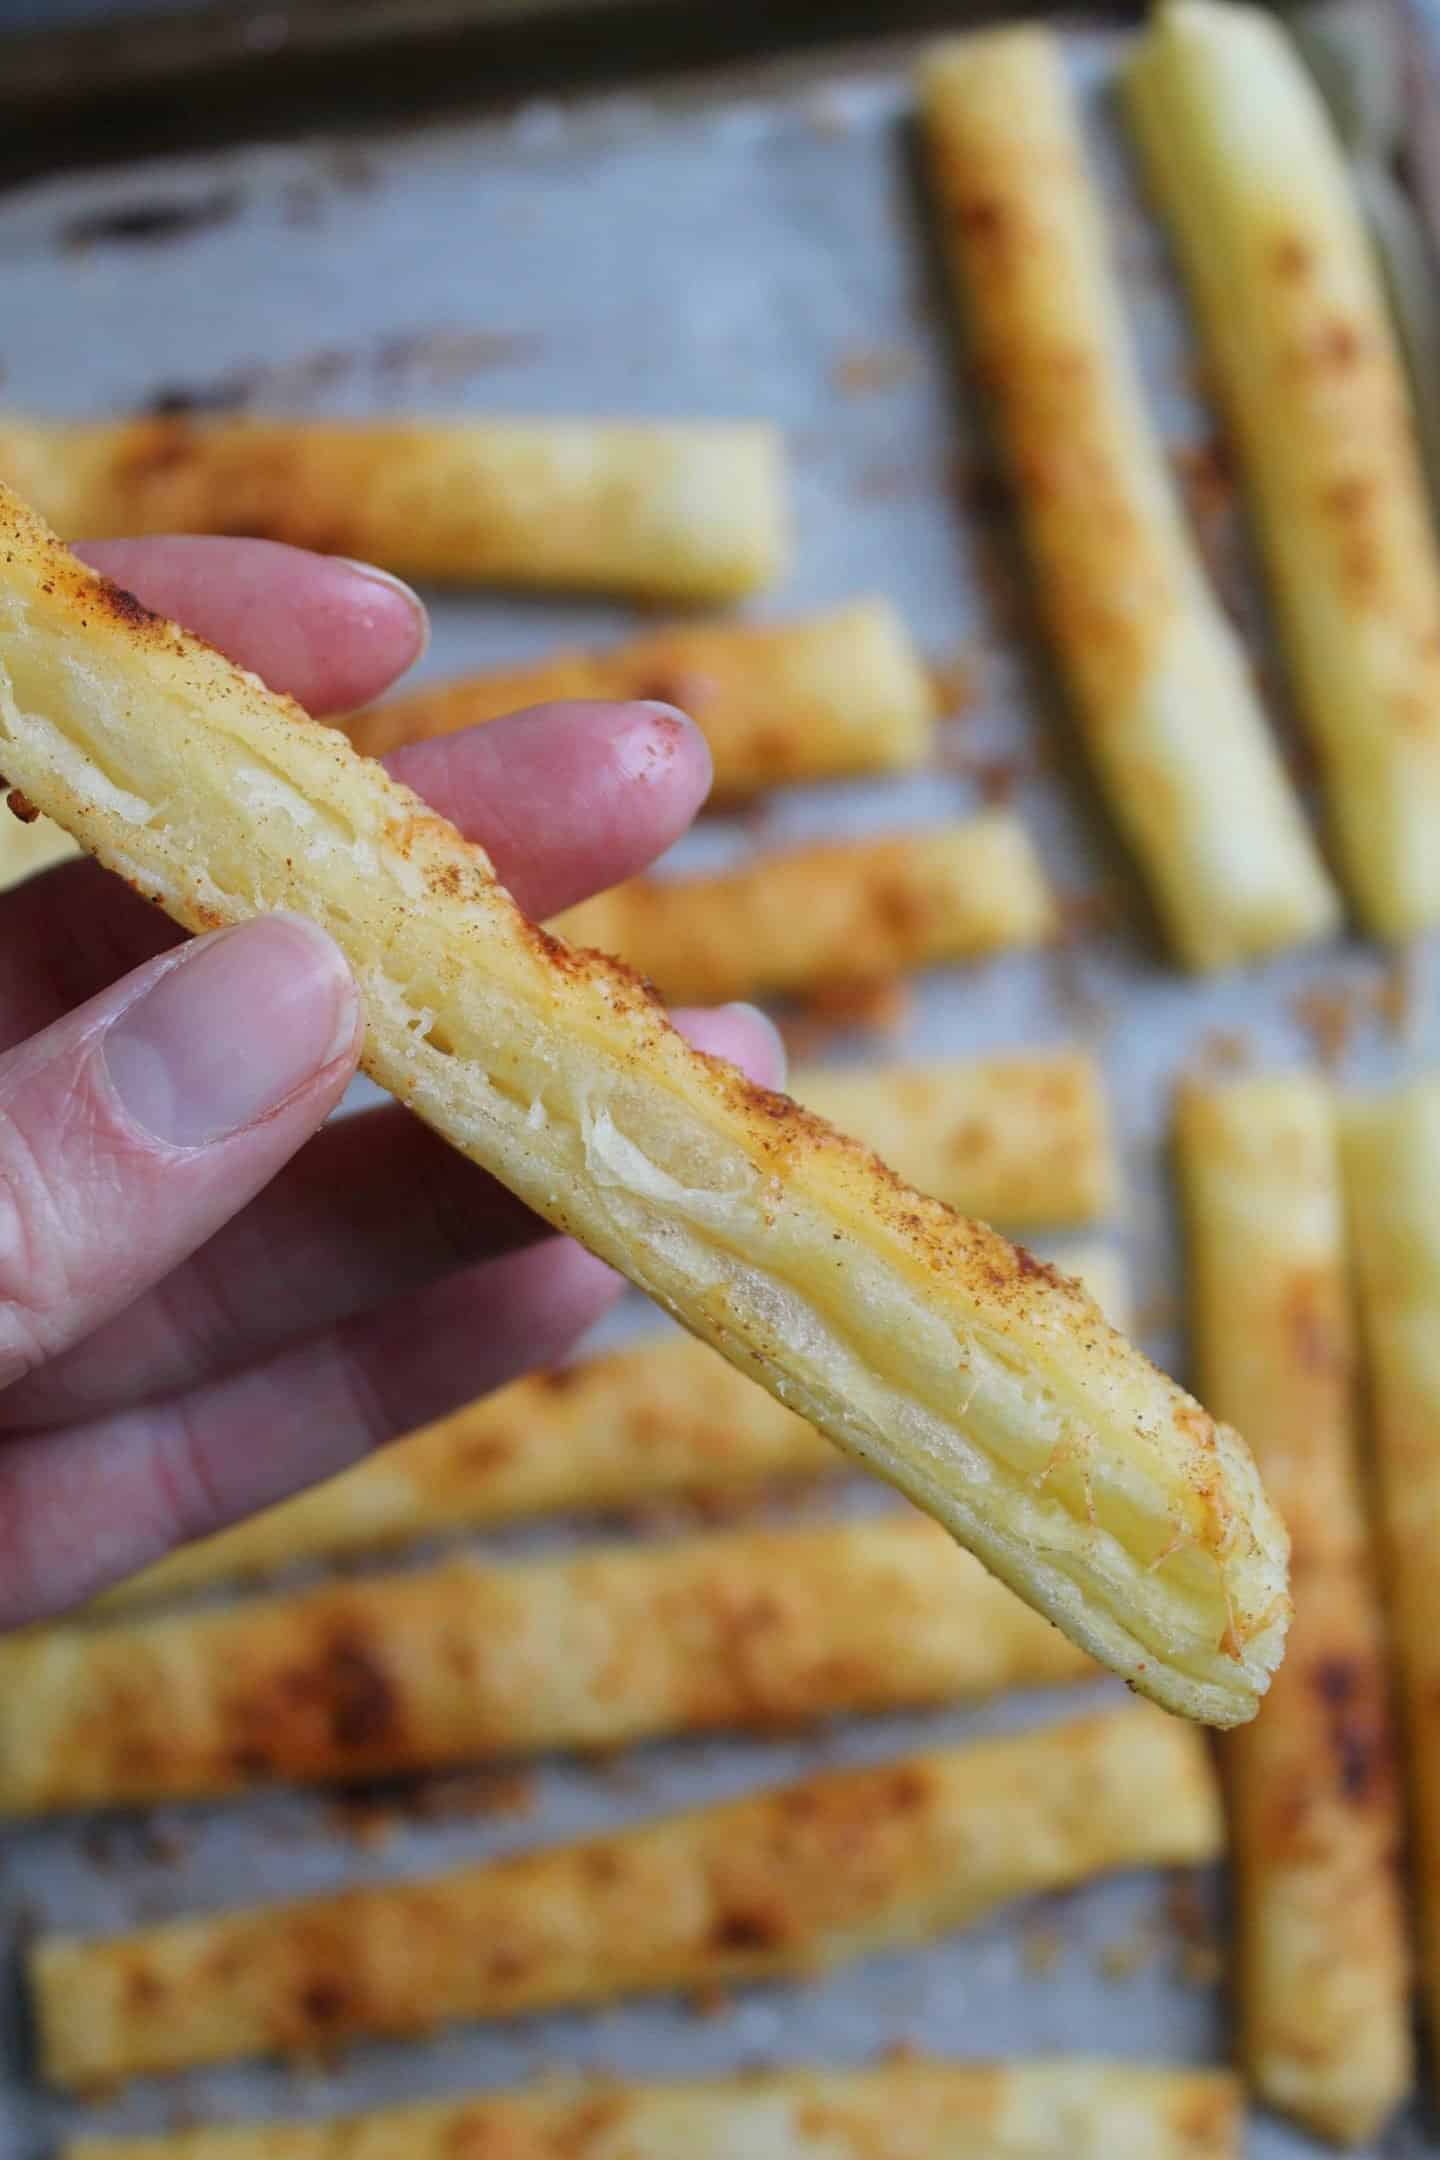
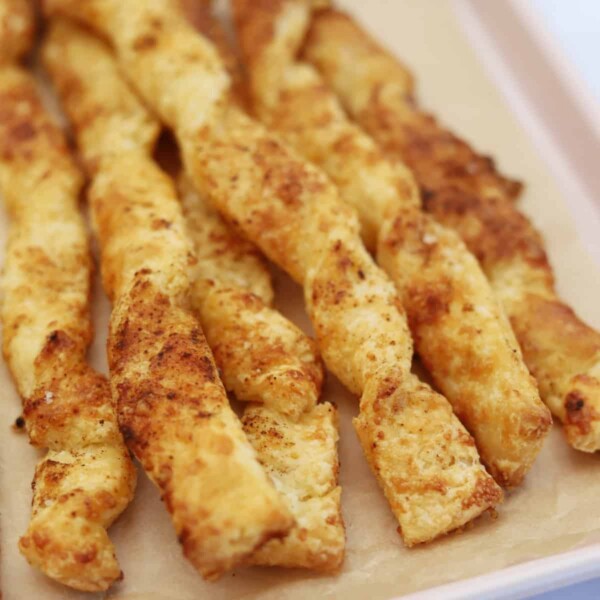
This creates a gorgeously flaky pastry – the perfect kind for sausage rolls, apple turnovers, cheese straws and even Greggs-style steak bakes.
It’s also very easy to do and requires very little technical skill – if you have a rolling pin, you can do it!
What do I need to make gluten free puff pastry?
This gluten free pastry recipe is very simple – you actually only need a few ingredients!
There’s a full printable recipe card below, but for the shopping list you’ll need:
- 250g unsalted butter (cold)
- 250g plain gluten free flour
- 1.5 tsp xanthan gum
- 1 tsp salt
- 150ml ice cold water
And that’s it! Nothing fancy or complicated at all.
I always use either the FREEE or Asda gluten free plain flour but any plain (or all purpose) gluten free flour blend should work.
The xanthan gum is very important for the texture of this bake.
Even if your flour blend already contains xanthan gum you’ll need to add the recommended amount in the recipe.
Otherwise your pastry will become an un-foldable, sticky mess and will be unworkable.
Apart from that it’s just unsalted butter and salt – plus some ice cold water. The colder the better.
What’s the secret to perfect puff pastry?
There’s one absolutely, completely vital trick to making sure your gluten free puff pastry works….
Keep. It. Cold.
Nothing complicated – just pure temperature!
If your puff pastry dough gets too hot, the butter in those lovely layers your creating will begin to melt.
If the butter melts, you’ll lose those layers. No layers = no puff.
You’ll just end up with a tough-as-old-boots shortcrust pastry which trust me, doesn’t taste too great.
The best thing you can remember is: if in double, refrigerate.
Making gluten free puff pastry is definitely easier on a colder day.
In fact, if it’s really cold you may even be able to do the whole thing without having to stop and refrigerate the dough once.
But as soon as it starts to warm up, you’ll need to chill the pastry in the fridge (or freezer, if you’re keen to save time).
This way it’ll stay super cold and you won’t need to worry about losing those layers you’re working so hard to create.
So if it’s a warm day, prepare to have lots of pauses to chill your dough between folds. Trust me, it’ll be worth it!
Gluten free puff pastry: a step-by-step guide
Don’t forget there is a full, printable recipe card down below but I will also go through each stage of making gluten free puff pastry here.
I tried to take a photograph at every stage, plus there is a handy video tutorial as well.
1. Add the butter to the flour mix
The first stage of making this gluten free puff pastry is actually not too dissimilar to making my gluten free shortcrust pastry.
First you need to mix together the gluten free flour, xantham gum and salt in a large mixing bowl.
Next, take your butter straight from the fridge (remember, cold is key here!) and cut it into cubes, approximately 2cm in size.
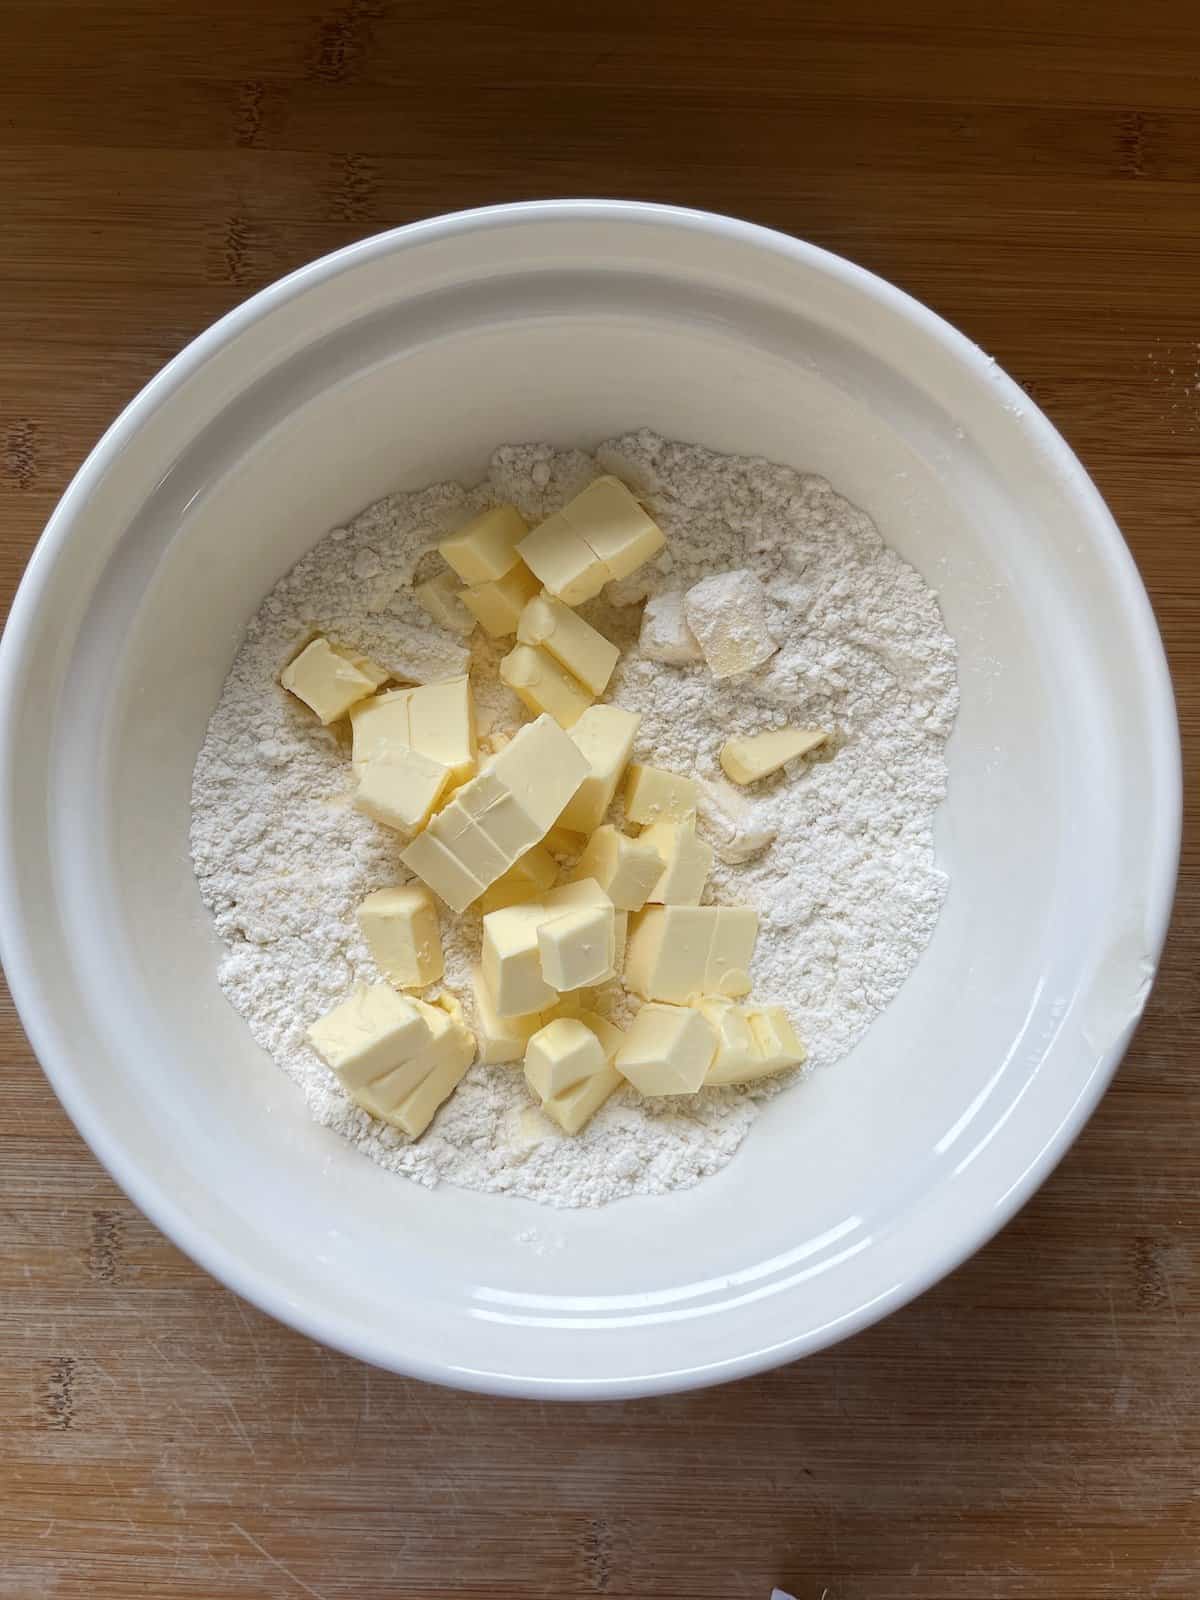
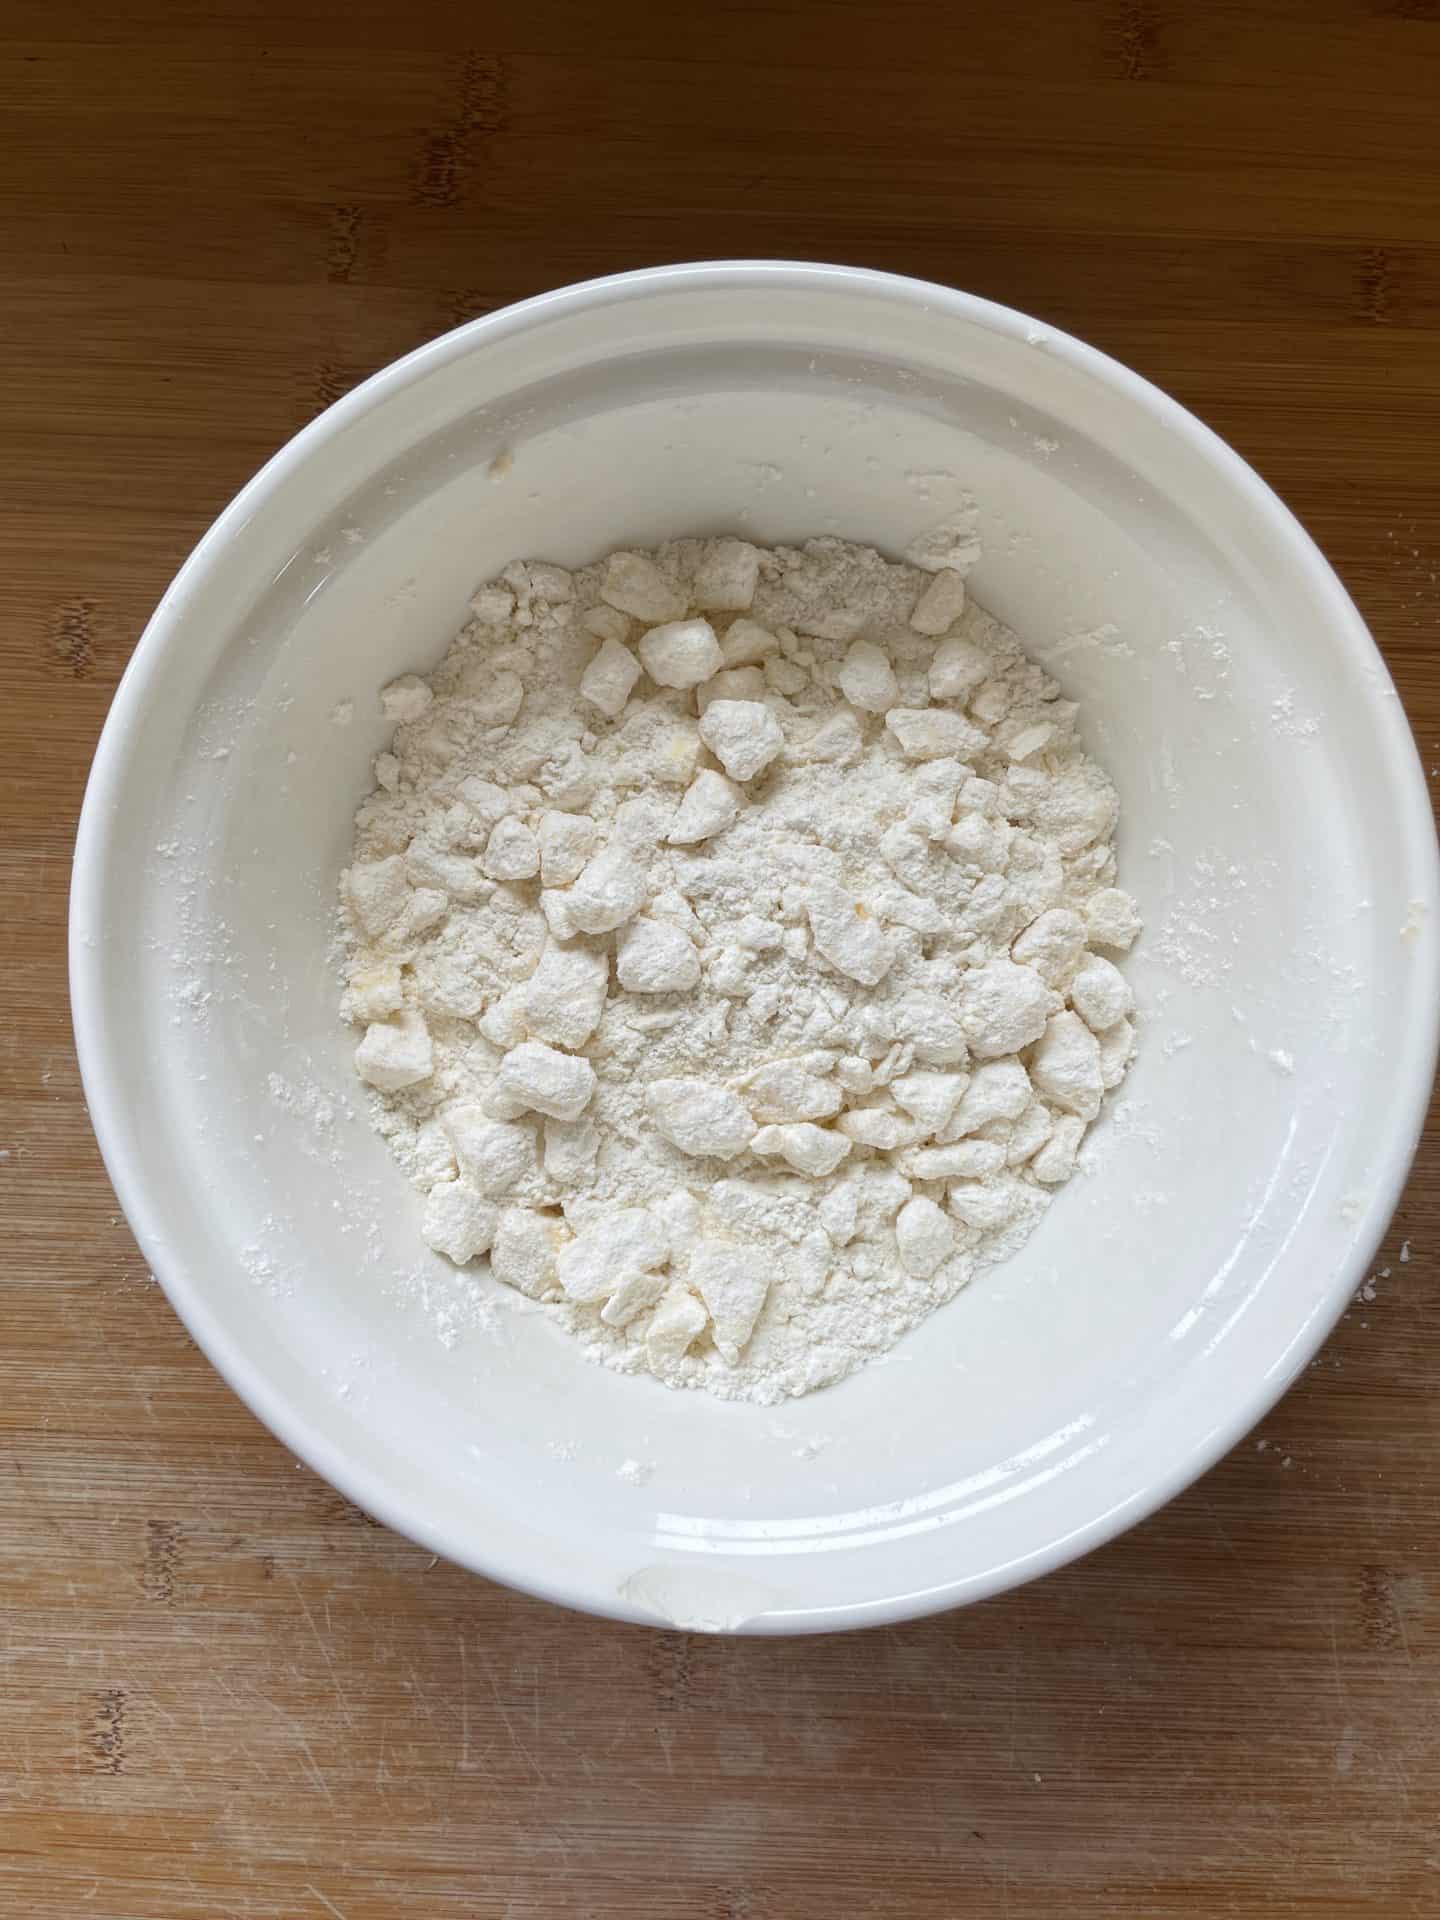
Add the cubes of butter to the flour mix and then you’ll want to use two knives top ‘criss-cross’ across the mixture.
The idea is to chop the butter into smaller piece (we’re aiming for about pea-sized) and ensuring the cut edges keep getting covered in the flour mix.
When your done, you mixture should look a little like this:
2. Add the cold water
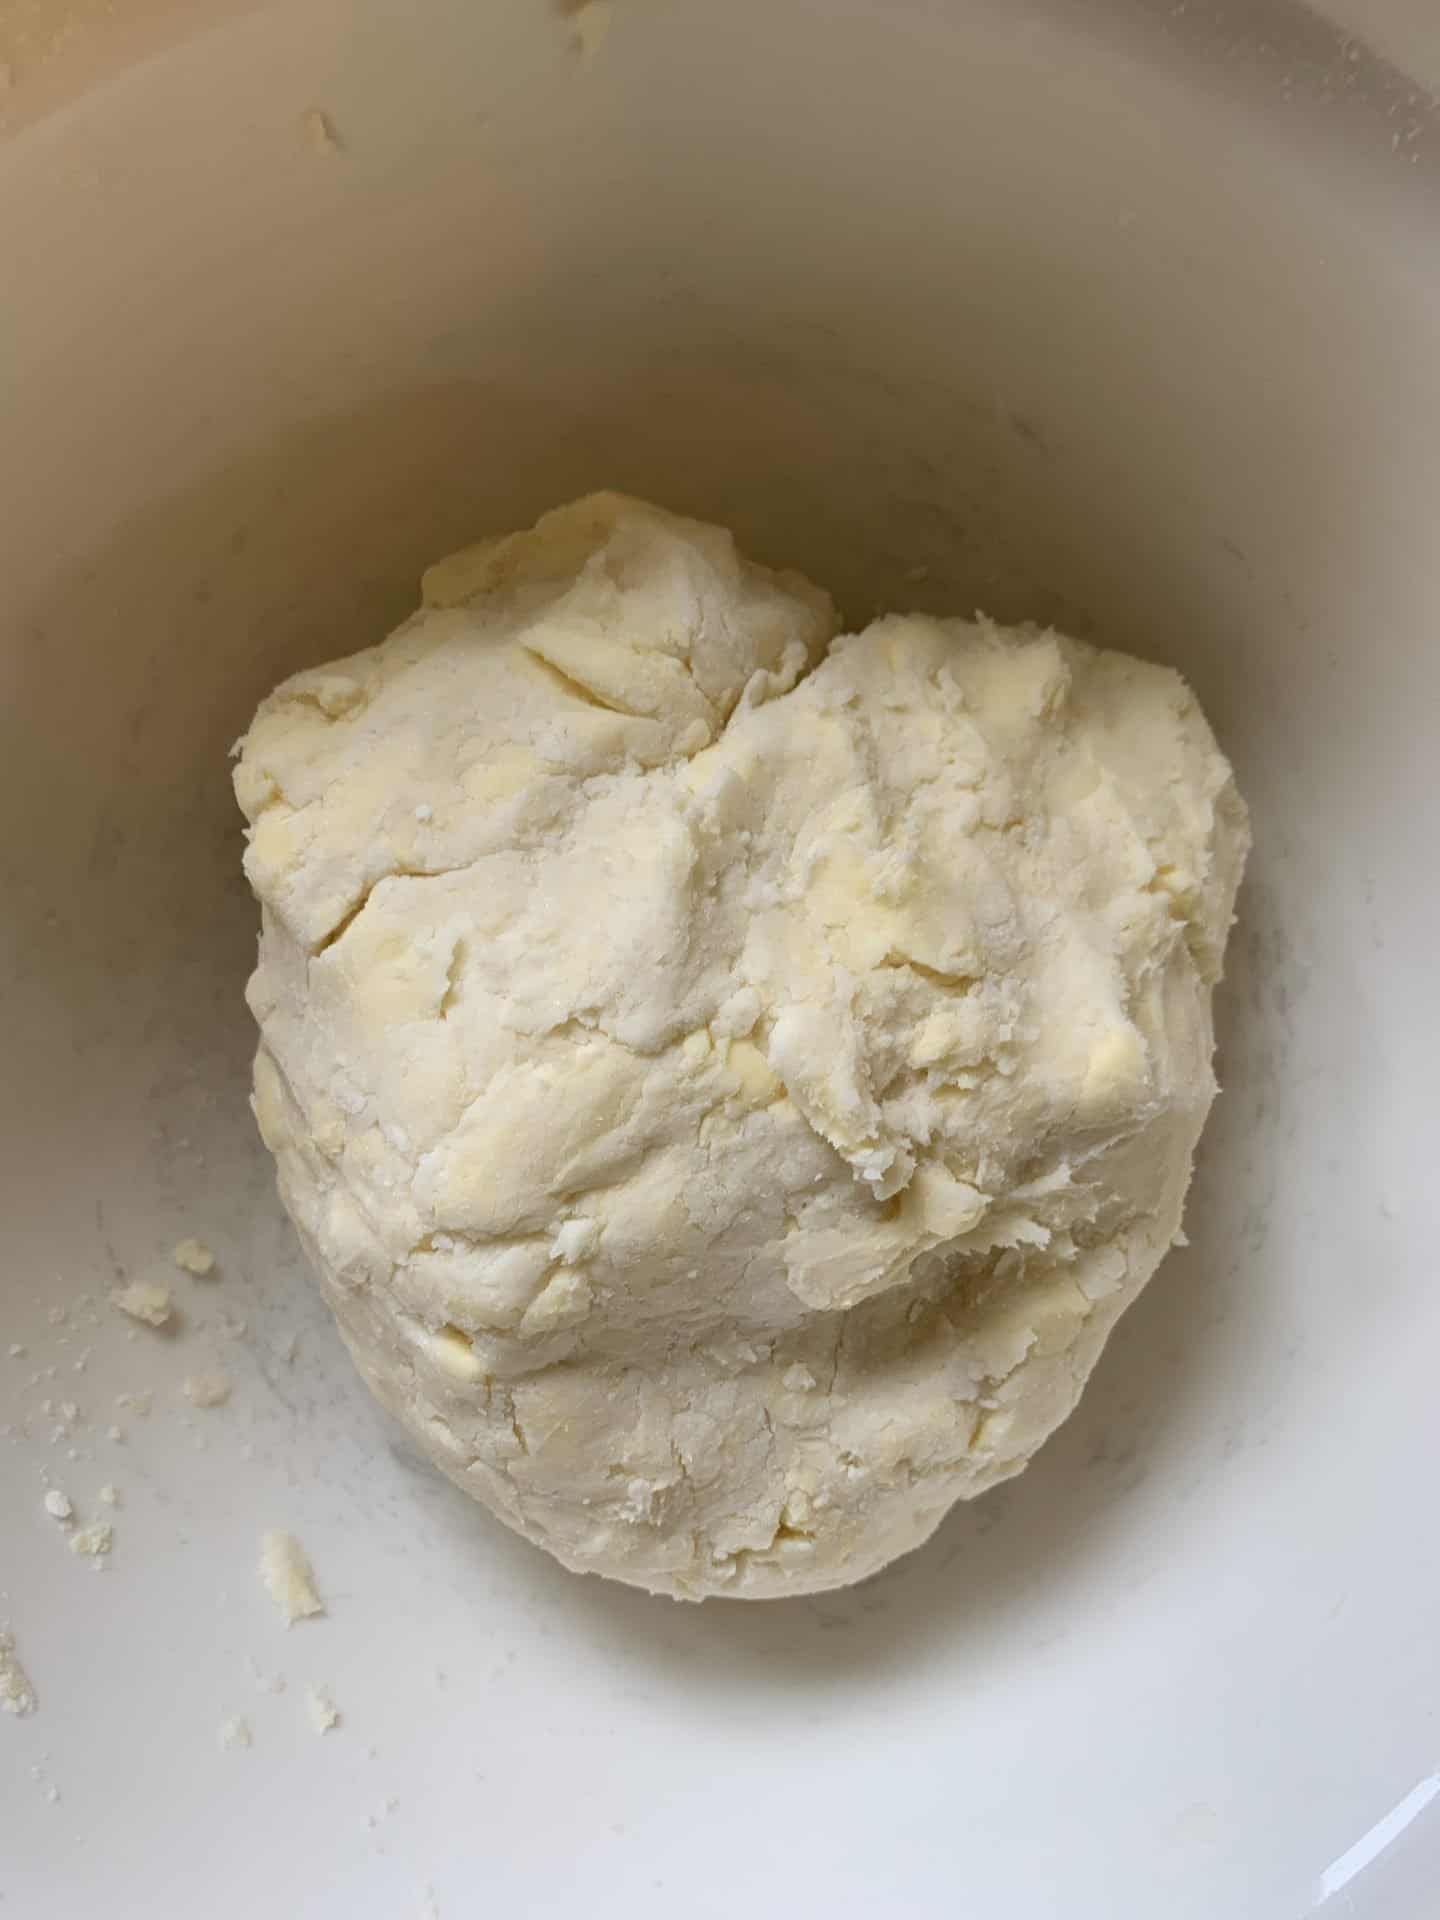
Once your butter is all chopped up, we need to create a dough for our pastry.
Gradually add the ice-cold water to the mixture, using a wooden spoon to bring it all together as you go.
When you add the last of the water the mixture should start to come together as a dough.
You can use your hands here to bring it into a ball but try and handle it as little as possible.
Remember, we want to keep the lumps of butter intact – if it’s a warm day or you feel the butter starting to melt, you’ll need to chill the pastry ball.
This is really important as if the butter doesn’t stay cold, you won’t get that flaky puff.
If it’s warm, I’d recommend wrapping the ball of dough in clingfilm and chilling for at least 20-30 minutes.
If the butter is still cold, it’s time to move onto the next step.
3. Rolling out your pastry
This is where the fun starts – it’s time to make those lovely layers!
The layers in puff pastry are achieved by simply rolling and folding the pastry in a certain (but simple!) way.
However, as I said before, this relies on the pastry being cold so if your dough warms up at any point, just pop it back in the fridge.
The making of this gluten free puff pastry is really quite simple, it just takes patience more than anything.
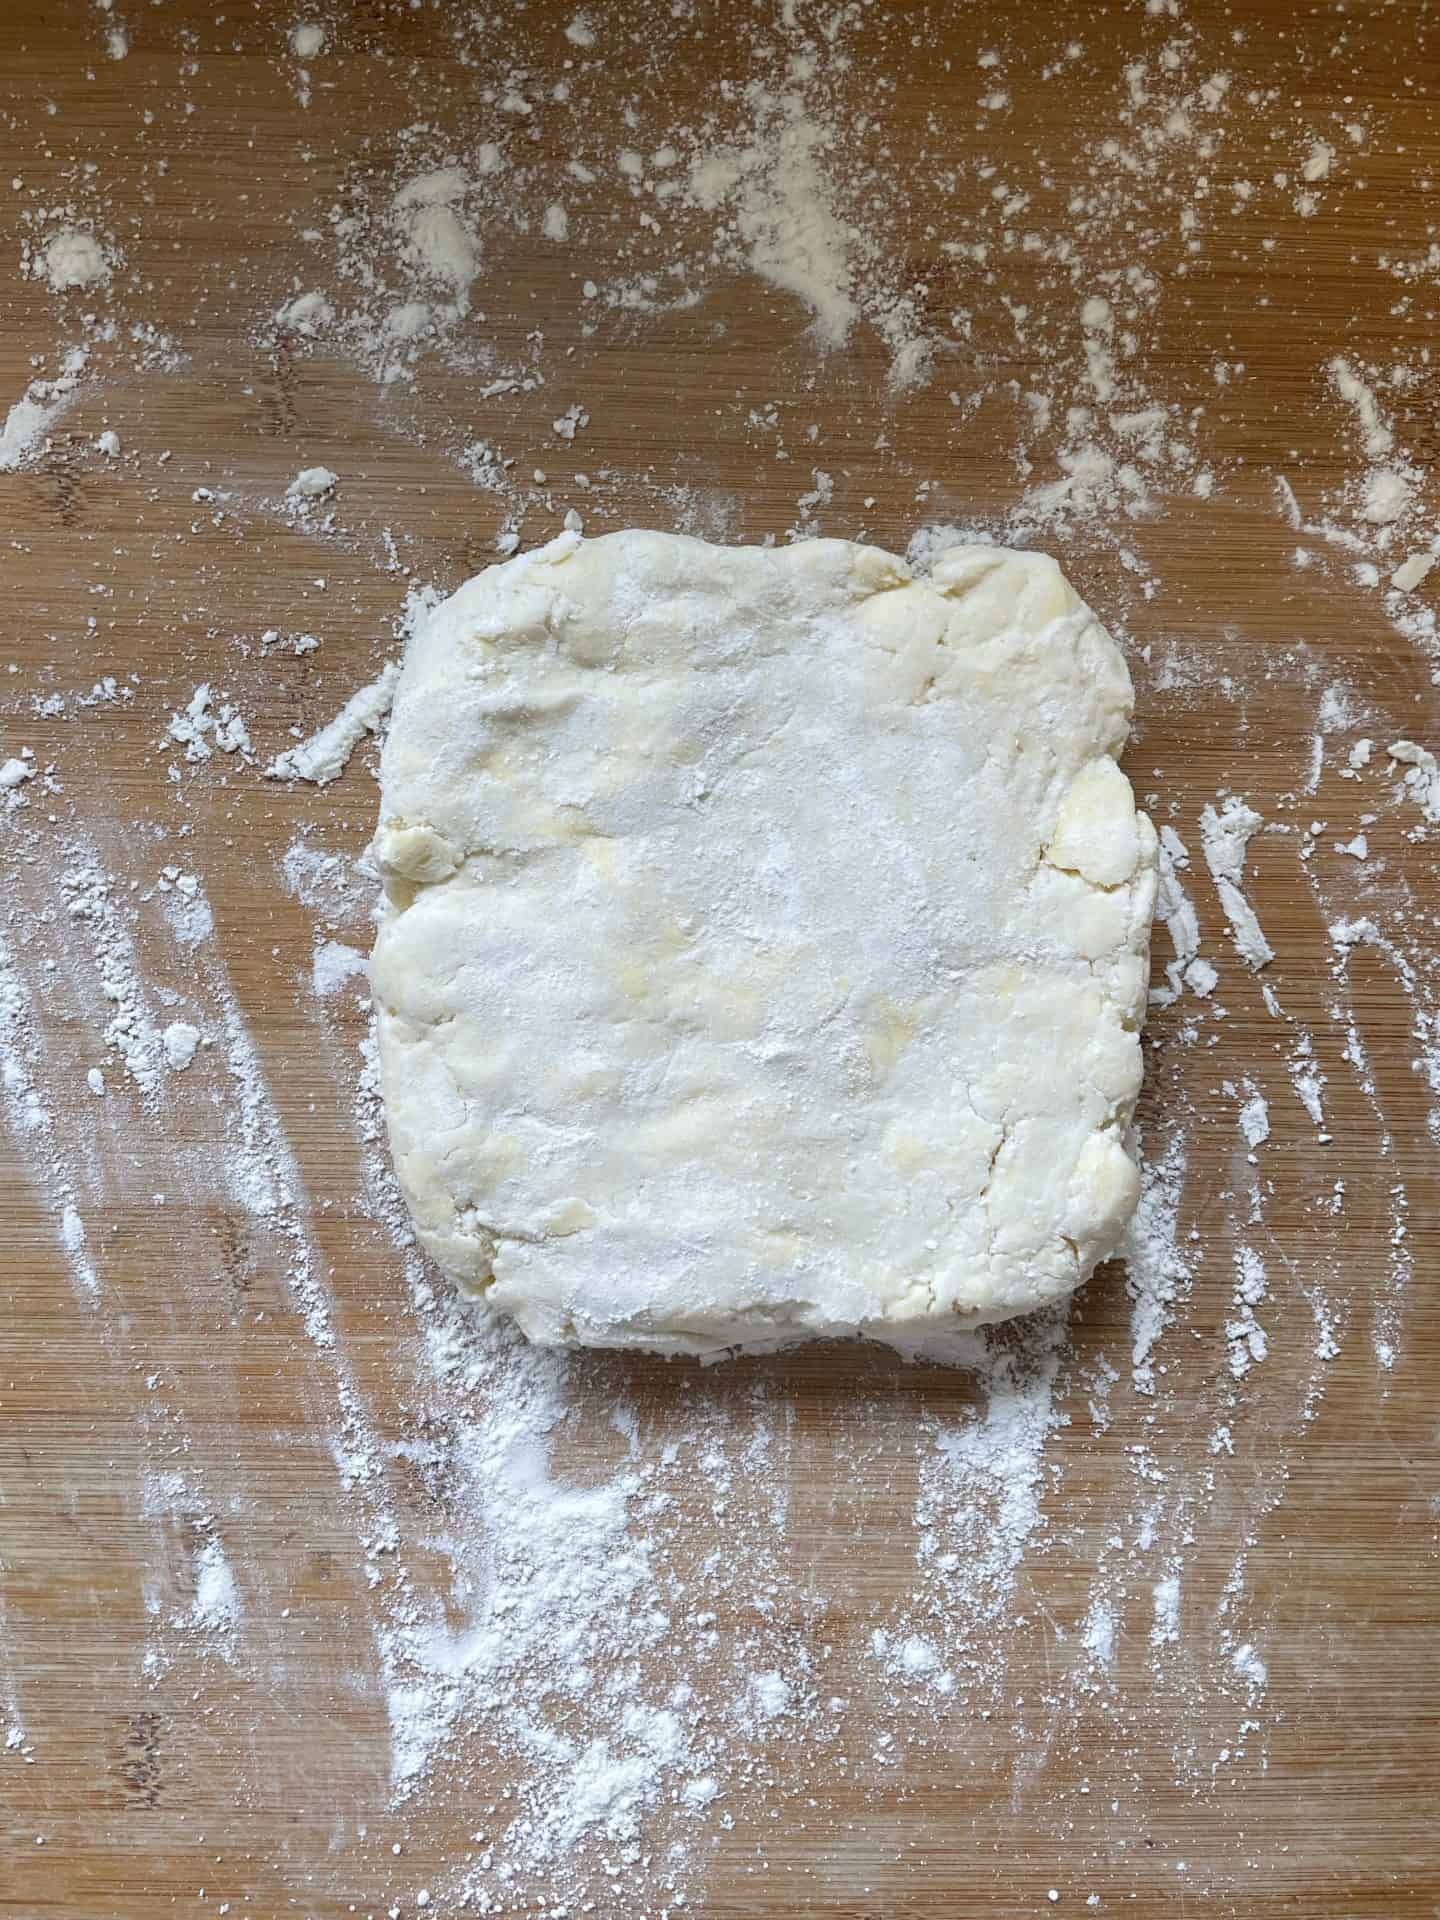
Remove your pastry from the fridge (if it’s chilling) and generously dust the work surface with gluten free flour.
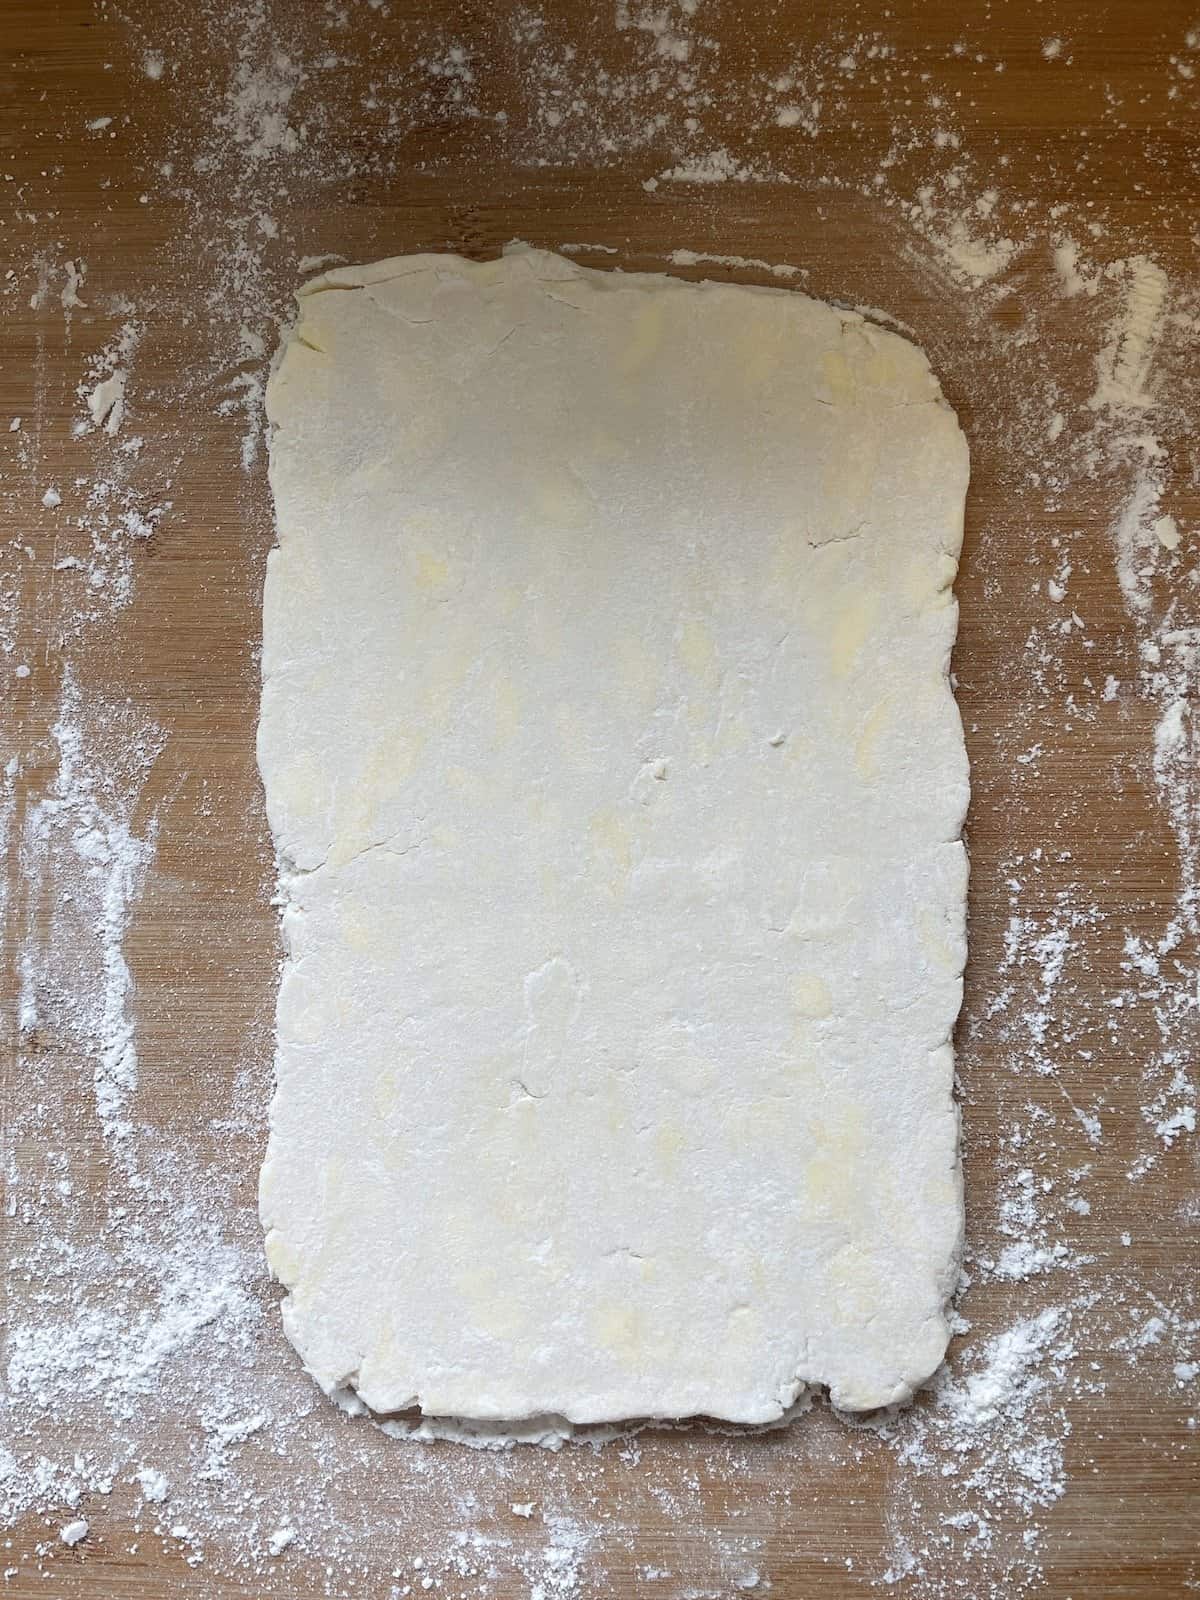
Place the dough in the centre and use your hands to flatten the dough into a rectangular shape, like this:
Then, with the short end nearest you, roll the pastry out in one direction into a long rectangle.
You want it to be approximately 1cm thick (using a rolling pin like this one helps).
Use your hands to keep shaping the pastry into a rectangle as you roll, so that you have reasonably straight edges.
Your rolled out rectangle should look like this, with the long ends approximately double the length of the short ends.
Folding the pastry
Once the gluten free puff pastry is rolled out it’s time to create the first fold.
Before you fold, make sure the short end of the pastry is facing towards you.
At this stage I also like to take a pastry brush and brush off any excess flour on top of the dough so that you don’t add too much extra to the mix.
Take the short end of the pastry which is furthest away from you and fold it back towards you until it meets the centre line, like this:
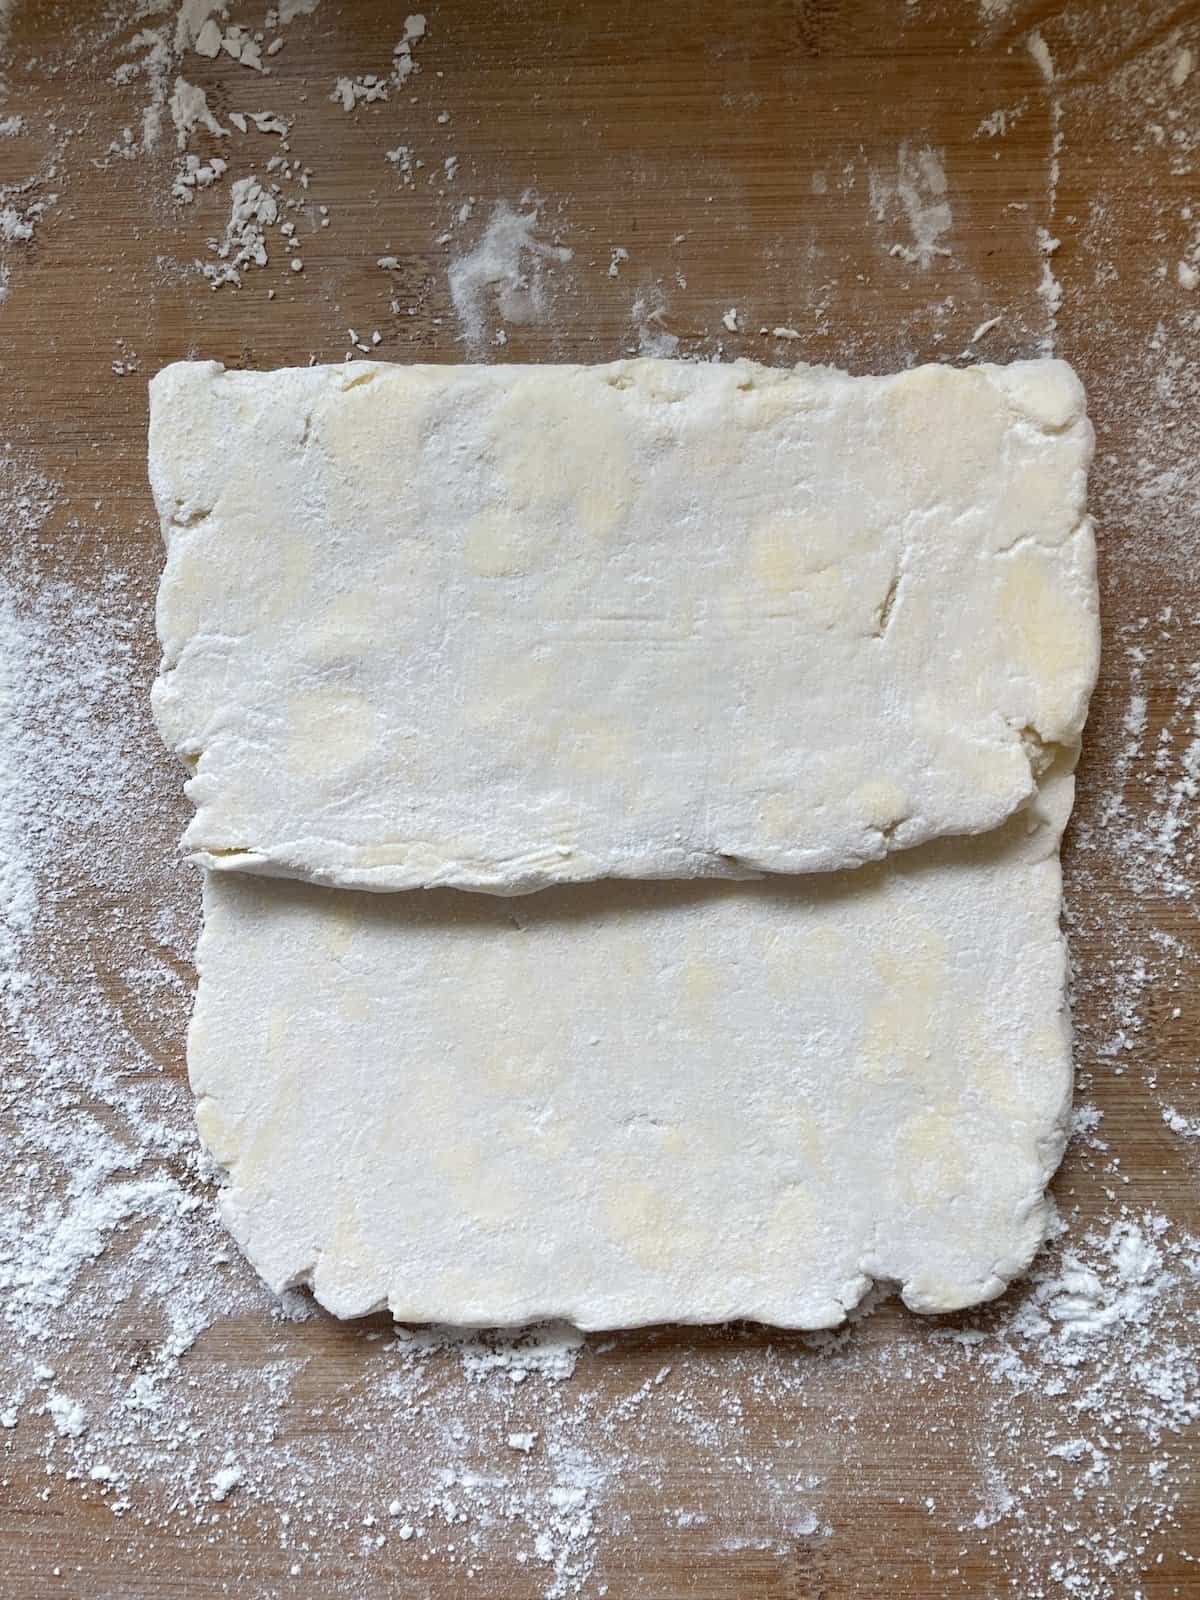
Then take the end nearest you and fold it over the top of the piece you have just folded.
You will then have three neat layers with your pastry folded like a letter.
It should look like this:
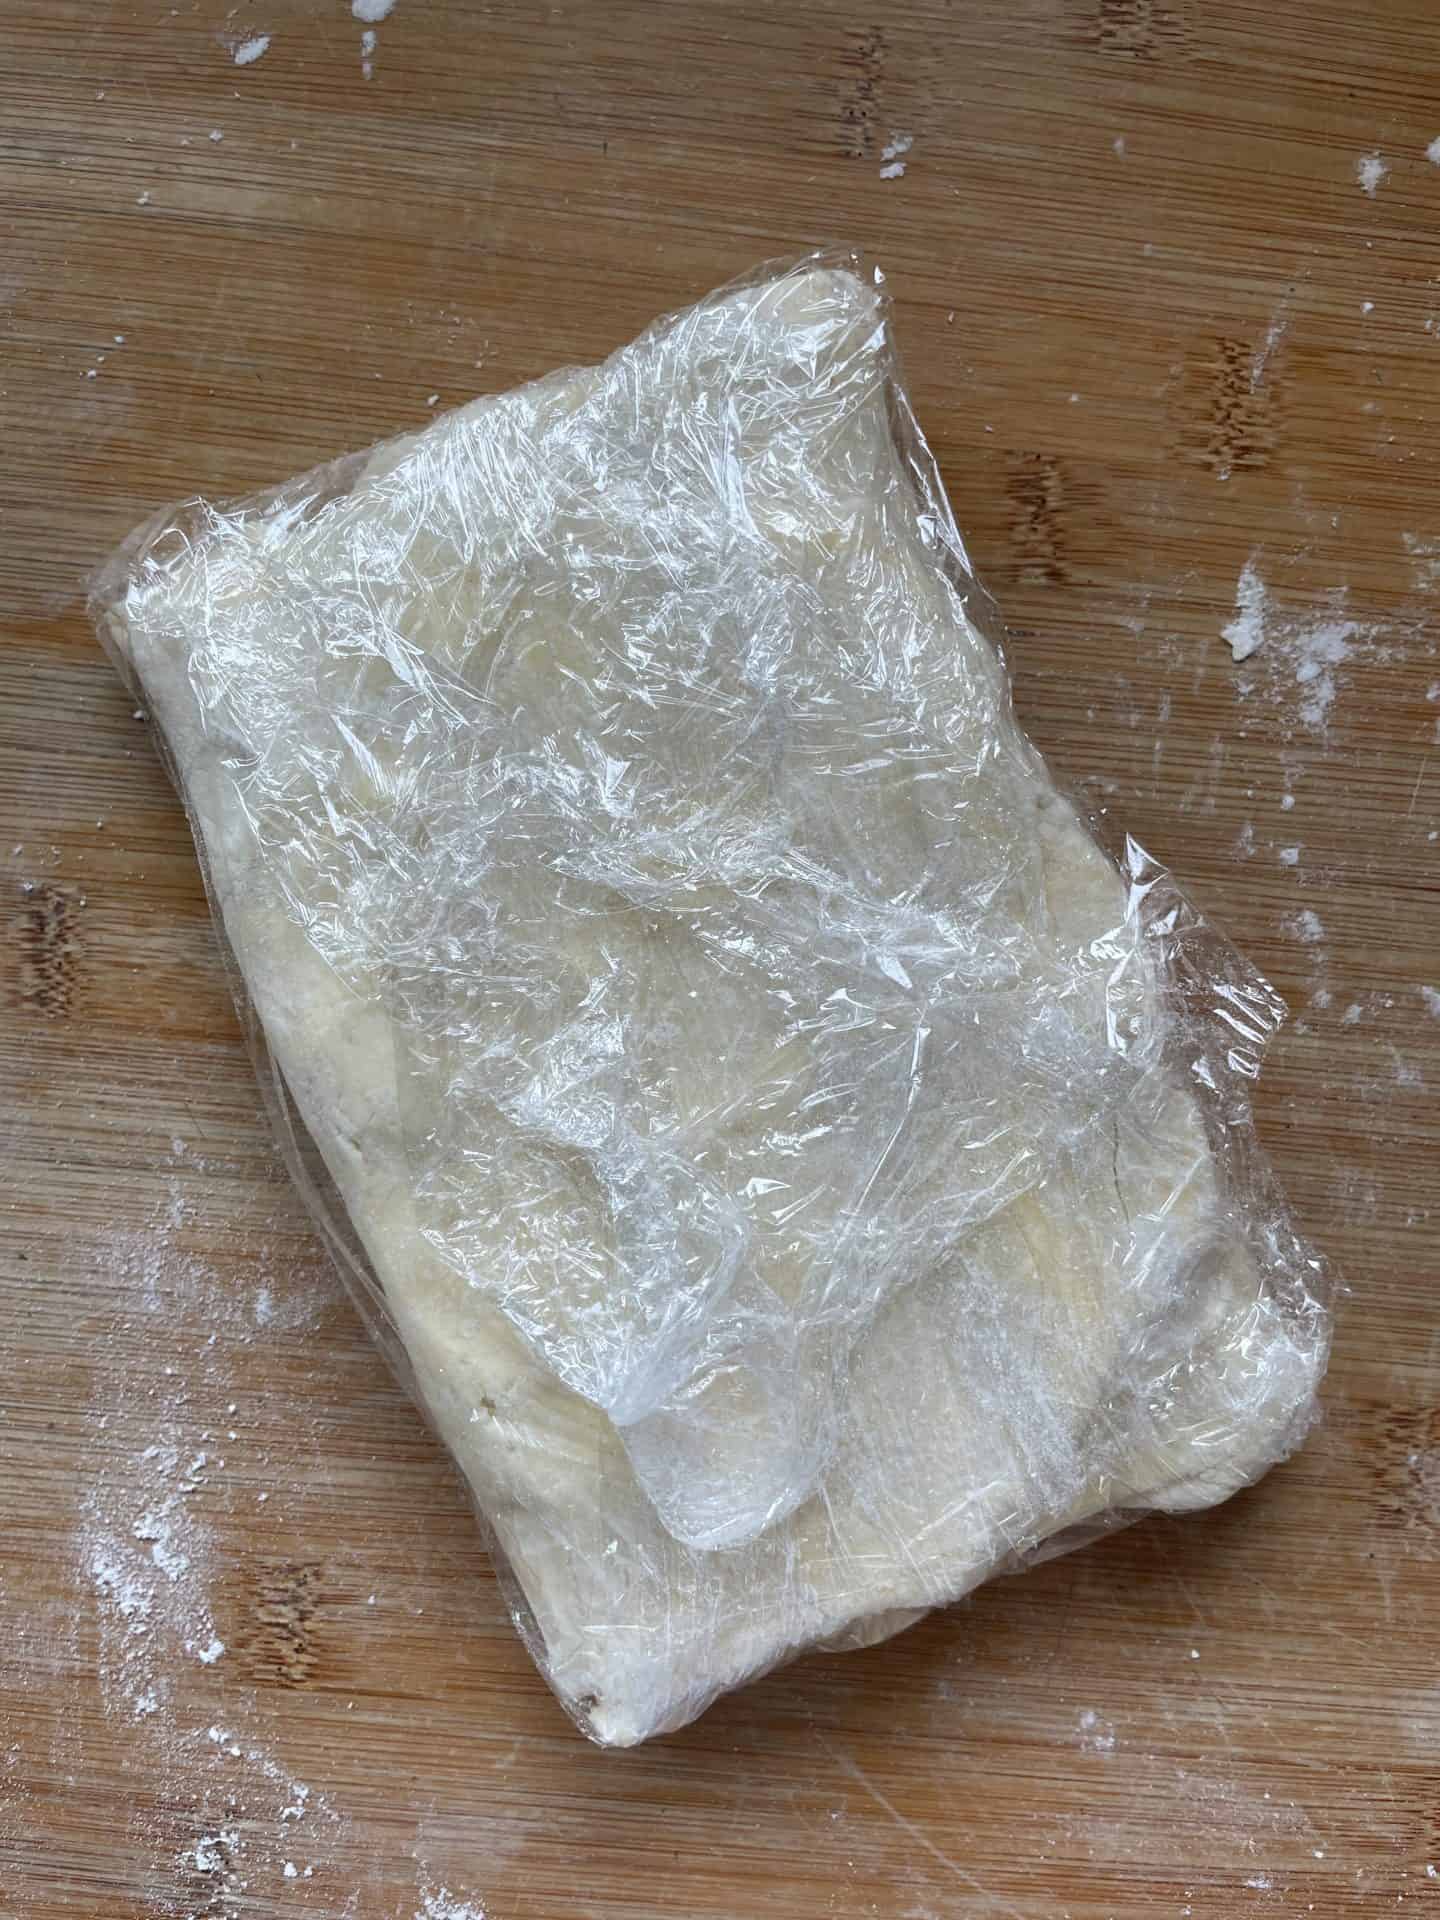
At this stage you may need to chill the pastry again – simply wrap it in clingfilm and place it in the fridge for 20 minutes or so.
If at any point you find the pastry is starting to stick, use a dough scraper to help it come away from the worktop then add some extra flour.
If the dough is sticking though, it’s an indication it’s warming up and needs to be chilled again.
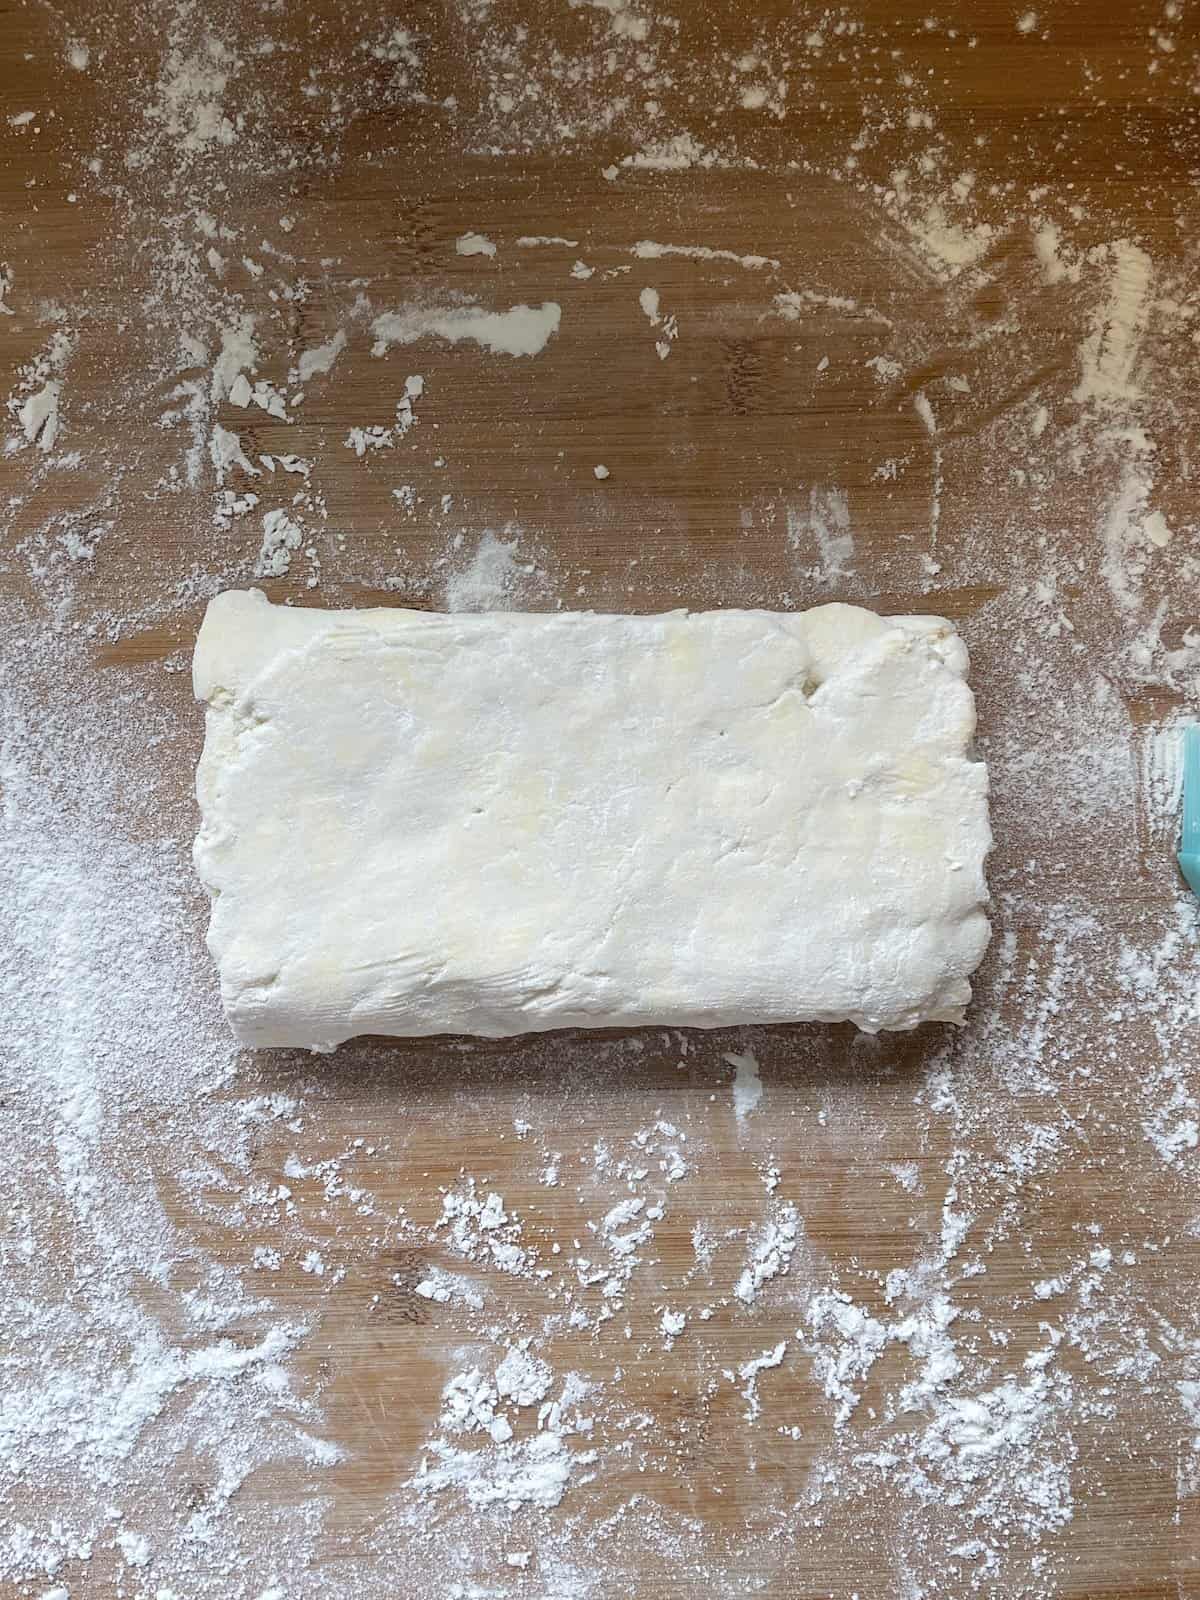
Turning the pastry
When you’re ready, we’re going to repeat this process twice more.
Before rolling out the pastry out for the next fold, you will need to dust the worktop with a little more flour.
Place the pastry down exactly as it was when you finished the last fold.
Then turn the pastry a quarter turn (90 degrees) clockwise before rolling the pastry out and folding as above.

Remember to always roll the pastry in one direction to preserve the layers – this is important!
You might need to chill the pastry between every turn-and-fold or, if it’s a cold day, you may be able to work quickly and do it all without chilling.
Simply judge it by how sticky the butter becomes and don’t be afraid to chill for as long as needed.
Once you’ve completed the three turns, wrap your pastry and chill it.
It can now be either used to make your chosen bake, kept in the fridge for up to three days, or frozen for three months.
Using your gluten free puff pastry
Once you’re ready to use your gluten free puff pastry, it’s pretty simple from here on!
To roll it out, remove it from the fridge and roll to the desired thickness dictated in the recipe.
If you have any offcuts, make sure you stack them neatly instead of scrunching them up.
This way you can re-roll the stacked-up pile out and use them for things like cheese straws!
If you scrunch them up you’ll lose all those layers and they won’t puff up anymore.
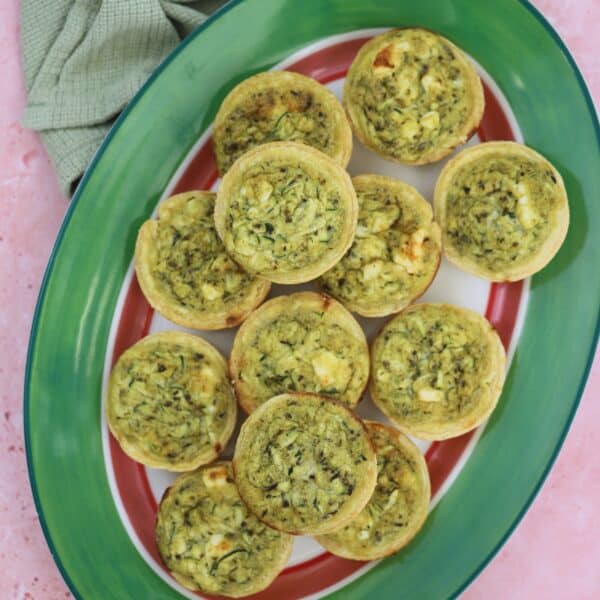
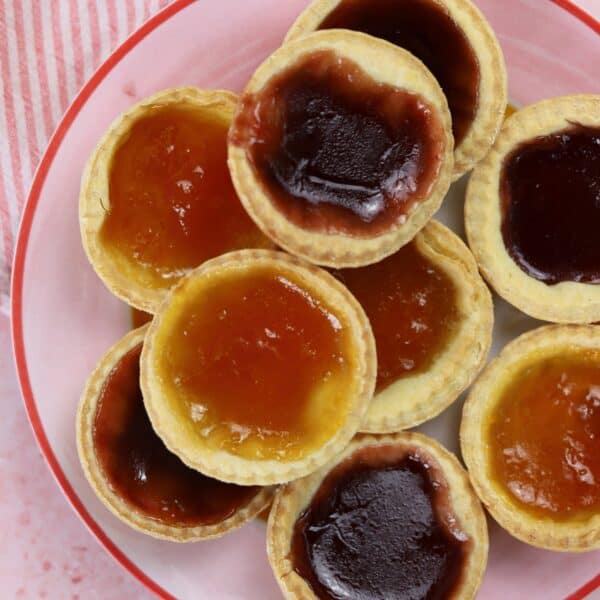
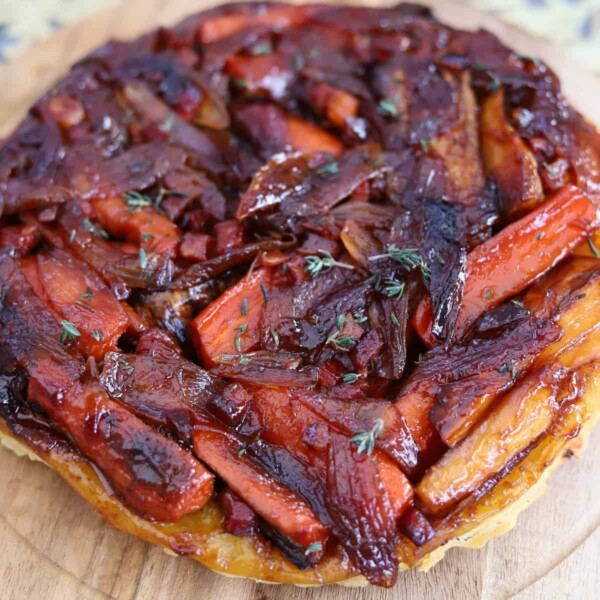
I’ll be gradually adding more gluten free puff pastry recipes to the blog now so do keep checking back for ideas on how to use your pastry.
For starters, why not use it to make my gluten free sausage rolls?
My gluten free puff pastry recipe
So now you’ve read the above guide, it’s time to start making your gluten free puff pastry!
Don’t forget you can print this recipe card out, and above blog post has a step-by-step photo and video guide to making this gluten free puff pastry.
As a guide, this makes around 12 small sausage rolls – so you can judge if you need more or less based on that!
If you make this recipe and love it, please do let me know by tagging me on my Instagram or using #theglutenfreeblogger. I love seeing your bakes!
And please do leave a review to let others know you loved it too! It would mean the world to me.

Gluten Free Puff Pastry
This gluten free rough puff pastry is actually really simple - and just needs a little patience! A gluten free flaky pastry perfect for sausage rolls, cheese straws apple turnovers and more. As a guide, this makes enough for 12 mini sausage rolls. The trick is to keep the pastry as cool as possible.
Ingredients
- 250g unsalted butter (cold)
- 250g plain gluten free flour
- 1.5 tsp xanthan gum
- 1 tsp salt
- 150ml ice cold water
Instructions
- Cut the butter (which must be as cold as possible!) into cubes of approx 2cm.
- Add the gluten free flour, xanthan gum and salt to a large mixing bowl and stir. Then add the cubes of cold butter.
- Using two butter knives, ‘criss-cross’ across the pastry mix, cutting the butter into smaller pieces. You'll want to keep stirring the bowl to make sure the cut edges become coated in flour. Keep going until the butter lumps are mostly the size of peas - a few bigger lumps are absolutely fine.
- Gradually add the ice cold water to the mixture, stirring in between using a wooden spoon. Once it's all added, use your hands to bring the mixture together into a ball. Try to handle it as little as possible - you want to ensure you can still see lumps of butter throughout the pastry. *At this point, if it’s a warm day or the dough feels at all sticky, wrap the dough in cling-film and refrigerate for at least 20 minutes. If it’s a colder day and the dough still feels smooth and cool, you might be able to get your first roll-and-turn in straight away.
- Sprinkle gluten free flour onto a worktop and place the ball of dough in the centre. Use your hands to flatten the dough slightly and shape it into a rectangle shape.
- Roll the dough out in ONE DIRECTION only, in one long rectangle approx 1cm thick. I find the best way to do this is to roll the dough away from you. Use your hands to keep gently nudging the pastry back into a reasonably straight line on the edges. You should see marbled streaks of butter throughout the dough as you roll it.
- Take the short edge which is furthest away from you and fold it back towards you until it meets the centre line. Then take the edge closest to you and fold it away from you over the piece you have just folded, so the pastry is in three layers.
- Wrap in clingfilm and place in the fridge for 20-30 minutes until chilled. When you remove it from the fridge, place the dough down in exactly the same position as it was before, then give the dough a quarter turn clockwise.
- Repeat steps 6, 7 and 8 TWICE more - so a total of three fold-and-turns. Each time you start, place the folded dough in the same position as when you finished the last fold and give it a quarter-turn before you begin rolling.
- Ensure you chill for at least 20-30 minutes before rolling out to use in your chosen bake. Any offcuts should be stacked on top of each other - don’t scrunch them up into a ball otherwise you will lose all the layers you’ve worked into them.
Notes
- It's VITAL to keep this dough as cold as possible. If making this on a hot day, you may need to refrigerate the dough more frequently. If it sticks to the worktop, use a dough scraper to gently ease it off the worktop and sprinkle some more flour down to stop it sticking further.
- Just remember: If in doubt, REFRIGERATE.
- This dough can be kept in the fridge for up to three days and can be frozen for up to three months. Freeze in it's folded state, wrapped in clingfilm. Defrost thoroughly before using.
Nutrition Information:
Yield:
12Serving Size:
1 (Based on 12 servings)Amount Per Serving: Calories: 226Total Fat: 17gSaturated Fat: 11gTrans Fat: 0gUnsaturated Fat: 6gCholesterol: 45mgSodium: 197mgCarbohydrates: 16gFiber: 1gSugar: 0gProtein: 2g
Need some more gluten free baking inspiration?
Want to have a go at some of the other gluten free baking recipes on the blog?
Give some of these other gluten free bakes a try and see what you think!
There are plenty to choose from – here are a couple of easy baking tutorials to get you going:
Plus I’ve got some easy recipes to make using this gluten free puff pastry as a base:
If you do make this recipe please let me know! I’d love to see your photos using #theglutenfreeblogger, share them in my Facebook group or tag me on Instagram.
And if you have any recipe suggestions, please let me know in the comments what you’d like to see next!
Like this Gluten Free Puff Pastry recipe?
Make sure you pin these recipe cards below for later! Do head over and follow me on Pinterest too for more gluten free recipe inspiration.


Hi
What plain flour company do you use?
Thank you
I’m sad I’m writing this really, but I had the same experience as some others 🙁 it’s puffed slightly but just a massive pool of butter on my tray. The pastry was chilling for hours before I used it so it was definitely cool enough. And I preheated the oven to higher than I was using to cook then turned it down. Bit sad really as it just looks hella greasy.