This post may contain affiliate links for which I earn a small commission at no extra cost to you. For more info, check out my Disclosure Policy. Thank you for your support!
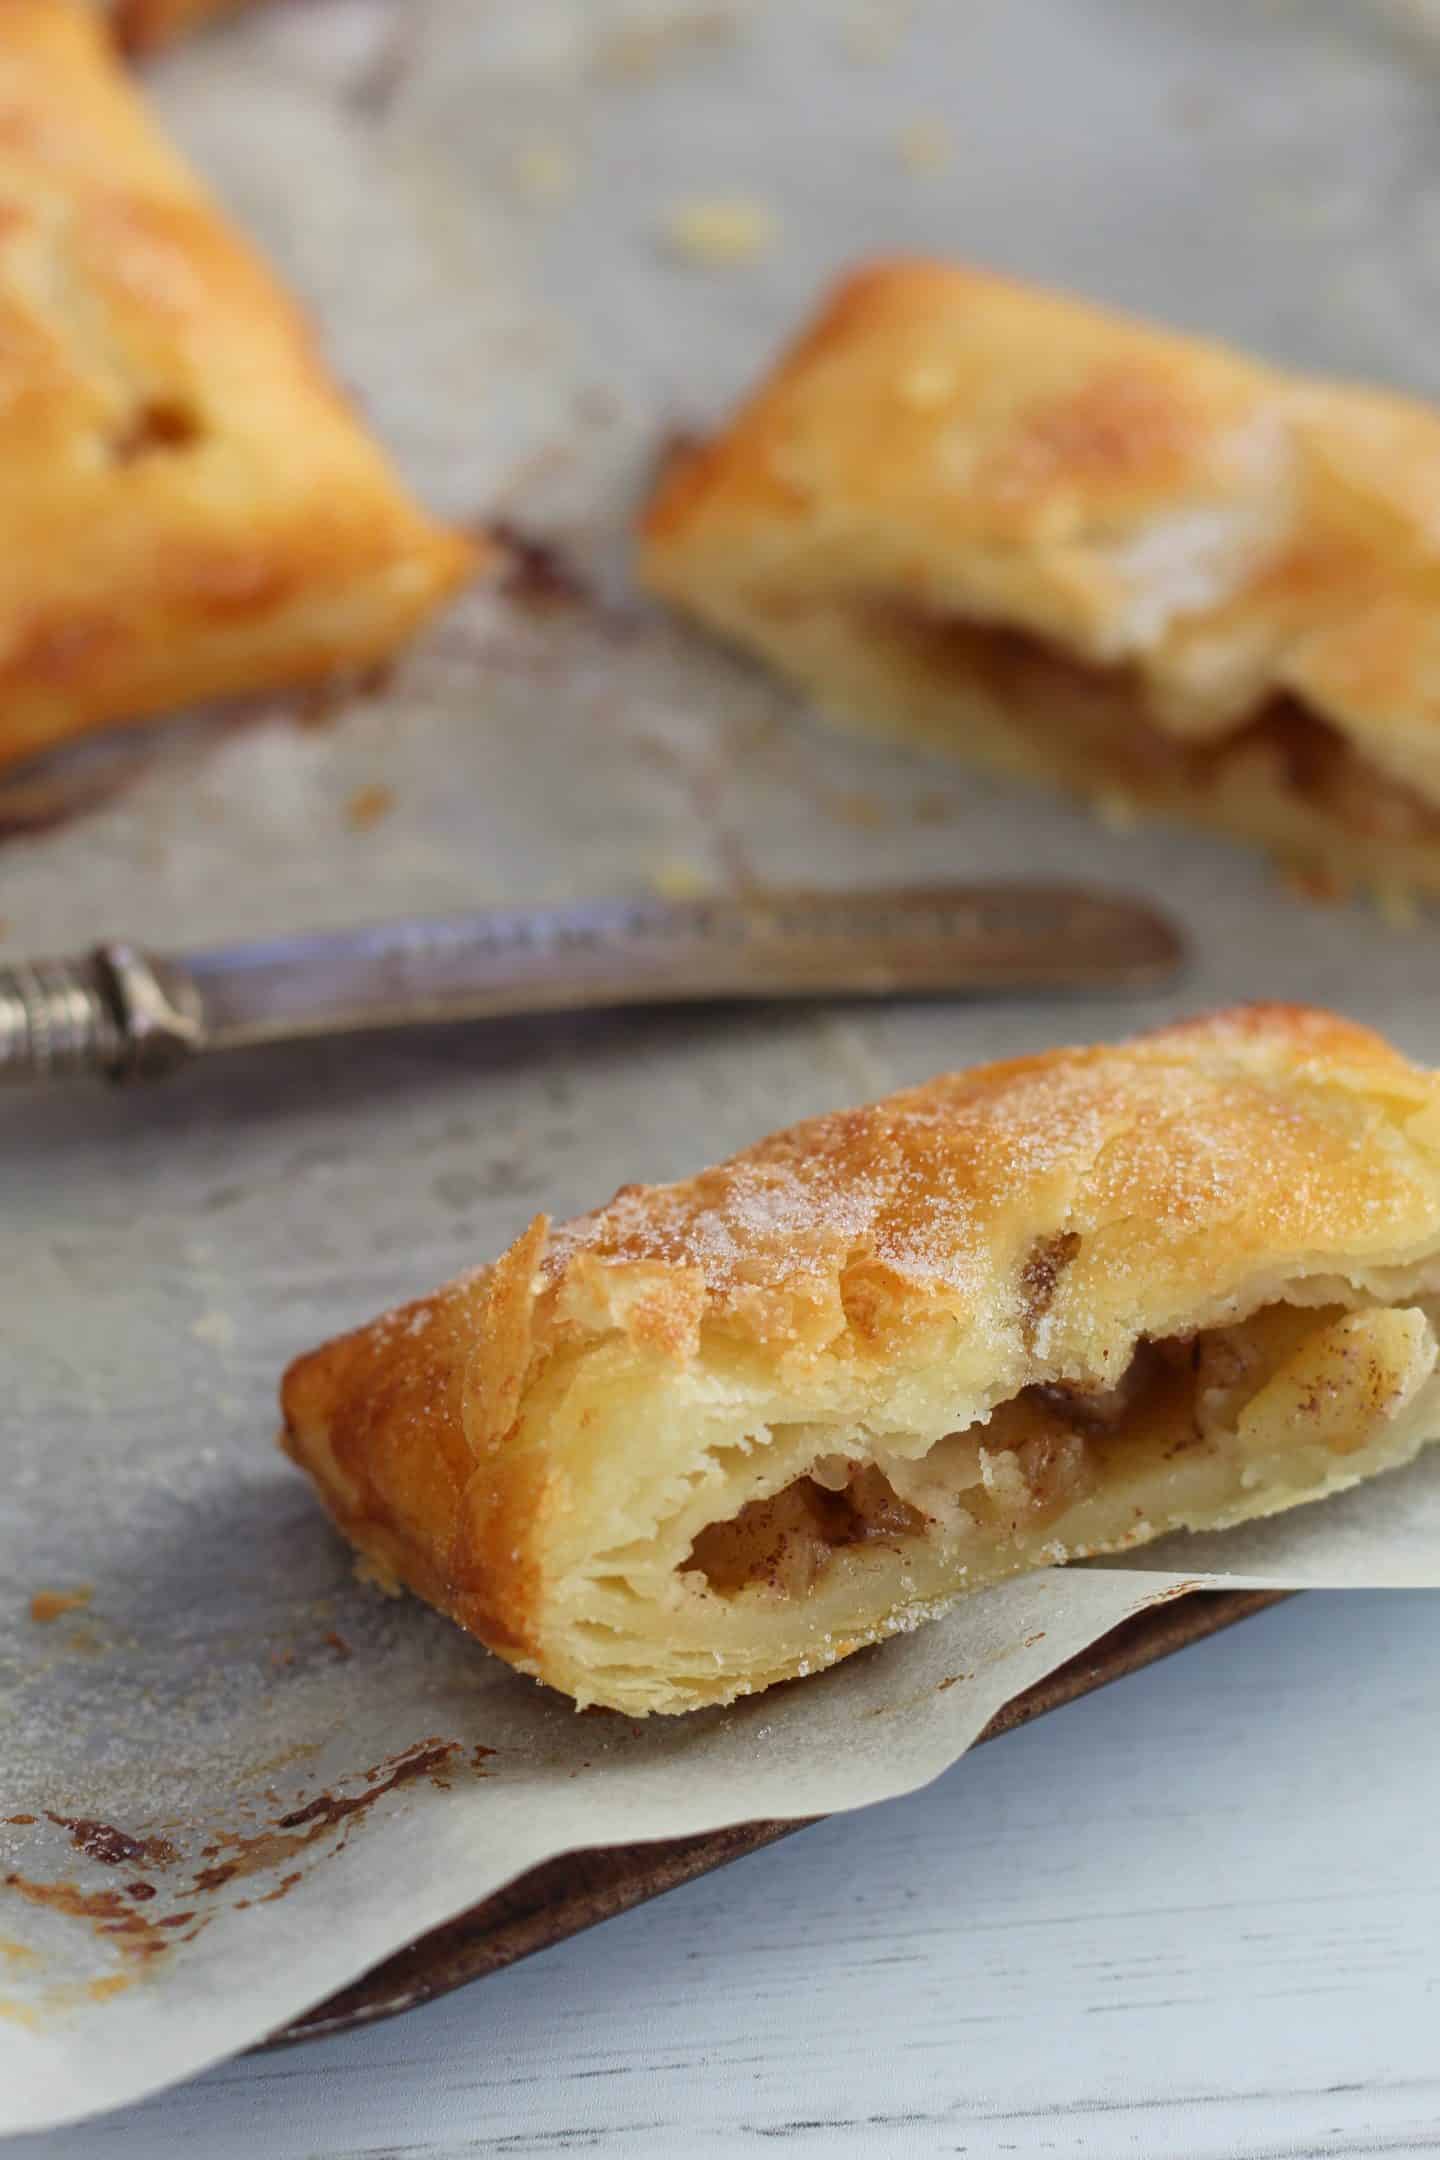
This Gluten Free Puff Pastry recipe is a flaky, delicious, buttery pastry which is surprisingly easy to make! Homemade gluten free rough puff pastry with just 4 ingredients. Perfect for sausage rolls, cheese straws, vol-au-vents, tartes, apple turnovers and more!

Gluten Free Puff Pastry Is Easier Than You Think!
- Why choose this recipe? You shouldn’t have to settle for sub-par, shop-bought gluten free puff pastry when making your own is SO easy – and tastes way better! For too many years I was terrified of making my own puff pastry, and now I make it all the time. It’s a lot simpler than you think, with only 4 ingredients.
- Top Tip: I cannot emphasise HOW important it is to keep this puff pastry cool at every stage of the recipe. Most of the recipe time is actually spent chilling the pastry – it’s not very labour intensive at all! Use the freezer to speed things up.
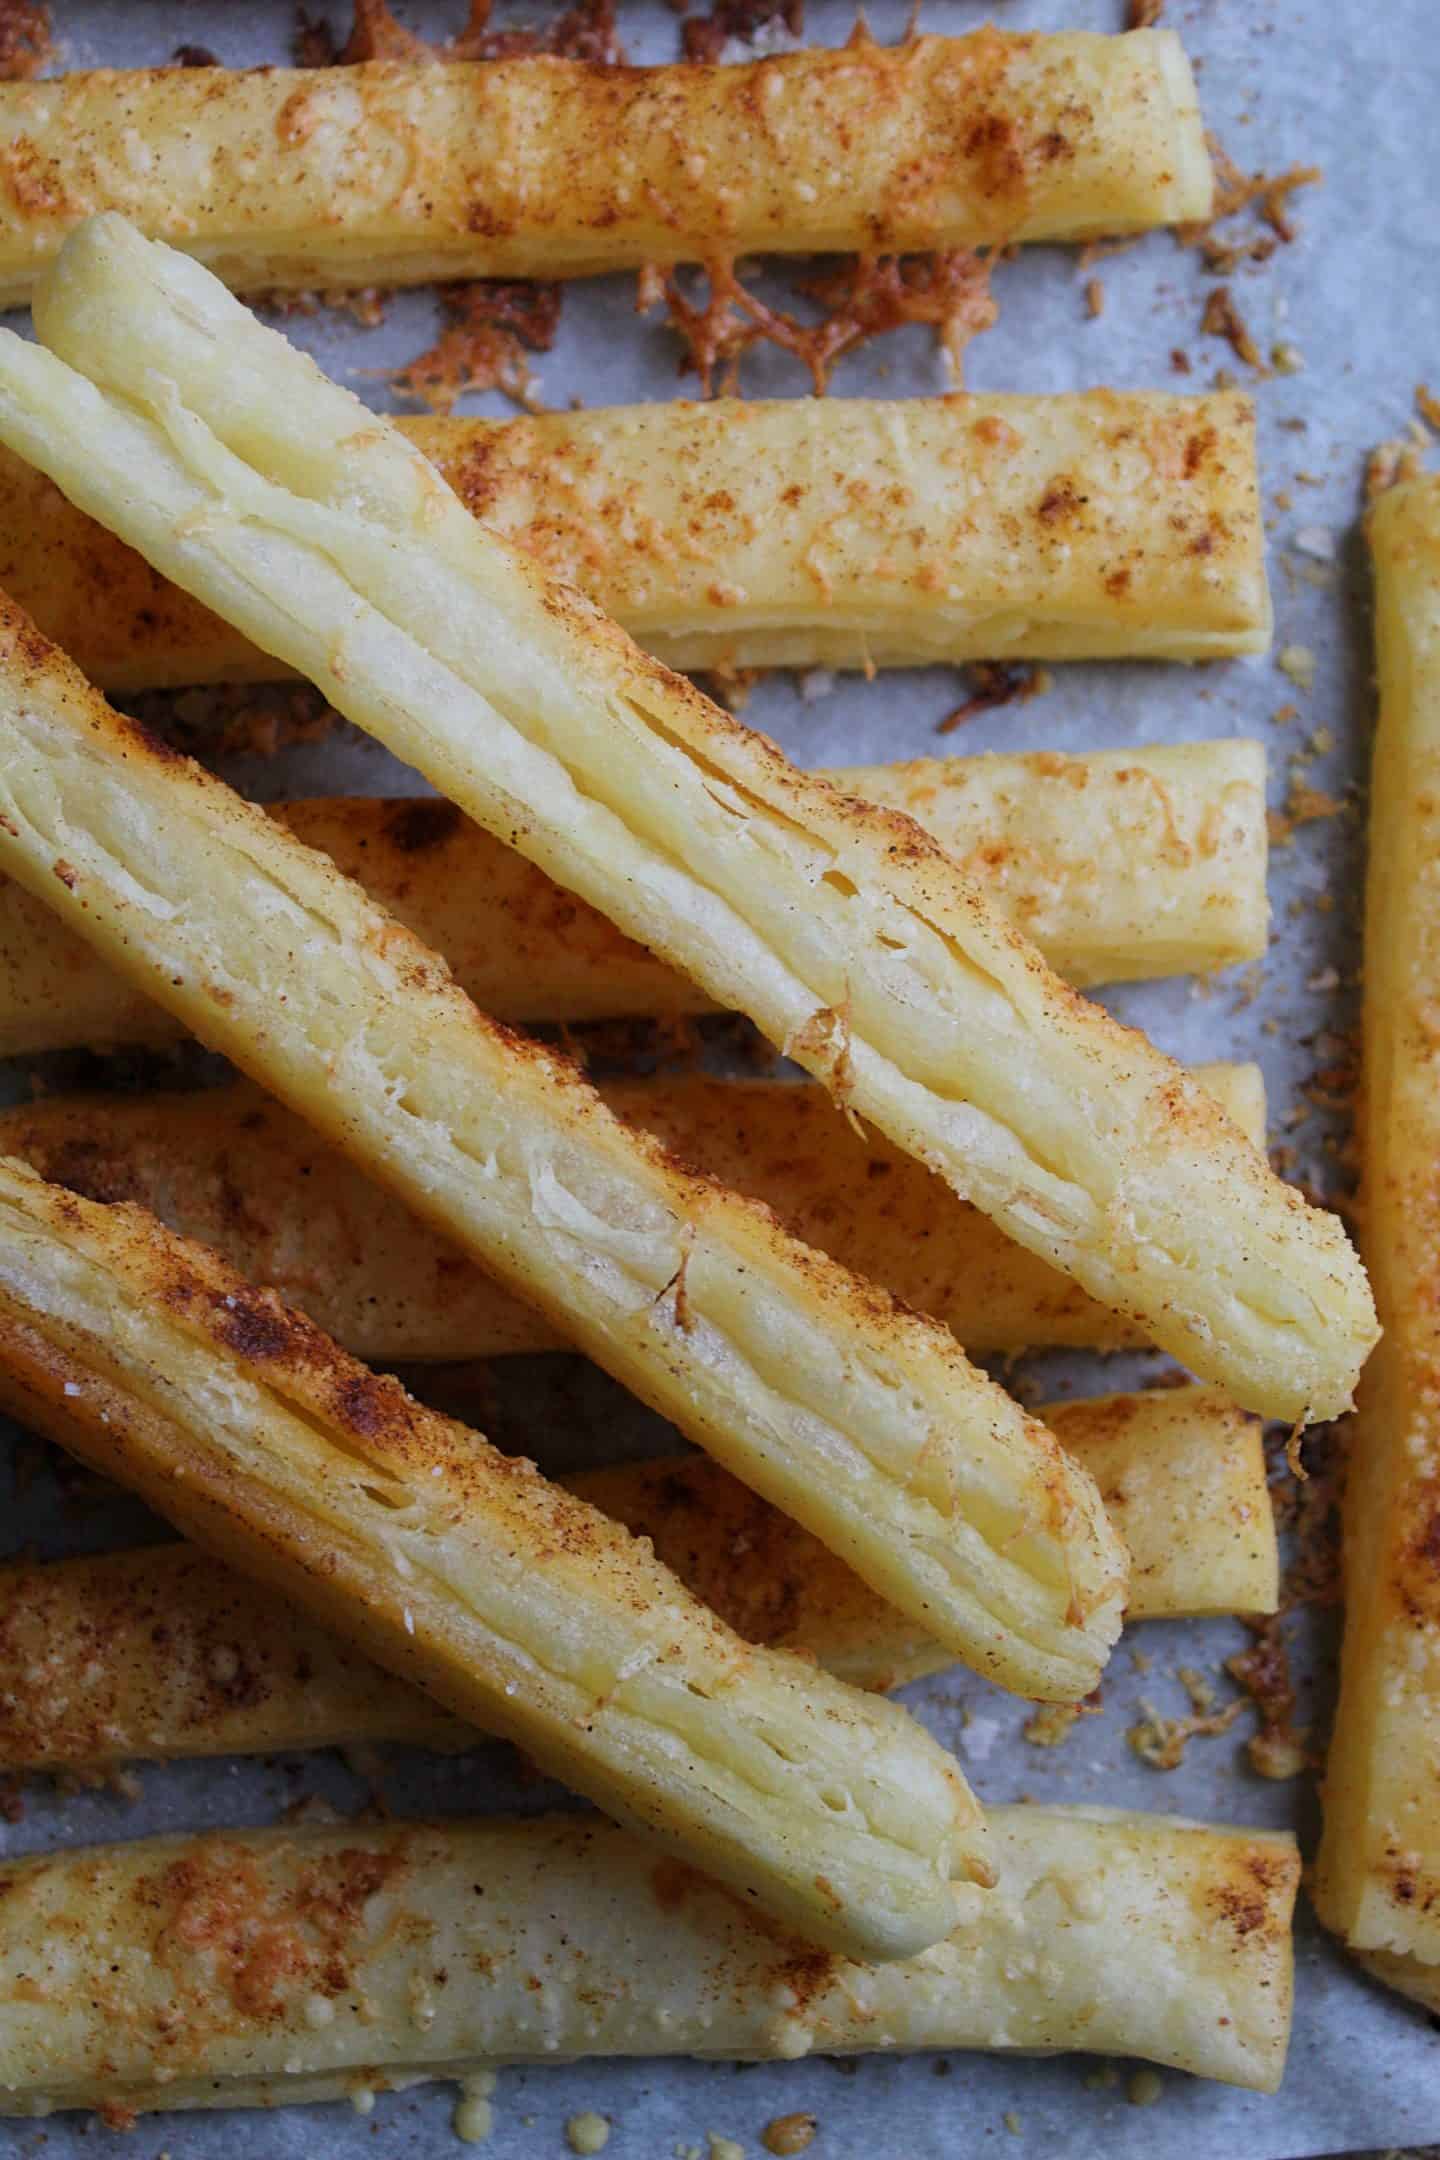
- How To Use It: This flaky gluten free pastry is perfect for making gluten free sausage rolls, cheese straws, vol au vents, puff pies and apple turnovers… to name but a few suggestions!
- Updated for 2025: I first published this rough puff pastry recipe in 2021, but I’ve updated it with new step-by-step photos, a tutorial video and an in-depth FAQ answering all your questions from the comments. You can’t go wrong!
Table of Contents
Don’t just take my word for it…
Linda left ⭐️⭐️⭐️⭐️⭐️ and said: “The pastry was flaky and tender. It was easy to make, this will be a go to pastry in my home!”
Sarah used this recipe to make sausage rolls and commented: “The flavour and texture beat the bought puff pastry and I know the ingredients are top quality.”
Molara left ⭐️⭐️⭐️⭐️⭐️ and said: “I made the puff pastry for sausage rolls and they came out perfect! I’ve tried for years to do gluten-free and dairy-free pastry baking and this is the first time it tastes amazing. My son kept coming back for more!”
Ingredients and Substitutions
This gluten free puff pastry recipe is very simple – you actually only need a few ingredients and it’s likely you’ll have most of them already. For the shopping list you’ll need:
- Unsalted Butter: It is very important that you use a good quality butter with a fat content of at least 82% for this to puff well. Cheaper, lower quality butters tend to melt quicker and leak out of the pastry more as it cooks. The butter must also be kept as cold as possible throughout the recipe. I’ve not tested this with a dairy free recipe, but you’d need a vegan margarine which is hard with a higher melting point.
- Plain Gluten Free Flour: I always use either the FREEE or Asda gluten free plain flour but any plain (or all purpose) gluten free flour blend should work.
- Xanthan Gum: This is super important – do not omit this even if your flour blend already contains it. Xanthan gum stops the pastry dough from becoming too crumbly or sticky and helps it be pliable and easy to work with.
- Ice Cold Water: The colder the better!

How to Make Gluten Free Puff Pastry
There’s a printable recipe card below with the method. But here are some step-by-step photos to show you how easy this gluten free puff pastry recipe is to make. Including a visual on how to fold puff pastry as well.

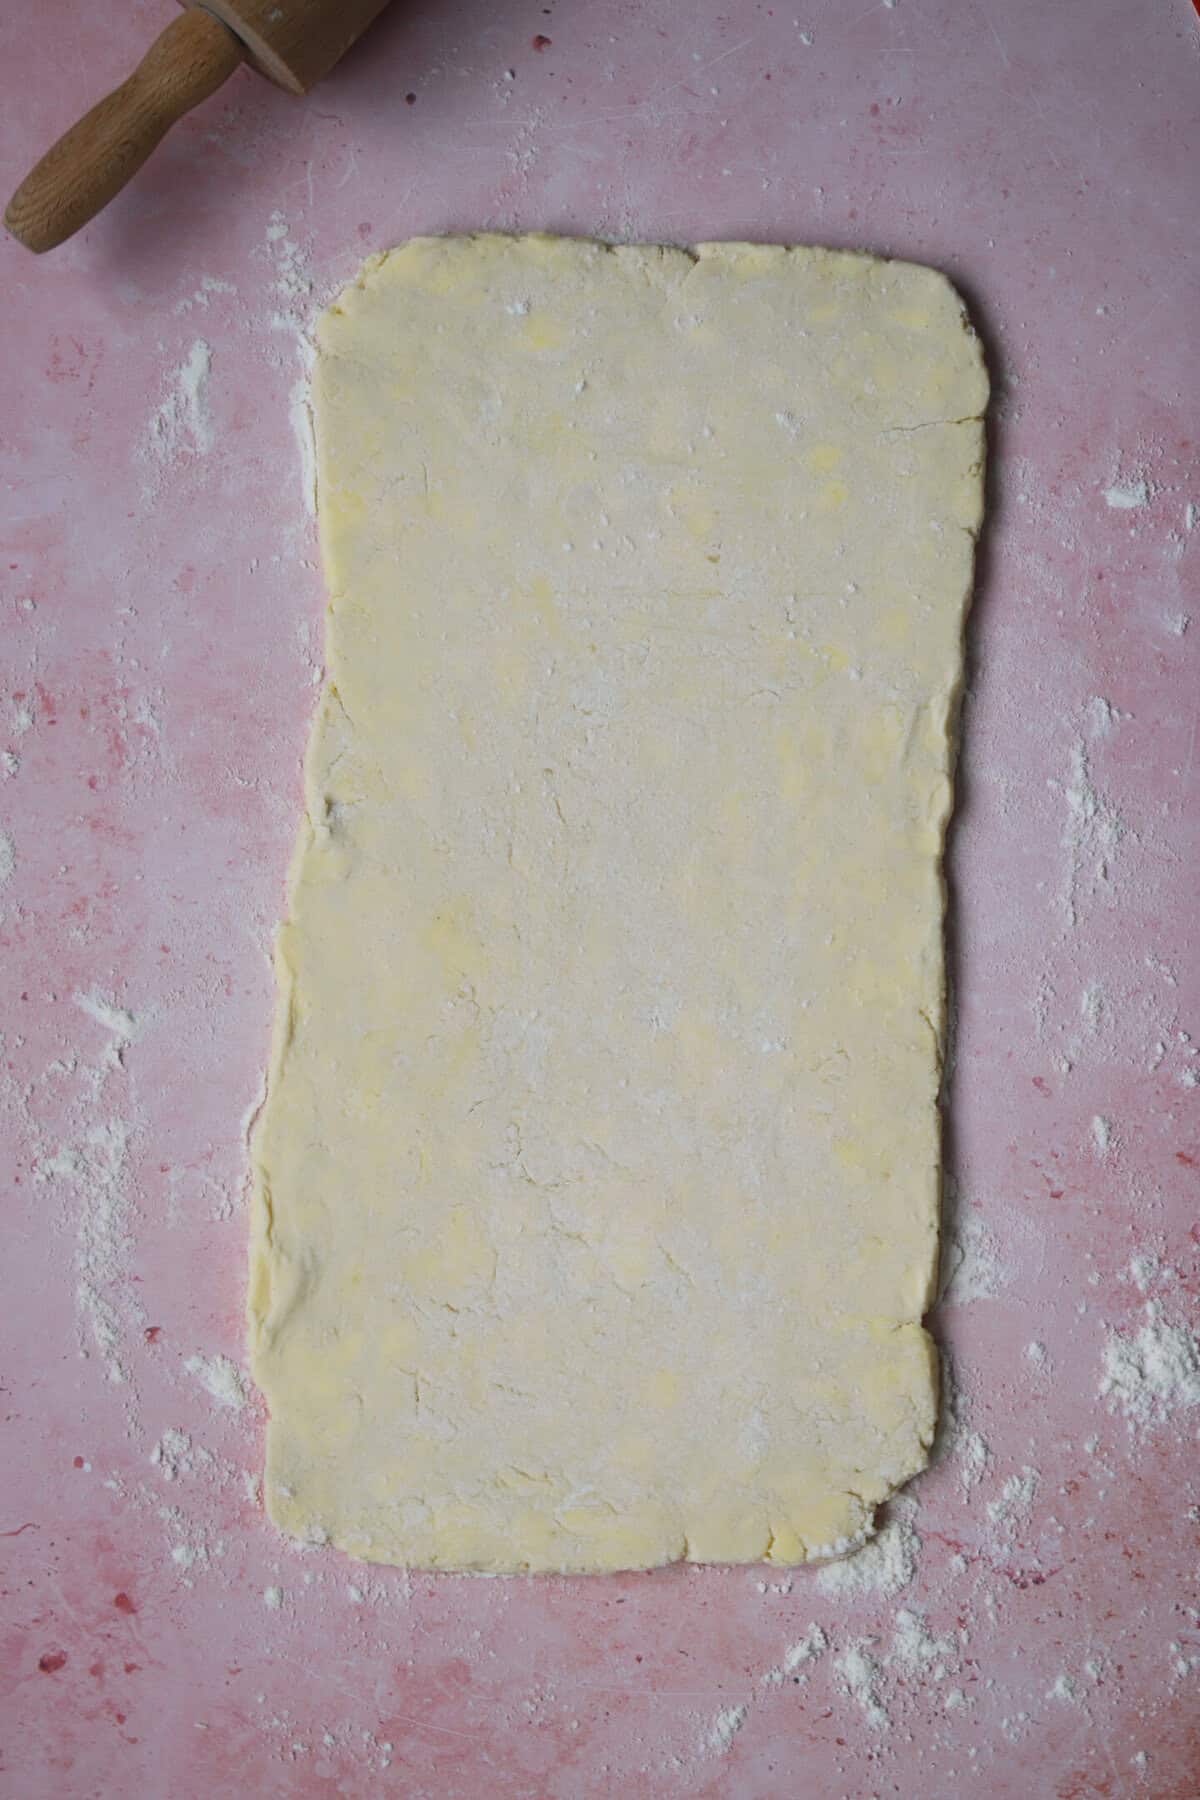
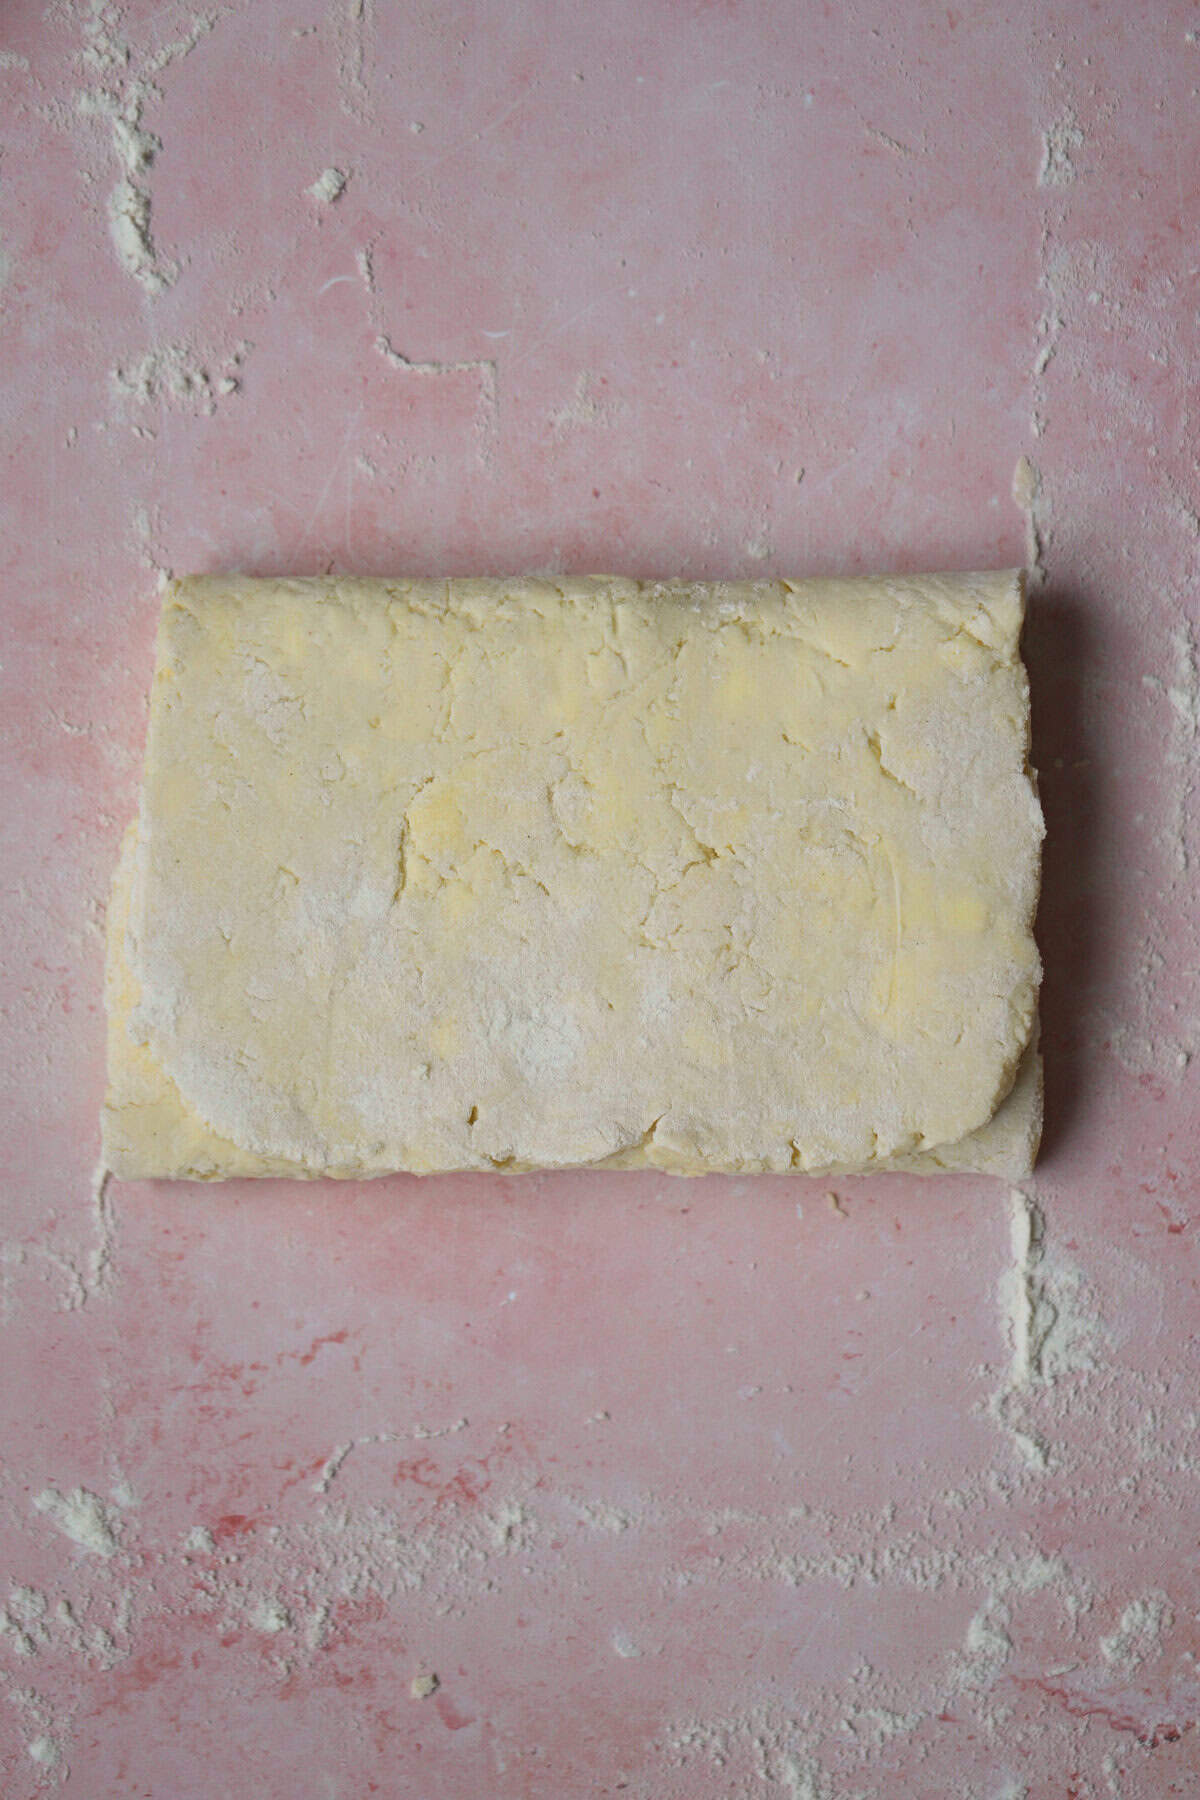
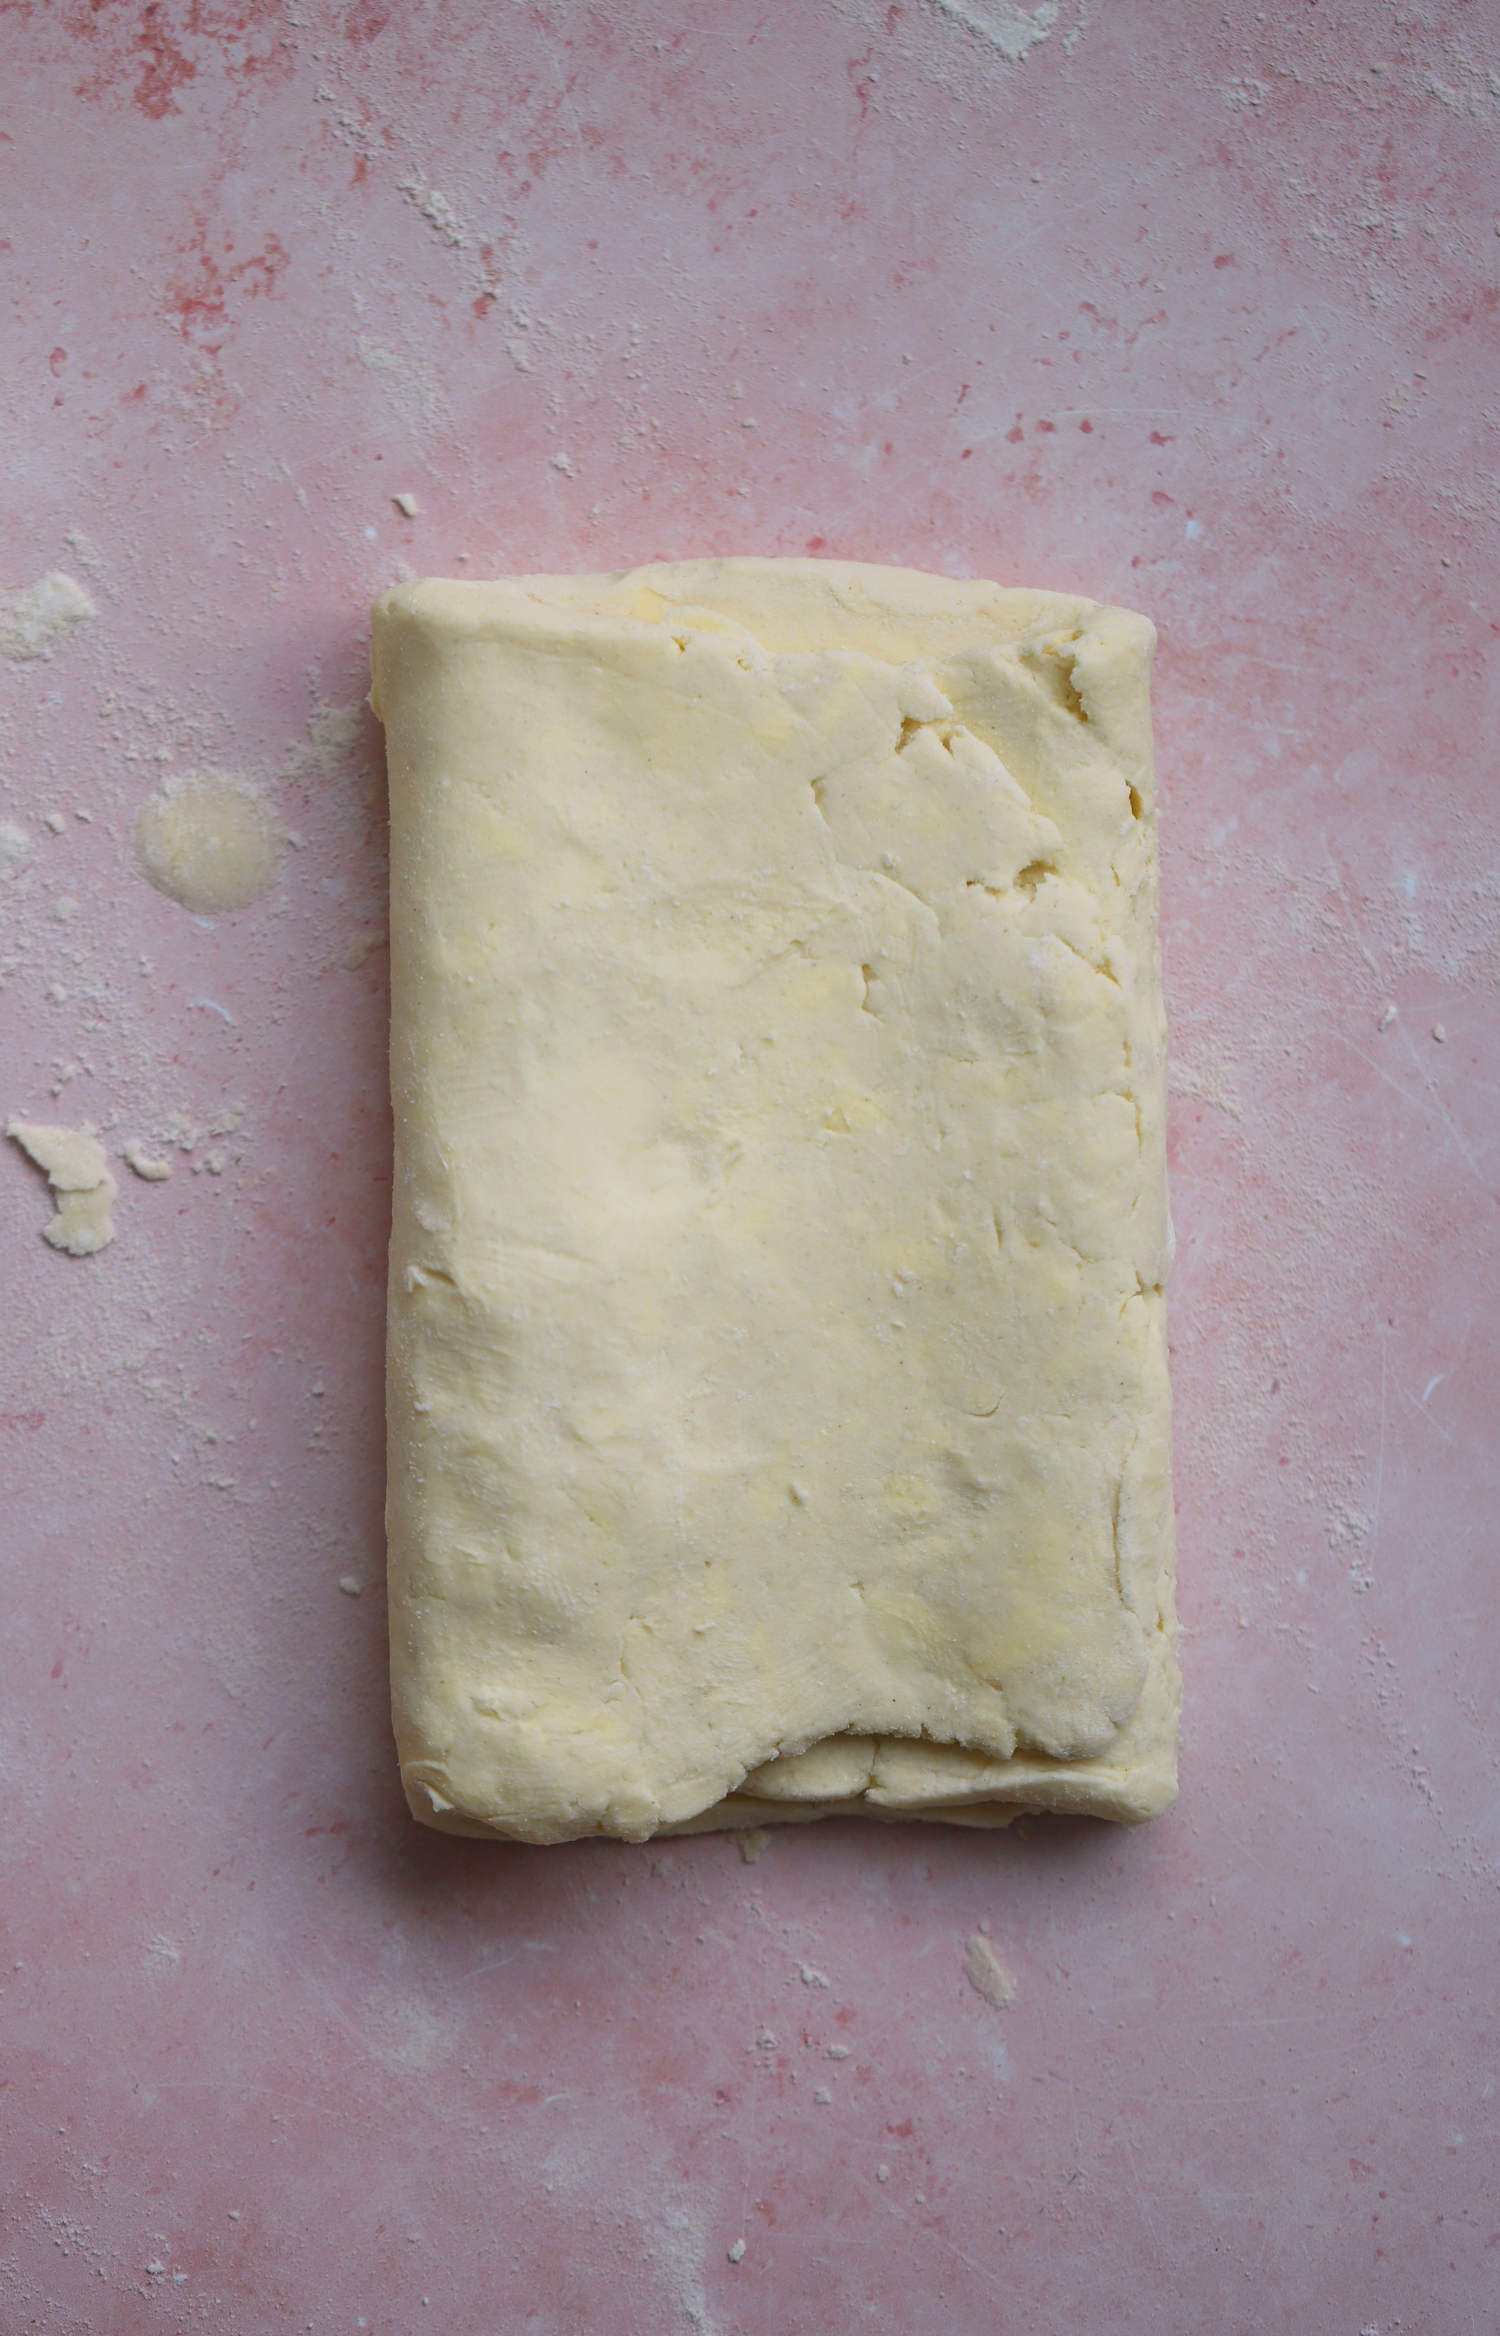
Once your dough is completely chilled, it’s time to roll, fold, and then chill again. To give you a visual idea of how the folding looks:

Always ensure you chill the puff pastry between steps 3 and 4 – I always chill for at least half an hour before the next turn, or the butter can melt and you’ll lose the layers.
Frequently Asked Questions
Here are some FAQs about this gluten free puff pastry recipe. This FAQ section is quite in depth but I wanted to ensure I answered all your queries and feedback from the comments!
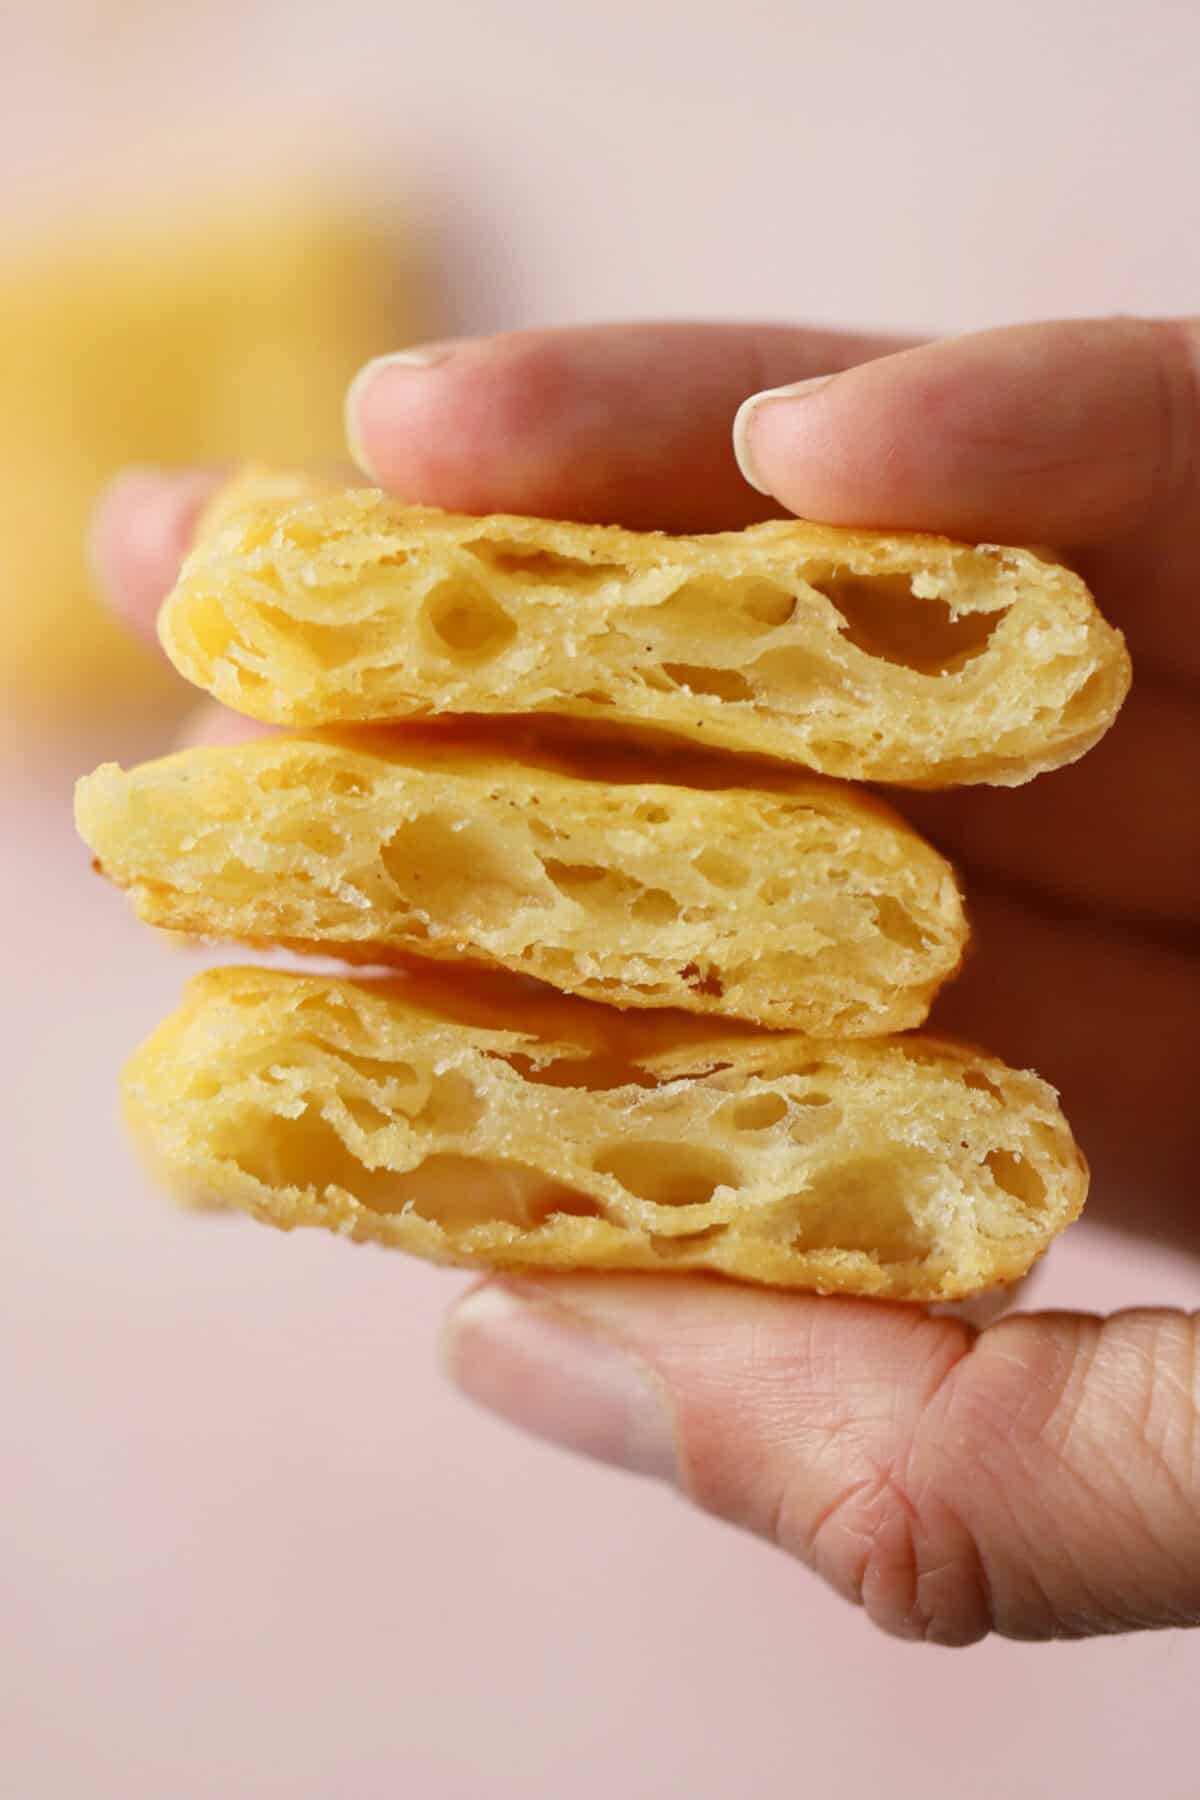
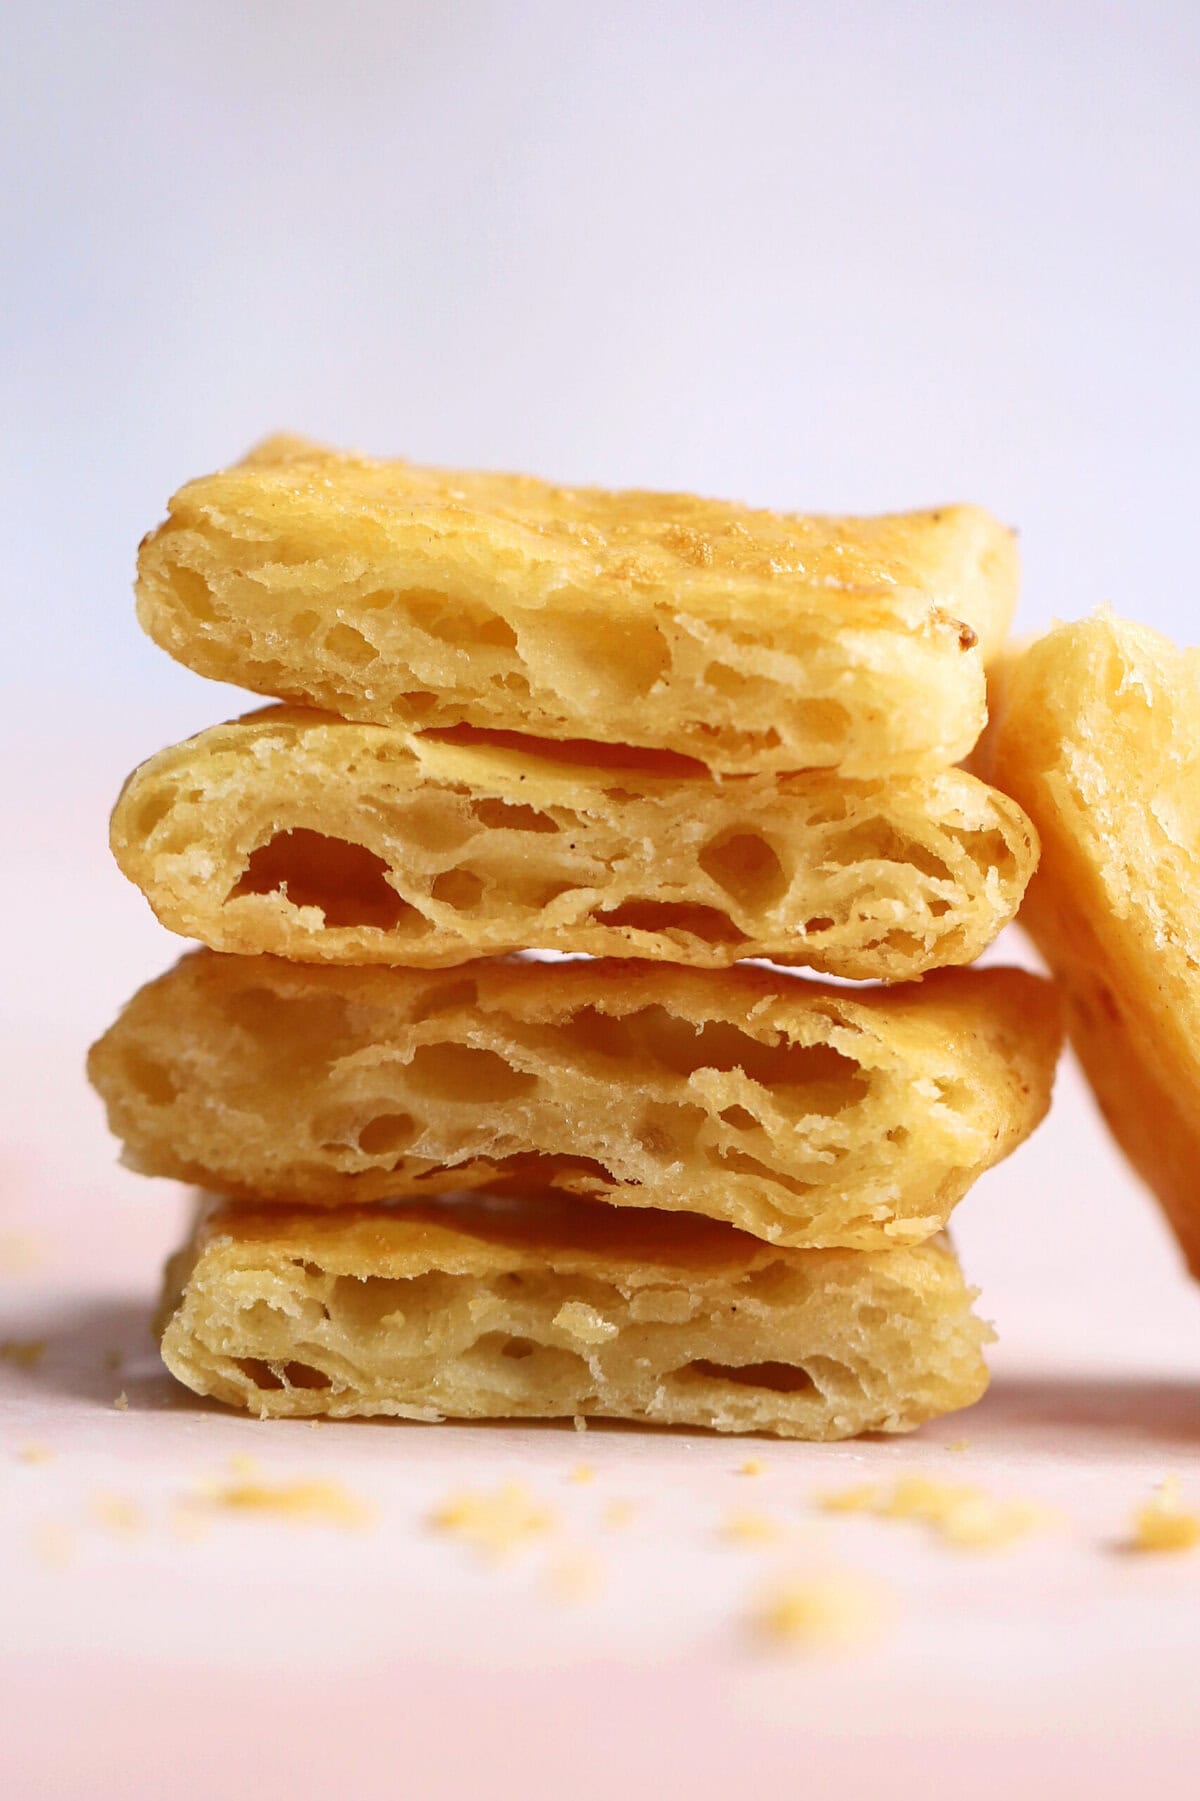
Puff pastry is made by creating layers – this is called ‘laminating’ the pastry. As it cooks, the butter between the layers of pastry melt, causing the pastry to puff up.
‘Proper’ puff pastry is made when you place a flattened block of butter in the middle of the pastry and then fold it into the layers. Kind of like when making gluten free croissants, which involves a yeasted version of this dough.
Rough puff pastry is a little easier. You simply ensure there are lumps of butter throughout the pastry dough, so when you fold the layers, this marbles through the pastry. This then melts when cooking, causing the pastry to puff. Simple!
A bit of butter leaking out of your puff pastry is normal, as long as it still ‘puffs’ when baking. To stop your bakes feeling greasy, you can simply take them straight off the tray once cooked and onto a kitchen towel to remove the excess butter.
There are several reasons this could have happened. Firstly, use a good quality butter (at least 80% fat content) and ALWAYS keep your pastry cold. If it starts to get warm, you’ll lose the lamination you’re creating.
You can wrap your pastry and chill it at any point in the recipe, and I implore you to do this if you think it’s getting at all warm. Melting butter during the dough-making process will be the main cause of your pastry not puffing.
You also want to make sure you still have good-sized lumps of butter when you ‘slice’ it through the mixture to make the dough. At least the size of peas. If you make the lumps too small, you’ll end up with gluten free shortcrust pastry instead.
I haven’t yet tested a vegan alternative I am happy with for this recipe. A good quality butter really makes this recipe, and a lot of vegan butters are quite soft and will melt easily, making it harder to get a good puff. I’d recommend a hard baking block, or something like Cookeen or Trex to try a dairy free version.
Yes, this gluten free puff pastry can be made in advance – simply make the dough and then keep in the fridge until you’re ready to use it, for up to a week. Or you could complete all the rolls-and-folds, then chill until ready to roll out. This is also the perfect time to freeze it – defrost in the fridge overnight before using.
If you’re reading this in the US I’d highly recommend you use European butter for this rough puff pastry. American butter tends to have a higher water content and this may result in the pastry not puffing properly. Always opt for the best quality butter you can afford for this recipe where possible.
Usually I find this dough is fine to roll on a lightly floured work surface. However, you can also roll it between sheets of clingfilm (plastic wrap) if you find this easier. You can then use the clingfilm to guide the pastry as you fold it, too.
Have you tried this recipe?
I have a huge favour to ask! It’s getting more and more difficult to get my recipes out there to the world – so if you try this and love it, it would mean a HUGE amount if you’d come back and leave a ⭐️⭐️⭐️⭐️⭐️ review and a little comment telling me what you thought! Just 30 seconds of your time would be such a huge support! 💛
Want to connect further?
- Tag me on Instagram with your amazing creations so I can share them!
- Join my Facebook group to meet other awesome gluten free people.
Gluten Free Puff Pastry Recipe
Equipment
Ingredients
- 250 g unsalted butter, (it MUST be cold!)
- 250 g plain gluten free flour, (I use FREEE or any supermarket blend)
- 1.5 tsp xanthan gum
- 1 tsp salt
- 150 ml ice cold water
Instructions
To make the gluten free puff pastry dough:
- Cut the butter (which must be as cold as possible!) into cubes of approx 2cm.
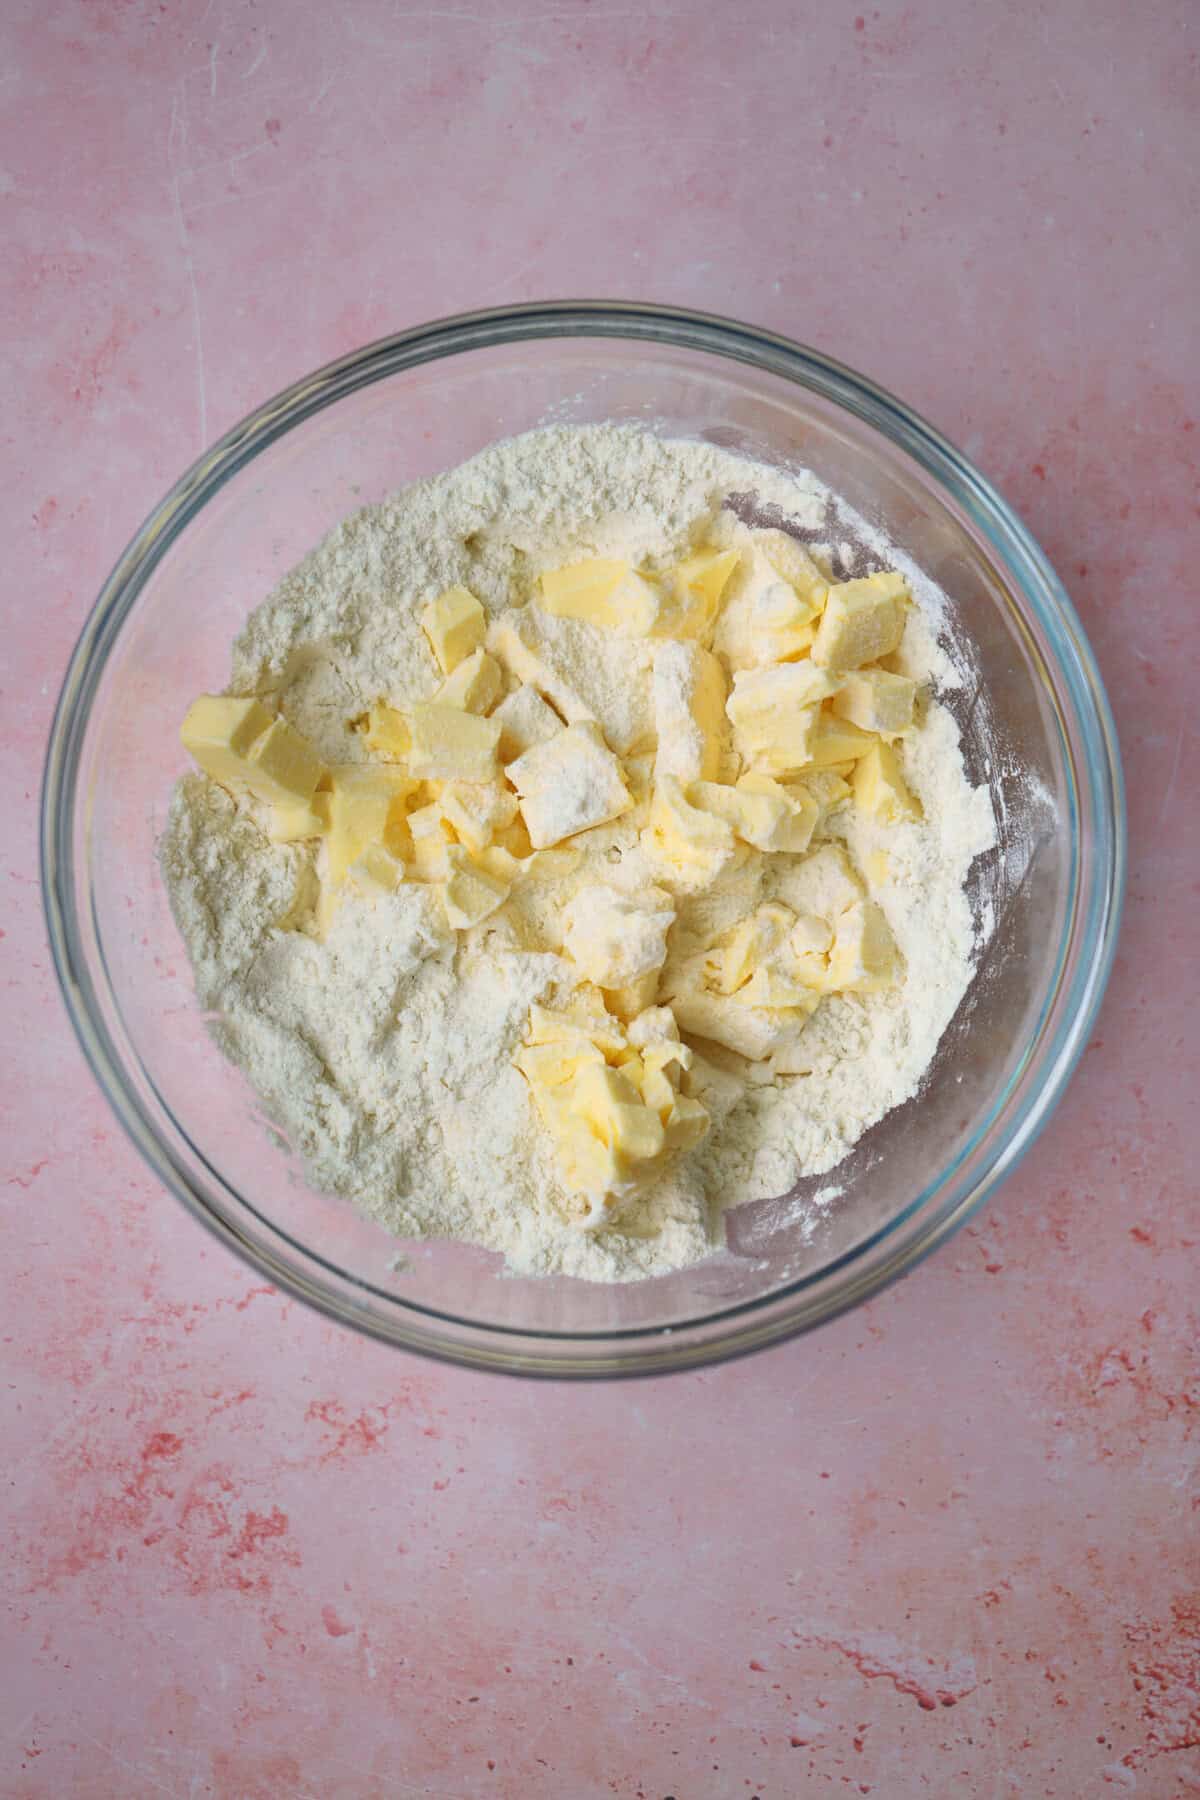
- Add the gluten free flour, xanthan gum and salt to a large mixing bowl and stir. Then add the cubes of cold butter.
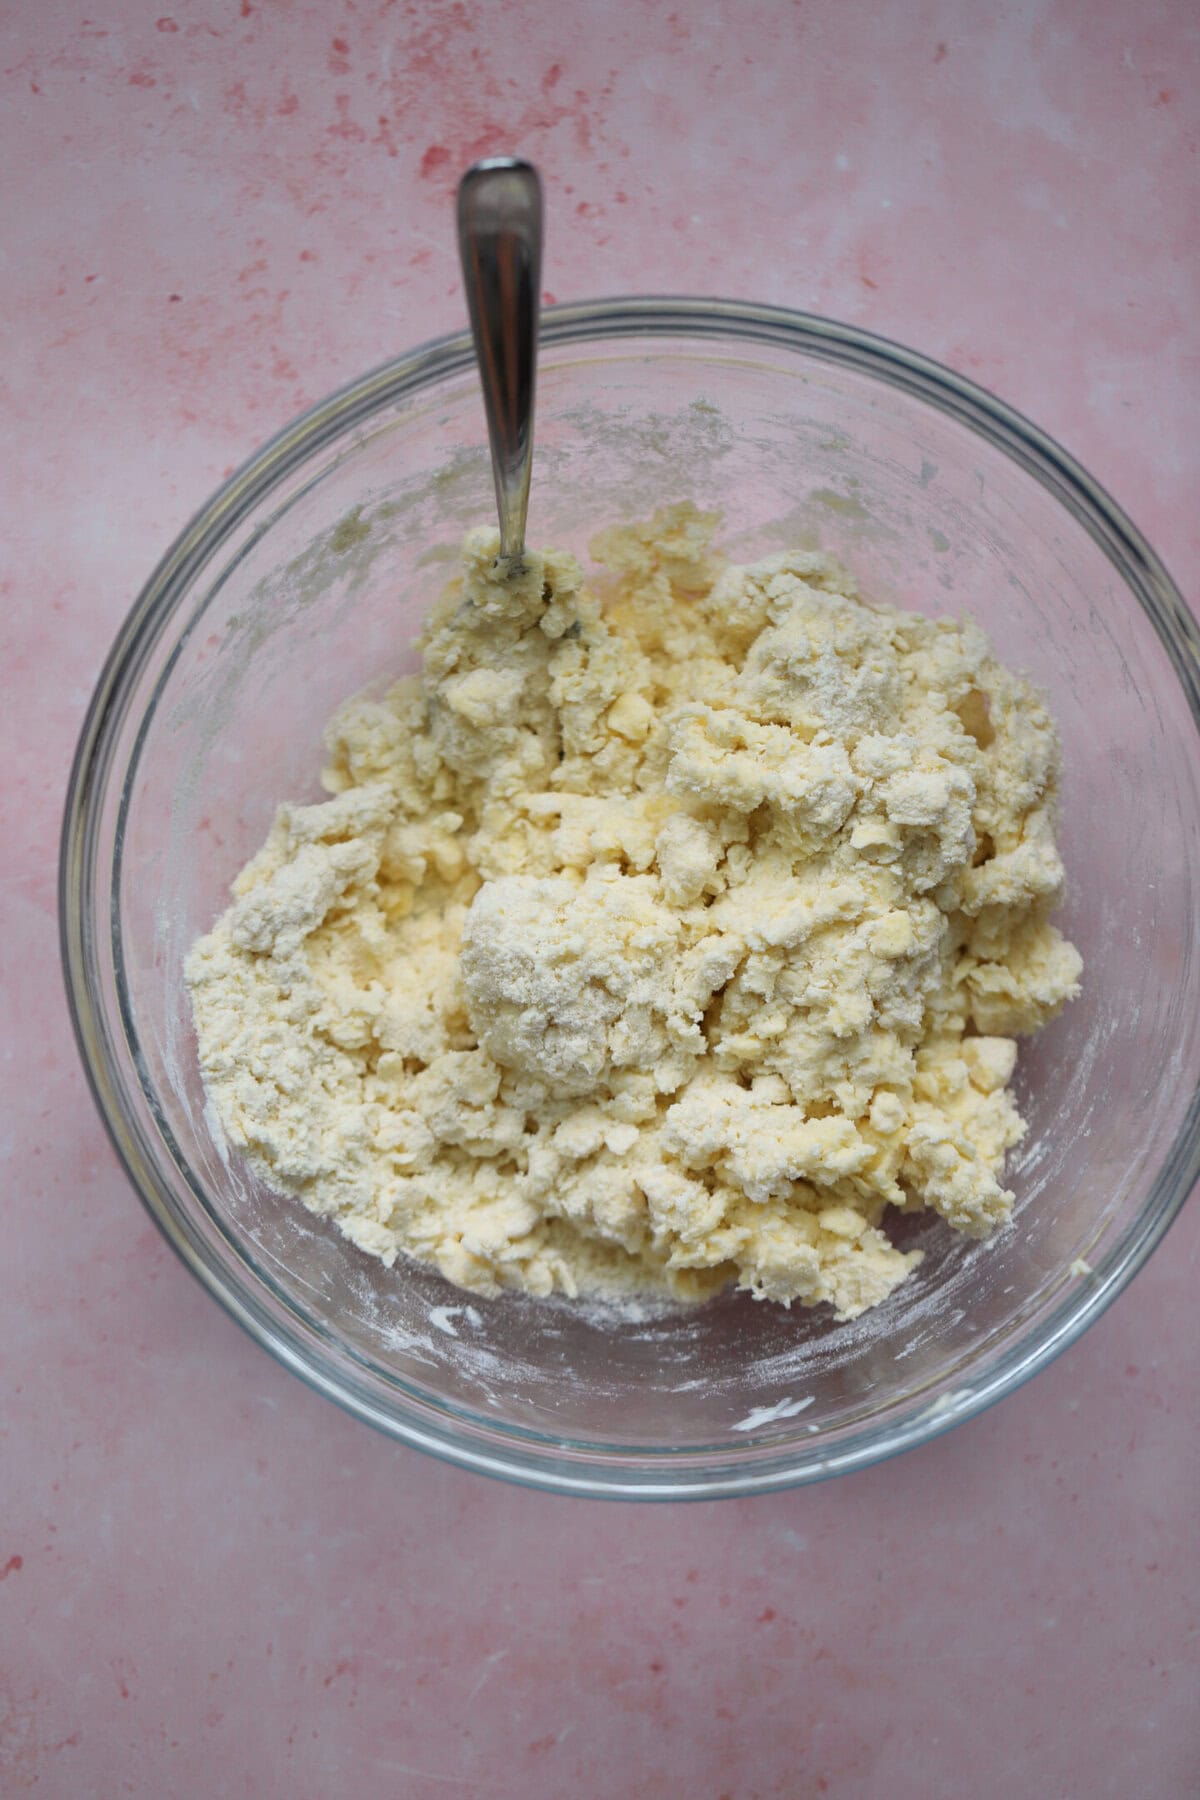
- Using two butter knives, ‘criss-cross’ across the pastry mix, cutting the butter into smaller pieces. You’ll want to keep stirring the bowl to make sure the cut edges become coated in flour. Keep going until the butter lumps are mostly the size of peas – a few bigger lumps are absolutely fine.
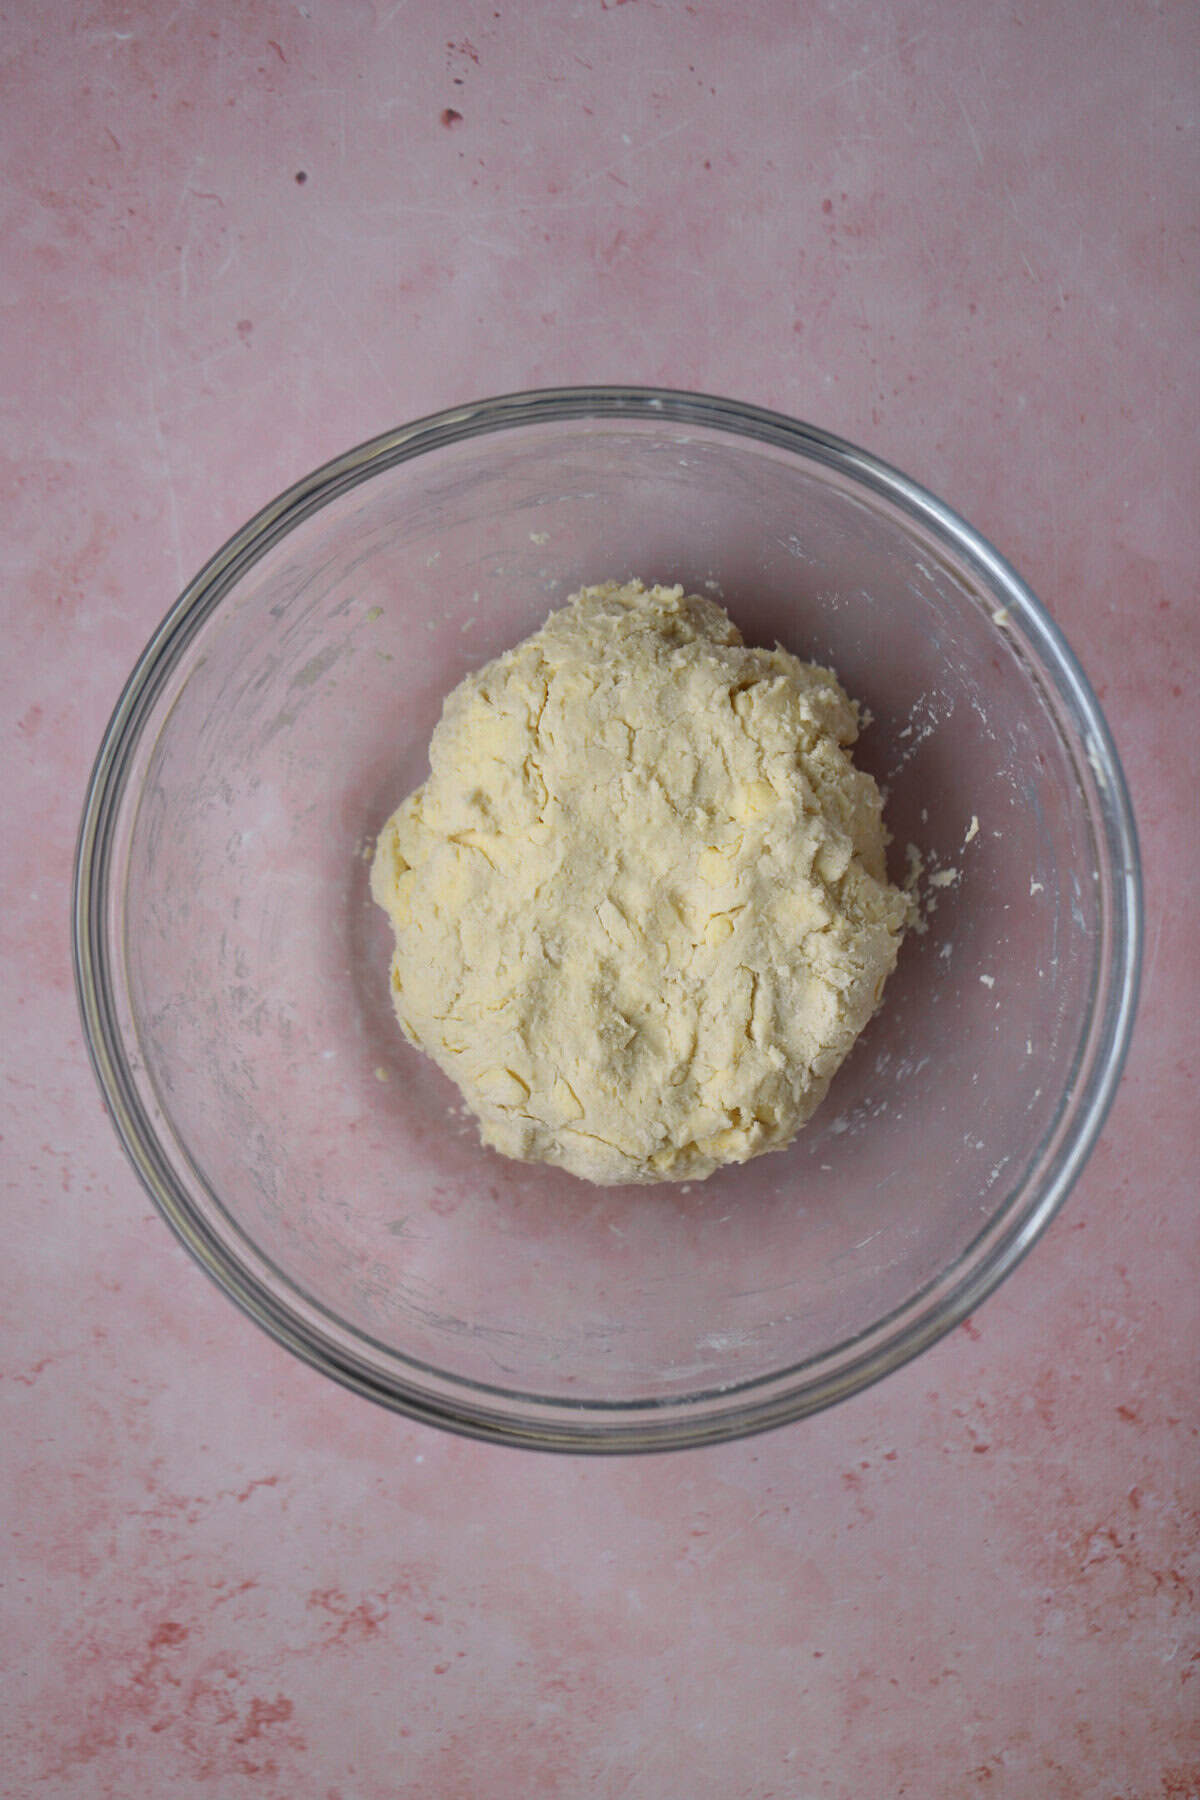
- Gradually add the ice cold water to the mixture, stirring in between using a wooden spoon. Once it's all added, use your hands to bring the mixture together into a ball. Try to handle it as little as possible – you want to ensure you can still see lumps of butter throughout the pastry.*At this point, if it’s a warm day or the dough feels at all sticky, wrap the dough in cling-film and refrigerate for at least 20 minutes. If it’s a colder day and the dough still feels smooth and cool, you might be able to get your first roll-and-turn in straight away.
To laminate the gluten free puff pastry:
- Sprinkle gluten free flour onto a worktop and place the ball of dough in the centre. Use your hands to flatten the dough slightly and shape it into a rectangle shape.
- Roll the dough out in ONE DIRECTION only, in one long rectangle approx 1cm thick. I find the best way to do this is to roll the dough away from you. Use your hands to keep gently nudging the pastry back into a reasonably straight line on the edges. You should see marbled streaks of butter throughout the dough as you roll it.
- Take the short edge which is furthest away from you and fold it back towards you until it meets the centre line. Then take the edge closest to you and fold it away from you over the piece you have just folded, so the pastry is in three layers.
Chill and repeat:
- Wrap in clingfilm and place in the fridge for 20-30 minutes until chilled. When you remove it from the fridge, place the dough down in exactly the same position as it was before, then give the dough a quarter turn clockwise.
- Repeat steps 6, 7 and 8 TWICE more – so a total of three fold-and-turns. Each time you start, place the folded dough in the same position as when you finished the last fold and give it a quarter-turn before you begin rolling.
- Ensure you chill for at least 20-30 minutes before rolling out to use in your chosen bake. Any offcuts should be stacked on top of each other – don’t scrunch them up into a ball otherwise you will lose all the layers you’ve worked into them.
- To bake, follow the individual recipe you are making for the appropriate cooking times.
Video
Notes
- IMPORTANT: It’s VITAL to keep this dough as cold as possible. If making this on a hot day, you may need to refrigerate the dough more frequently. If it sticks to the worktop, use a dough scraper to gently ease it off the worktop and sprinkle some more flour down to stop it sticking further. You can also roll it between sheets of clingfilm if you find this easier.
- Weighing Scales vs Cups: You can toggle this recipe card to convert the ingredients into cups. However, I always recommend using weighing scales – these are cheap to buy and much more accurate. And in gluten free baking, a tiny variation can make a huge difference!
- Step-by-Step Photos: Check out the blog post above for step-by-step photos to guide you through how this gluten free puff pastry recipe should look at each stage.
- Storing: This gluten free puff pastry can be kept in the fridge once rolled and folded, for up to a week. You can also freeze it – defrost before rolling and making your chosen recipe.
- Like this Recipe? It would mean SO much to me if you could leave a 5* rating and leave a little comment about this Gluten Free Puff Pastry recipe! It really helps support my blog and get my recipes out there, so thank you! xx
Nutrition
Recipes Using My Gluten Free Puff Pastry
Once you’re ready to use your gluten free puff pastry, it’s pretty simple from here on!
To roll out gluten free rough puff pastry, remove it from the fridge and roll to the desired thickness dictated in the recipe. Usually around 5mm – try not to roll it too thin!
If you have any offcuts, make sure you stack them neatly instead of scrunching them up. Be warned – if you scrunch them up you’ll lose all those layers and they won’t puff up anymore.
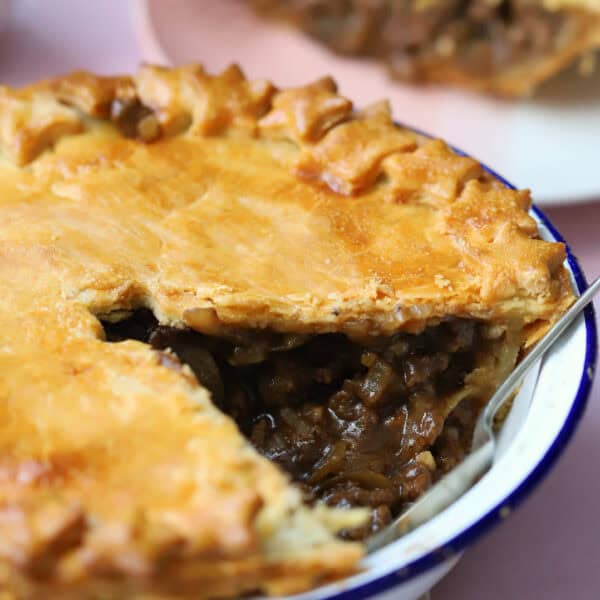
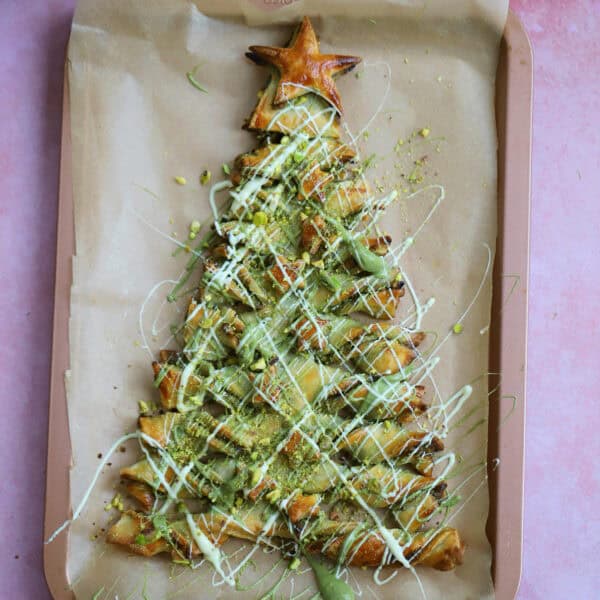
All of my individual puff pastry recipes have specific instructions on how to cook your baking creations once you have rolled out the pastry:
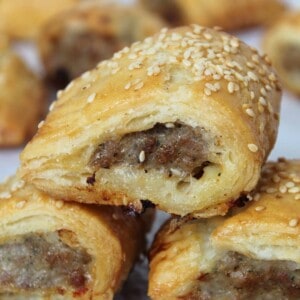
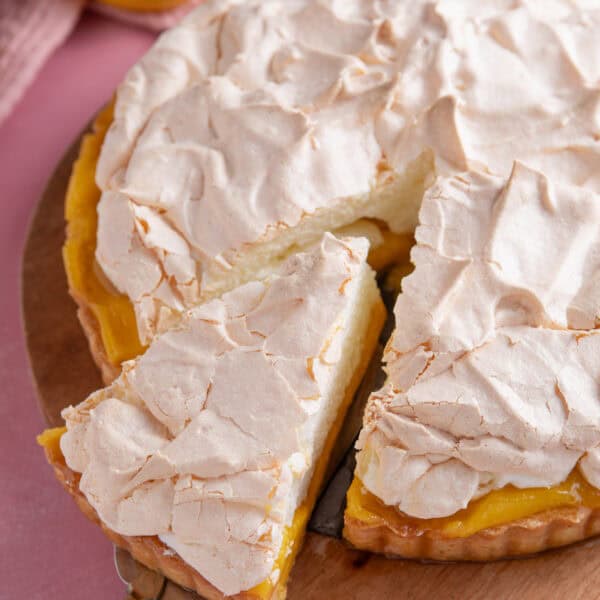
- Gluten Free Sausage Rolls
- Gluten Free Apple Turnovers
- Gluten Free Vol-au-Vents
- Gluten Free Gregg’s Steak Bake
- Puff Pastry Christmas Tree
- Gluten Free Pizza Pinwheels
- Gluten Free Vegetable Tarte Tatin
- Christmas Sausage Rolls
- Gluten Free Cheese Straws
- Chicken and Mushroom Pie
- Nutella Christmas Tree
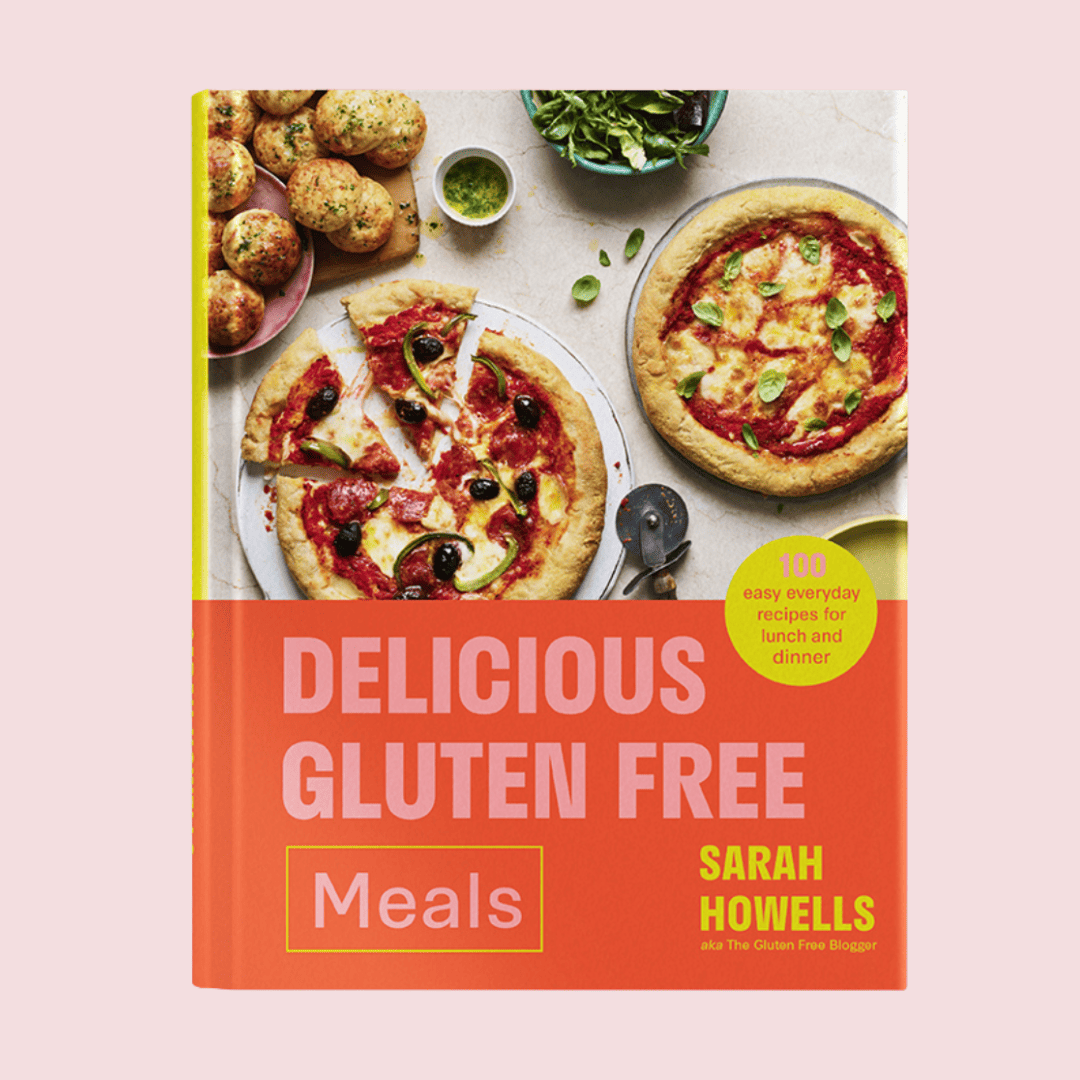
I also have some delicious recipes in my cookbook, Delicious Gluten Free Meals, including a vegetable pot pie, chicken ham and leek puff pie and a butternut squash wellington.
And don’t forget to also check out my gluten free shortcrust pastry for pies, tarts and quiches, and my gluten free choux pastry for profiteroles and eclairs!
More Gluten Free Pastry Recipes


Get my cookbook!
Want more gluten free meals inspiration? My debut cookbook, Delicious Gluten Free Meals, has 100+ gluten free recipes, from breakfast and lunch ideas to dinners, desserts and sides.


Hi Sarah, thanks for sharing puff pastry recipe, I used it on couple of pies ,turned out sensational, never going to buy GF puff pastry for supermarket again .
Thank you for sharing the puff pastry recipe. I made sausage rolls and cheese sticks for my son and they were delicious and puffy.
If I want to make it vegan as well what can I use to replace the butter? Would the vegan butter Earth Balance would work?
Thank you!
I’m not sure what happened. Used Schar GF flour and having made glutinous doughs before, added extra flour. Used a vegan block butter (Naturli) and it worked fine. Chilled it 30 mins before rolling out. All good. The folding and rolling was OK. After the 2nd rolling/folding it was so sticky. FROZE it for 30 mins and then when I took it out and rolled it out again (no wandering off and accidentally letting it soften) it got so sticky the rolling pin basically broke the dough and I binned it. Not sure why it’s not working bc the butter should not be melting when it’s spent 30 mins in the freezer. So waste of time, money, ingredients and effort. And blood too, since I couldn’t get the cling film to unroll properly, got frustrated, stabbed and bit at it, had to get my brother to unroll it which he couldn’t, cut through multiple thick layers of cling film with a knife and cut my hand 4 times. Maybe it’s the flour, maybe it’s the vegan butter block (which was extremely cold when I made the pastry; I’d frozen it after cutting for at least an hour beforehand) maybe it’s just me but that was not a success end I’m gutted as I want nice light fluffy GF vegan puff pastry (I’m allergic to eggs, dairy and gluten) rather than the stuff you buy in the shops which is crispy on the outside when you cook it but can sometimes be doughy in the middle. I guess this isn’t it and I need to find a recipe where the butter won’t melt after being frozen for half an hour.
Hi Olivia, apologies for the somewhat long delay in replying, for some reason I never saw this comment. It sounds like the issues have arisen from the fact you’ve used a different flour blend to the one I recommend in the recipe, and have used a dairy free alternative to butter. This recipe requires butter (I haven’t tested with a DF alternative as I can eat dairy but these tend to melt a lot faster and make it trickier) and I haven’t used the Schar flour – I’m sorry to hear it didn’t work for you when trying to substitute those items.
Hi
What plain flour company do you use?
Thank you
I use baking block from the supermarkets. Usually Asda or morrisons own 😃
I cant thank you enough for this recipe!! I just made it for the first time and it was fairly easy and tasted amazing!!
Hi. What can I use instead of butter? I cannot tolerate dairy either. Thank you.
I used plant butter and it turned out fine, but you really need to keep it cold as margarine melts much easier than real butter. I tossed it in the fridge after every step for a few minutes and worked on a flat aluminum baking sheet that I threw in the fridge with the dough. I didn’t bother wrapping it and cut the recipe in half and worked with half a batch at a time. Treating it like wheat biscuit dough (handle and mess with as little as possible) and less like a croissant dough also seems to help. Otherwise you could try lard or vegetable shortening as alternative fats.
Good advice! I’ve not tested with a dairy free alternative but hopefully this will help anyone looking to try it!
Hi. What can I use instead of butter? I’m also dairy intolerant. Cheers.