This post may contain affiliate links for which I earn a small commission at no extra cost to you. For more info, check out my Disclosure Policy. Thank you for your support!
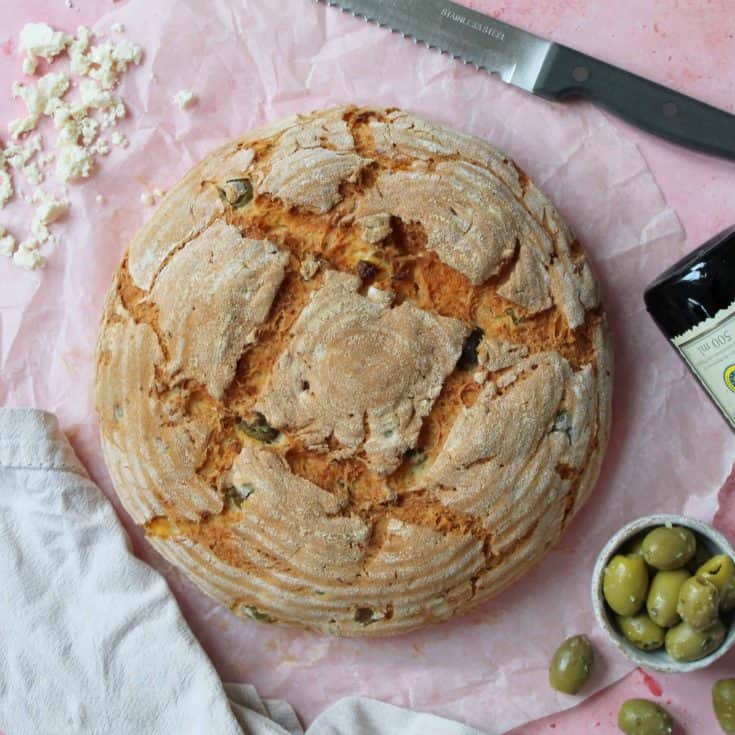
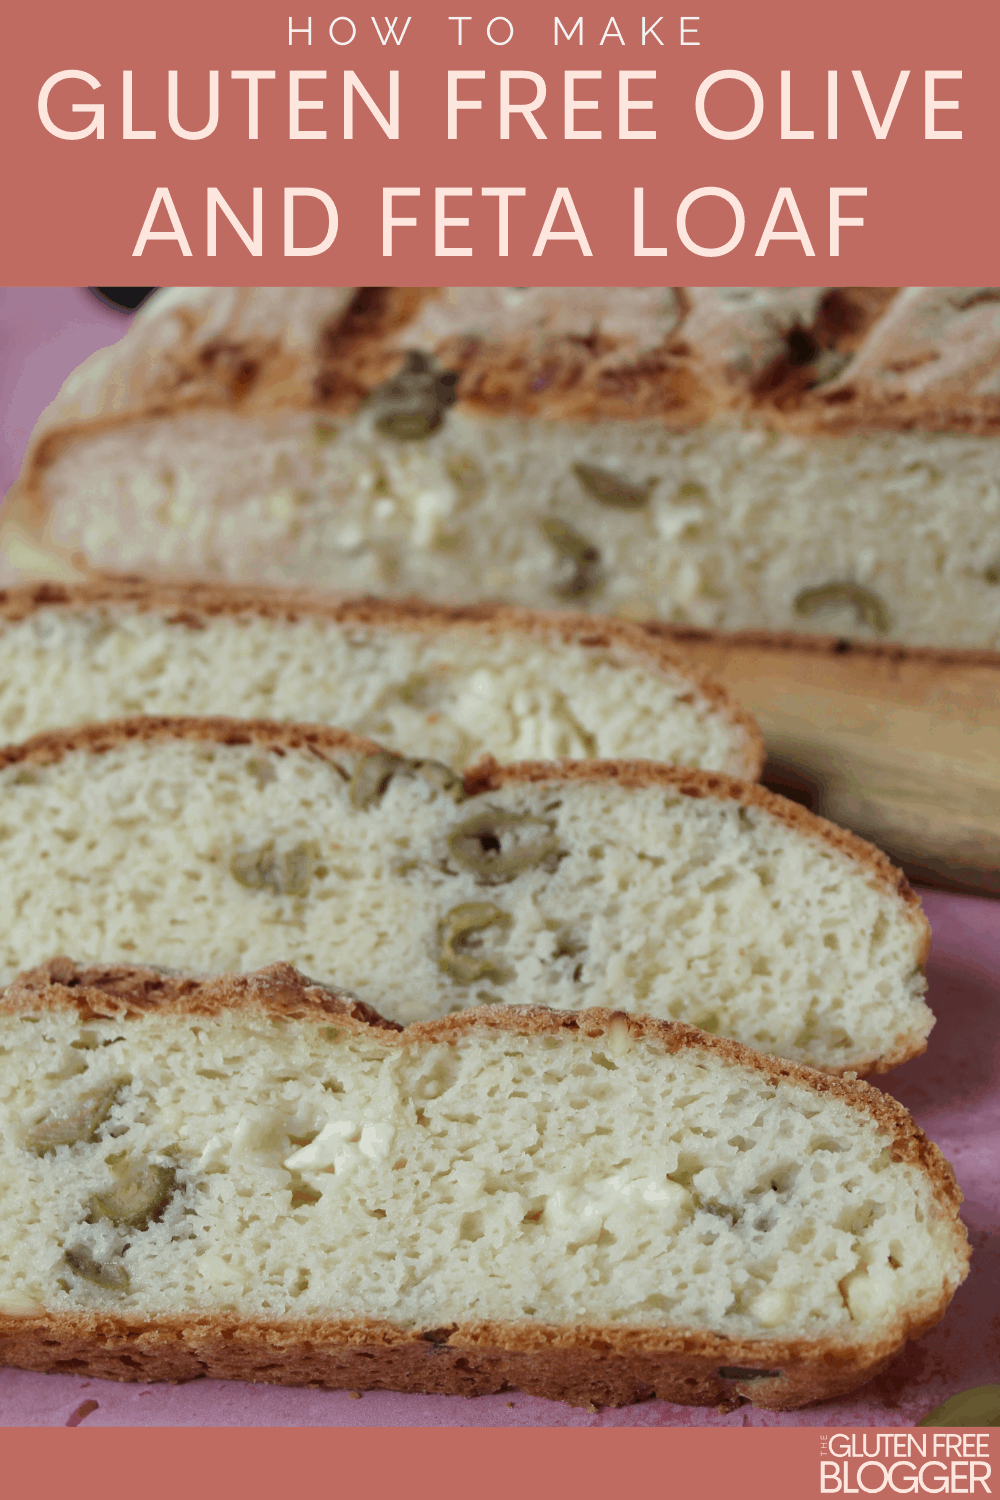
If you’re looking for an easy gluten free artisan bread recipe then look no further – this gluten free olive and feta bread is the dream baking recipe you need in your repertoire.
A gorgeous gluten free bread with olives and feta, this is a no knead bread recipe which is simple to make.
If you’re already a fan of my gluten free white loaf recipe or my super soft gluten free bread rolls then you’re going to love this.
All you need to make it is some simple ingredients, a bread banneton for proving and a nice hot oven – it’s that easy.
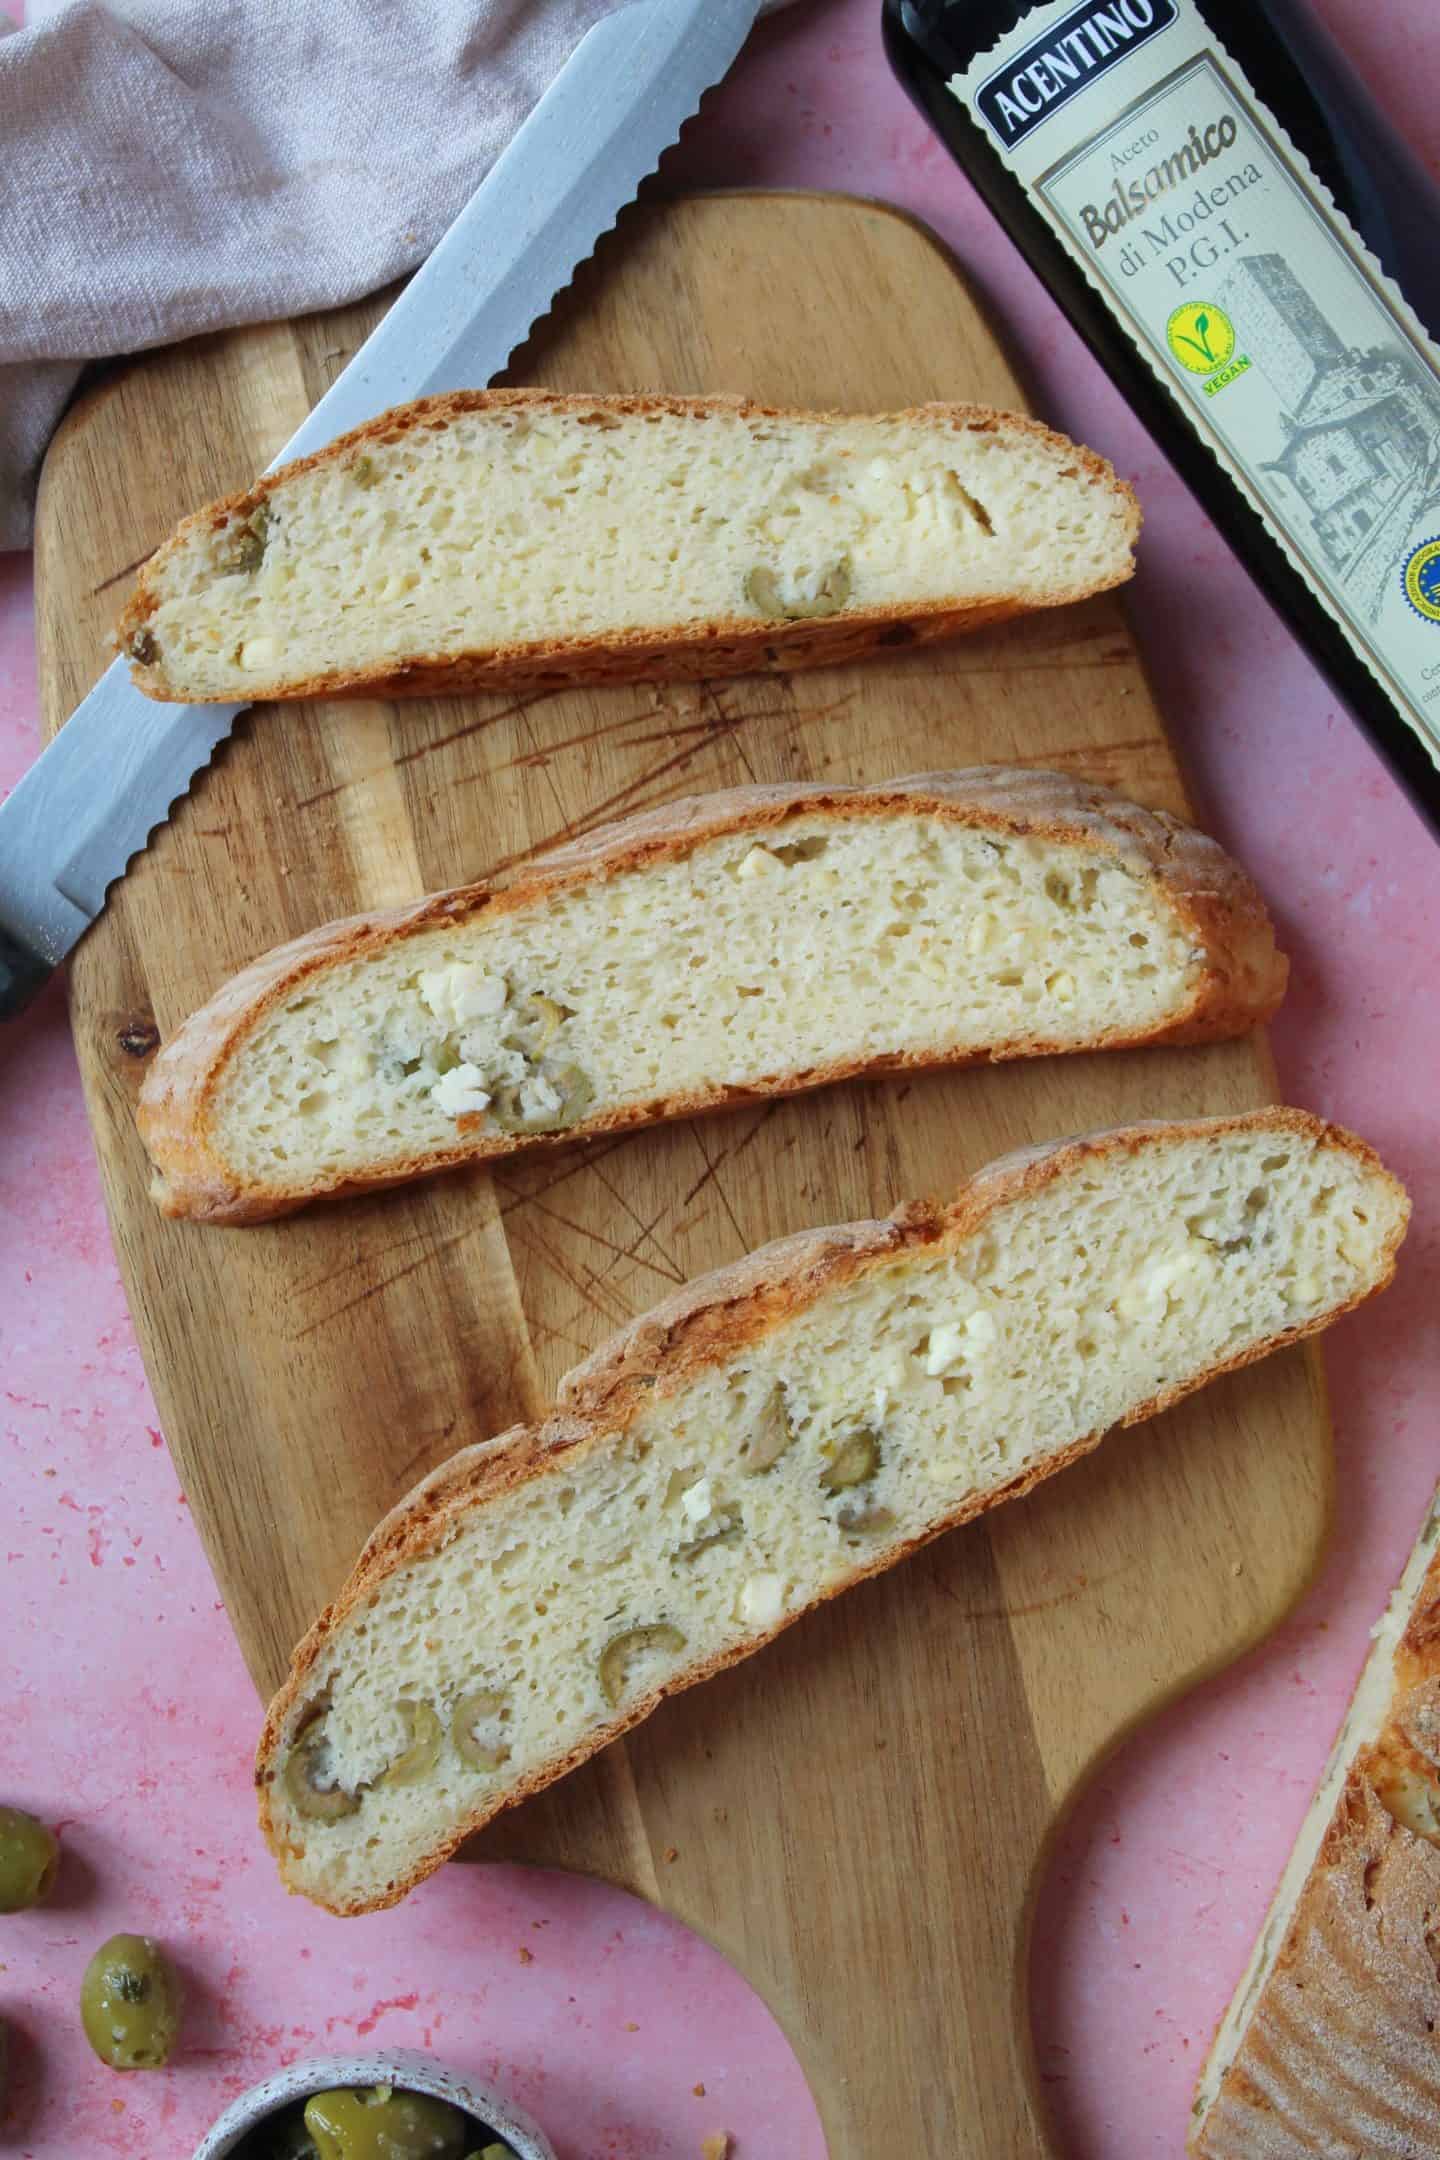
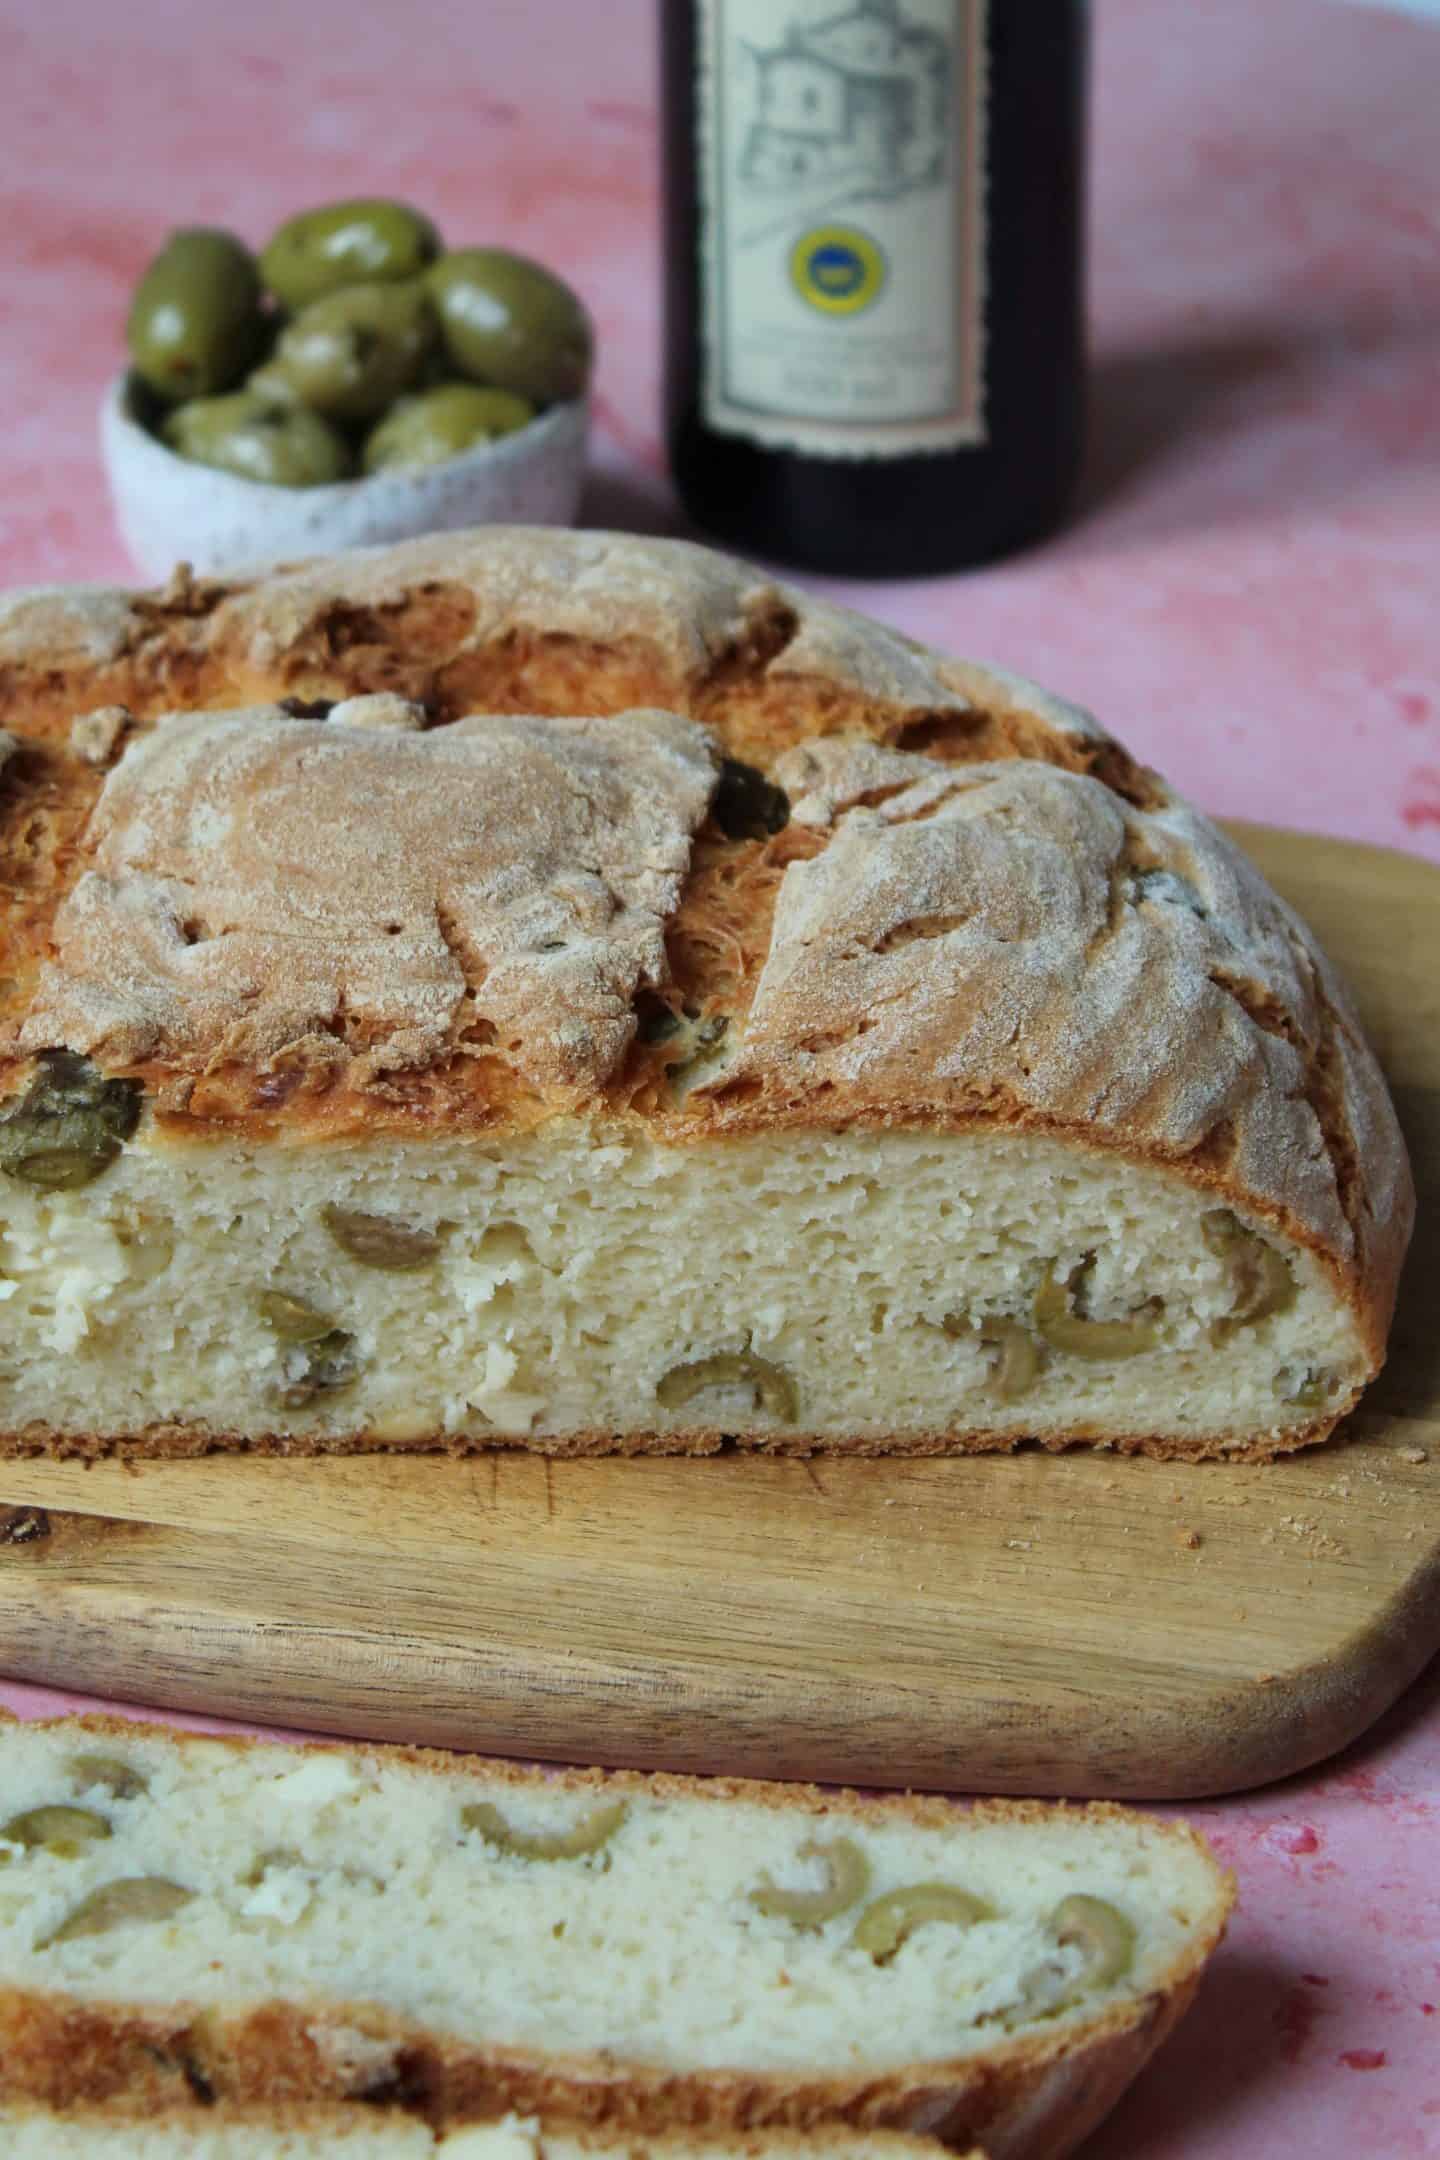
This simple gluten free bread has a lovely chewy crust and a super soft interior which is dotted with olives and feta cheese.
It’s a gorgeous medley of flavours and the perfect base for adding any herbs or flavours you love to make it your own.
Plus it looks just like something you’d find in the bakers, perfect for slicing up at a picnic or a lunch spread – or for dipping in some homemade soup.
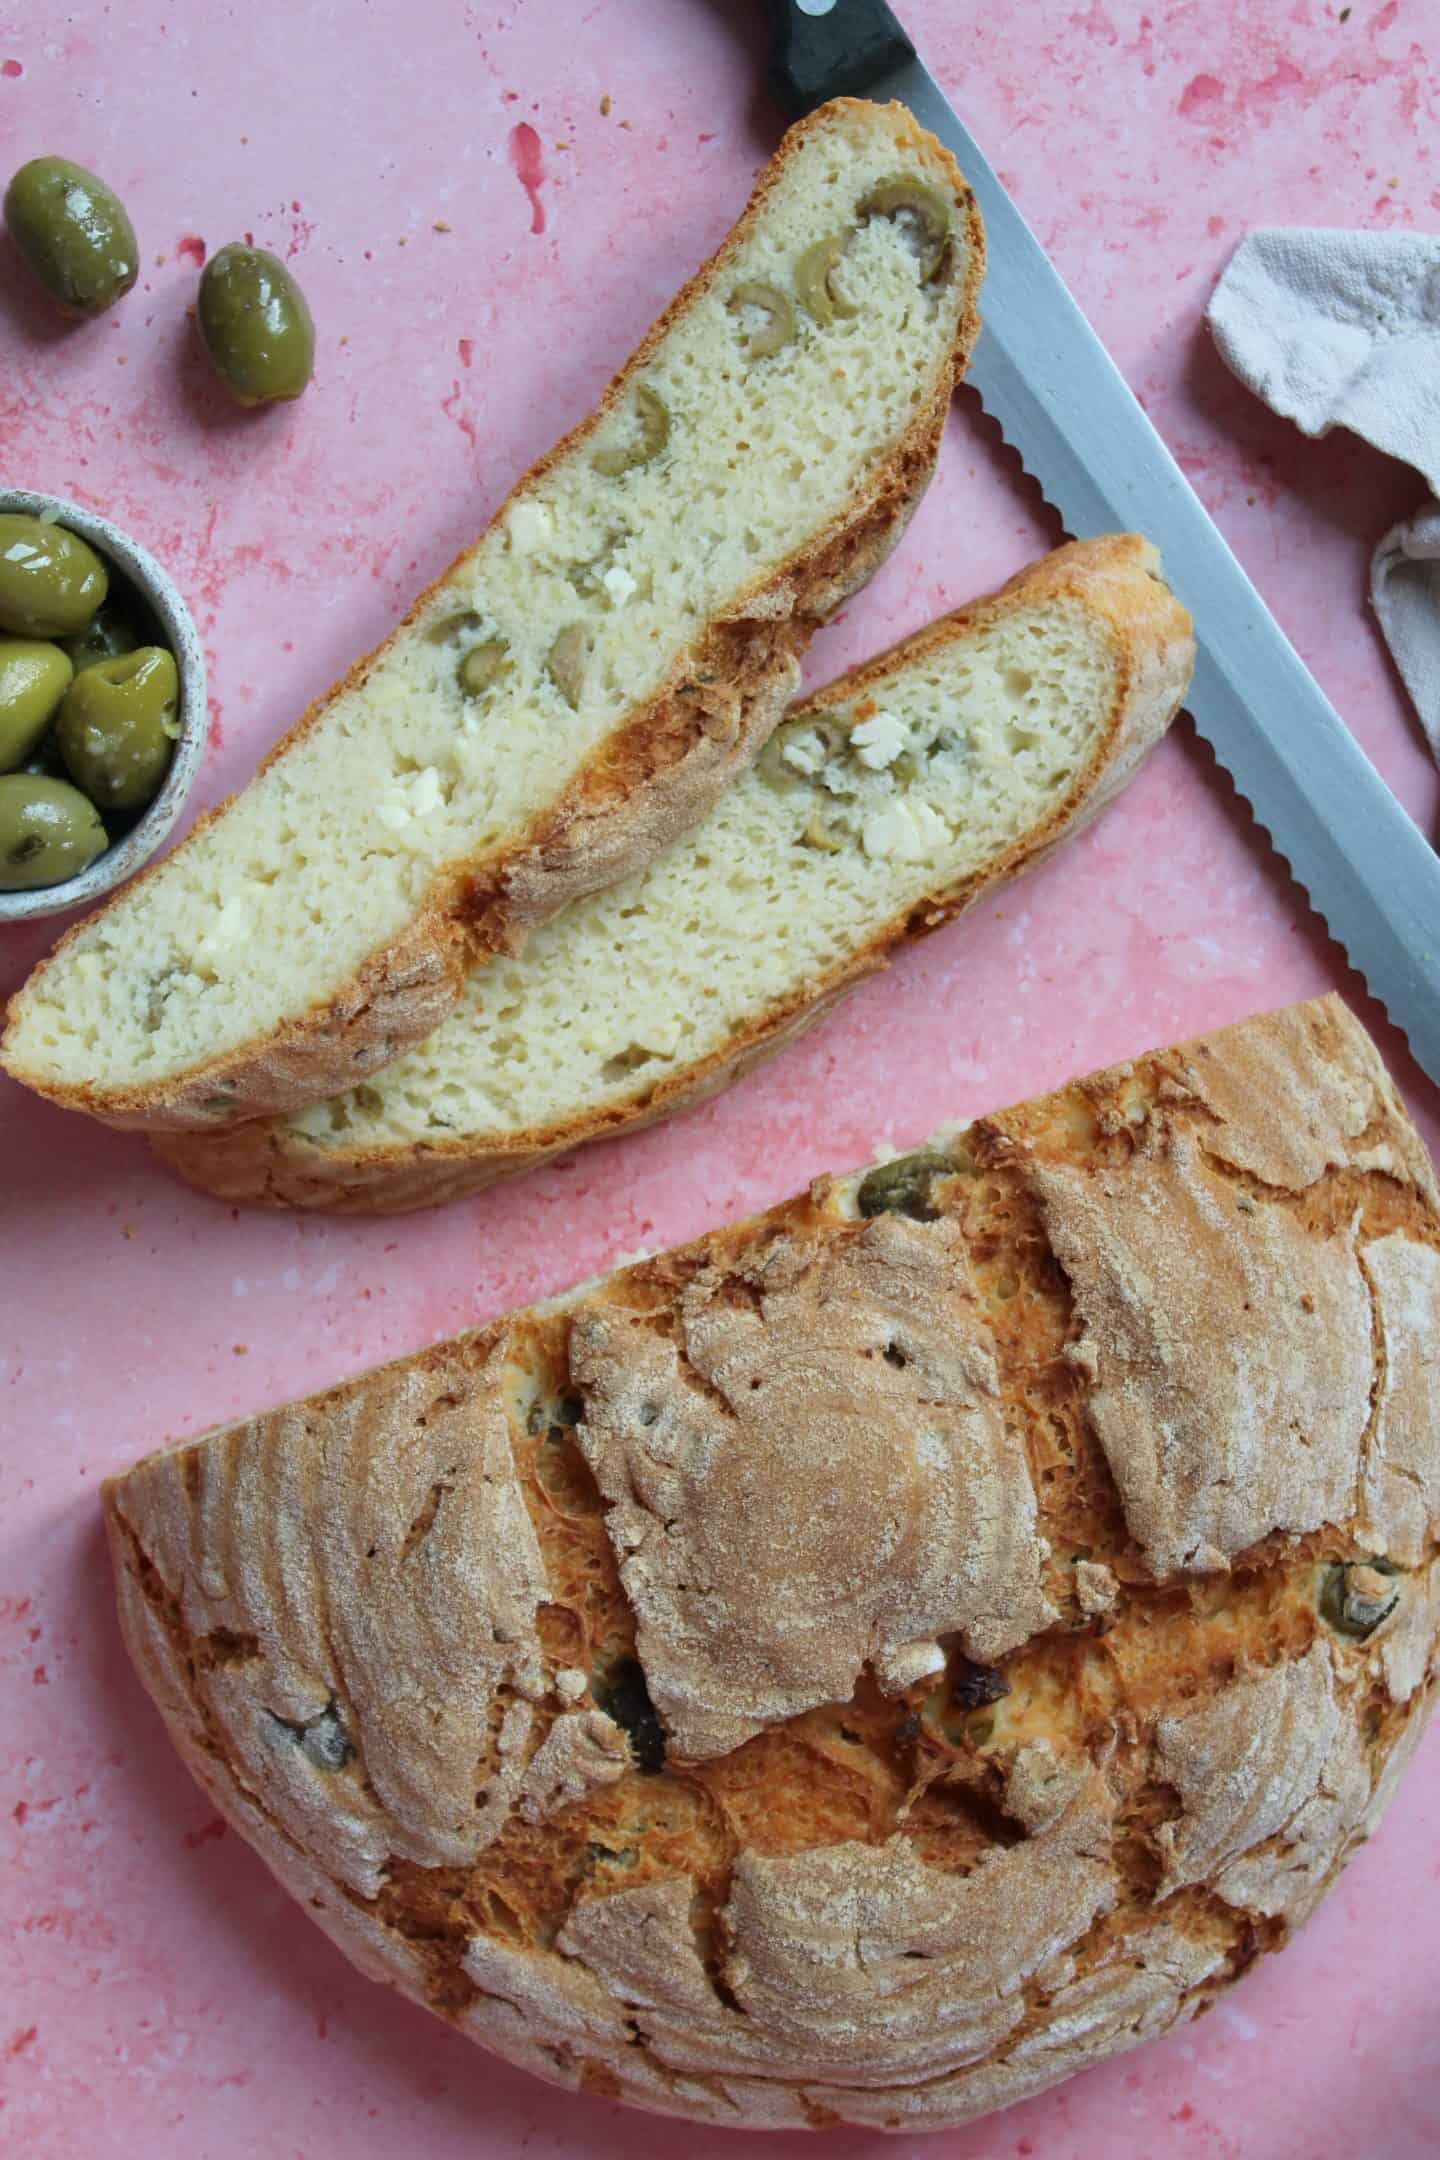
Table of Contents
- How to make gluten free bread
- What ingredients do I need?
- WHICH YEAST IS GLUTEN FREE?
- USING A BREAD BANNETON
- TESTING IF YOUR YEAST IS ACTIVE
- How much should my bread rise?
- Why use steam when baking bread?
- My gluten free artisan bread recipe
- NEED SOME MORE GLUTEN FREE bread inspiration?
- Gluten Free Artisan Feta and Olive Bread Recipe
How to make gluten free bread
Making gluten free bread is actually really easy – you just have to remember it’s very different to ‘normal’ bread.
With a normal bread recipe you’d make a dough which can be kneaded and manipulated.
But making gluten free bread is more like making a thick, sticky batter.
Luckily this gluten free artisan feta and olive loaf doesn’t need any kneading or shaping, as this is done in the banneton.
Bread dough is traditionally kneaded to stretch the gluten, allowing the bread to rise better.
But as there is no gluten in this gluten free bread, you don’t have to knead it at all!
It’s simply a case of mixing up the ingredients (you’ll need a bit of elbow grease here!), letting them prove, and then baking. Simple.
What ingredients do I need?
There’s a full printable recipe card below, but for the shopping list you’ll need:
- 300ml warm water (skin temperature)
- 2 tbsp caster sugar
- 14g dried yeast
- 475g FREEE gluten free white bread flour
- 1 tsp xanthan gum
- 1 tsp salt
- 1 tsp apple cider vinegar
- 5 tbsp vegetable oil (such as rapeseed oil)
- 2 eggs
- 85g green olives (pitted and roughly chopped)
- 100g feta (crumbled)
- 2-3 tbsp rice flour (for dusting)
I always use the FREEE gluten free white bread flour, but if you can’t find this you want a gluten free flour blend which includes rice, potato and tapioca flour.
The xanthan gum is important as this helps to provide some of the stretchy texture you’d normally get from the gluten.
You can use a different oil if you prefer, but I find vegetable/rapeseed oil gives the best texture and it’s also neutral in flavour.
Using olive oil would probably work but the bread would be more like a gluten free focaccia in taste.
You can, of course, use black olive instead of green, or even a combination of both.
Sundried tomatoes are also a tasty addition if you fancy them or you can swap the olives for these if you’re not a huge fan of olives.
The little bites of tangy feta and salty olives just make this gluten free artisan bread so tasty.
WHICH YEAST IS GLUTEN FREE?
I am based in the UK and there are several yeast products here which are gluten free and readily available.
I always use either the Allinson’s Easy Bake Yeast or the Dove’s Farm Quick Yeast.
You can also use the Allinson’s Time Saver Yeast, though be aware that you may not need to prove the dough for as long if you use this.
All of these yeasts are gluten free in the UK.
The Dove’s Farm one is certified gluten free and found in the free from aisle.
The Allinson’s yeasts are free from gluten and can be found with the ‘regular’ baking goods.
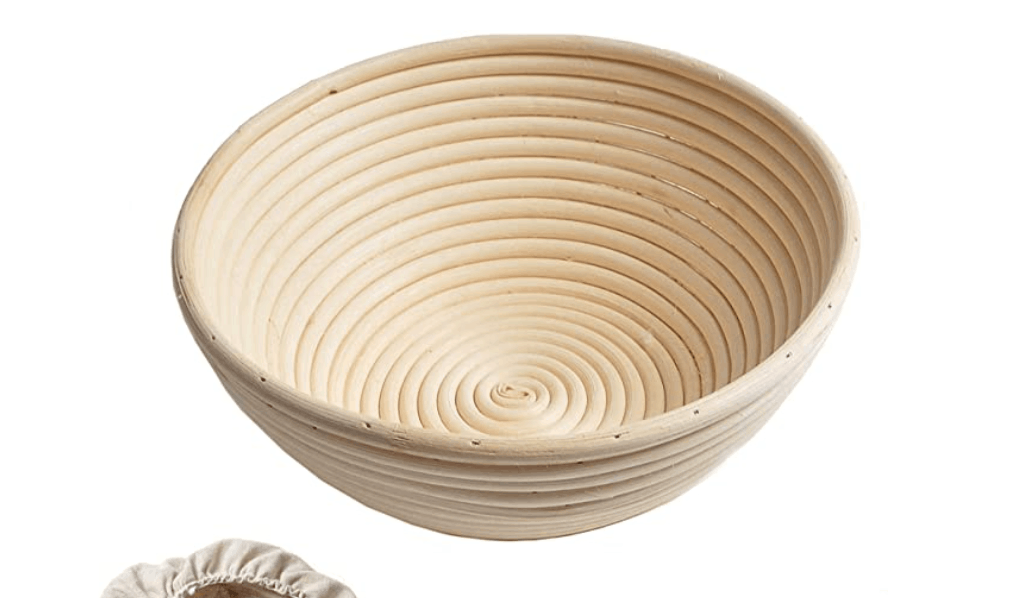
USING A BREAD BANNETON
They key to getting that gorgeous, artisan look to this loaf is using a bread banneton for proving.
If this is your first time using a bread banneton however, I do have a few tips to make it easier.
One of the biggest worries is that the gluten free bread dough sticks to the banneton.
This is more likely to happen if banneton is new and you haven’t really worn it in, but it’s easily overcome.
My steps to stop gluten free bread dough sticking to your proving basket are:
- Wet the banneton: Run it under a tap and make sure you swill the water around so that it gets into every crack.
- Leave it for 5 minutes: Shake out the excess water then let the bowl sit on the side for five minutes so the water can soak into the rattan.
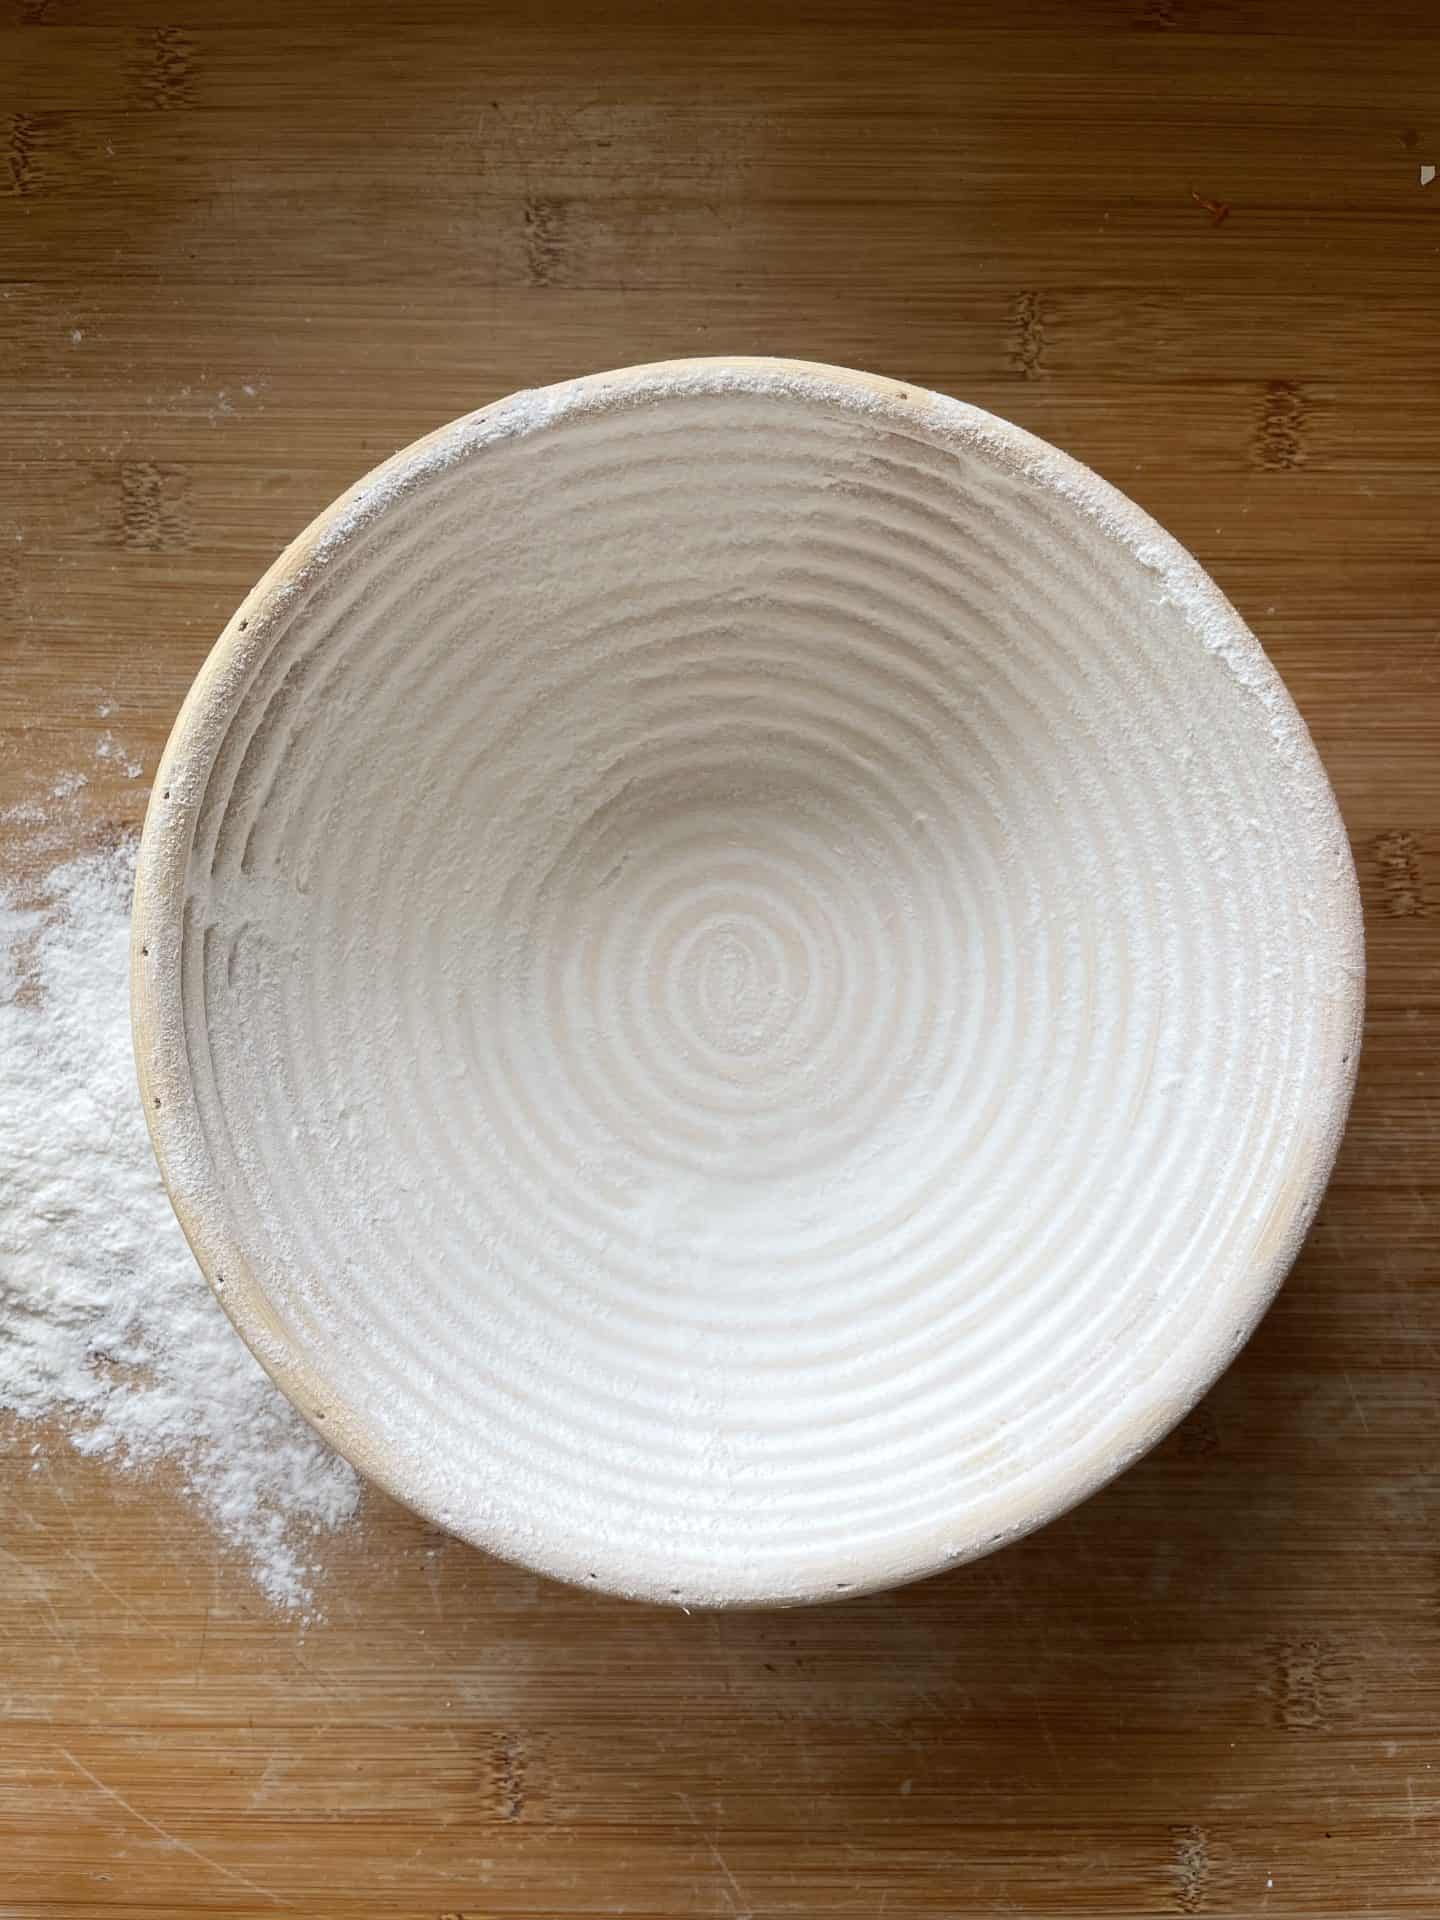
- Flour it well: Take the damp bread basket and dust the inside liberally with rice flour – the best way to do this is to turn it on its side and spin it as you sprinkle flour into it. Make sure you cover every nook and cranny.
- Shake it off: Gently shake out any excess flour and if you see any uncovered patches, keep dusting until the whole of the inside of the banneton is coated in flour.
And that’s it! A few simple steps and you’re then ready to pour in your gluten free bread dough and leave it to prove.
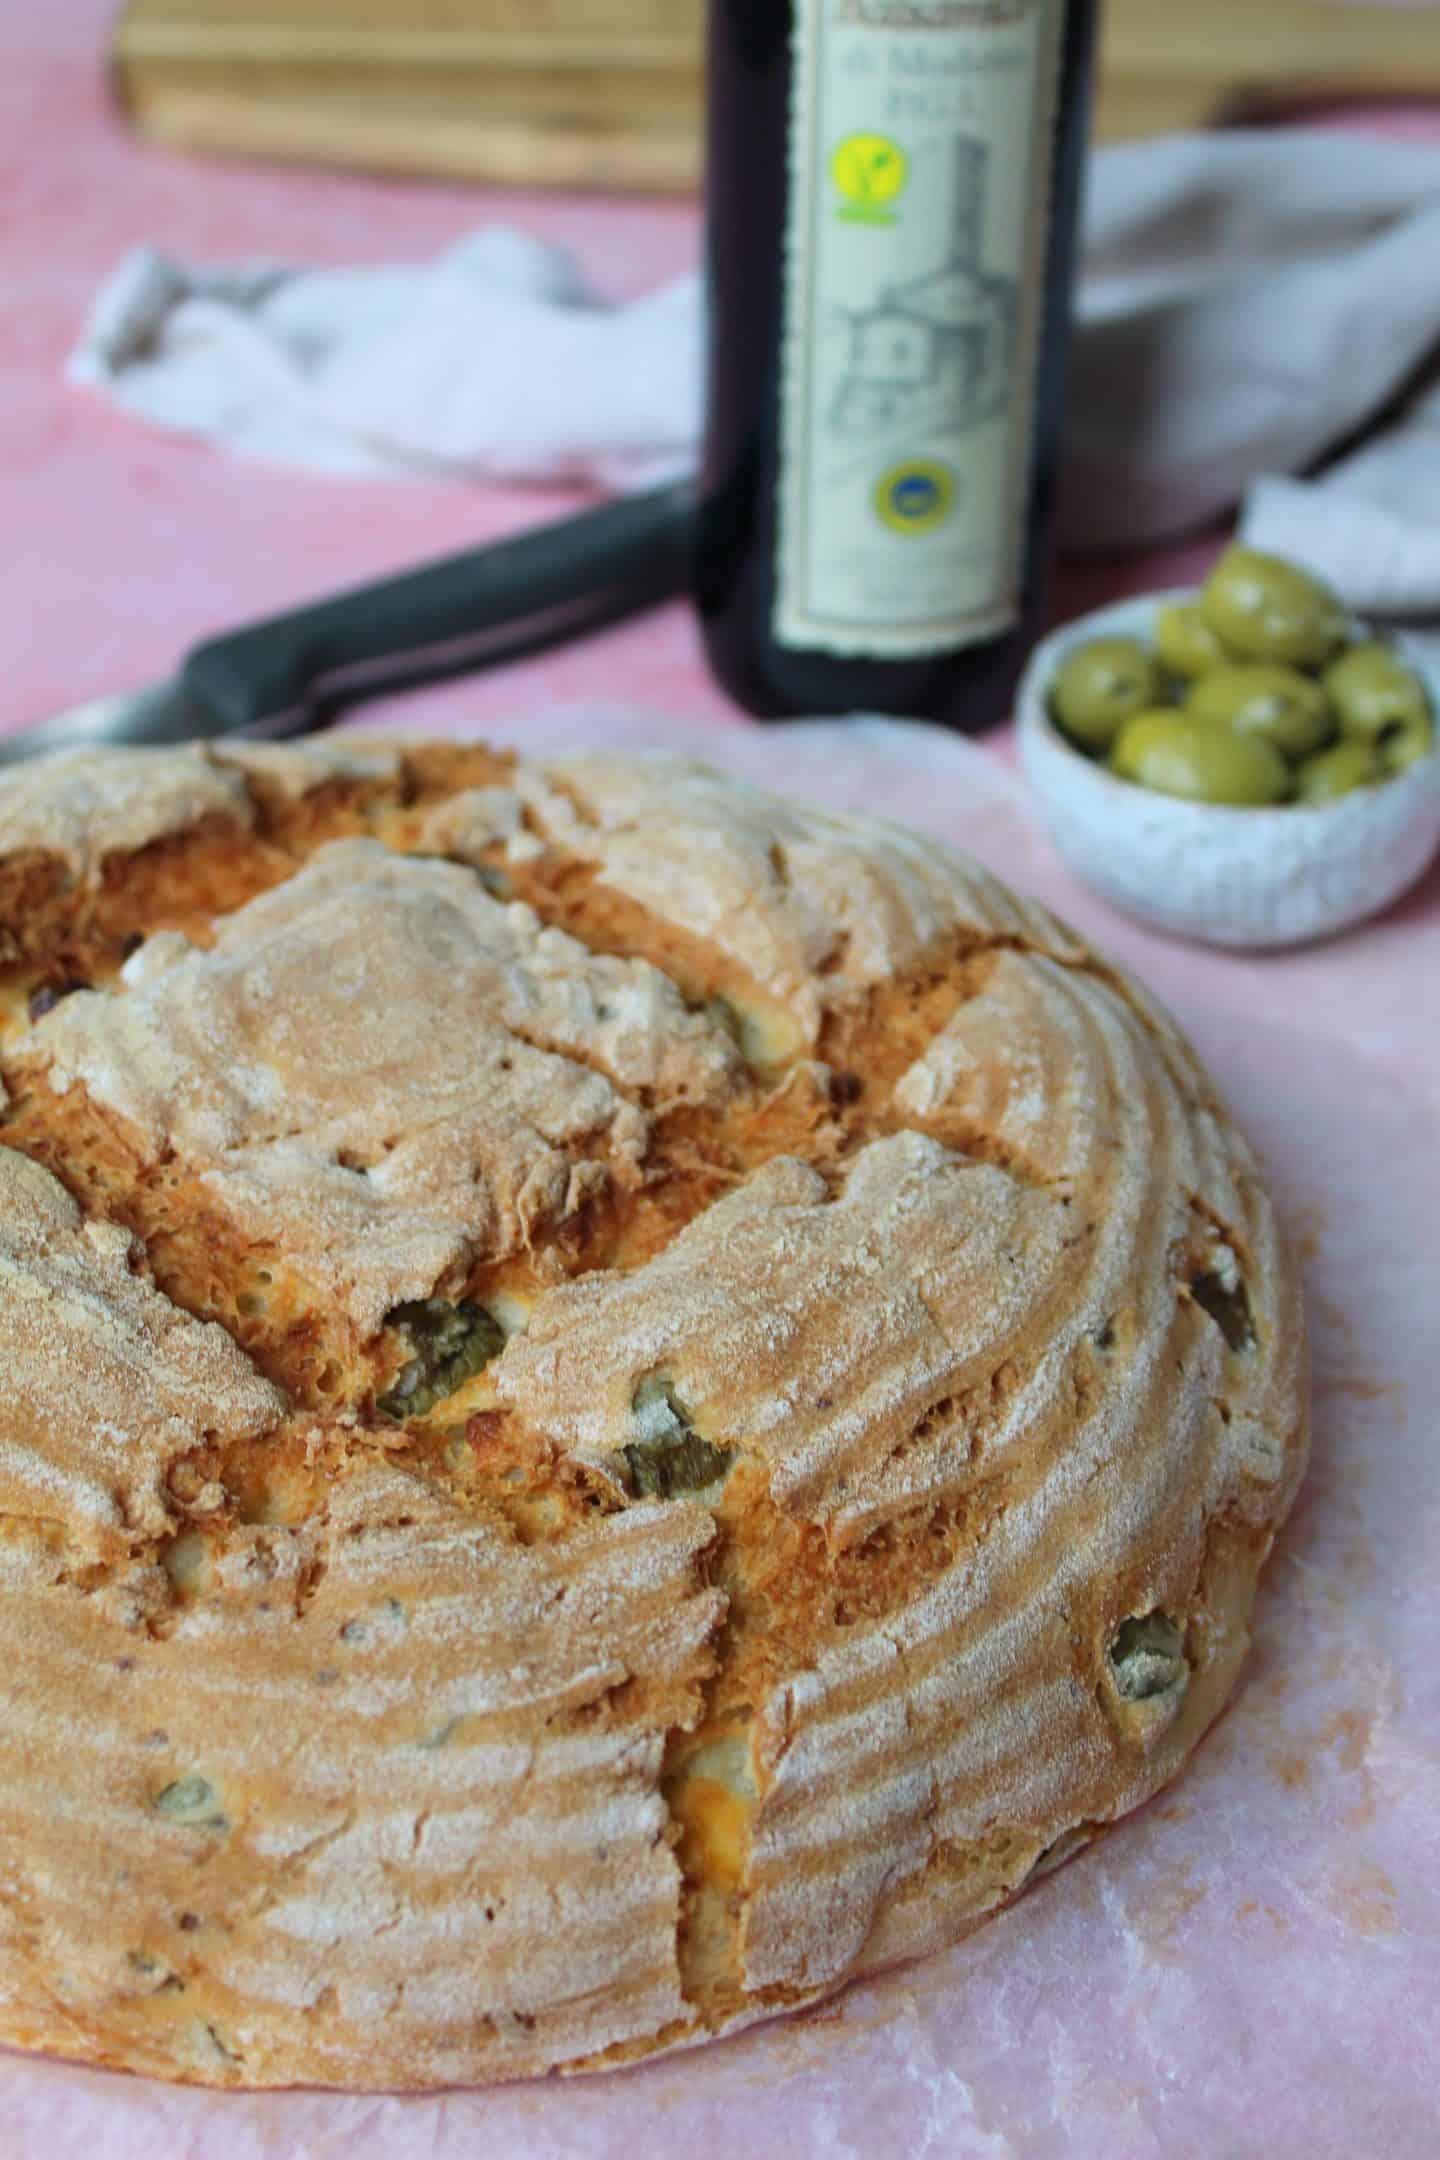
The results will be a gorgeous, artisan round loaf with those pretty swirly lines on top from the proving bowl.
The more you use the basket, the less the dough will stick – just make sure you use lots of gluten free flour and you’ll be absolutely fine.
When you’re ready, your bread banneton should look like this:
TESTING IF YOUR YEAST IS ACTIVE
It’s very important with any bread recipe that you activate the yeast before using it.
To do this, all of my gluten free bread-based recipes start by mixing the yeast with warm milk (or some of them with water) and sugar.
I’d strongly recommend using a food thermometer like this one to ensure the water or milk is around 40’C – skin temperature.
Too hot and it will kill the yeast, which means your bake will not rise.
When left in a warm spot for 5-10 minutes, the yeast should form a frothy top a bit like the head on beer.
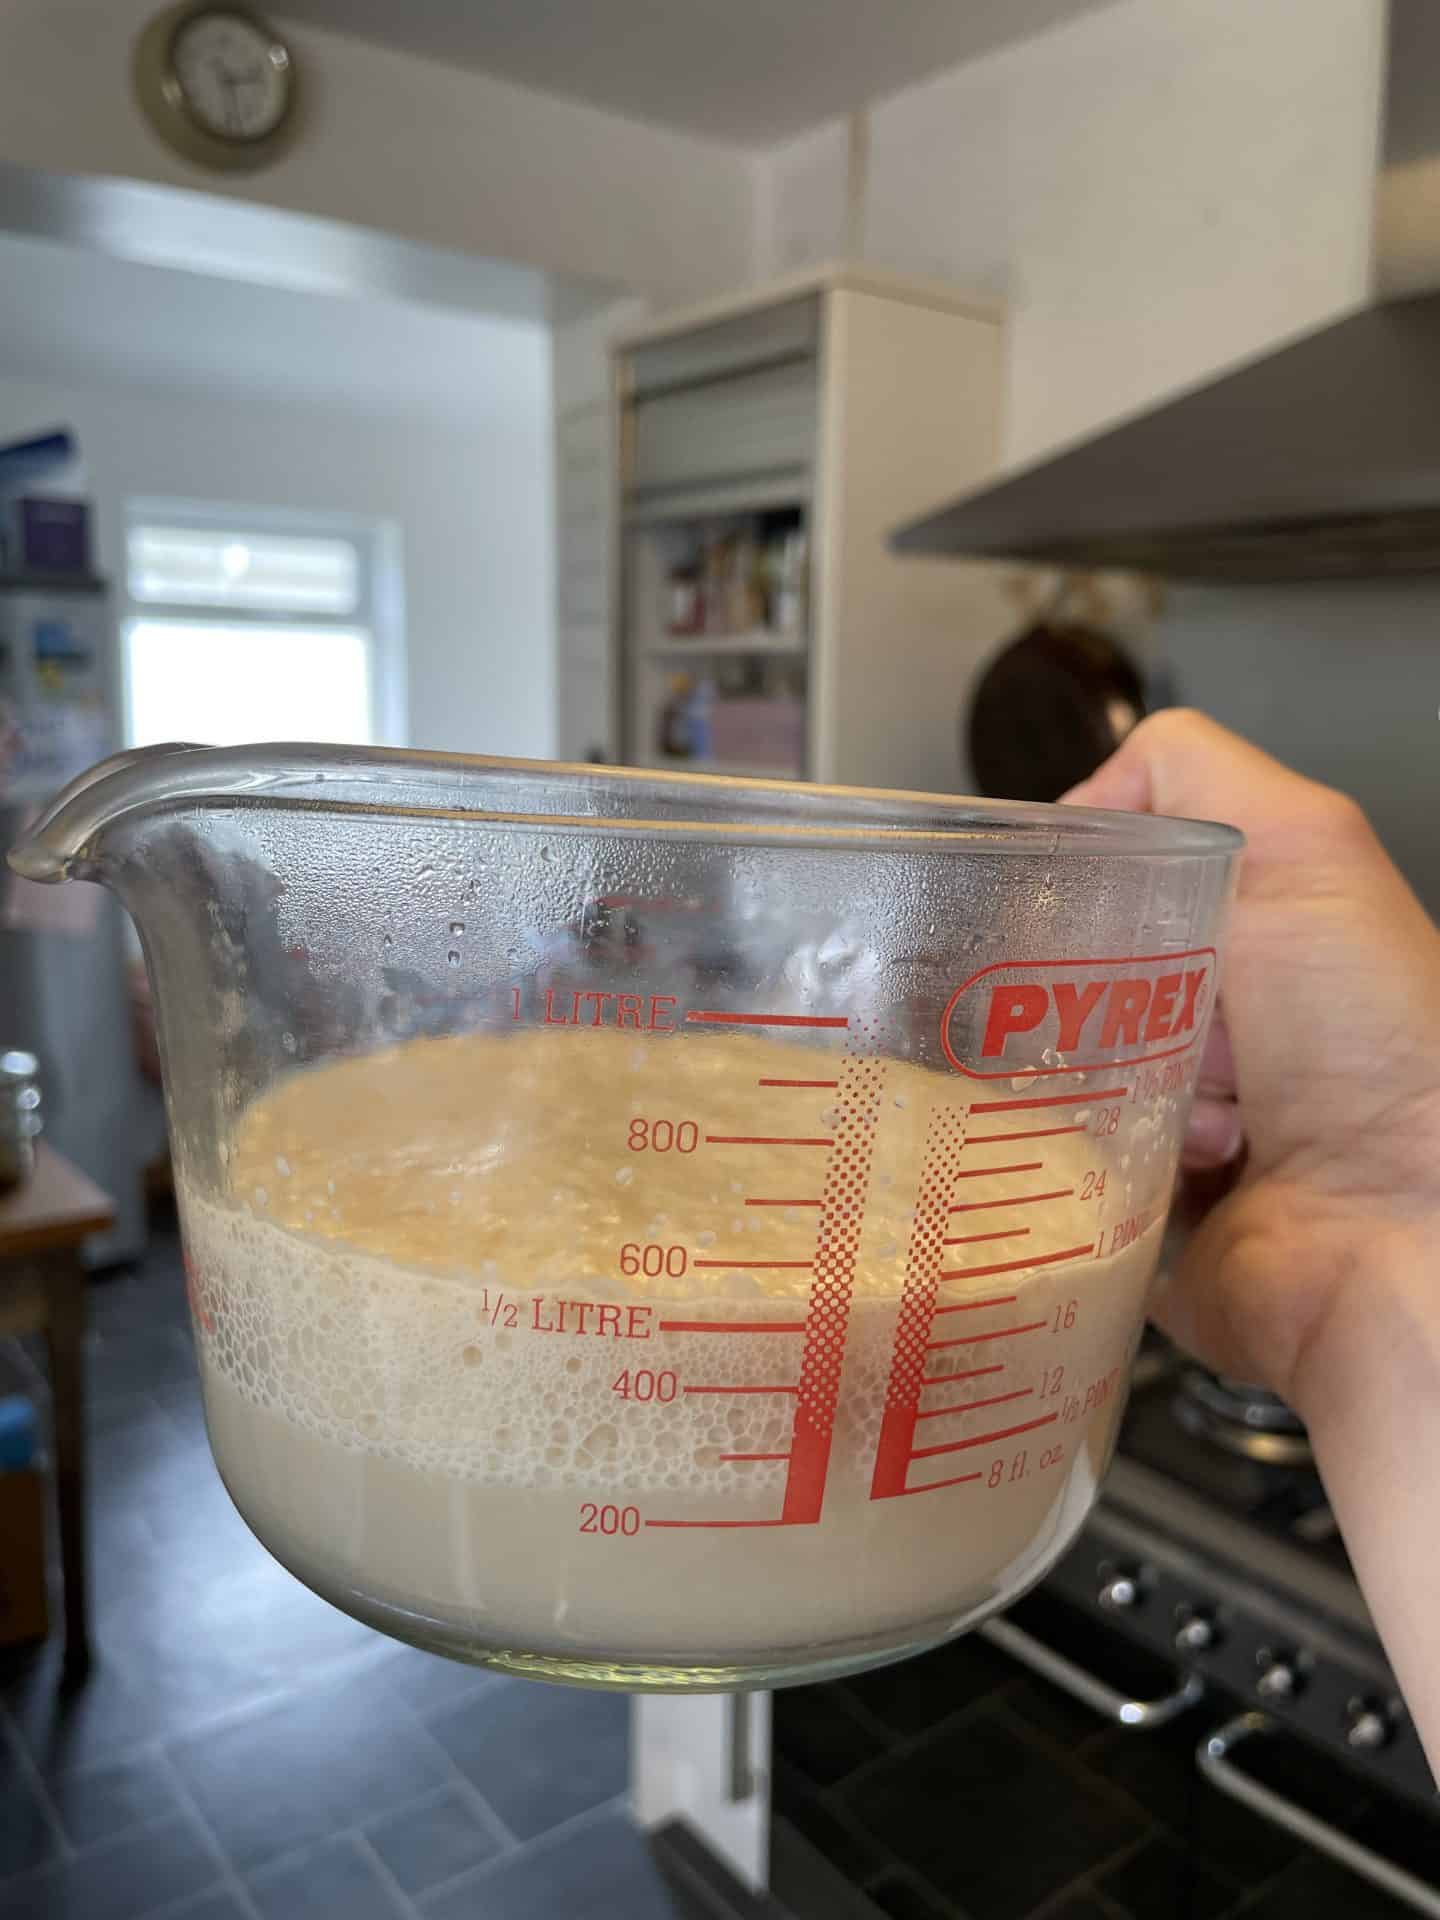
This means your yeast is active and you’re good to go!
If your yeast doesn’t froth up after 10 minutes, it’s likely it is dead and you’ll need to discard it and start again.
Sometimes yeast can go out of date so this could be a reason for it not frothing.
This is also why a food thermometer is so helpful – if the water is too hot or too cold your yeast won’t activate the way it should.
How much should my bread rise?
You want to make sure you’re giving this gluten free artisan loaf enough time to get a good rise.
I have indicated the bread dough should be left for around one hour.
However, this can completely vary depending on the time of year and conditions of your kitchen!
For example, if you were to make this on a very hot, humid day, you may find the bread rises in half the time compared to making it in the middle of winter.
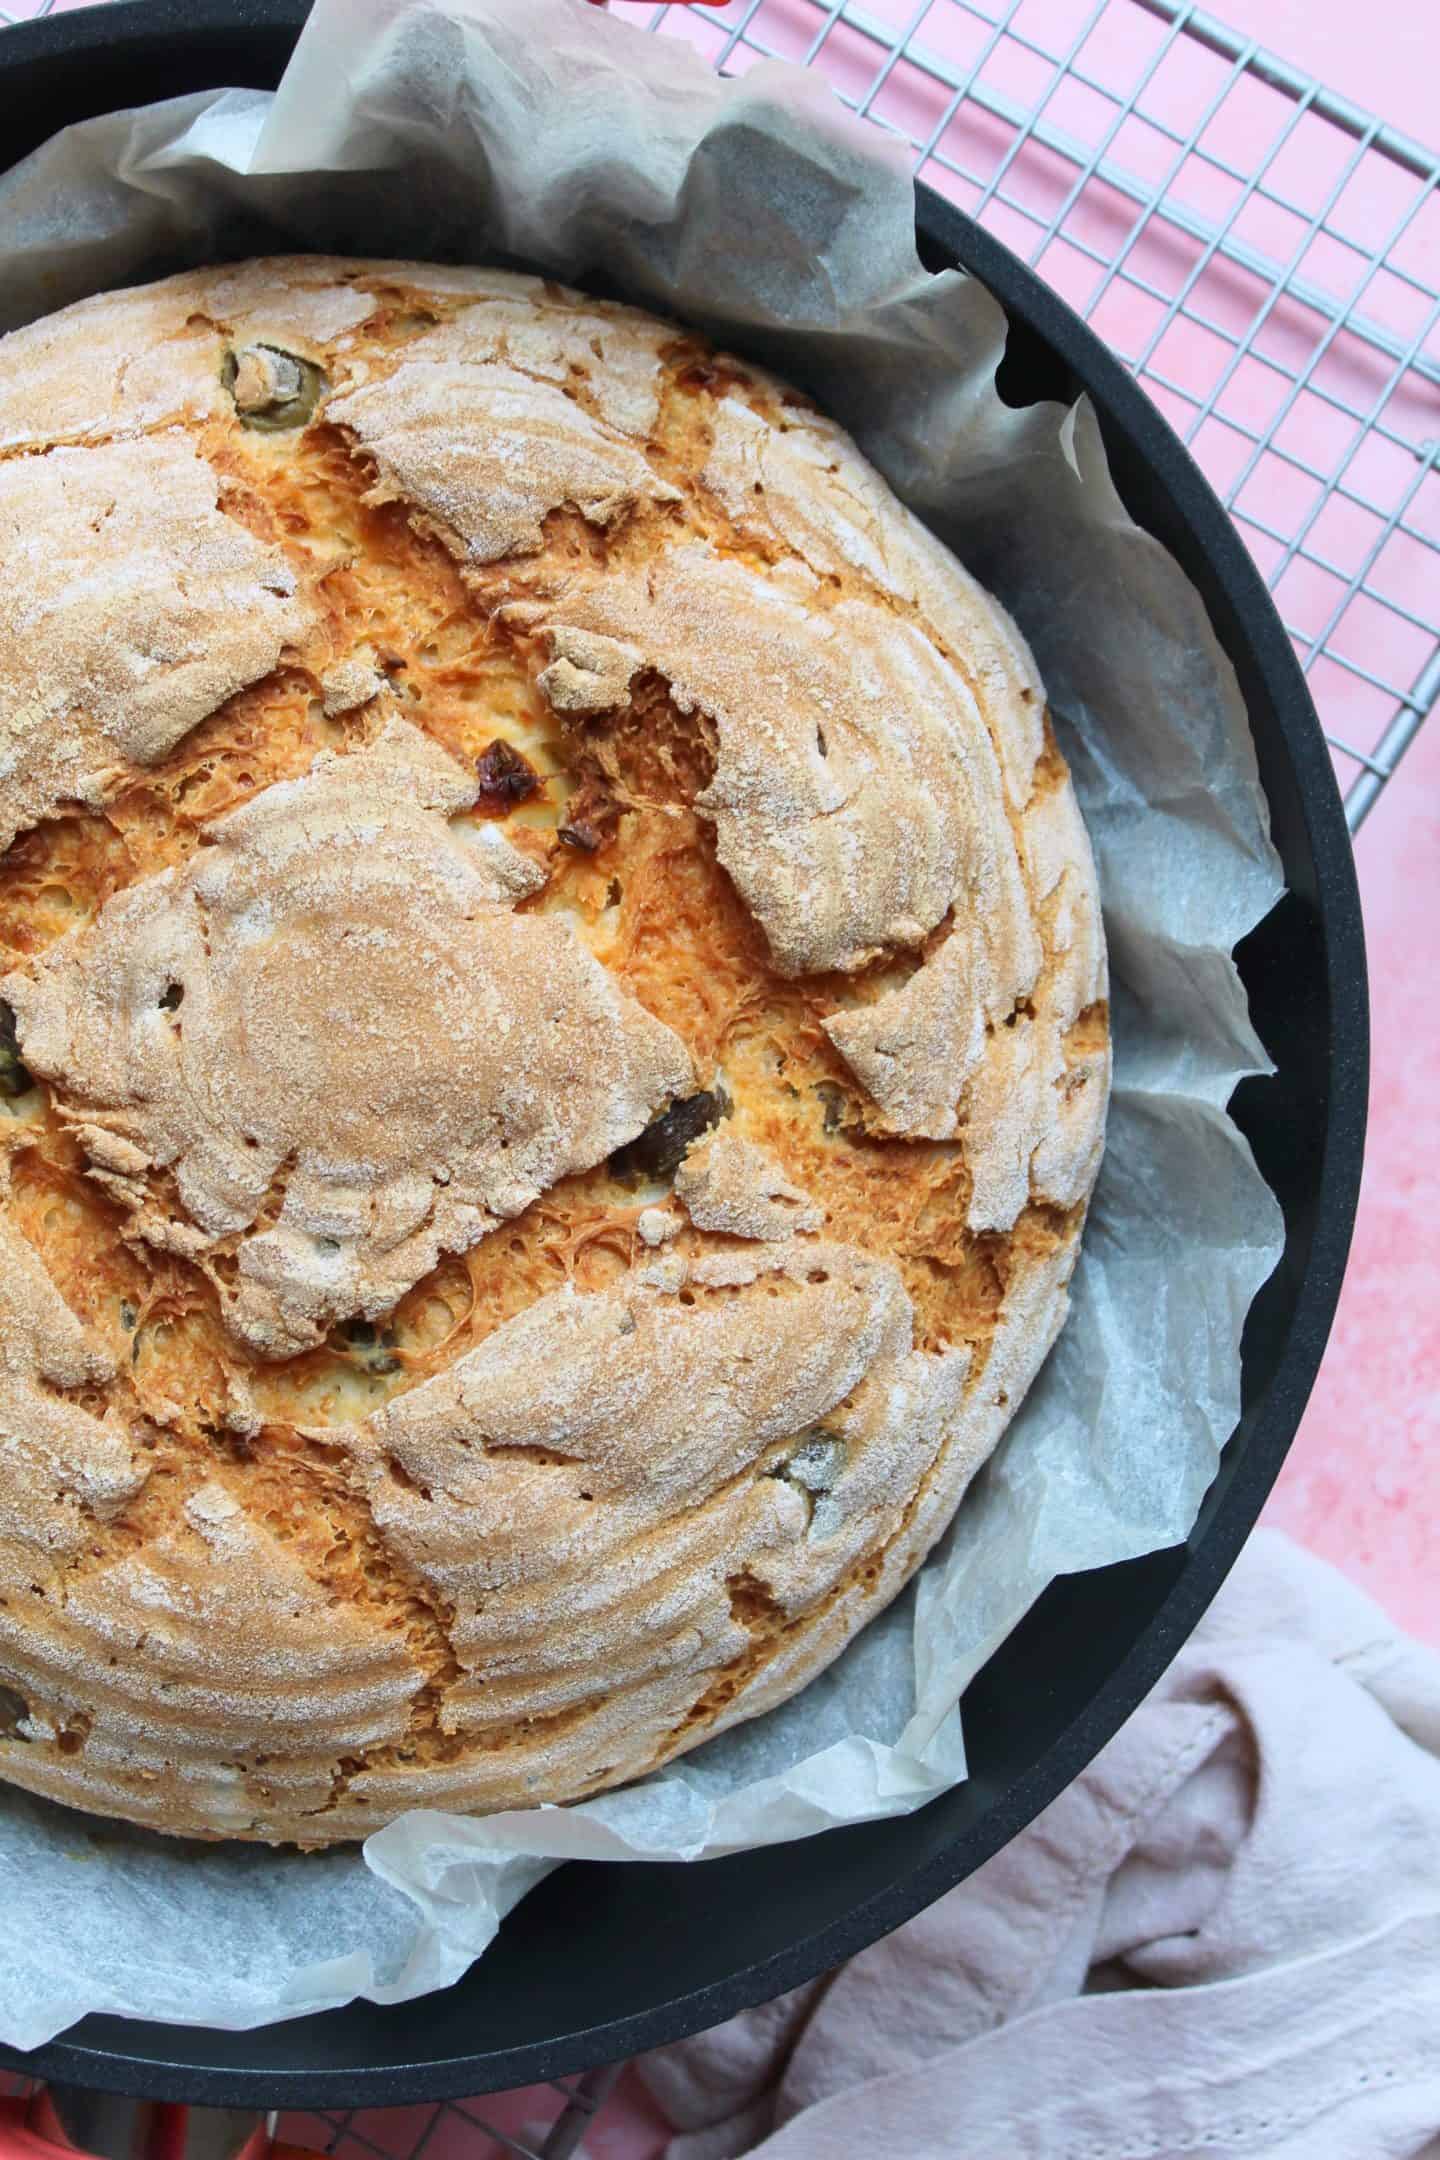
As a guide, here is what my bread looked like before and after proving:
Before proving:
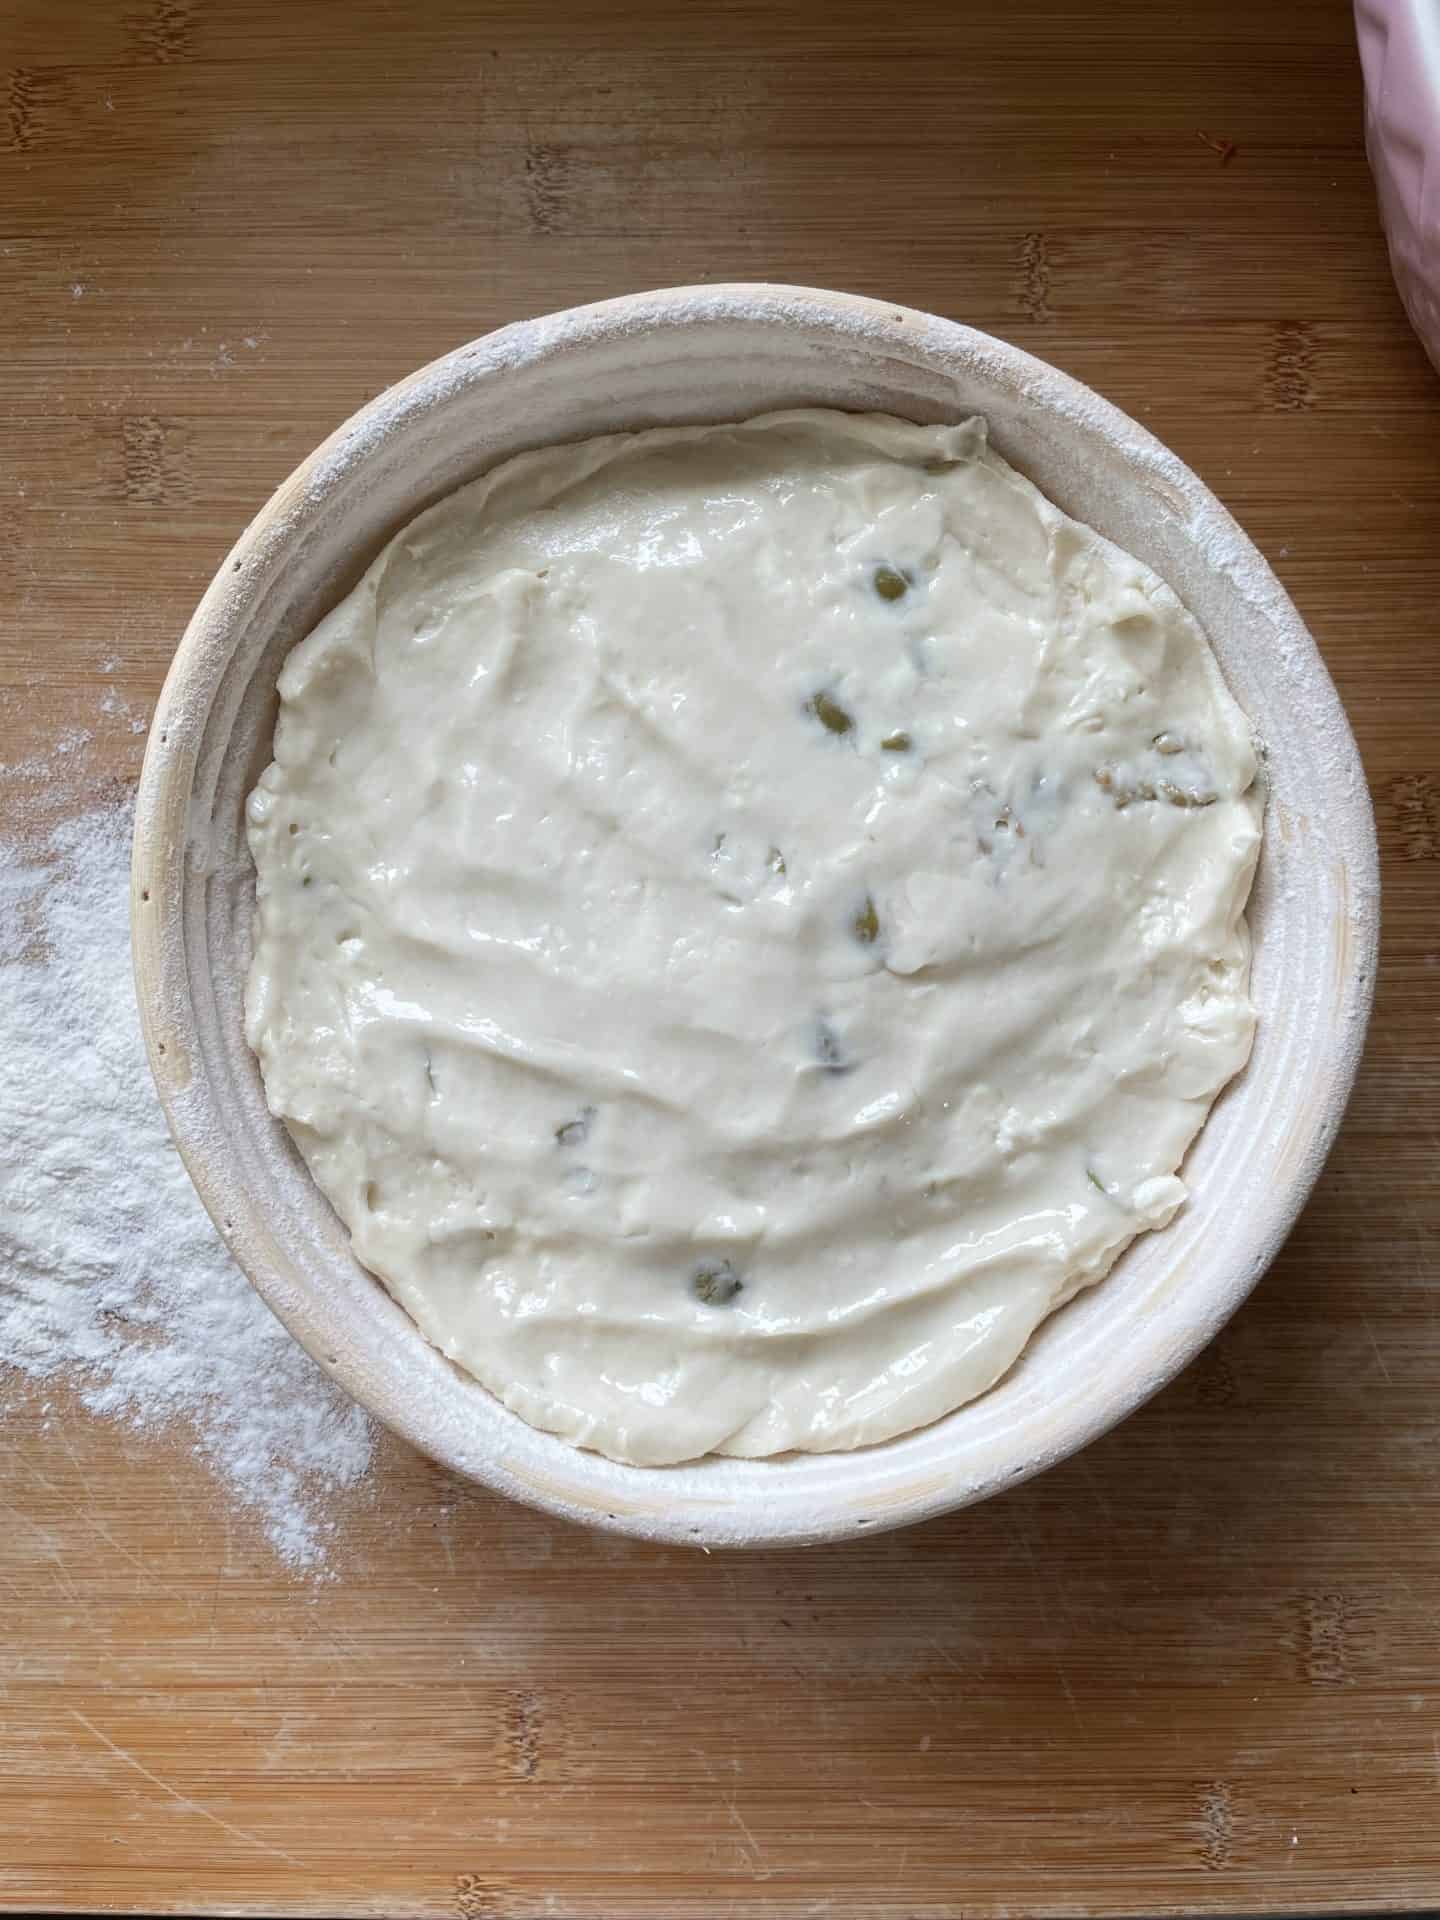
After one hour proving:

If you don’t let your bread prove for long enough, you’ll find it may end up with big bubbles in it.
This is where the heat from the oven has caused the bread to rise too quickly and the steam has burst through the crust, causing splits and bubbles.
This is also why we score the bread before popping it in to bake, so that the steam can escape without creating unsightly gashes in your loaf.

Why use steam when baking bread?
I always use steam in my oven when baking a gluten free artisan loaf as it helps to give a gorgeous, chewy crust.
The best way to do this is to place a tray of hot water in the bottom of the oven when you turn it on, and then heat it up with the water in it.
When you add the bread to the oven, do it as quickly as possible and then DO NOT OPEN THE DOOR for at least 20 minutes.
This will give the steam time to work it’s magic without it escaping!
If you do forget to add the hot water, you can always chuck a few ice cubes into the tray at the bottom of the oven when you add the bread.
This will have the same effect as the cold ice hitting the hot oven will instantly produce steam.
My gluten free artisan bread recipe
Ok, that’s all my top tips – now it’s time for you to get baking with this easy gluten free artisan bread with feta and olives.
It really is very simple to make and you’ll absolutely love it fresh on the day or toasted.
It also freezes well – I’d recommend slicing it before freezing so you can grab what you need every time you fancy some.
If you make this recipe and love it, please do let me know by tagging me on my Instagram or using #theglutenfreeblogger. I love seeing your creations!
And please do leave a review to let others know you loved it too! It would mean the world to me.
Gluten Free Artisan Feta and Olive Bread
Looking for a gluten free artisan bread recipe? This easy no knead feta and olive bread is the perfect gluten free artisan bread for everyone! A delicious gluten free boulle perfect for picnics or dunking in soup. Makes one large, 9-inch diameter loaf (approx 16 slices) and can be frozen.
Ingredients
- 300ml warm water (skin temperature)
- 2 tbsp caster sugar
- 14g dried yeast
- 475g FREEE gluten free white bread flour
- 1 tsp xanthan gum
- 1 tsp salt
- 1 tsp apple cider vinegar
- 5 tbsp vegetable oil (such as rapeseed oil)
- 2 eggs
- 85g green olives (pitted and roughly chopped)
- 100g feta (crumbled)
- 2-3 tbsp rice flour (for dusting)
Instructions
- Measure out the warm water into a jug - it should be at around 40'C (which should feel like skin temperature if you dip your finger in). Stir the sugar into the warm water and until dissolved, then add the yeast and stir again. Leave in a warm spot for 5-10 minutes for the yeast to activate. It should form a lovely froth on top when it's ready.
- Add the gluten free bread flour, xanthan gum and salt to a large mixing bowl and stir to mix together.
- In a separate mug or bowl, add the eggs, oil and vinegar and lightly whisk to combine.
- Once the yeast/water mixture is active (frothy), add it to the flour along with the egg/oil mixture. Using a wooden spoon, beat the mixture together vigorously to combine it into a thick, sticky dough. When the mixture is smooth with no lumps of flour, stir in the olives and feta until evenly distributed.
- Dust the bread bowl with the rice flour (see blog post above for tips) until coated evenly and then pour in the bread dough. Smooth it out using wet hands and then loosely cover the tin with oiled clingfilm and leave in a warm spot to prove for around 40-60 minutes. You want the dough to be lovely and risen and puffy.
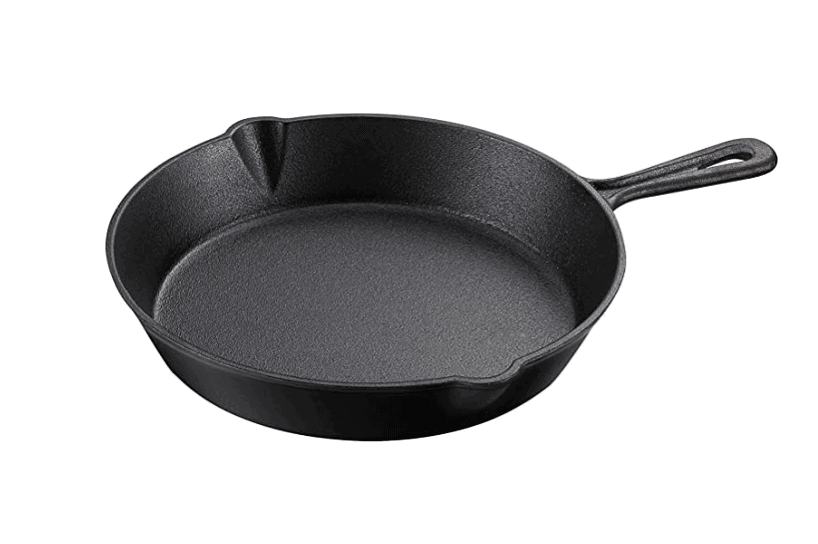
- When the dough has nearly finished proving, place a tray of hot water in the bottom of the oven and your skillet/cast iron pan on a shelf in the middle of the oven. Preheat to 200'C / Fan 180'C / Gas Mark 6 with both the water and the pan in the oven so they get nice and hot.
- When ready to bake, carefully remove the hot skillet from the oven. Place a piece of baking paper on a plate or chopping board and turn the bread out of the bowl onto this. Carefully lift the paper with the dough on into the skillet. Score the top with a sharp knife or razor - a simple cross or criss-cross pattern is fine!
- Working quickly so as not to lose too much steam, place the bread in the oven and close the door. Bake for 55-60 minutes until it is risen and golden - DO NOT open the door for at least the first 20 minutes, otherwise you'll lose all the steam! After this, if the top of loaf starts to catch then place some foil over it. You'll know the bread is done if you tip it out of the tin and tap on each surface - it should sound hard and hollow.
- Leave the loaf to cool in the tin on a cooling rack for at least 30 minutes before cutting into it. It's important to give it this time to rest - you want WARM bread, not hot!
Notes
- This gluten free bread is best eaten on the day of baking. It can also be sliced and frozen once cool. If eating the next day or after, I'd recommend either lightly toasting or flick a few drops of water onto a slice and refresh in a warm oven for five minutes.
- If you do not have rice flour for dusting the banneton you can use plain gluten free flour or some extra bread flour which will work just fine.
Recommended Products
As an Amazon Associate and member of other affiliate programs, I earn from qualifying purchases.

Nutrition Information:
Yield:
16Serving Size:
1 sliceAmount Per Serving: Calories: 201Total Fat: 8gSaturated Fat: 2gTrans Fat: 0gUnsaturated Fat: 5gCholesterol: 29mgSodium: 296mgCarbohydrates: 27gFiber: 1gSugar: 2gProtein: 6g
NEED SOME MORE GLUTEN FREE bread inspiration?
Want to have a go at some of the other gluten free bread recipes on the blog?
Give some of these other gluten free treats a try and see what you think!
There are plenty to choose from – here are a couple of easy baking ideas to get you going:
- Easy white gluten free loaf
- Brown seeded bread
- Vegan and gluten free focaccia
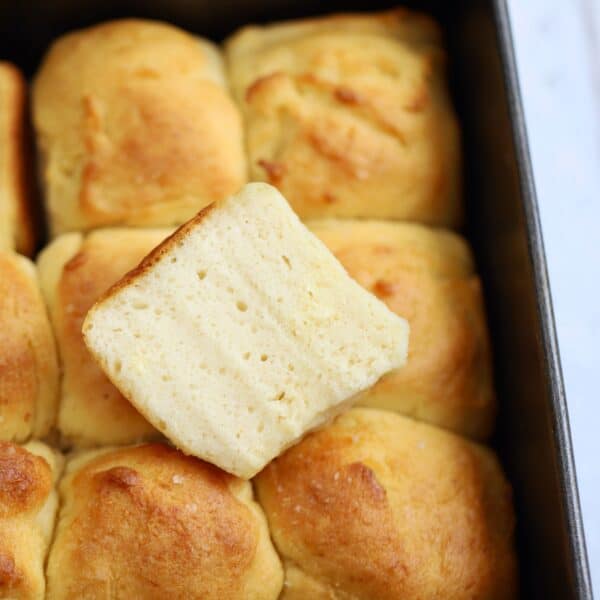
- Super soft gluten free bread rolls
- Yeast free soda bread
- Gluten Free Flatbread
If you do make this recipe please let me know! I’d love to see your photos using #theglutenfreeblogger, share them in my Facebook group or tag me on Instagram.
And if you have any recipe suggestions, please let me know in the comments what you’d like to see next!
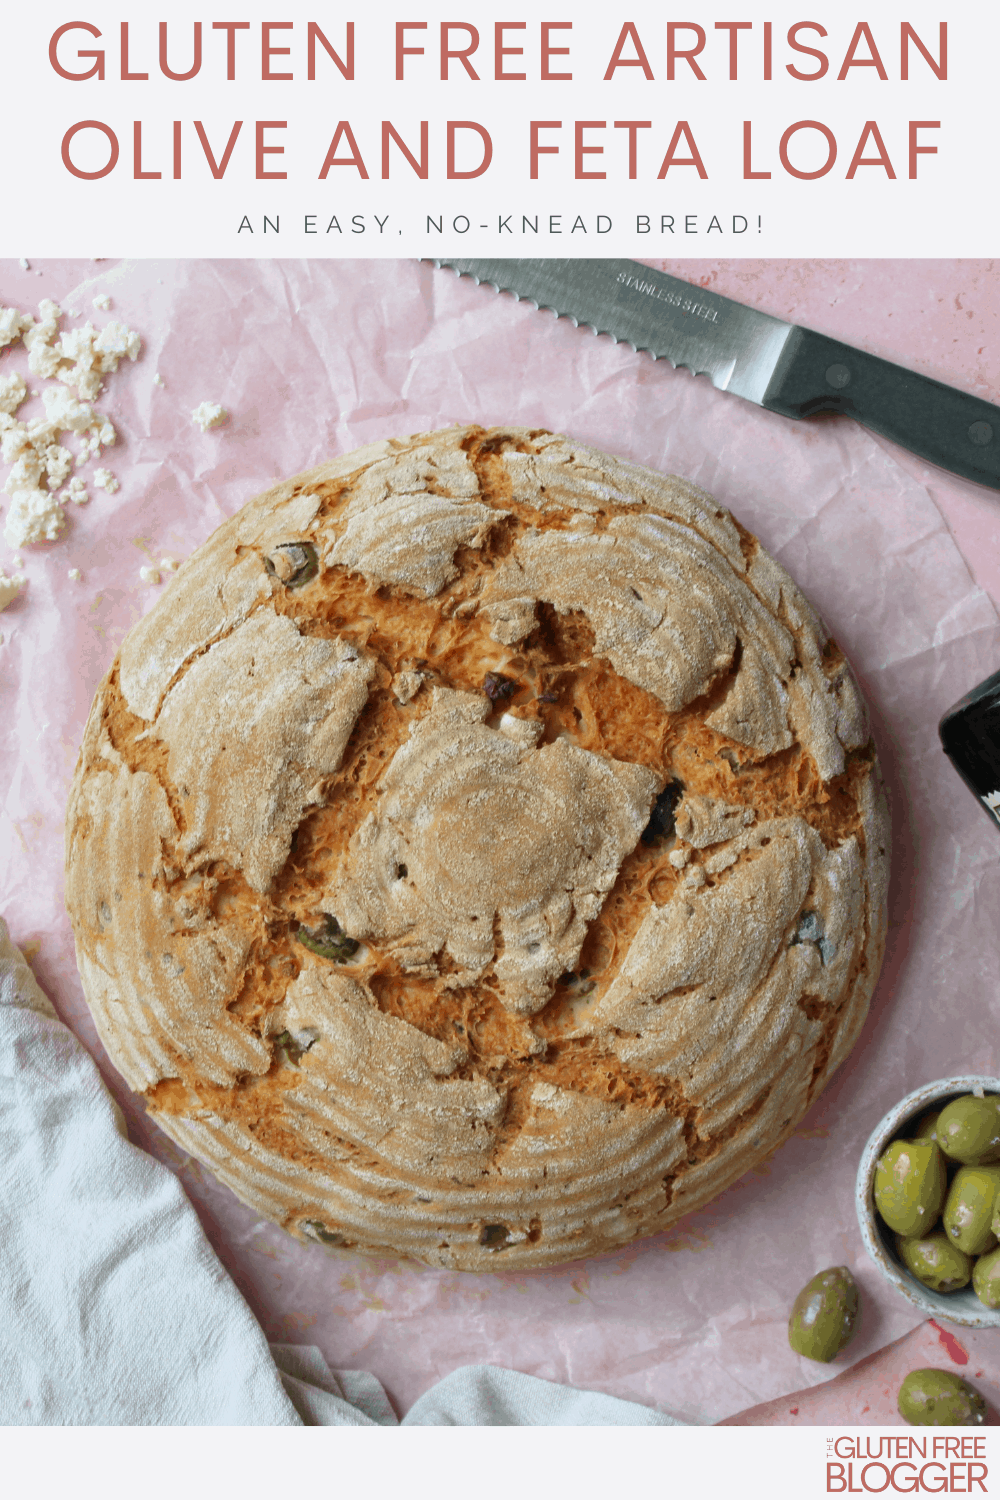
LIKE THIS GLUTEN FREE Artisan Bread RECIPE?
Make sure you pin these recipe cards below for later!
Do head over and follow me on Pinterest too for more gluten free recipe inspiration.


I made this two nights running and followed to the letter the instructions, and it was made in two separate ovens, as I am helping a non cooking friend who is GF to learn to cook. Both times it was very dense, and took a lot longer to actually get to the crusty stage, was it because we didn’t use that special baking dish you mention?
my friend with gluten intolerance didnt like olives so it was quite bland she said, do you think adding green herbs like rosemary would help in that instance.
Great site btw and love your instagram too – helps me find recipes for my pal
Hi Mary, using a cast iron skillet will certainly help with crisping up the loaf, as will the steam in the oven. Green herbs could certainly be added for some extra flavour. If you like a really crispy bread I recommend my focaccia bread instead!
This is by far the most exciting loaf I have ever made 😋 I have had my eye on this recipe for a while and finally got round to making it today, it was so easy. Didn’t have a proofing basket so I lined a mixing bowl with oiled cling film and it seemed to work fine, though didn’t have the same artisan finish to it. Now I know I can make such yummy bread though, I’m definitely going to invest in one.