Gluten Free Puff Pastry Recipe
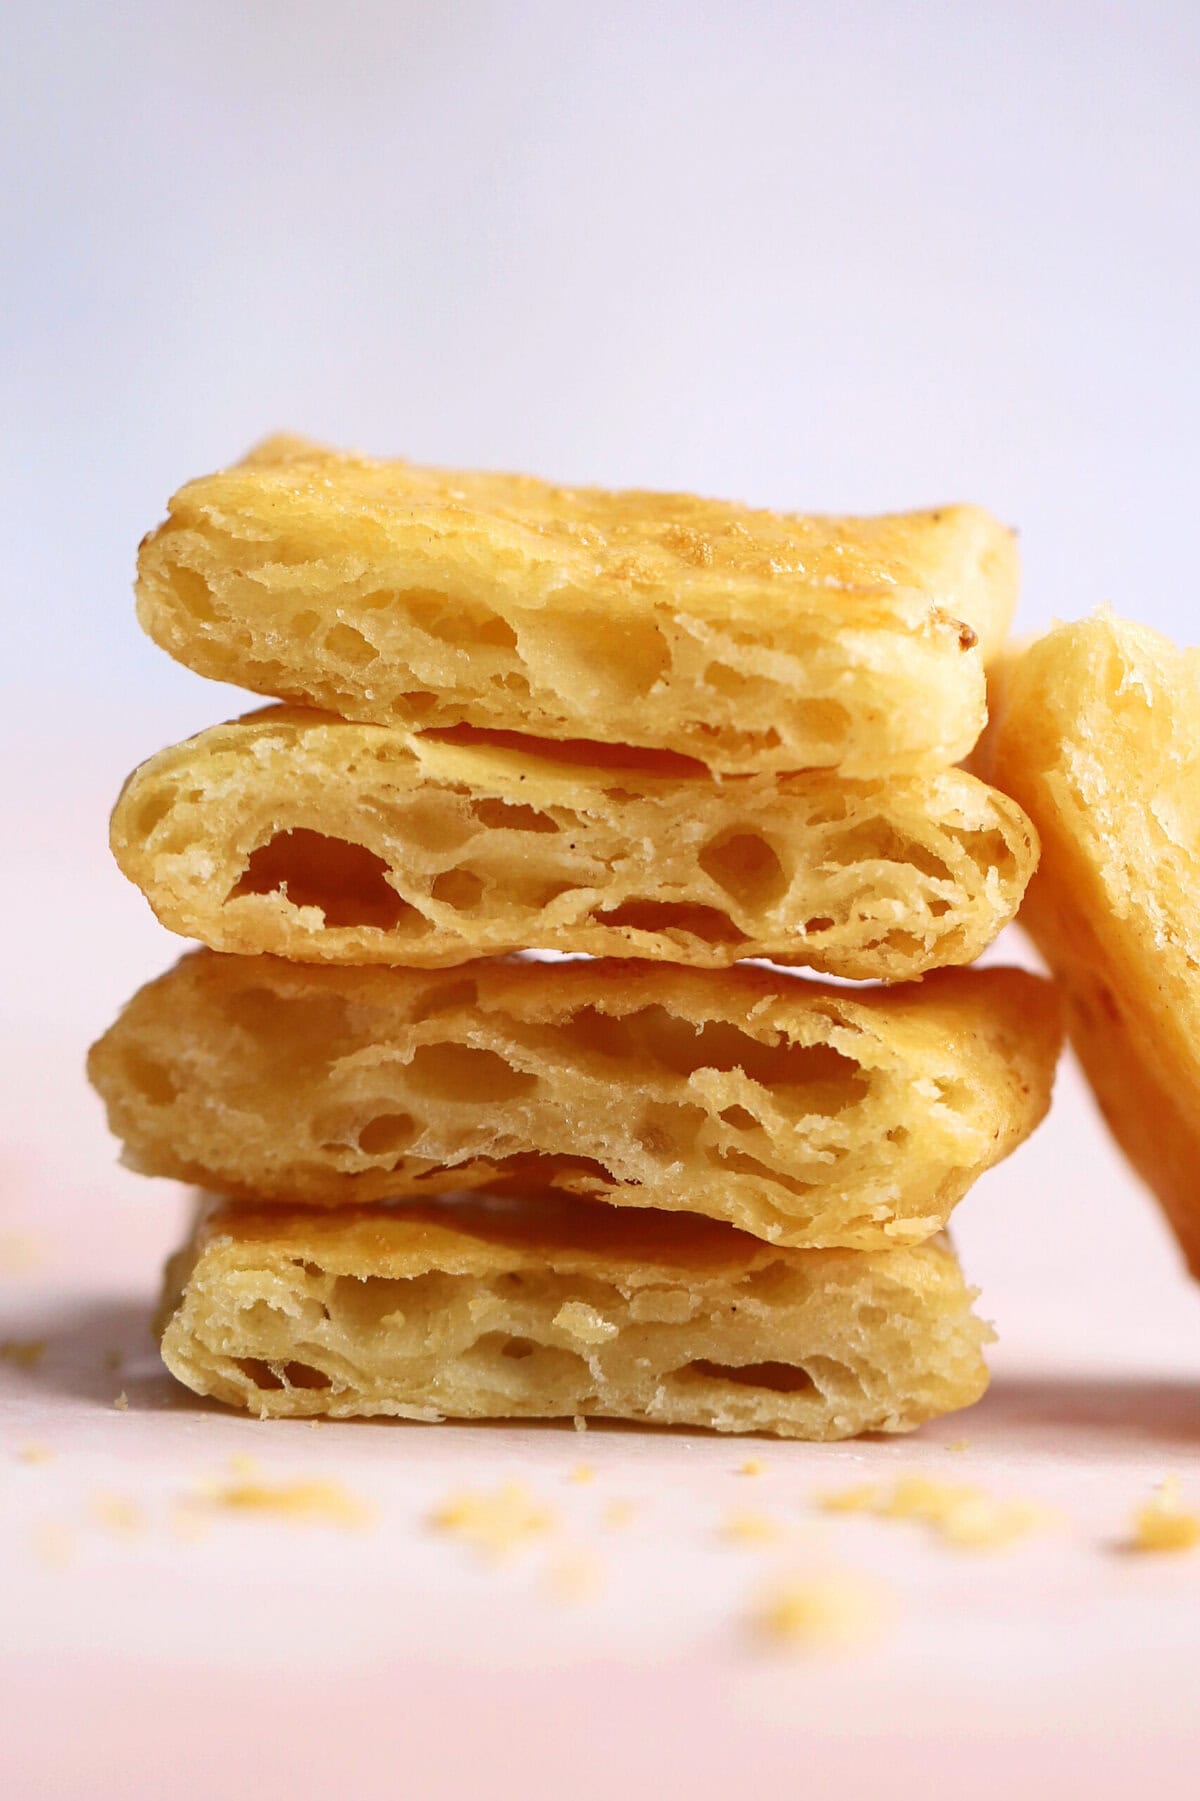
This Gluten Free Puff Pastry is actually really simple - it just needs a little patience! A gluten free flaky pastry perfect for sausage rolls, cheese straws, apple turnovers and more. As a guide, this makes enough for 12 mini sausage rolls.
Servings: 1 block
Equipment
Ingredients
- 250 g unsalted butter (it MUST be cold!)
- 250 g plain gluten free flour (I use FREEE or any supermarket blend)
- 1.5 tsp xanthan gum
- 1 tsp salt
- 150 ml ice cold water
Instructions
To make the gluten free puff pastry dough:
- Cut the butter (which must be as cold as possible!) into cubes of approx 2cm.
- Add the gluten free flour, xanthan gum and salt to a large mixing bowl and stir. Then add the cubes of cold butter.
- Using two butter knives, ‘criss-cross’ across the pastry mix, cutting the butter into smaller pieces. You'll want to keep stirring the bowl to make sure the cut edges become coated in flour. Keep going until the butter lumps are mostly the size of peas - a few bigger lumps are absolutely fine.
- Gradually add the ice cold water to the mixture, stirring in between using a wooden spoon. Once it's all added, use your hands to bring the mixture together into a ball. Try to handle it as little as possible - you want to ensure you can still see lumps of butter throughout the pastry.*At this point, if it’s a warm day or the dough feels at all sticky, wrap the dough in cling-film and refrigerate for at least 20 minutes. If it’s a colder day and the dough still feels smooth and cool, you might be able to get your first roll-and-turn in straight away.
To laminate the gluten free puff pastry:
- Sprinkle gluten free flour onto a worktop and place the ball of dough in the centre. Use your hands to flatten the dough slightly and shape it into a rectangle shape.
- Roll the dough out in ONE DIRECTION only, in one long rectangle approx 1cm thick. I find the best way to do this is to roll the dough away from you. Use your hands to keep gently nudging the pastry back into a reasonably straight line on the edges. You should see marbled streaks of butter throughout the dough as you roll it.
- Take the short edge which is furthest away from you and fold it back towards you until it meets the centre line. Then take the edge closest to you and fold it away from you over the piece you have just folded, so the pastry is in three layers.
Chill and repeat:
- Wrap in clingfilm and place in the fridge for 20-30 minutes until chilled. When you remove it from the fridge, place the dough down in exactly the same position as it was before, then give the dough a quarter turn clockwise.
- Repeat steps 6, 7 and 8 TWICE more - so a total of three fold-and-turns. Each time you start, place the folded dough in the same position as when you finished the last fold and give it a quarter-turn before you begin rolling.
- Ensure you chill for at least 20-30 minutes before rolling out to use in your chosen bake. Any offcuts should be stacked on top of each other - don’t scrunch them up into a ball otherwise you will lose all the layers you’ve worked into them.
- To bake, follow the individual recipe you are making for the appropriate cooking times.
Video
Notes
- IMPORTANT: It's VITAL to keep this dough as cold as possible. If making this on a hot day, you may need to refrigerate the dough more frequently. If it sticks to the worktop, use a dough scraper to gently ease it off the worktop and sprinkle some more flour down to stop it sticking further. You can also roll it between sheets of clingfilm if you find this easier.
- Weighing Scales vs Cups: You can toggle this recipe card to convert the ingredients into cups. However, I always recommend using weighing scales – these are cheap to buy and much more accurate. And in gluten free baking, a tiny variation can make a huge difference!
- Step-by-Step Photos: Check out the blog post above for step-by-step photos to guide you through how this gluten free puff pastry recipe should look at each stage.
- Storing: This gluten free puff pastry can be kept in the fridge once rolled and folded, for up to a week. You can also freeze it - defrost before rolling and making your chosen recipe.
- Like this Recipe? It would mean SO much to me if you could leave a 5* rating and leave a little comment about this Gluten Free Puff Pastry recipe! It really helps support my blog and get my recipes out there, so thank you! xx
Nutrition
Serving: 1(Based on 12 servings) | Calories: 226kcal | Carbohydrates: 16g | Protein: 2g | Fat: 17g
