This post may contain affiliate links for which I earn a small commission at no extra cost to you. For more info, check out my Disclosure Policy. Thank you for your support!
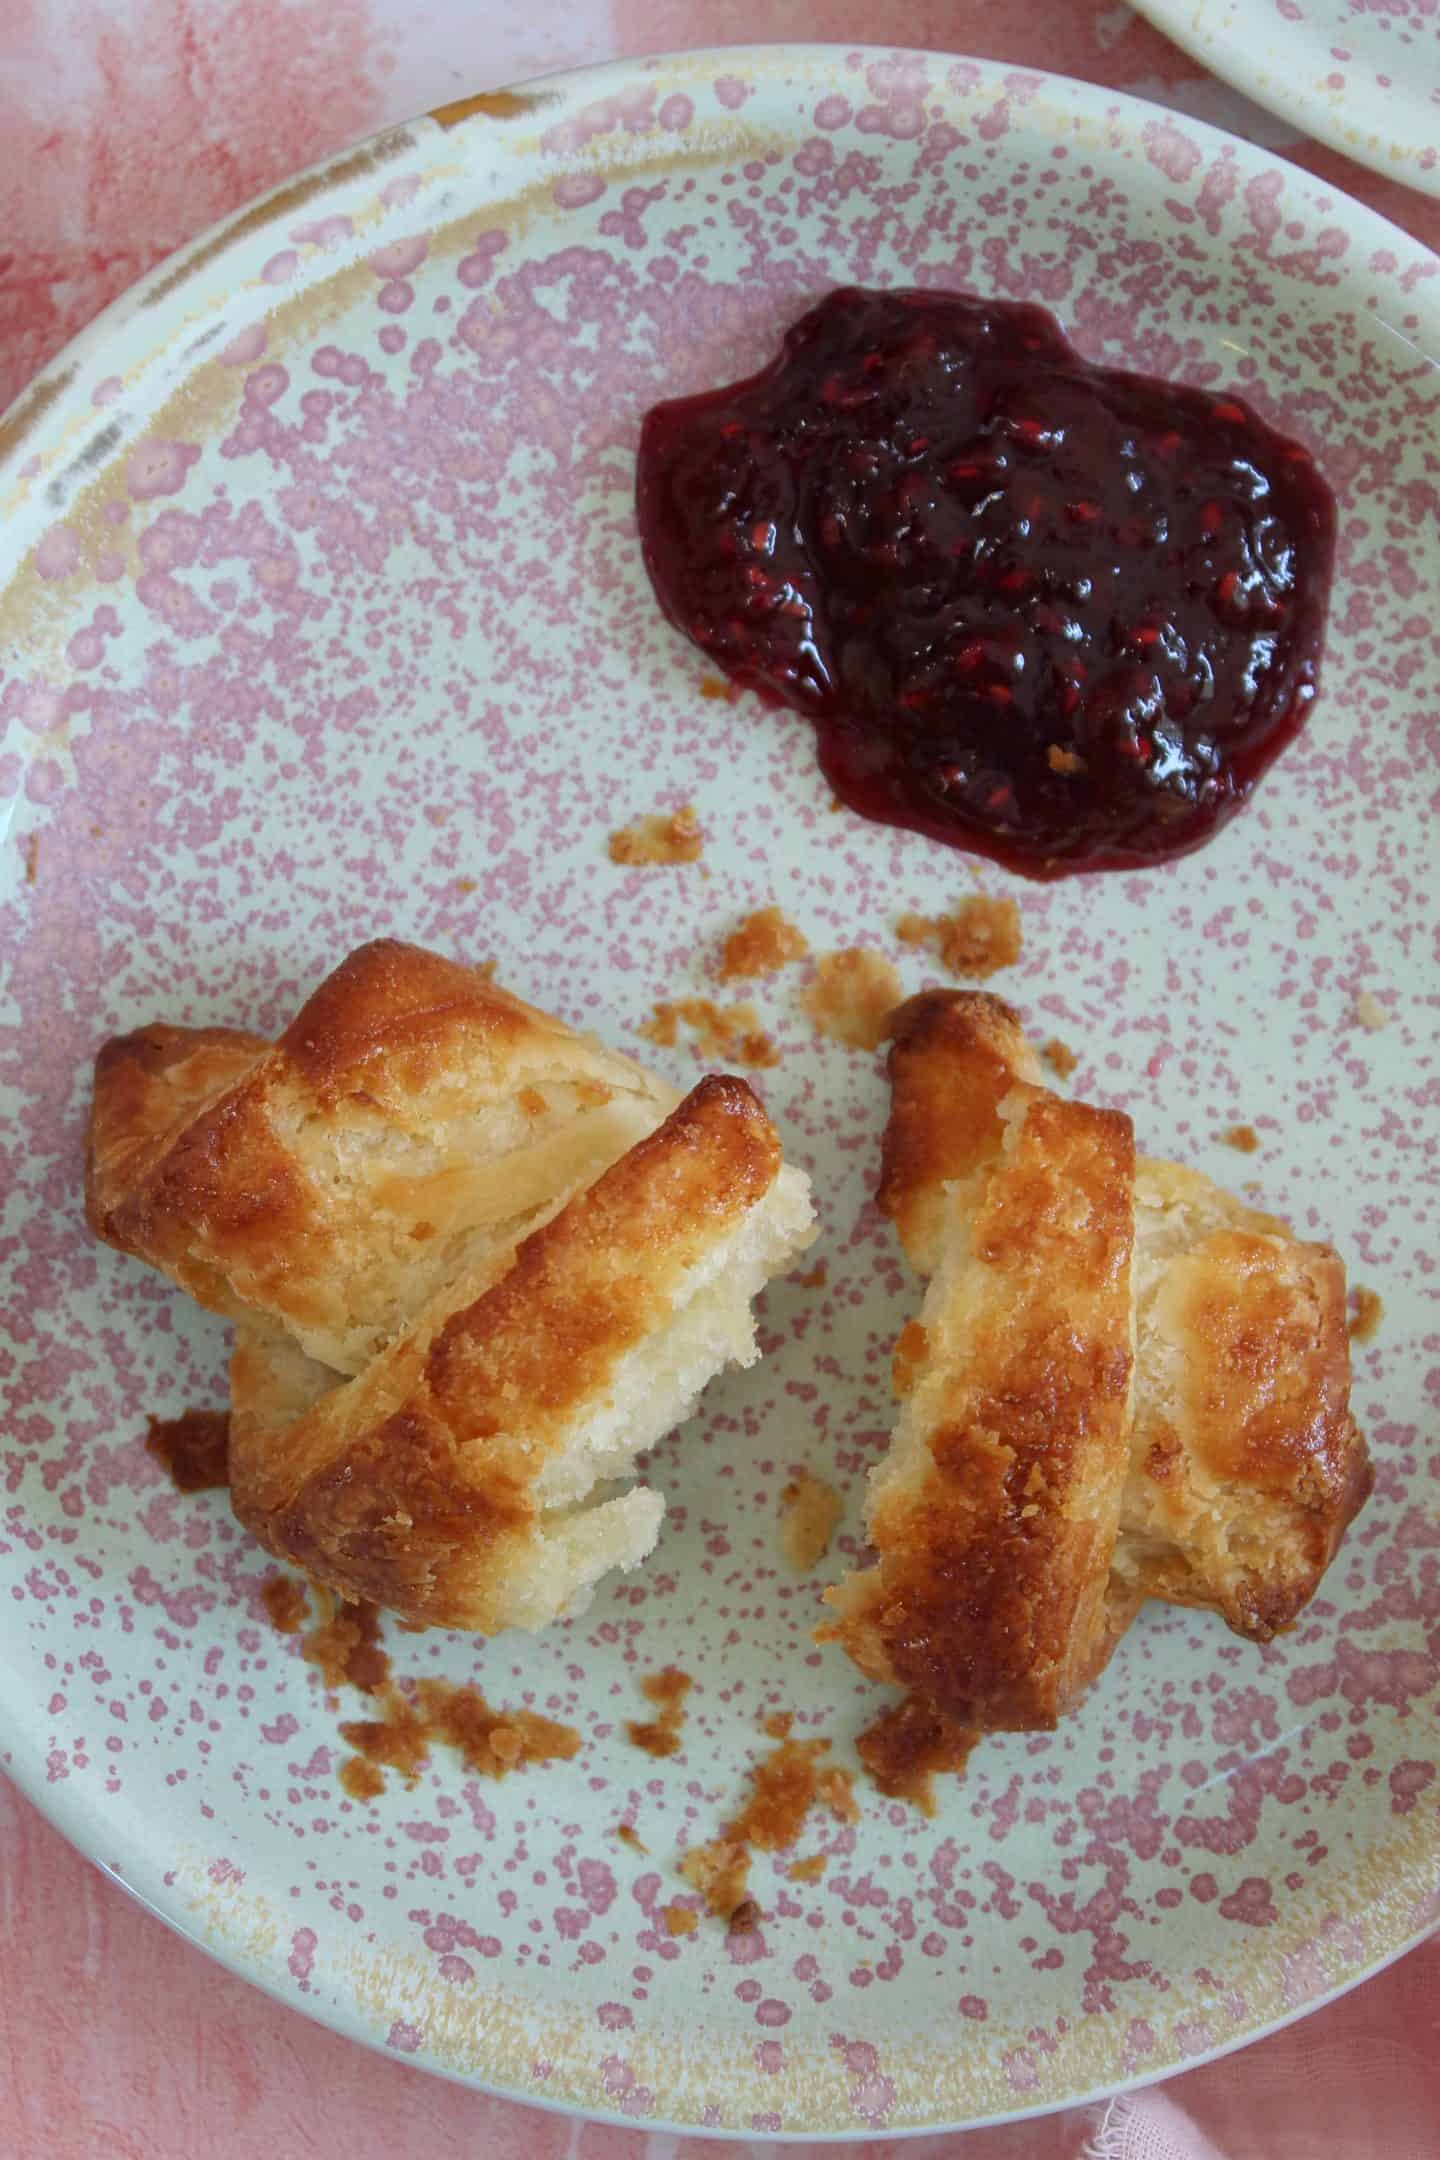
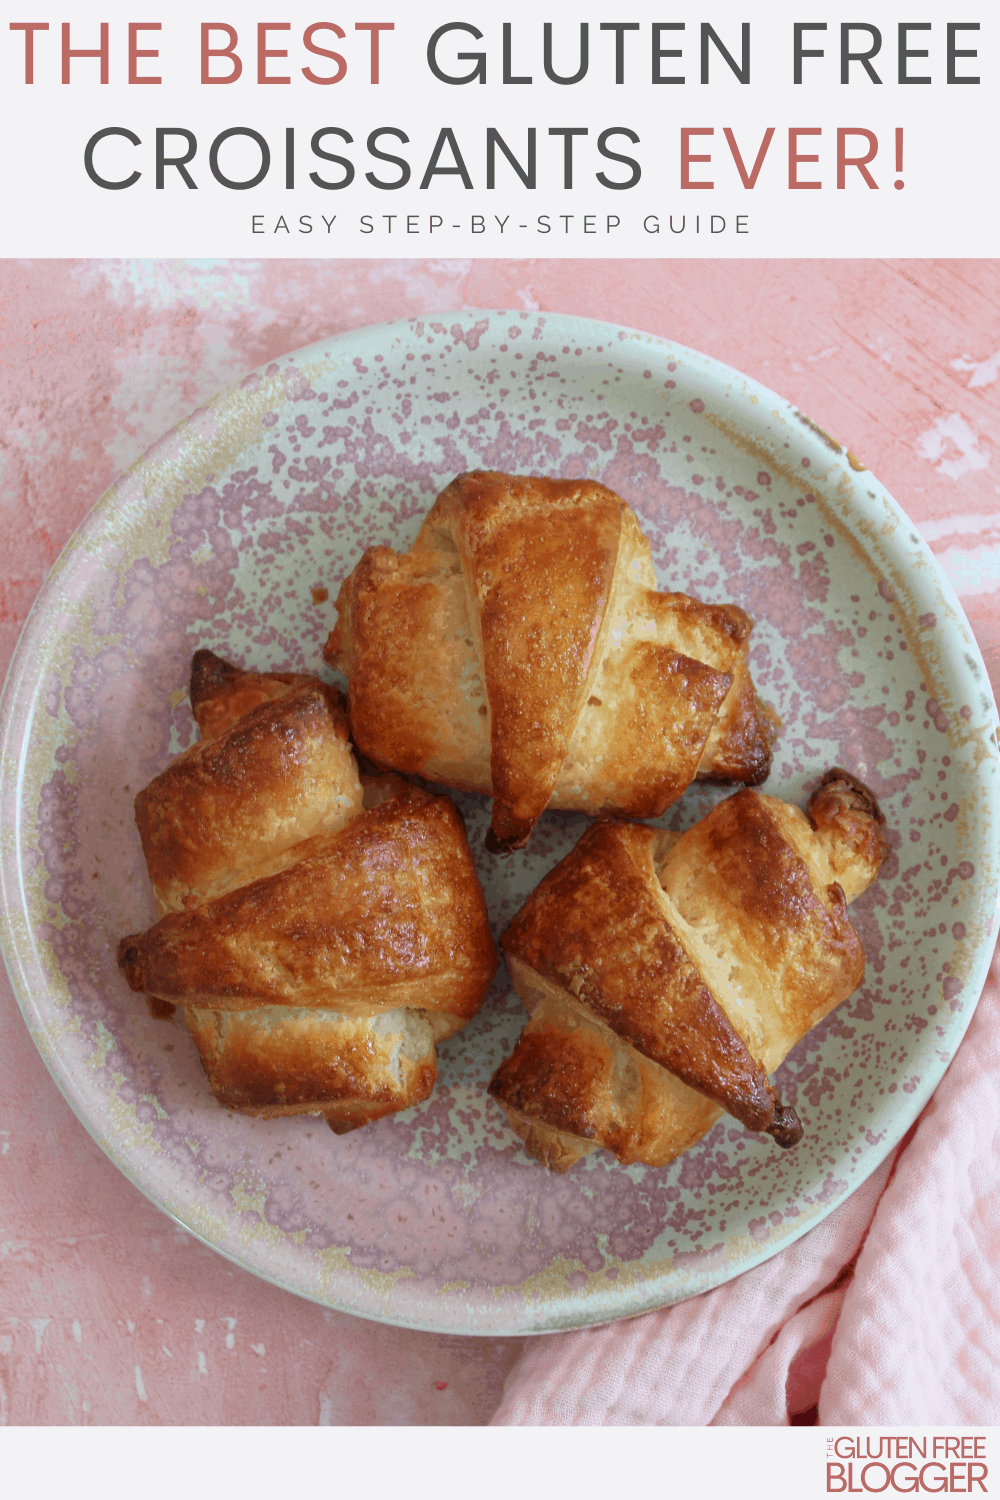
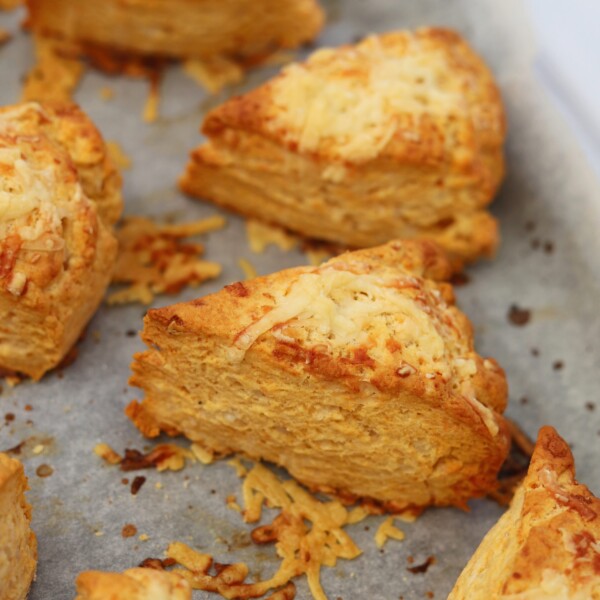
My gluten free croissants recipe is finally here and with flaky, buttery pastry and gorgeous layers, they are going to BLOW YOUR MIND.
These gluten free croissants might just be the Holy Grail of gluten free baking.
Honestly, I don’t think I’ve ever been so excited to share a recipe with you.
And I’m not kidding when I said I’ve been working on this gluten free croissant recipe for a year – I have cried myself to sleep many a night trying to get these right.
These gluten free croissants may be a bit more complex than all my other bakes but trust me, they are SO worth it.
And with my handy step-by-step photo guide and tutorial video, I’ll be virtually holding your hand the whole way through the croissant-making process.
This blog post is a little more detailed than my usual recipe post because the recipe is a little more complex.
So please do take the time to read it through before making these gluten free croissants as I have tried to guide you through it as easily as possible.
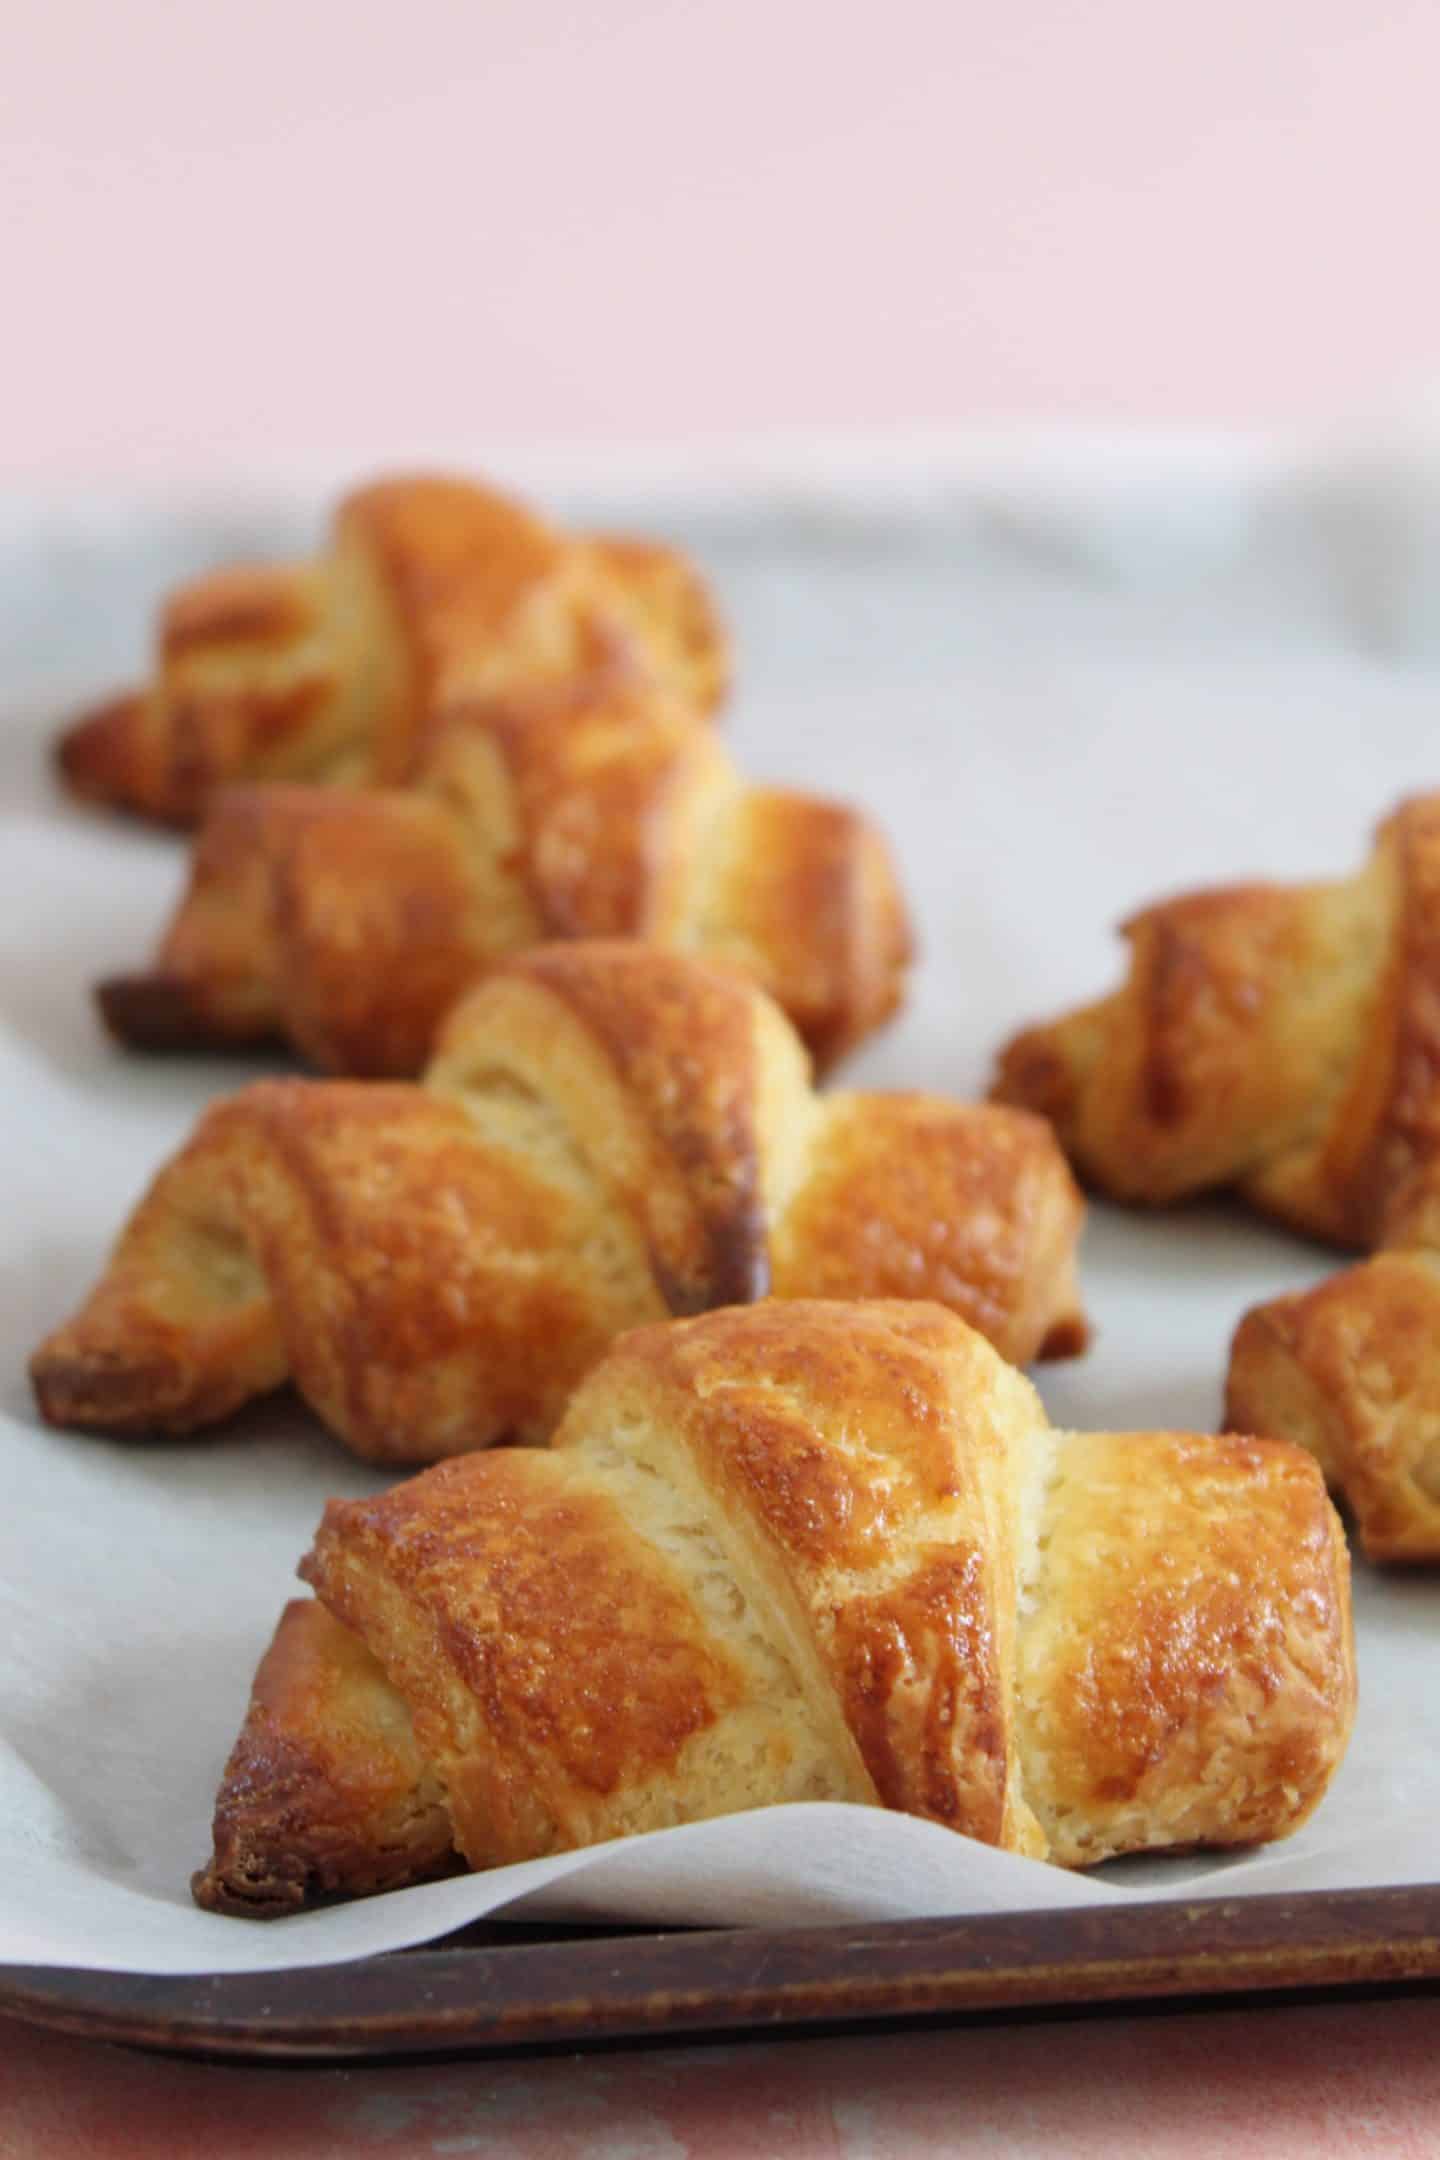
Table of Contents
- Are gluten free croissants possible!?
- Gluten free croissant ingredients
- How to make gluten free croissants
- How to fold your croissant dough
- Chill, chill and CHILL!
- But there is a trick to speed up the chilling…
- What about proving the croissants?
- I’m just scared they’re too difficult!
- My gluten free croissants recipe
- NEED SOME MORE GLUTEN FREE Pastry RECIPES?
- Gluten Free Croissants Recipe
Are gluten free croissants possible!?
Yes, gluten free croissants ARE possible to make at home!
They may not be the simplest recipe but actually if you follow this step-by-step, you’ll find it’s more a lengthy than complicated process.
And if you have made my gluten free puff pastry before, you’ll be familiar with a lot of this process.
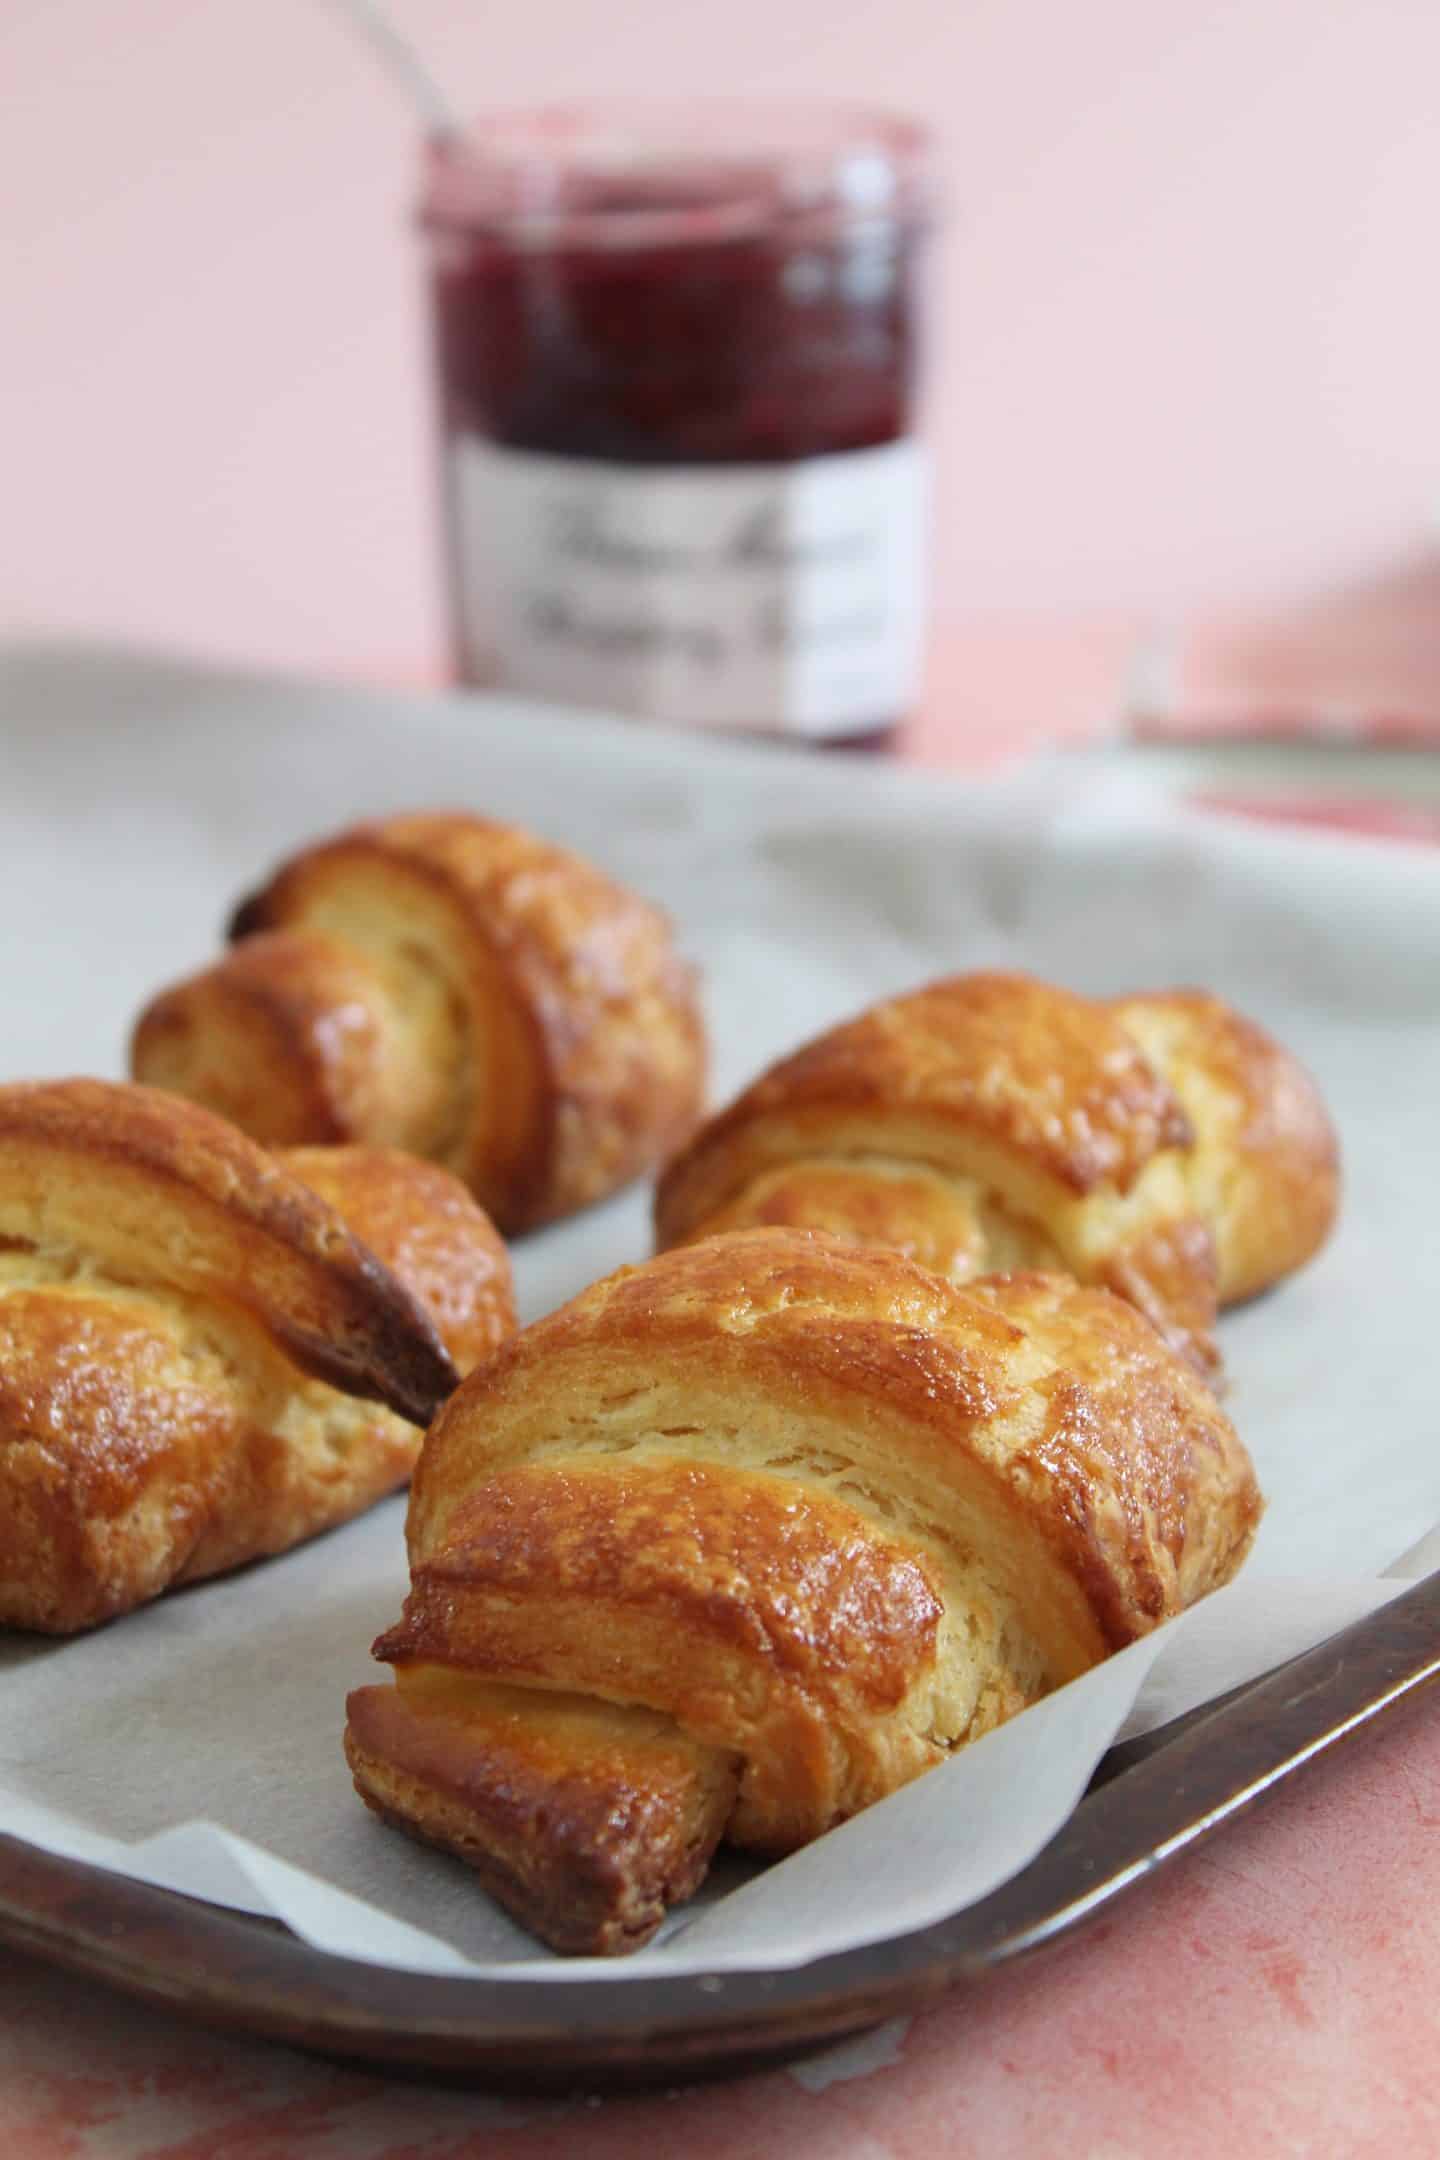
There’s a lot of rolling and folding – and most importantly, chilling – but the results are buttery, flaky, delicious gluten free croissants.
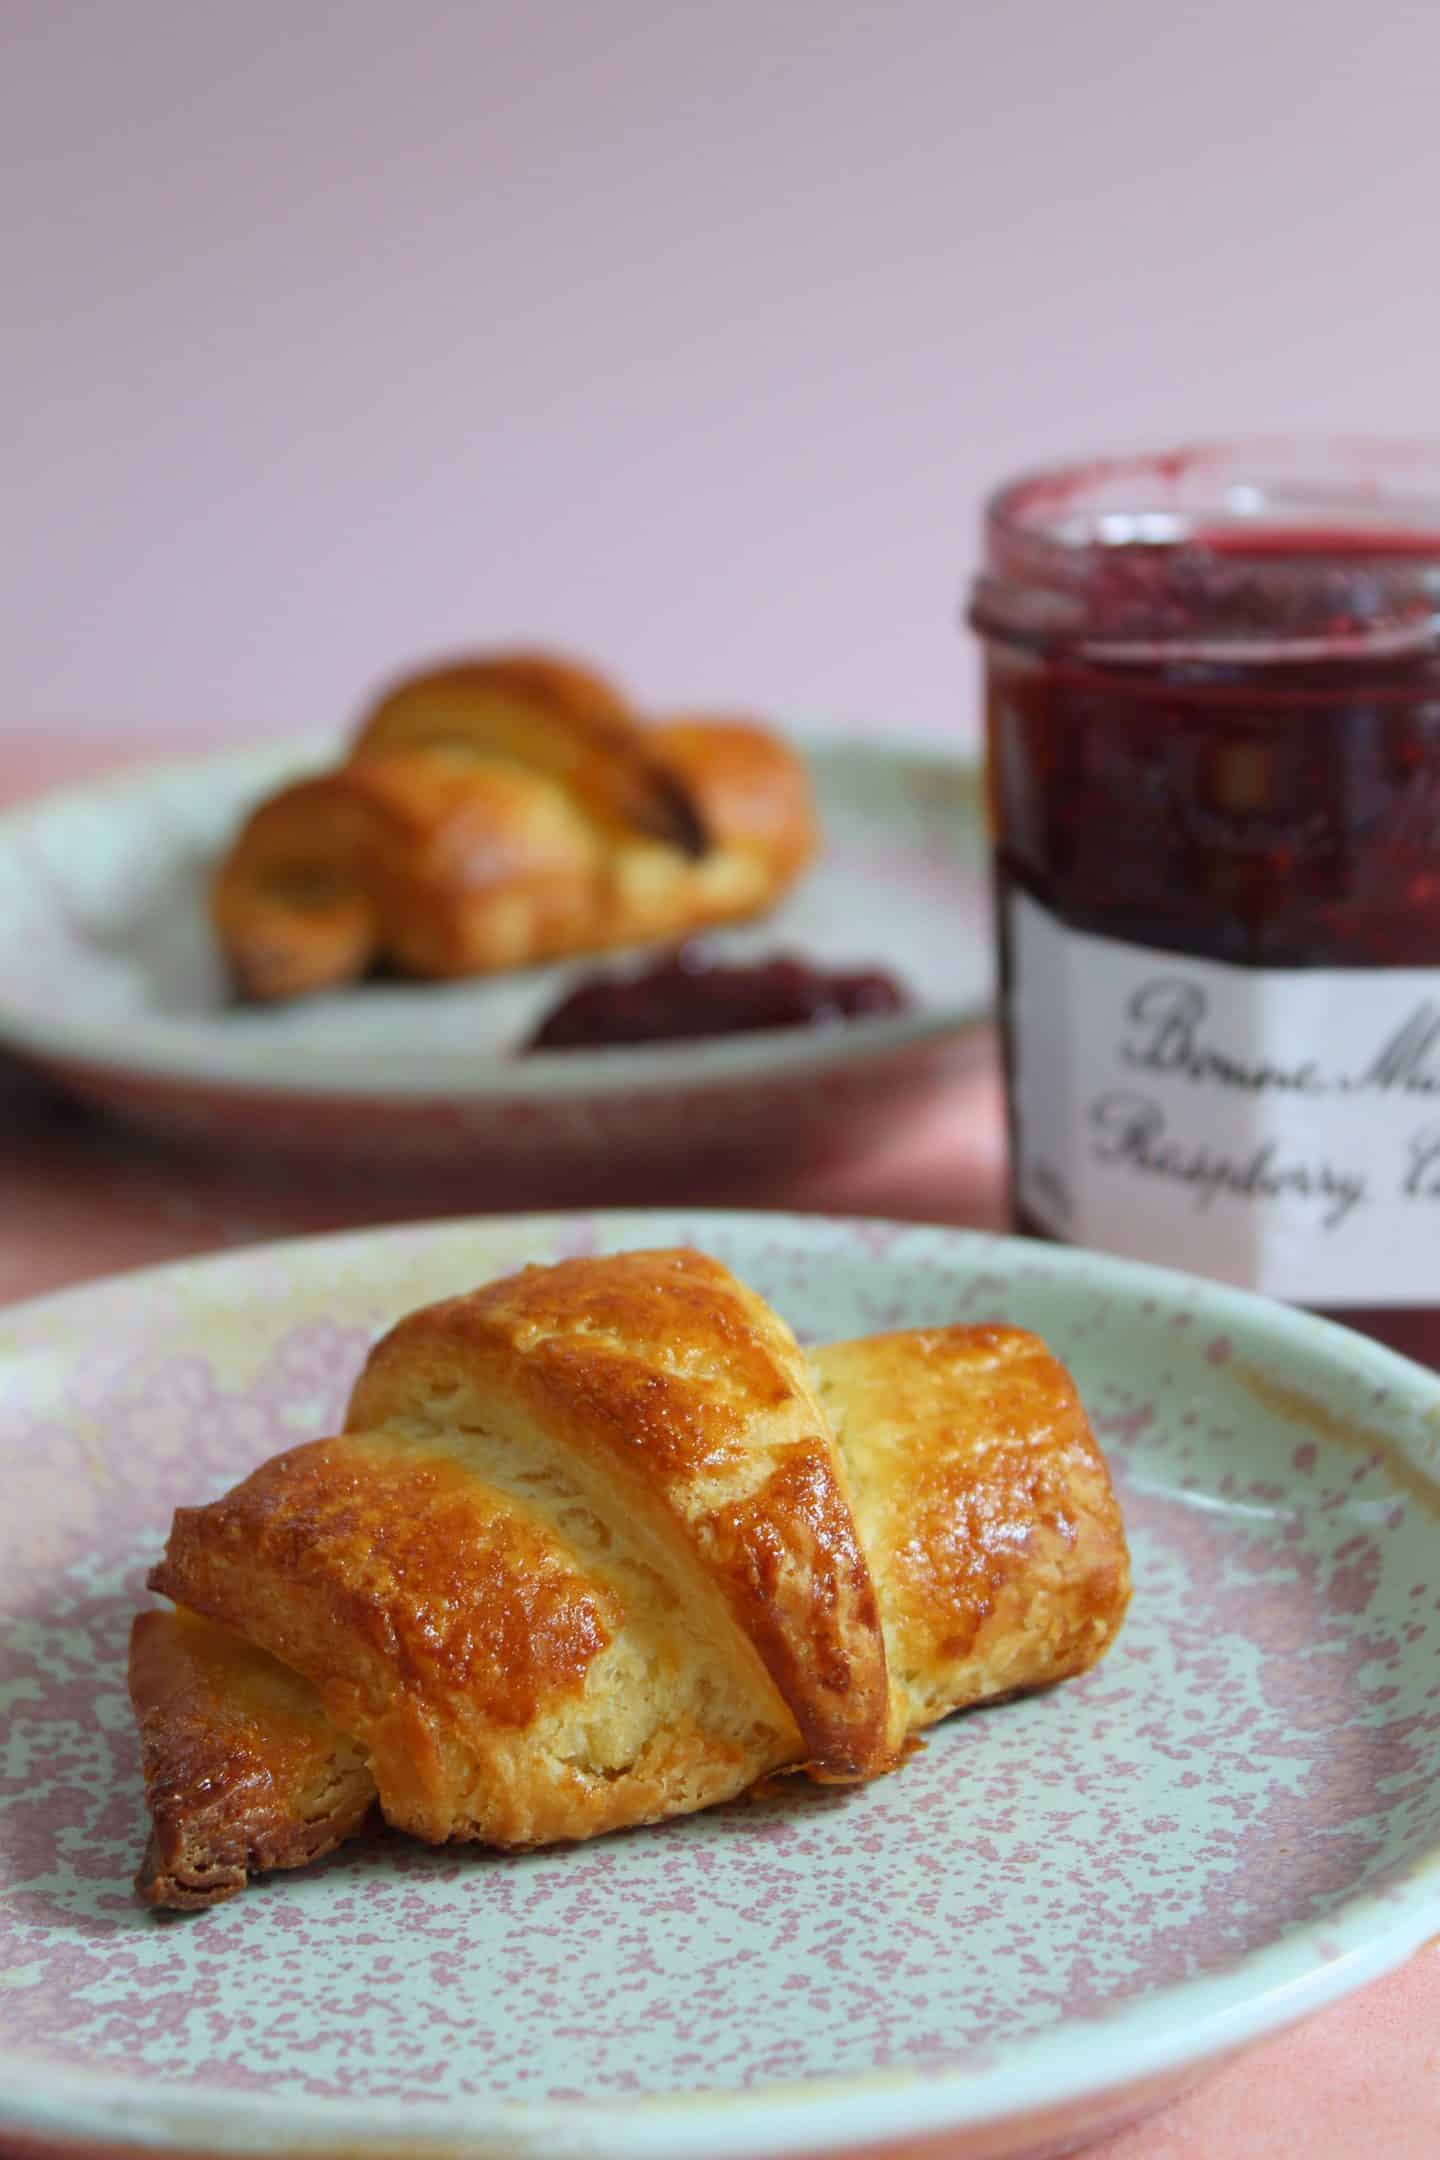
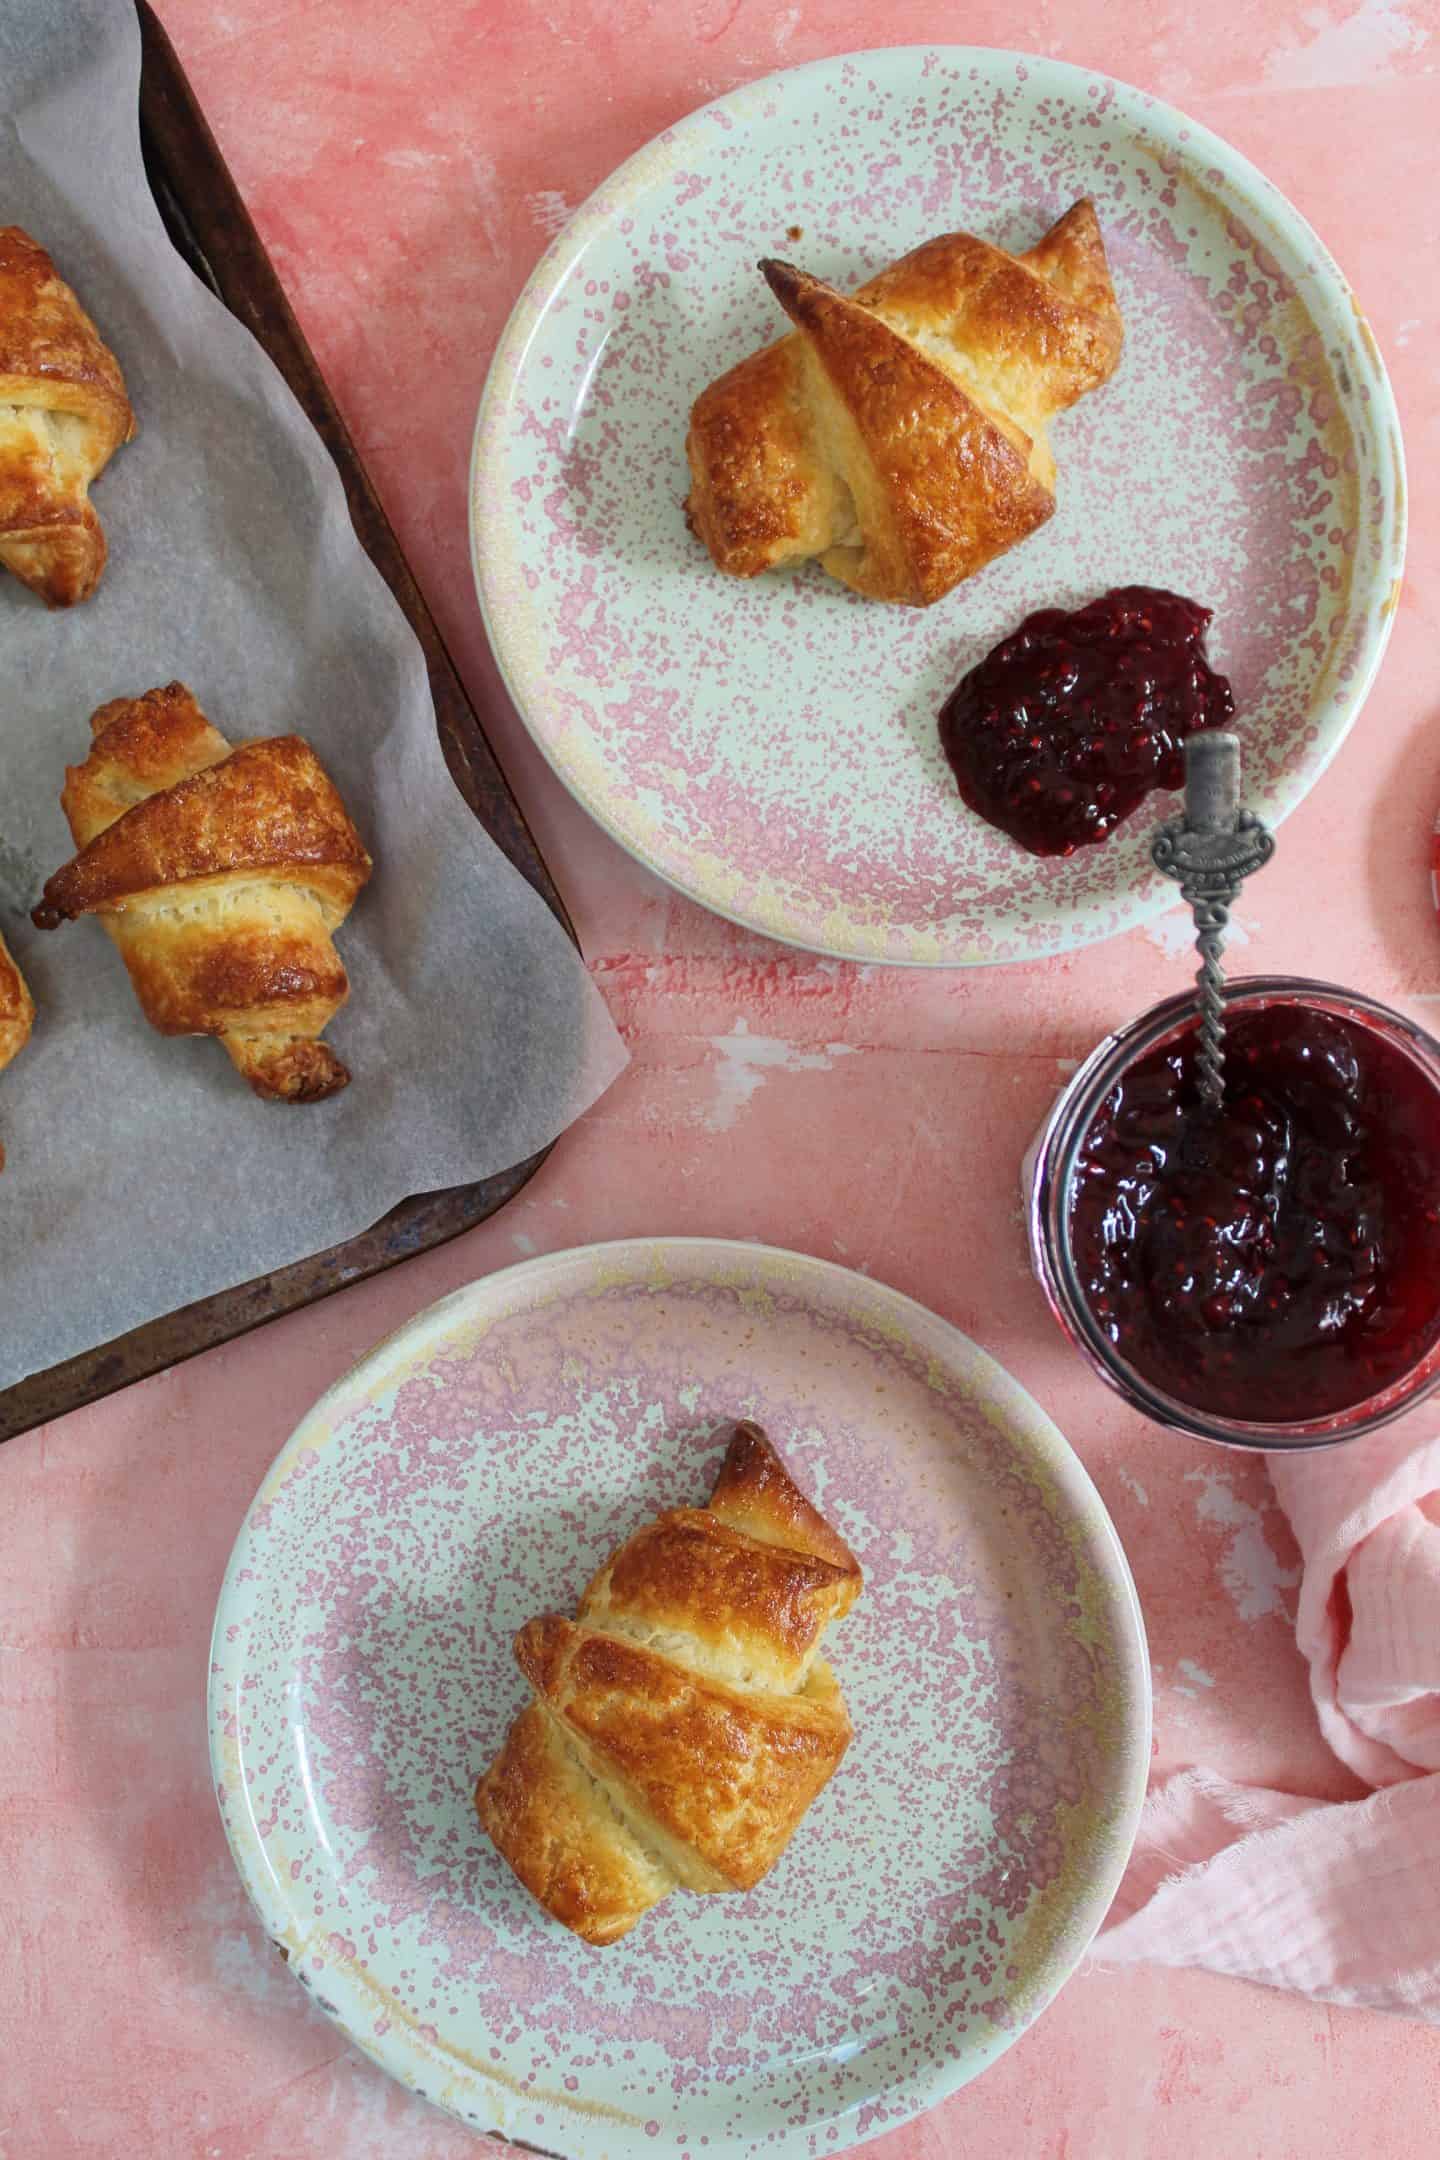
Freshly baked they make the most perfect gluten free breakfast or brunch treat and best enjoyed with lashings of butter and jam.
Because of the absolutely essential amount of chilling involved in this gluten free croissant recipe I do recommend making them over a leisurely weekend.
You can speed this up a little (I have ALL the tips down below so please make sure you read the whole post before you start!) but the slow process is part of the enjoyment for me.
I recommend making them the day before baking so they can properly chill in the fridge overnight.
Before we look at how these croissants are made, let’s take a look at what you’re going to need to stock up on first.
Gluten free croissant ingredients
When making croissants there are two crucial parts: the dough (détrempe) and the butter packed (beurrage).
The two are made separately then folded together – and it’s this repeated rolling and folding which creates the beautiful, flakey layers.
There’s a full printable recipe card below, but for the shopping list you’ll need the following ingredients:
FOR THE DOUGH:
- 14g dried quick yeast
- 120ml milk
- 50g caster sugar
- 250g gluten free white bread flour (see notes)
- 2 tsp xanthan gum
- Pinch salt
- 50g unsalted butter (cold)
FOR THE BUTTER PACKET:
- 125g unsalted butter (cold)
- 1-2 tbsp plain gluten free flour
I have tested this recipe many times and I have always found the FREEE gluten free white bread flour produces slightly better results.
However this recipe does also work with a plain/all purpose gluten free flour blend too.
And yes, you DO need to add the extra xanthan gum – it is crucial for ensuring the mixture is workable.
I always use either the Allinson’s Easy Bake Yeast or the Dove’s Farm Quick Yeast.
You can also use the Allinson’s Time Saver Yeast, though be aware that you may not need to prove the dough for as long if you use this.
All of these yeasts are gluten free in the UK.
The Dove’s Farm one is certified gluten free and found in the free from aisle.
The Allinson’s yeasts are free from gluten and can be found with the ‘regular’ baking goods.
For the butter, any unsalted butter will do, but if you want top notch croissants, I’d use a more expensive, higher quality butter for the beurrage.
This will just ensure a richer, more delicious taste and texture – who doesn’t want to splash out on the best on occasion, right?
How to make gluten free croissants
Don’t forget there is a recipe card below with the full method in detail, but here I’ll just talk you through some of the more complicated steps.
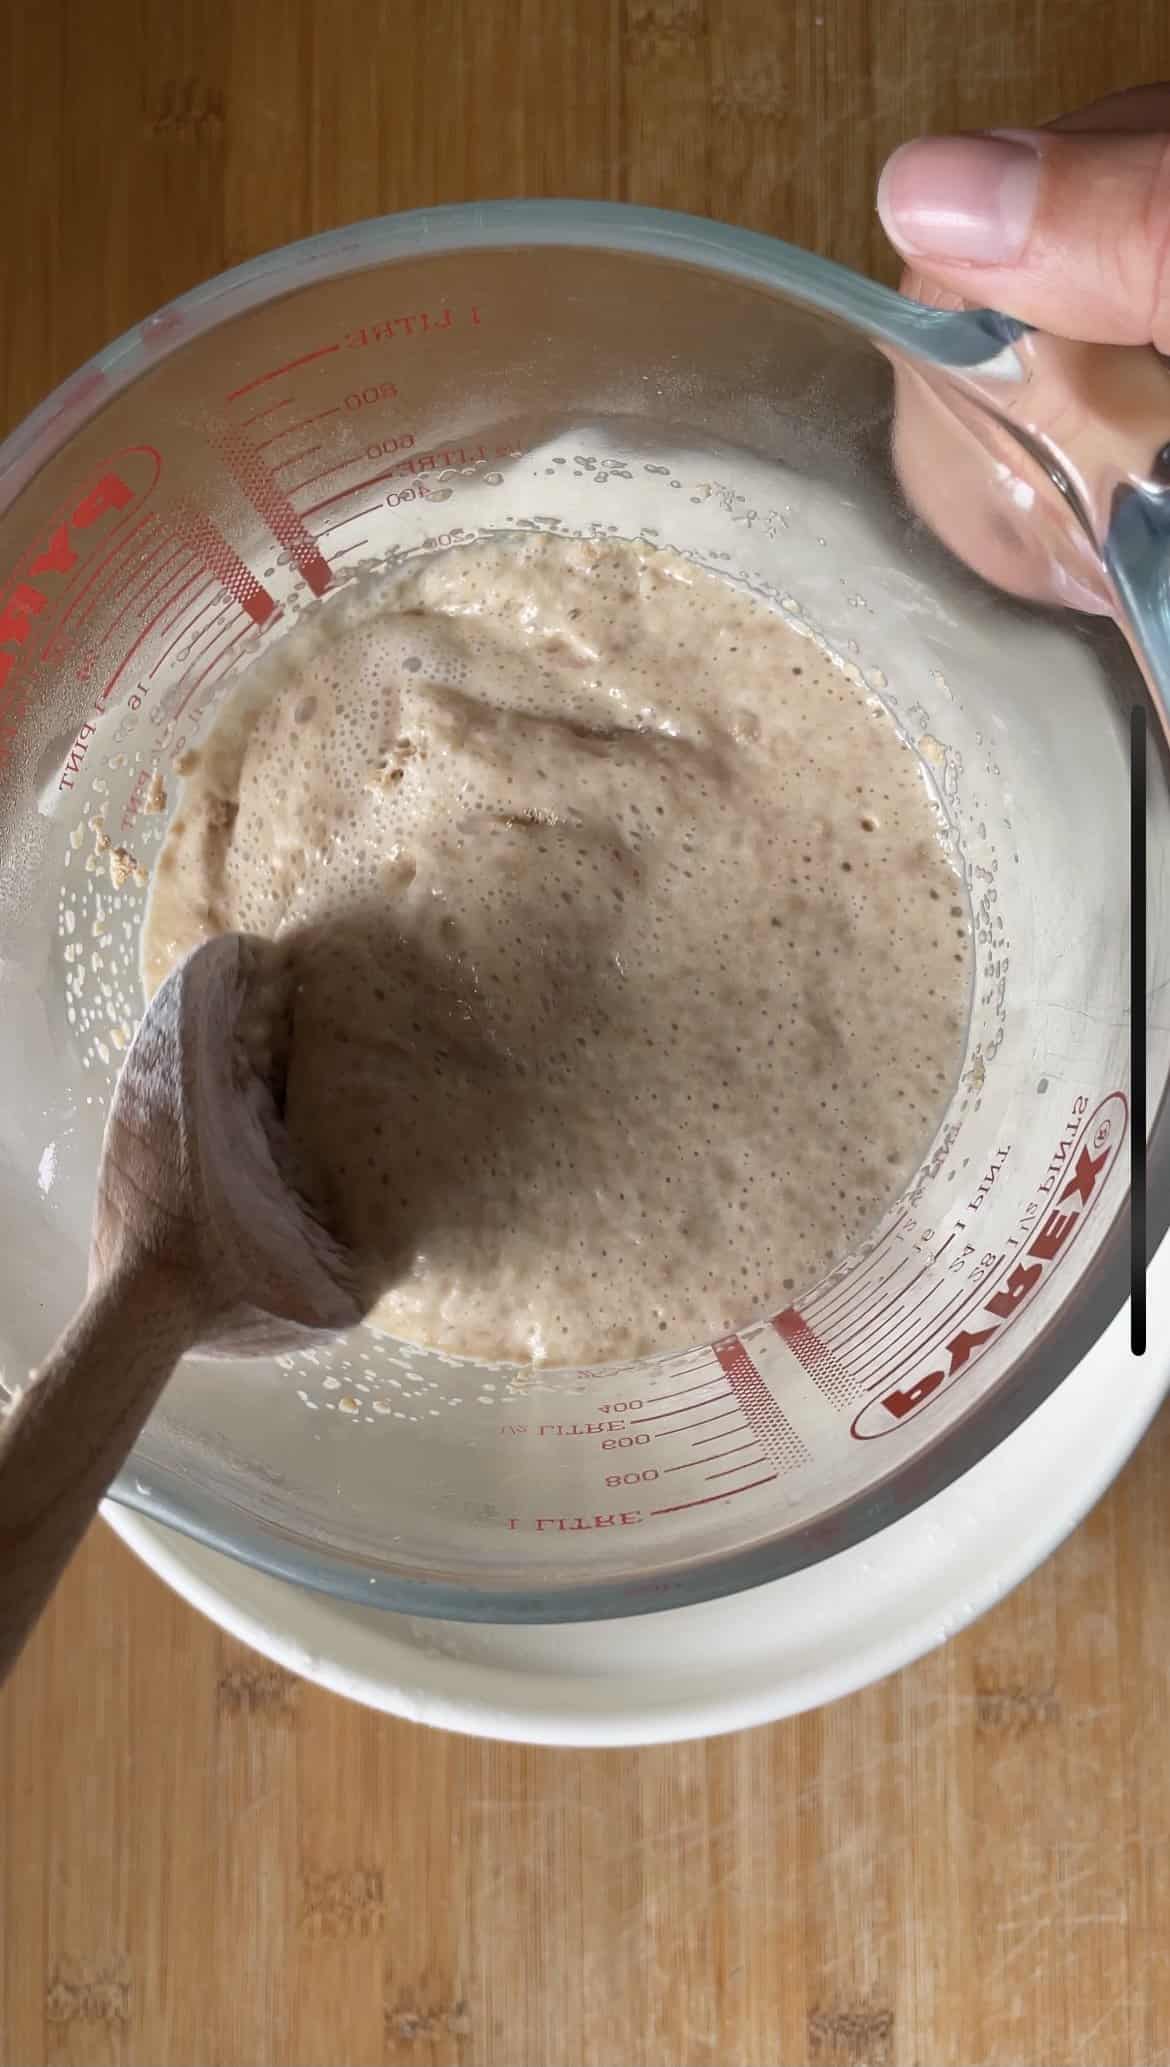
First of all, I always activate the yeast in warm milk with some of the sugar.
I tried this recipe without this stage but always found that this produced a much better result.
To do this, you’ll want to invest in a food thermometer – as the milk needs to be heated in a pan (or microwave) to around 40’C.
Once you stir in the yeast and sugar, cover it and leave it for 5-10 minutes.
The yeast is active when it forms a lovely froth on top, a bit like the head on a beer. It should look a little like this:
How to fold your croissant dough
Once you have created the dough and butter packet, the first stage is folding them together to create the first lot of layers.
It’s easier to explain this in pictures, which is also why I filmed a video on how to make these too!
Firstly, make up the dough as per the recipe, then pop it back into the fridge while you make the butter packet.
Make the butter packet by rolling the butter between two floured pieces of baking paper, until it is a rectangle approximately 18 x 10cm and around 6mm thick.
Pop it back in the fridge and chill until both the dough and butter packet around around the same temperature before making the first fold.
To test them, see if you can bend the butter a little – if it’s firm but still flexible, it’s good to go.
Ready to start rolling?
First, roll the chilled croissant dough out until it is around 6mm thick and in a long rectangular shape.
The thickness is more important than the size of the rectangle, but mine was approximately 30cm x 20cm.
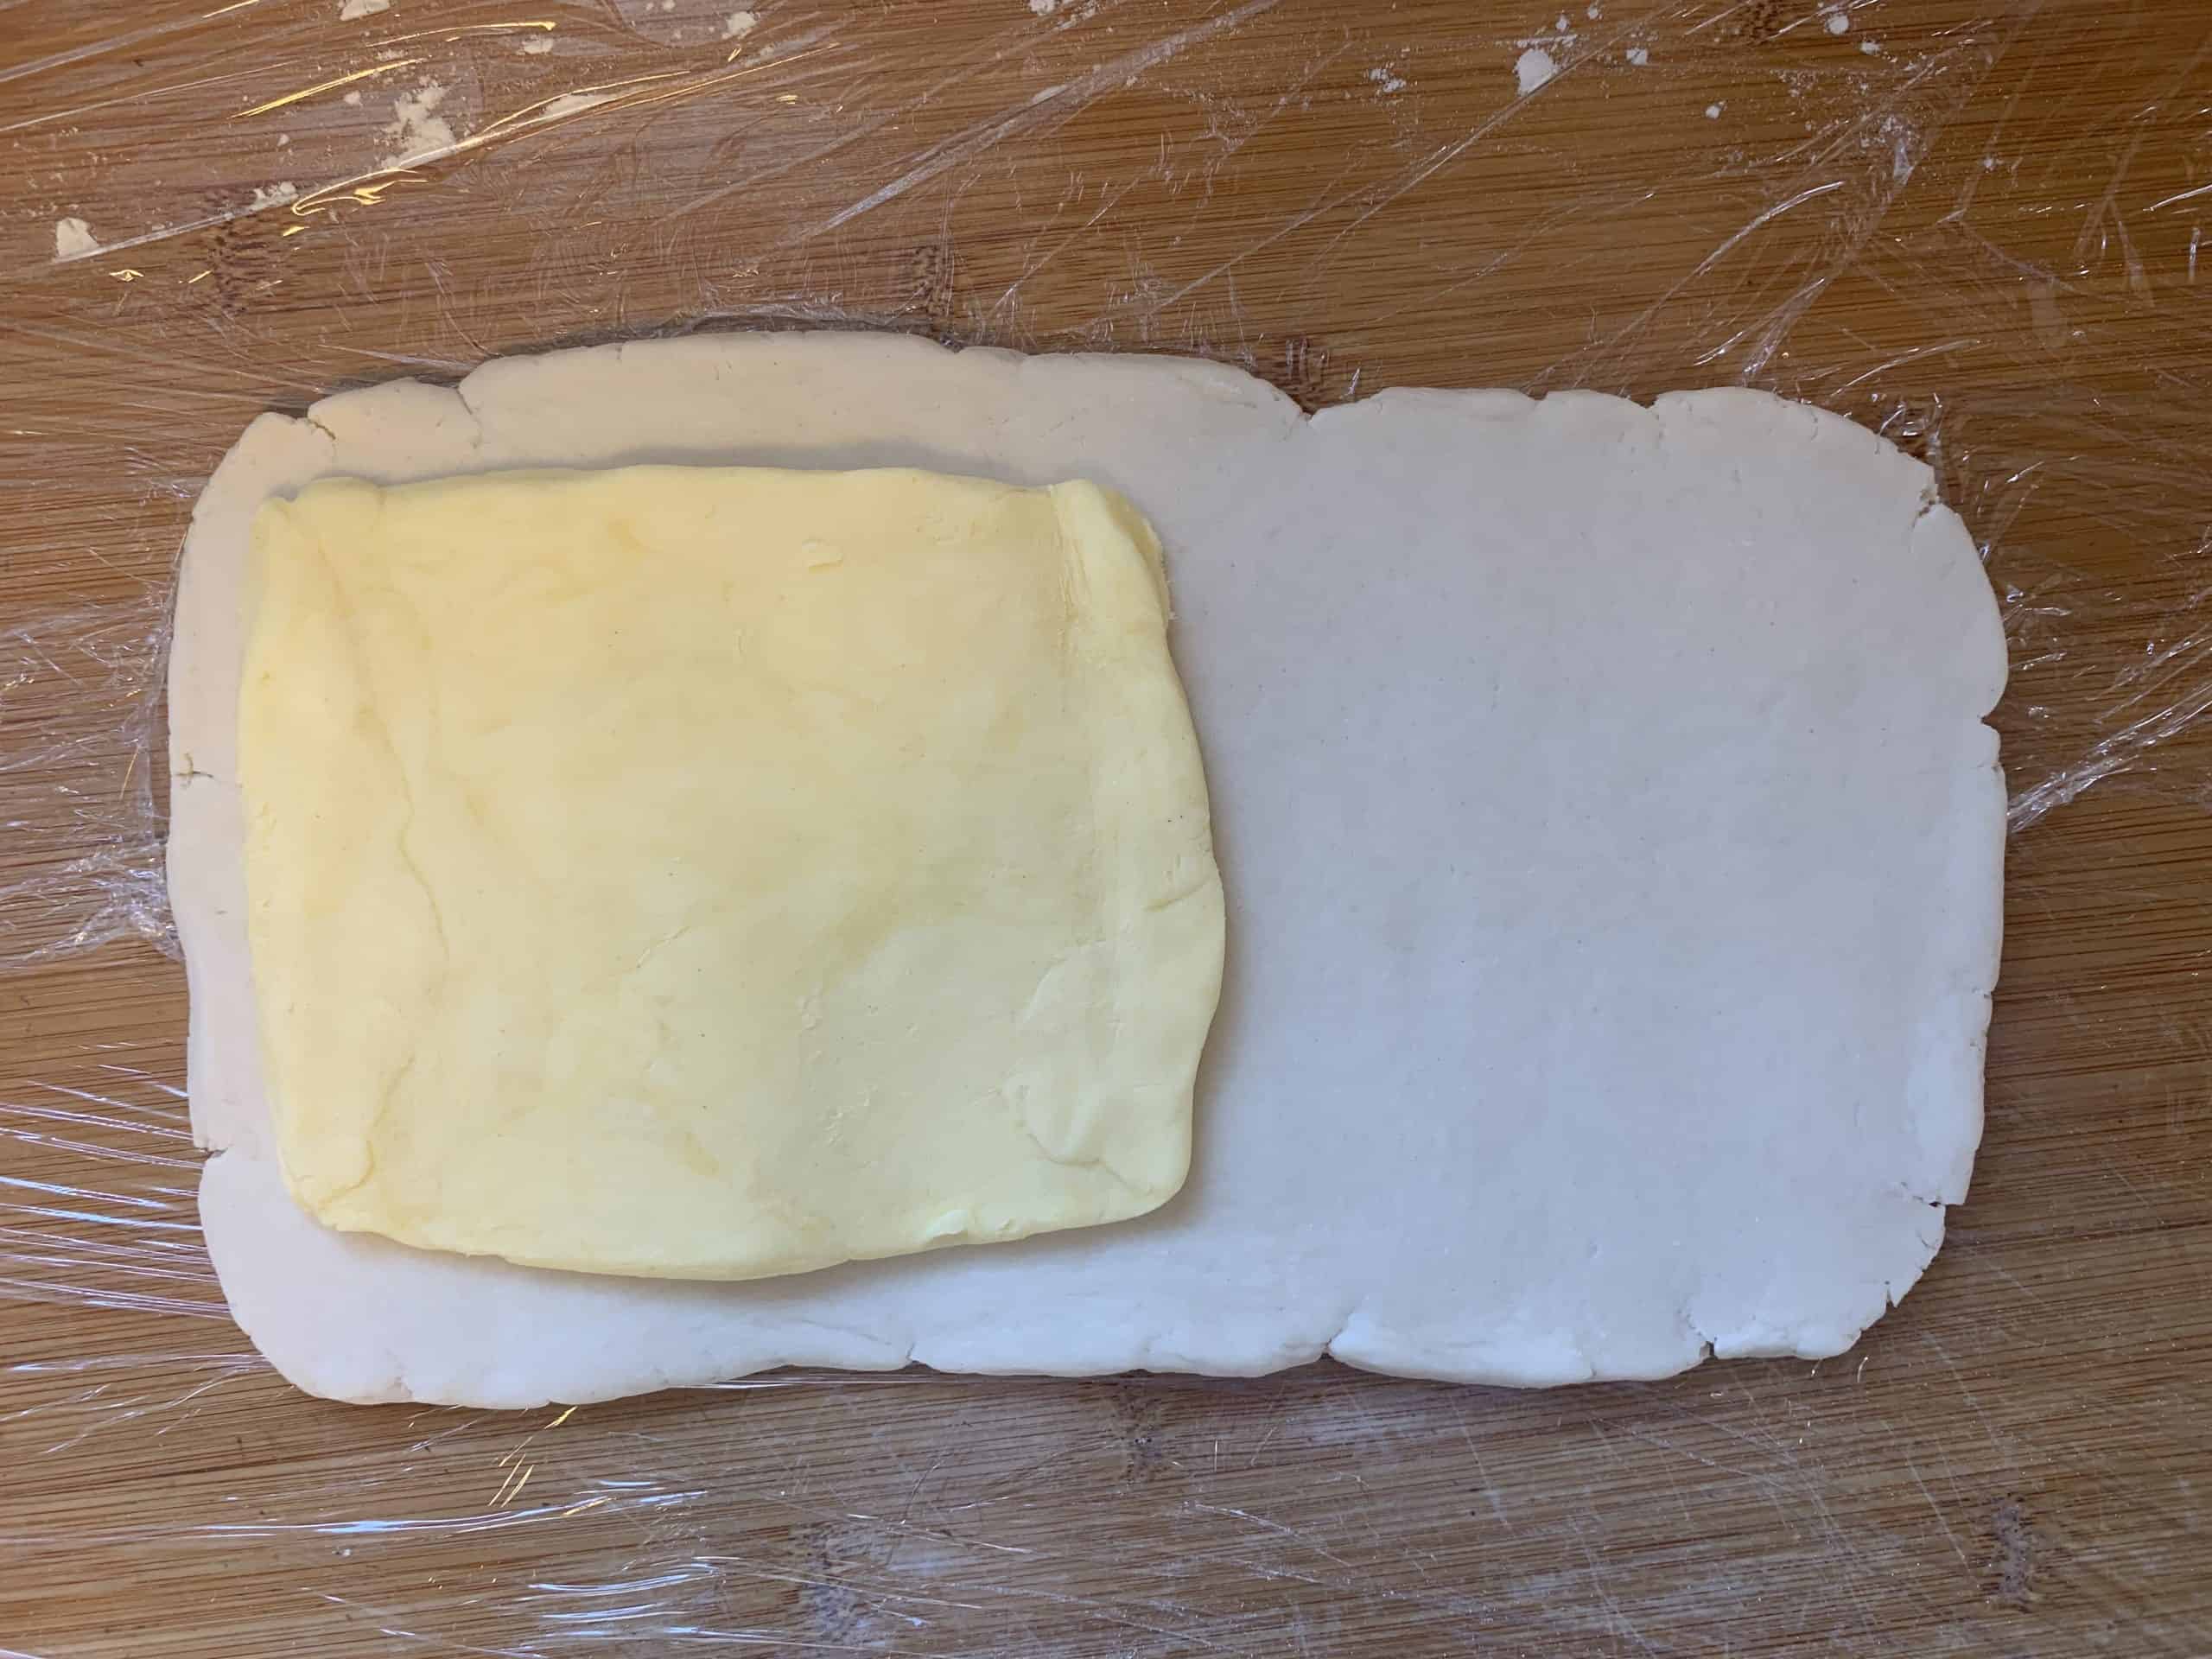
Carefully unwrap the butter packet and place is towards one of the short ends of the rectangle of dough.
It should have a small border around the edges and then a length of dough to one side of it.
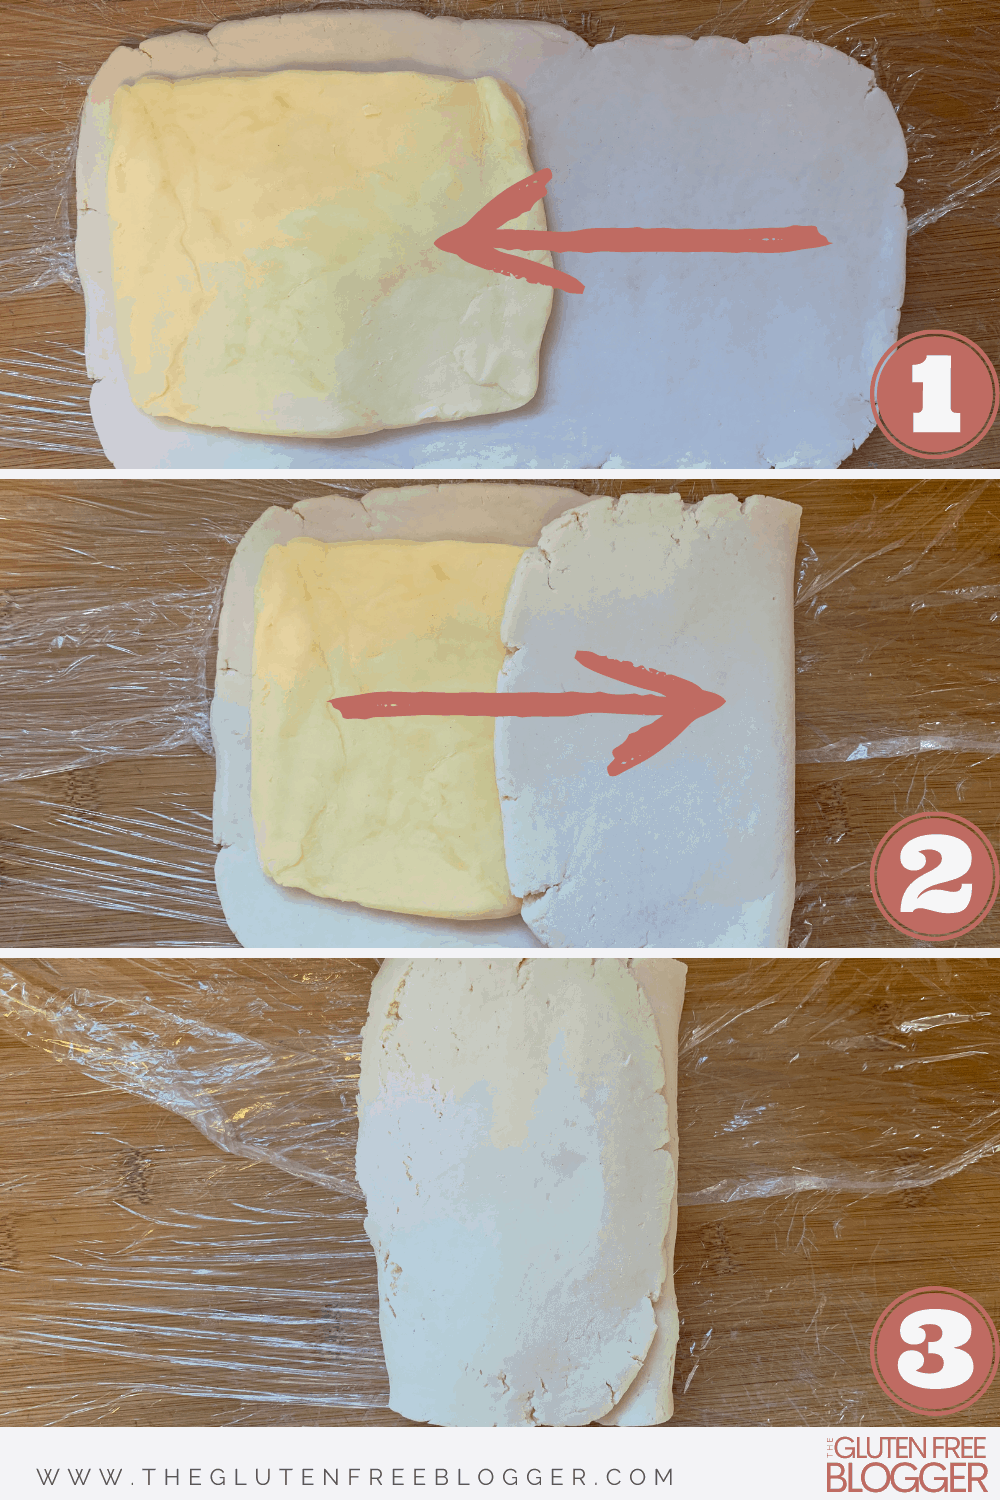
Now, we’re going to fold this a bit like a letter!
Roll the dough with no butter on towards the centre and over the dough. Then carefully roll the uncovered piece of dough and butter back over the top of the first fold.
You should then have a nice rectangle of layers – dough, butter, dough, butter, dough.
The pictures below demonstrate these folds, in case the above is hard to visualise!
Chill, chill and CHILL!
Honestly, I cannot emphasise enough how vitally important it is to adequately chill the dough.
And when I say chill the dough between each fold, I mean chill the dough between each fold.
If you skip the chilling stages, two things will happen.
Number one, you’re gonna end up with one big, sticky mess that just attaches itself to your hands, the clingfilm, EVERYTHING.
So you can pretty much kiss goodbye to all the layers you’ve been creating if that happens.
Second, if you skip the final chilling stage before cooking, all of the butter will just melt straight out of your croissants as soon as they go in the oven.
The butter layers is what makes it puff up – so if the butter jumps ship straight away, again, all the effort was for nothing.
But there is a trick to speed up the chilling…
And it’s really not that complicated – simply pop your dough in the freezer instead of the fridge.
Instead of chilling the dough for 30-60 minutes in the fridge each time, you can pop it in the ‘quick freeze’ section of the freezer for 10-15 minutes.
Now, a word of warning – you need to exercise some caution if you do this.
If the dough freezes or gets too cold, you’re then going to have the opposite problem where you’re waiting for it to warm up enough to roll it.
So you can cut corners a little with the freezer but do so at your own caution. It doesn’t always work out for the best.
The best way to take on this gluten free croissant recipe is by enjoying it for the leisurely activity that it is.
The joy in making your own croissants is the care and attention put into crafting them – you would make them as slowly and leisurely as you’d enjoy them once baked!
What about proving the croissants?
Because these gluten free croissants are made with a yeasted dough, you have to prove them to help with the rise.
It’s the fermentation of the yeast that causes them to puff up, exposing the layers created by rolling and folding the butter and dough.
So it’s important to prove the croissants one you’ve completed the final fold.
However, unlike when making gluten free bread, finding a super warm spot isn’t always the best option.
If the croissant dough becomes too warm then the butter will begin to melt and ooze out, losing those layers.
So you’ll need to find a spot that is not too warm and not too cold – the croissants will not increase hugely in size but they will become puffier.
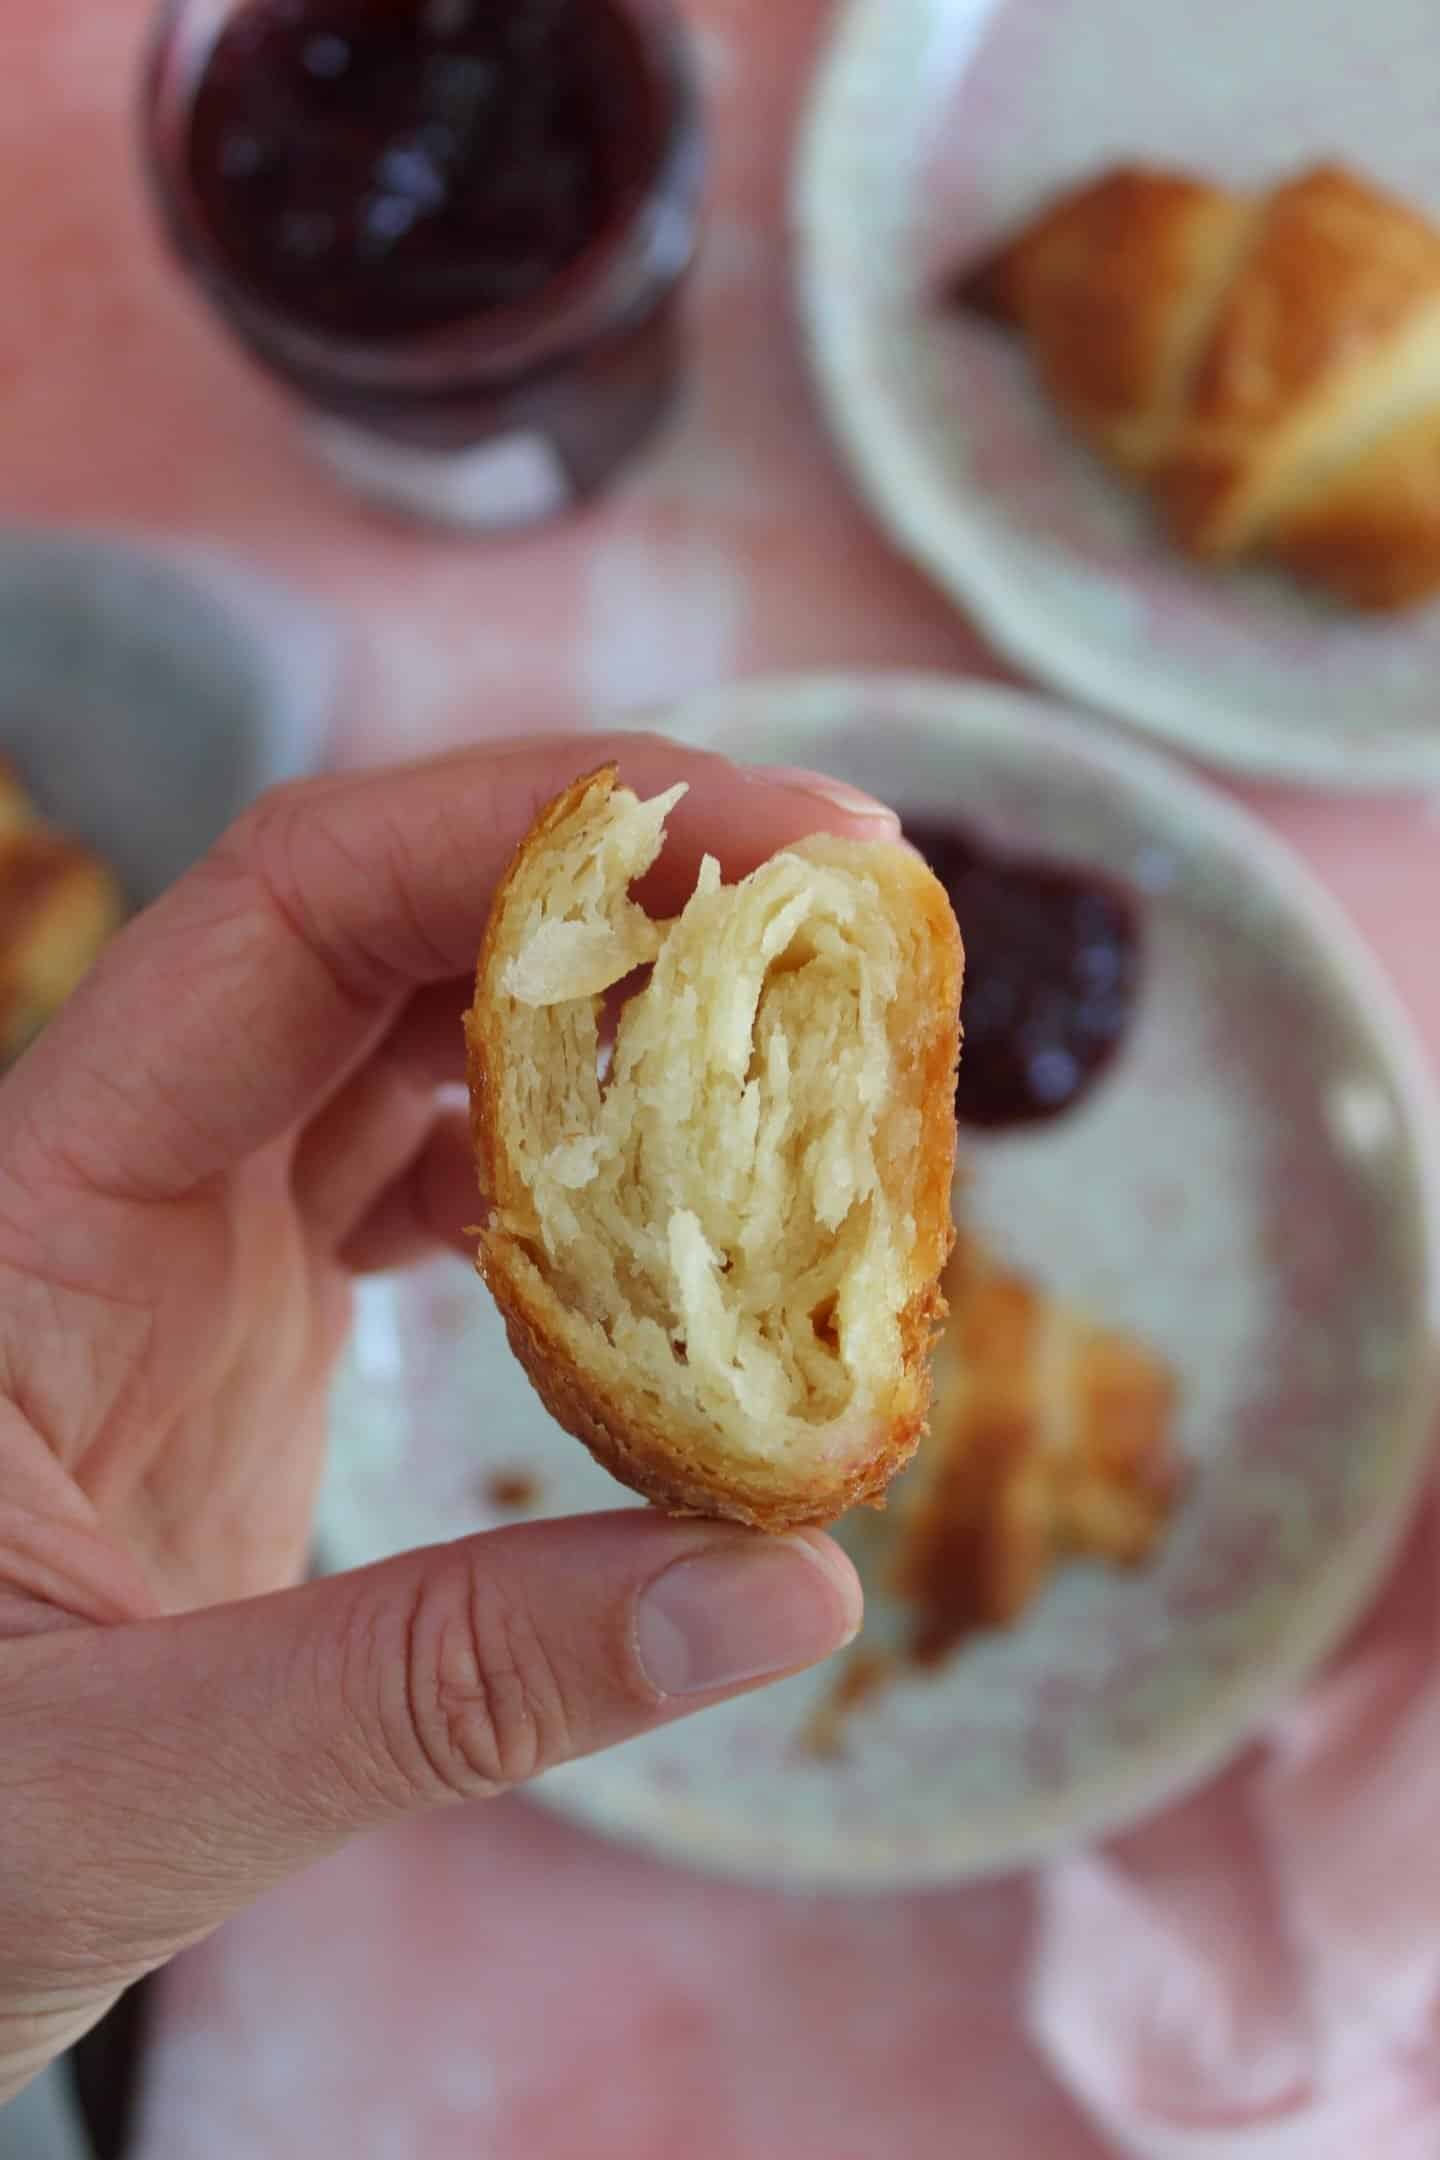
Sometimes you can see the layers start to expose themselves and they will go kind of puffy and marshmallow-y to the touch.
Once you’ve proved the croissant you’ll then need to chill the dough properly before baking, otherwise the butter will melt too quickly.
It’s a bit of a game of cat-and-mouse but trust me, it’s so worth it – and not as difficult as it sounds.
I just want to make sure you have all the information laid out in easy steps to cover all bases and avoid you making the same mistakes I did!
I’m just scared they’re too difficult!
Ok, I get I have just absolutely overloaded you with information and you’re probably slowly backing away from the computer.
But before you run out to buy some sub-standard gluten free croissants from the free from aisle, look at it this way.
Not only do you get to have the BEST croissants, but you’re gonna learn some super new skills.
Really all this is, is rolling, folding and chilling pastry. Repeatedly.
And that’s it! Yes, it may be more fiddly than making a cake and yes it takes more time because of all the chilling.
In fact, I’ve even got this handy tutorial video to show you how to make them:
But honestly? It’s actually super fun to make and you’ll feel such a level of achievement afterwards!
So what have you got to lose?
I certainly know what you’ve got to gain if you try these. Let me just remind you one more time…
My gluten free croissants recipe
Now you’ve read all my top tips, I think you’re ready to get stuck in to making your own gluten free croissants!
This recipe makes 6 croissants – you can double it to make 12 but I’d recommend starting out with 6 the first time round.
They’re much better when eaten fresh and also, there’s a lot to take in for the first batch so it’s good to get a test run under your belt before going for 12 in one go!
If you make this recipe and love it, please do let me know by tagging me on my Instagram or using #theglutenfreeblogger. I love seeing your bakes!
And please do leave a review to let others know you loved it too! It would mean the world to me.
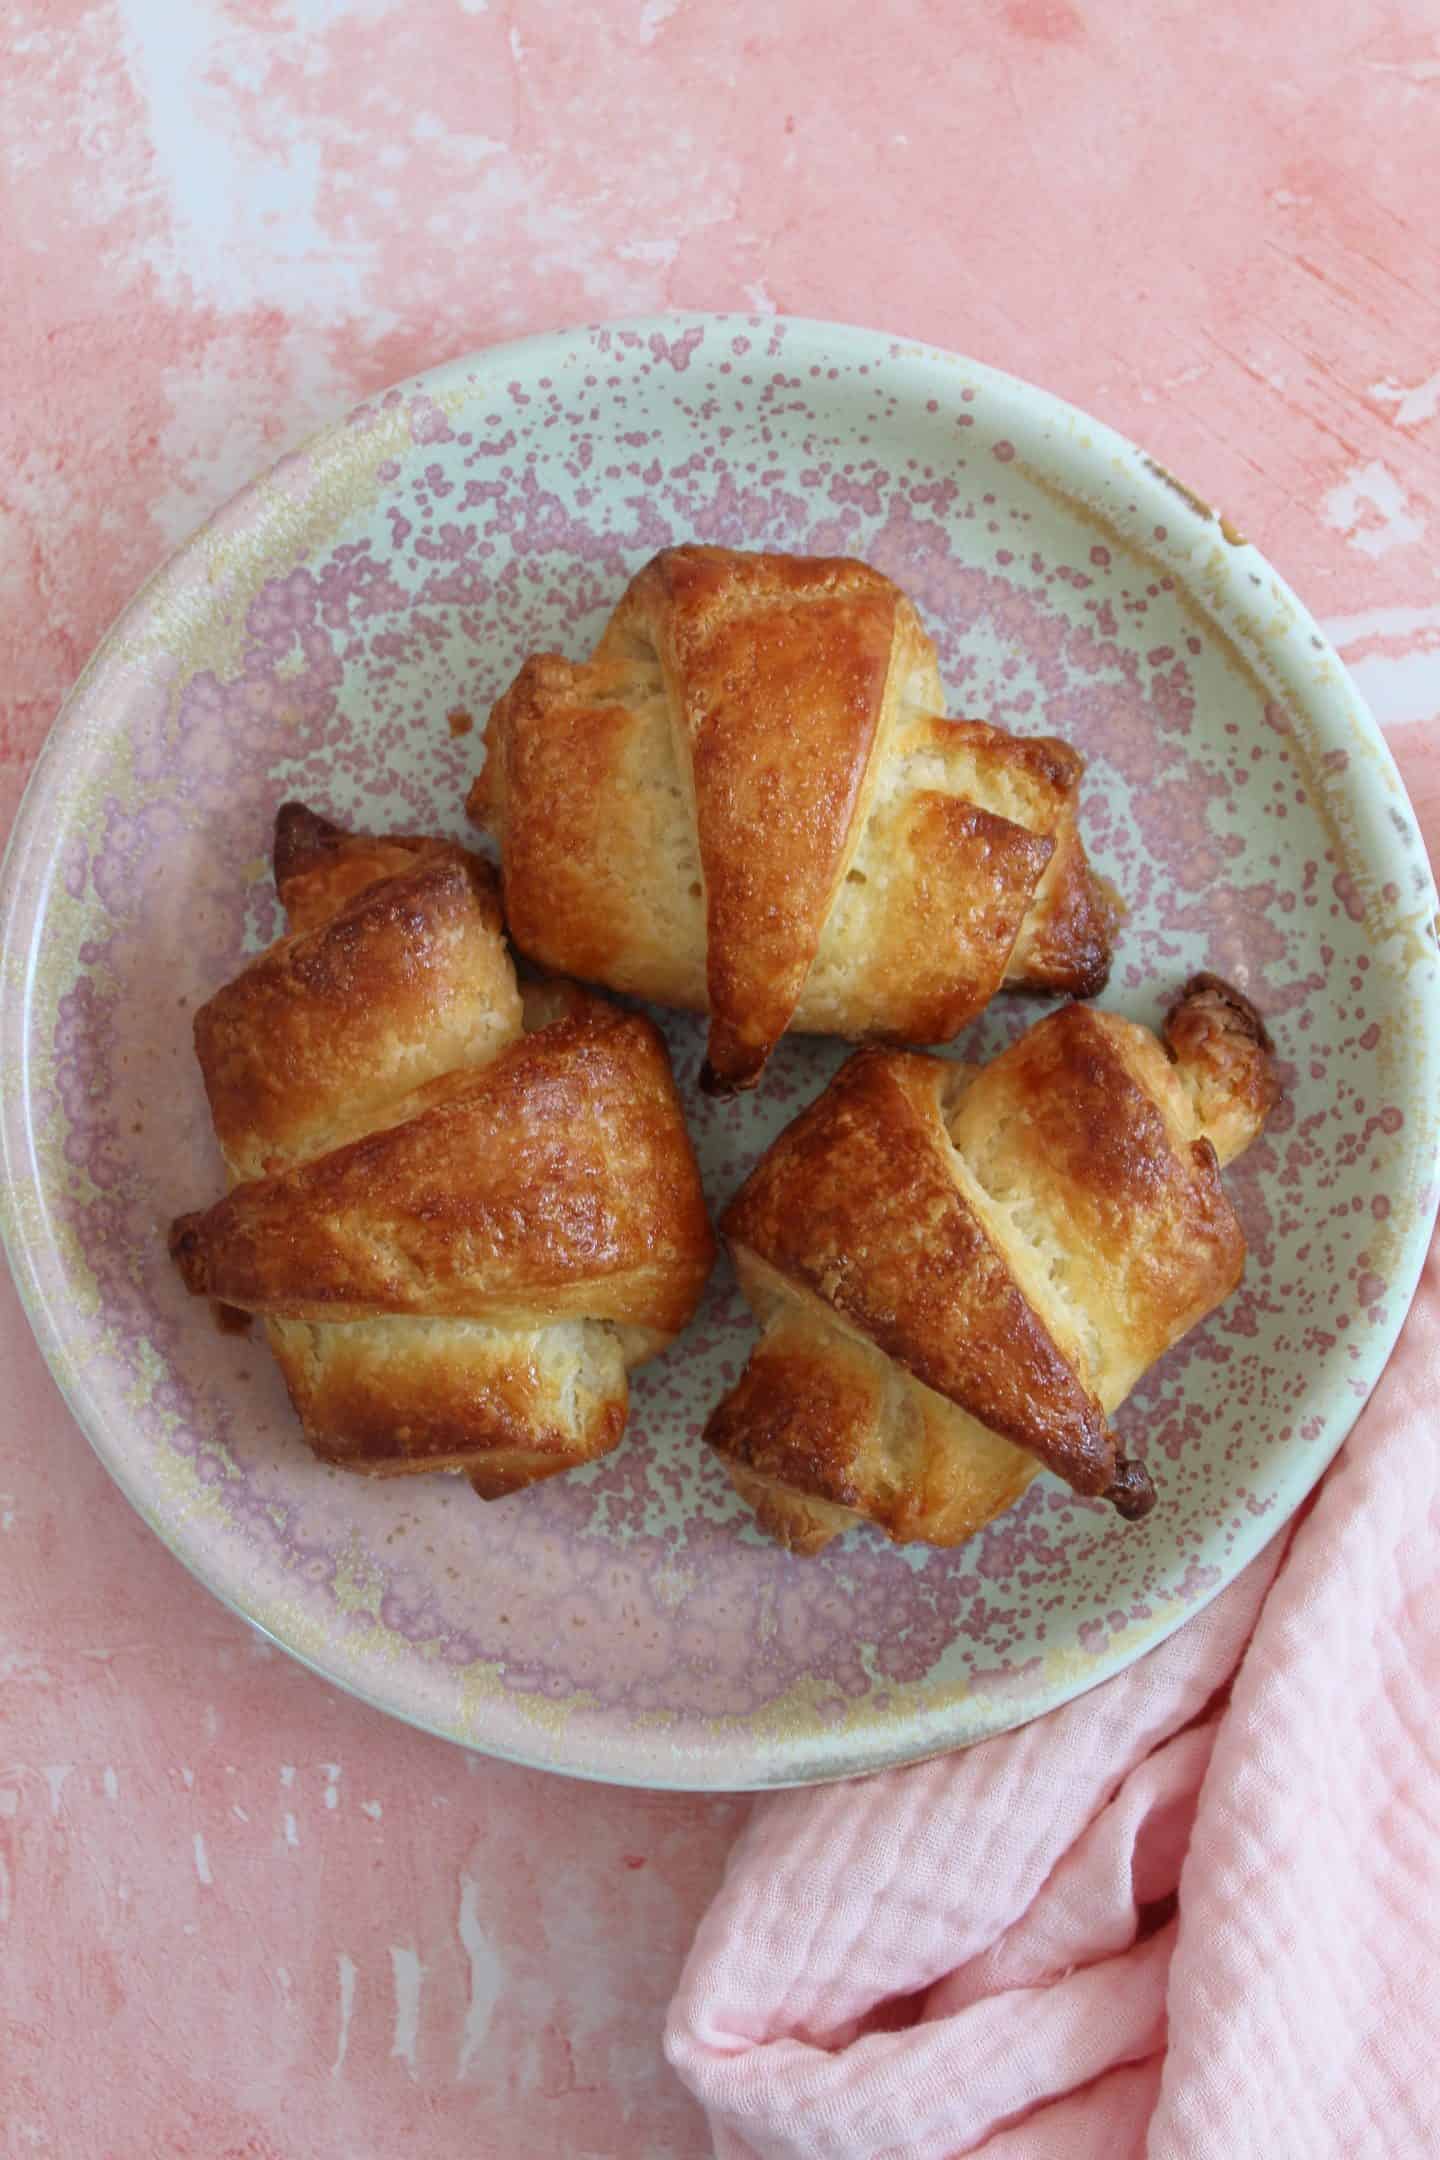
Gluten Free Croissants
These gluten free croissants are the ultimate breakfast or brunch treat. A flaky, yeasted pastry which is rich and buttery with lots of layers! This recipe makes six croissants but you can double it to make 12. I recommend making the dough the night before baking - do NOT skip any of the chilling stages!
Ingredients
For the dough (détrempe):
- 14g dried quick yeast
- 120ml milk
- 50g caster sugar
- 250g gluten free white bread flour (see notes)
- 2 tsp xanthan gum
- Pinch salt
- 50g unsalted butter (cold)
For the butter packet (beurrage):
- 125g unsalted butter (cold)
- 1-2 tbsp plain gluten free flour
Extras:
- 1 egg (for brushing)
- Extra gluten free flour (for dusting)
Instructions
First make the dough:
- Pour the milk into a saucepan and heat over a low heat (or in the microwave in 10-second intervals) until it reaches 40'C. If you don't have a food thermometer, you want it to be around the same temperature as your skin.
- Remove the milk from the heat, stir in 20g sugar and then add the dried yeast. Stir, cover with a tea towel and then leave in a warm spot for 5-10 minutes. It should form a lovely froth on top when it's ready.
- Add the remaining caster sugar, gluten free flour, xanthan gum and salt to a large mixing bowl and stir well with a wooden spoon.
- Cut the cold butter into chunks and add to the flour mix. Using your fingers, rub the flour mixture into the butter pieces, until it looks like fine breadcrumbs. Do this until there are no big lumps of butter left.
- Once the yeast mixture is frothy, pour it into the flour/butter mix. Stir together using a wooden spoon until it becomes thick, then use your hands to form it into a smooth, slightly sticky dough. Wrap in clingfilm (plastic wrap) and place in the fridge while you make the beurrage (butter packet).
Next make the beurrage:
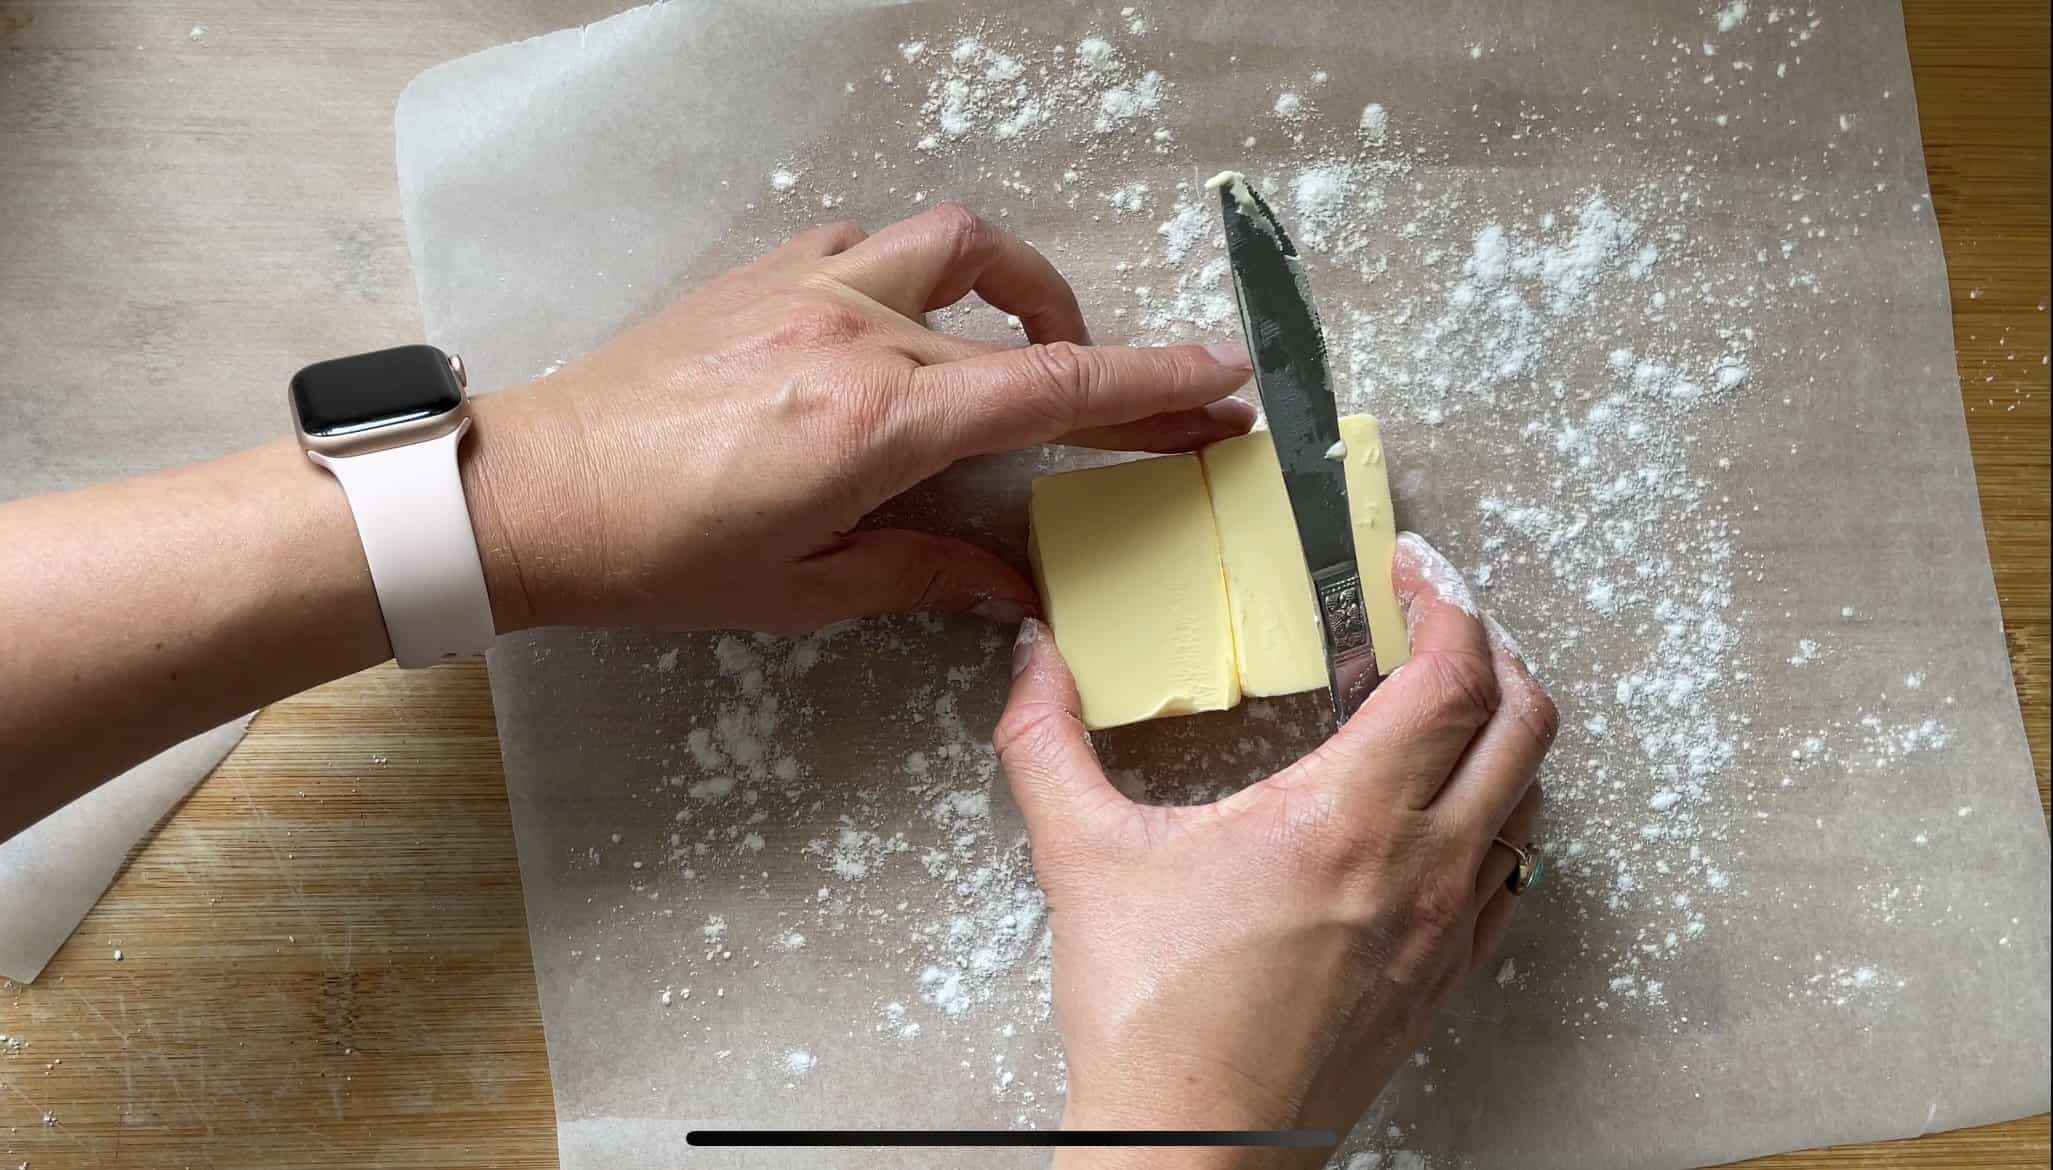
- Lay a sheet of baking paper out on the worktop and dust with 1/2 tbsp gluten free flour (plain or bread flour is fine). Cut the cold block of butter into two rectangles and place down on the sheet next to each other, like this:

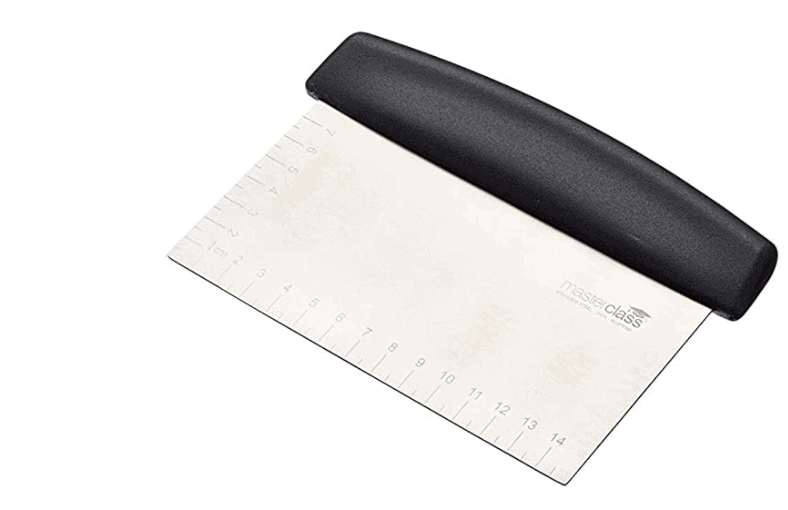
- Sprinkle another 1/2 tbsp gluten free flour over the top of the butter then cover with another sheet of baking paper. Use a rolling pin to press - and then roll - the butter and flour out into a rectangle shape, approximately 18cm x 10cm. Use a dough scraper to help keep the edges nice and neat!
- Once rolled, remove the top sheet of baking paper and wrap the butter packet in the bottom sheet. Place in the fridge (on a flat surface so it keeps its shape) until both the dough and the butter are the same temperature - around 30-60 mins.
Create the first fold:
- Now for the fun part! When the dough and butter are nicely chilled, remove the dough from the fridge. Place a large piece of clingfilm on the worktop and lightly dust with flour.
- Place the ball of dough onto the floured clingfilm then roll into a rectangle, approximately 30cm x 20cm in size and most importantly, around 6mm thick. Use your dough scraper to try to keep the edges as straight as possible.
- Remove the cold butter packet from the fridge and carefully unwrap it. Place is towards one of the short ends of the rectangle of dough. It should have a small border around the edges and then a length of dough to one side of it, like this:

- Roll the dough with no butter on it towards the centre and over the dough, like this:
- Then carefully roll the uncovered piece of dough and butter back over the top of the first fold, like this:
- Now you have your nicely folded parcel of dough, it's time to chill it again. First, mark the short end further away from your with a tiny X using a knife. This is because we need to turn the dough a quarter turn each time before rolling again. When you remove it from the fridge, the X will show you which way round the dough was - clever! Wrap the dough in clingfilm and chill for at least 30 minutes.

Roll, fold, chill, repeat!
- Once the dough has chilled, remove it from the fridge, unwrap it and place it back down on lightly floured clingfilm in exactly the same position it was before (using the X to guide you). Turn the dough 90 degrees clockwise, then cover with a piece of clingfilm.
- Carefully roll the dough out in ONE DIRECTION so it forms a long rectangle, again around 6mm thick. Try to keep the edges as straight as possible. You may find it helps to press the dough out a little with the rolling pin, before rolling.
- Once you have a rectangle, repeat the exact same folding process as before. Mark the end further from you with an X and wrap and place back in the fridge for another 30 minutes. When rolling, try to brush off any excess flour with a pastry brush so you don't end up adding a lot of extra flour to the mix.
- Repeat this process a further two times, and then wrap the dough and place in the fridge for 30-60 minutes for a final chill. If at any point you start to notice the dough splitting and exposing the butter, you can gently pat a tiny dusting of flour over the top then brush off any excess.
Shape the croissants:
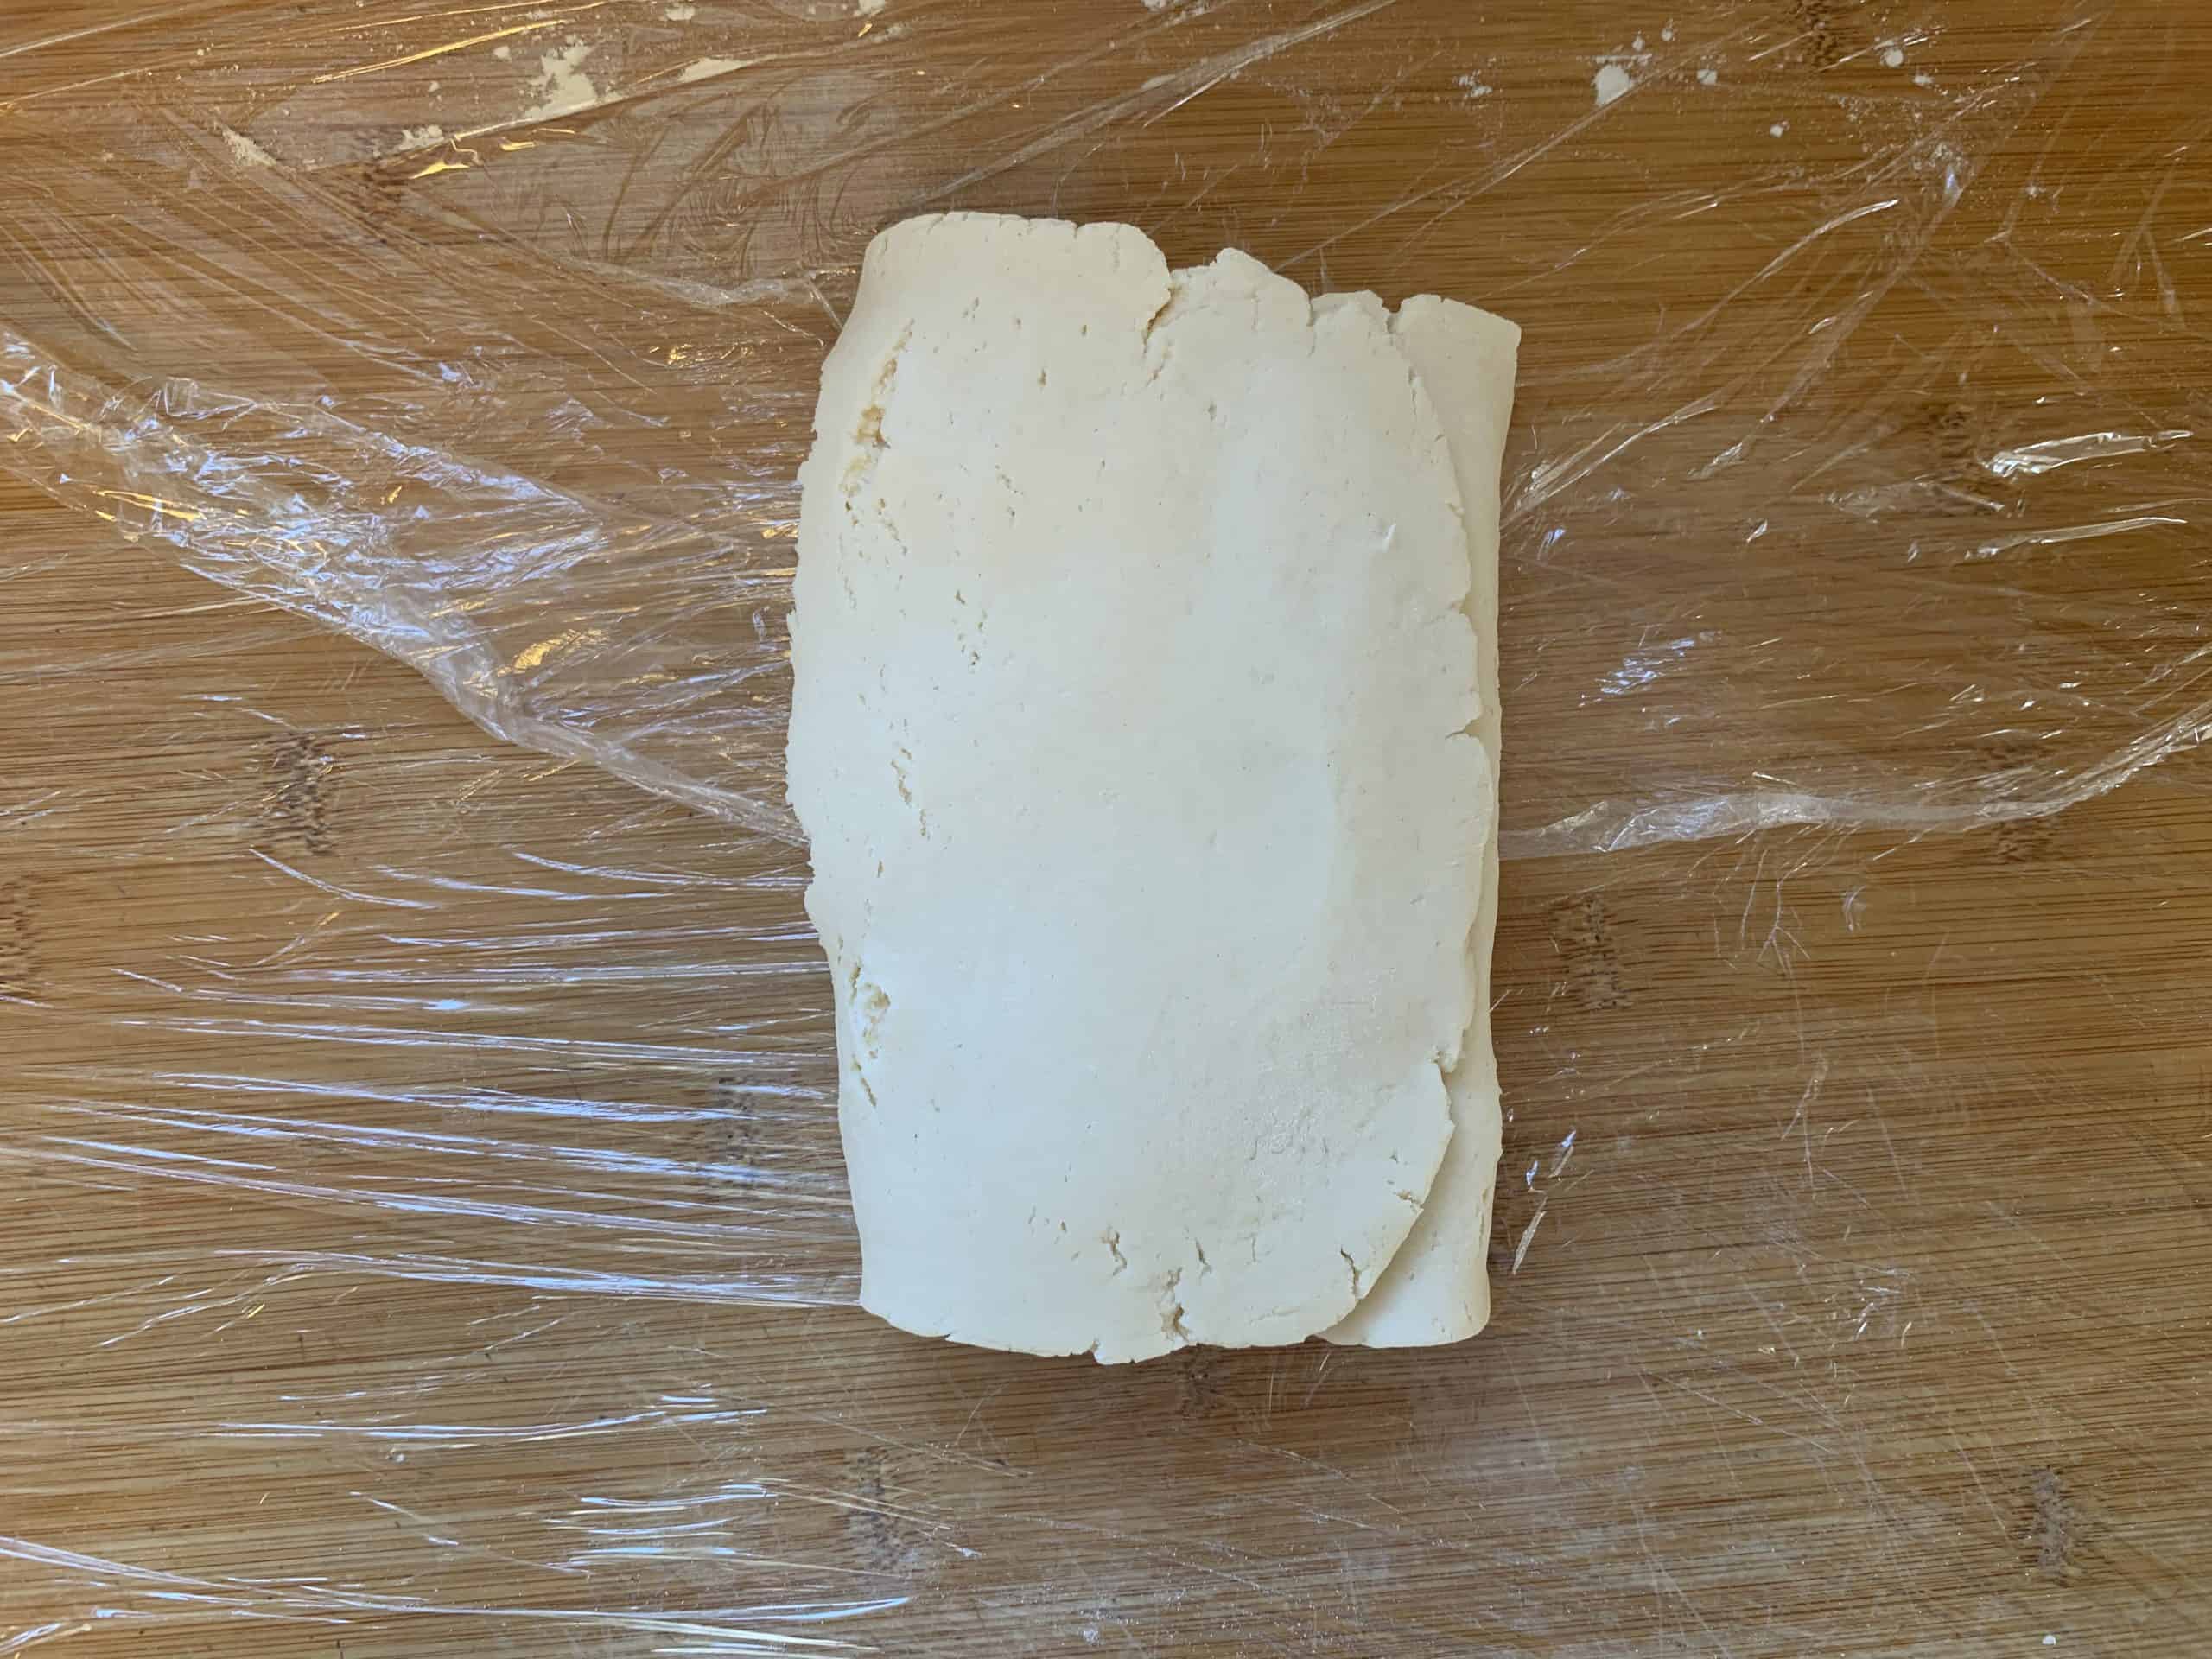
- Once your dough has chilled, remove it from the fridge and place it down onto a sheet of clingfilm. Place another sheet of clingfilm out on top. Carefully roll the rectangle out, as before, into a rectangle around 6mm thick.
- Using a sharp knife or pizza cutter, trim the edges so that you have a rectangle of dough.
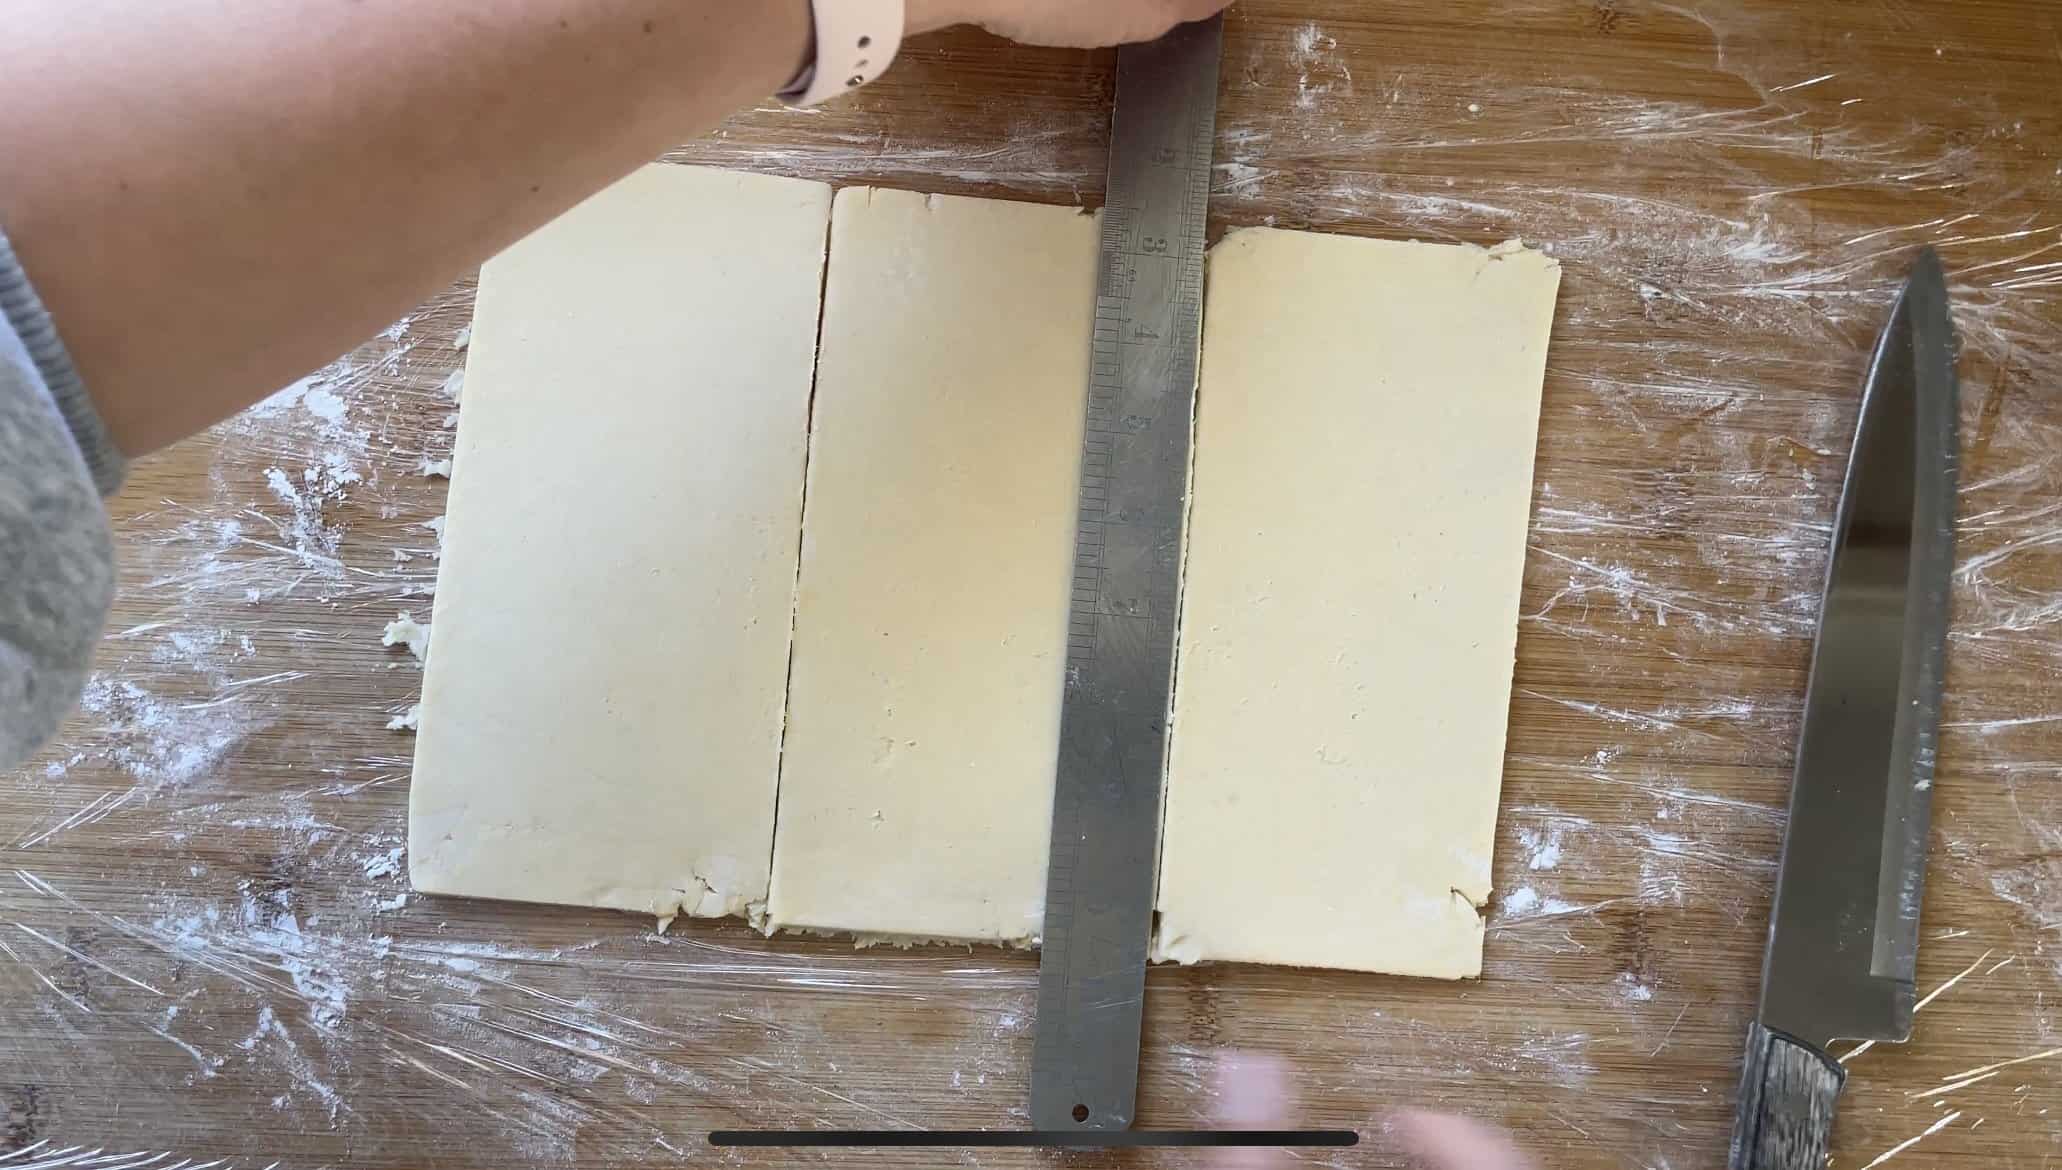
- Use a ruler to measure the longest side and then cut the dough into three rectangular pieces, like this:

- Next place your ruler diagonally across each rectangle, from corner-to-corner, and cut each piece in half into two triangle shapes, like this:
 At this stage, if the dough has become too warm to handle, you can lift the clingfilm (with dough on top) onto a tray or chopping board and then pop it back in the fridge for 30 mins. Otherwise, continue!
 - Carefully lift each triangle up from the clingfilm and lay it back down onto a fresh, lightly floured surface. Roll the dough loosely from the larger end of the triangle in a swirl. It should look like this:
- Place the croissants onto a lined baking tray with plenty of space between them, with the smallest end of the roll on top. Repeat until you have rolled all of the dough.
 At this stage, if the dough has become too warm to handle, you can lift the clingfilm (with dough on top) onto a tray or chopping board and then pop it back in the fridge for 30 mins. Otherwise, continue!
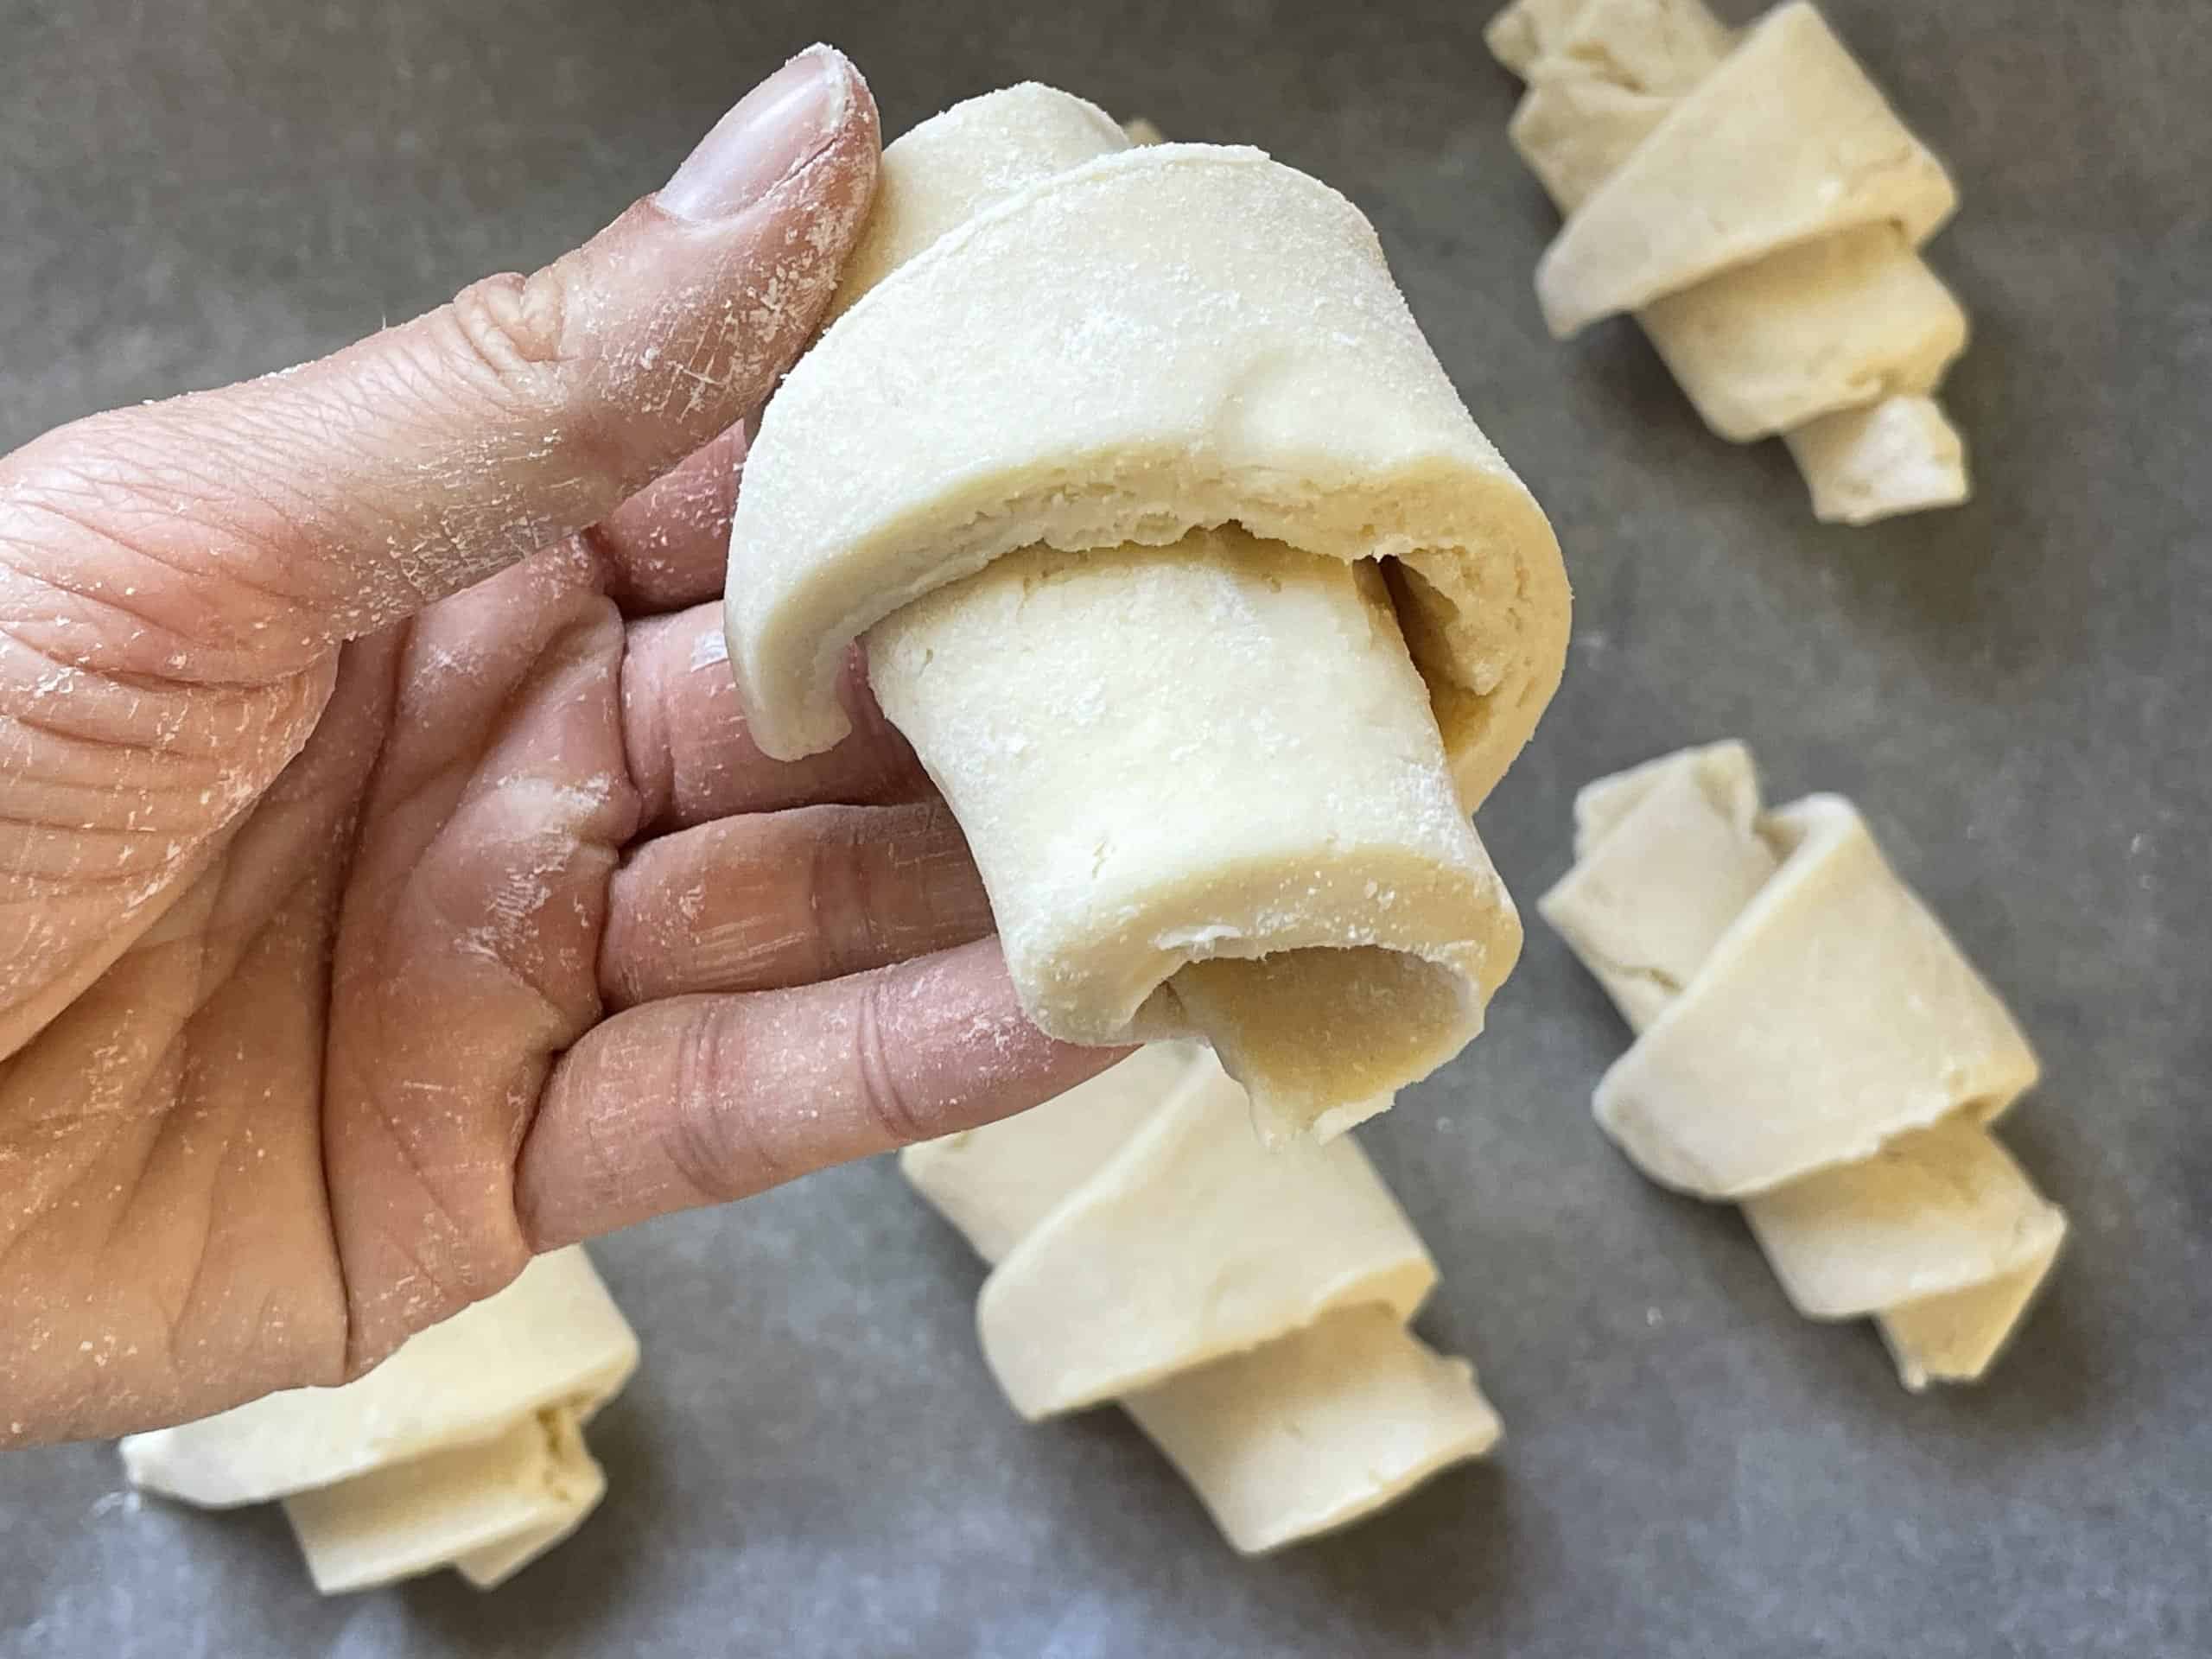
Proving the croissants:
- Once you have shaped all of the croissants, loosely cover them with a lightly oiled piece of clingfilm and place in a warm spot to prove. You want them to be room temperature - not too hot. If it looks like the butter is starting to leak out or melt, return them to the fridge to chill for a little while.
- These croissants will need to prove for around 60-90 minutes. They will puff up a little and become marshmallow-y to the touch, and you may start to see some layers on the cut edges. Don't expect them to grow a lot like bread though, it's a small difference!
Chill then bake!
- Once the croissants have proved, place the tray back in the fridge for an hour. DO NOT SKIP THIS STAGE. It is super important to ensure they are nice and cold when they go in the oven! You can also leave them overnight at this point and then bake them fresh in the morning.
- When the croissants have had at least an hour in the fridge, heat the oven to 200'C / Fan 180'C / Gas Mark 4.
- Once the oven had reached temperature, remove croissant tray from the fridge. Gently brush the tops of each croissant with a beaten egg (egg wash).
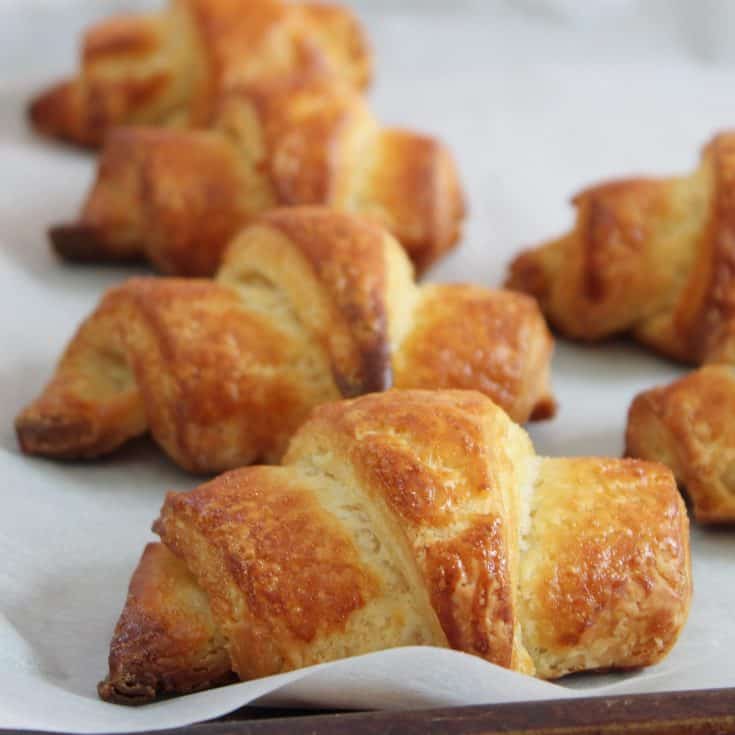
- Place the tray into the oven. Bake for 15-20 minutes until they puff up and become flaky and golden. Keep an eye on them - if they turn brown too quickly turn the oven down a little, or place a little foil loosely on top.
- Once baked, remove from the oven. Cool on a cooling rack for 5-10 minutes before tucking in - your work is complete!
Notes
- You can make this recipe with a plain/all purpose gluten free flour blend, but I find the FREEE gluten free white bread flour has produced the best results. The tapioca starch in the flour gives the dough a better texture.
- It's important to ALWAYS use cold butter and never skip the chilling stages!
- These croissants are best eaten fresh but will keep for 1-2 days in an airtight container. I recommend refreshing them in a hot oven for 5 minutes before eating - they're best warm!
Recommended Products
As an Amazon Associate and member of other affiliate programs, I earn from qualifying purchases.

Nutrition Information:
Yield:
6Serving Size:
1Amount Per Serving: Calories: 511Total Fat: 26gSaturated Fat: 15gTrans Fat: 0gUnsaturated Fat: 9gCholesterol: 95mgSodium: 50mgCarbohydrates: 59gFiber: 2gSugar: 9gProtein: 10g
NEED SOME MORE GLUTEN FREE Pastry RECIPES?
If you want to have a go at some of the other gluten free baking recipes on the blog, why not give some of these a try?
I have a couple of pastry tutorials – plus some breakfast and brunch treats you’ll love!
- Gluten free shortcrust pastry tutorial
- Gluten free puff pastry tutorial
- Cinnamon rolls (gluten free)
- Chocolate chip brioche (gluten free)
If you do make this recipe please let me know! I’d love to see your photos using #theglutenfreeblogger, share them in my Facebook group or tag me on Instagram.
And if you have any recipe suggestions, please let me know in the comments what you’d like to see next!
LIKE THIS GLUTEN FREE Croissants RECIPE?
Make sure you pin these recipe cards below for later!
Do head over and follow me on Pinterest too for more gluten free recipe inspiration.


Hi! Love this recipe but I cannot
Find the temperature for the oven, and I think it’s very important. Please let me know the oven temperature for the pastries and I will try it. Thank you for this, It seems easy.
The recipe says:
When the croissants have had at least an hour in the fridge, heat the oven to 200’C / Fan 180’C / Gas Mark 4.
and afterwards it says to bake them for 15 to 20 minutes.
Made these last night for a birthday treat today and celebrating one year of being gluten free. They looked and smelled like croissants but we found them a bit sweet for our tastes. Can the extra sugar in the dough be omitted? Thanks for the very comprehensive recipe, will definitely try then again.
I make these croissants! Your recipe is fantastic! Tried it twice now and perfect each time. Just a question…can you freeze them once proofed before baking? And how do you recommend thawing etc?
I made these at the weekend. They were fabulous. My non gf child loved them. You could put chocolate into the centres for an added treat. I was really impressed that they were light and flaky. It takes time (as good things do) but well worth the effort.
I have been wanting to learn how to make croissants for while and succeeded first time with this recipe! I ended up needing closer to 180ml milk – I know GF flours can be quite variable regarding the amount of liquid they hold and it did take two goes to get my dough the right consistency. Your video was very helpful. Thank you!
These were amazing! It has been 7 years since I have eaten a croissant due to being diagnosed with Celiac disease. I followed your recipe exactly and they came out perfectly except mine were tiny (but perfect) Not sure what I did wrong with the measurements but let me tell you it did not matter because they were little pieces of pastry, buttery, flaky perfections!! Thank you for sharing. I shared my experience and photos of them on my blog: https://bonniesgfbakery.com/2021/10/29/my-first-attempt-at-gluten-free-croissants/
Hi Sarah, great recipe! I tried to be a bit clever and use almond flour instead to get an almond croissant flavour… It did not work as I had planned but I wondered if there were flour alternatives that can be used to get a more nutty flavour or crisp texture? And if so, are the measurements the same as gluten-free flour? I found some gluten-free flour alternatives here but wondered what you would recommend. Thanks in advance. https://aroundmelbourne.com.au/flour-alternatives/
Been trying to find somewhere on the Gold Coast that has GF Croissants but haven’t been successful – doesn’t matter anymore cause now I can make them myself! yum
Hello, after the proving and final chill. Can you freeze these prior to cooking and then unfreeze and cook when you want them? Thanks
Are we able to use diary free substitute?
At the moment I haven’t tested this with a dairy free alternative but given the complex nature of the recipe I wouldn’t say you could just swap it for any vegan alternative, sorry
Hello! Since I’m lactose intolerant, I used the Stork Biscuit, Scones and Pastries Vegan Butter. I followed the exact same steps as Sarah’s recipe and they came out perfectly! They were flaky and crispy at the outside and you could see all the layers in the inside. The only negative point is that while I was baking them, a bit of the butter came out of the croissant, but it didn’t affect the final texture. Hope this helps!
Thank you for that bit of information. My daughter has been diagnosed with Celiac and a dairy allergy in the past 2 years. Since I grew up baking in a family restaurant I have been trying to find a way make most of her favorite foods.
Quite simply the best things that I have put into my mouth in over 10 years. Thank you
Yay!!!!!